Spring基于注解装配Bean
Java 从 JDK 5.0 以后,提供了 Annotation(注解)功能
Spring 默认不使用注解装配 Bean,因此需要在配置文件中添加 context:annotation-config/,启用注解。
Spring 中常用的注解如下
- @Component
可以使用此注解描述 Spring 中的 Bean,但它是一个泛化的概念,仅仅表示一个组件(Bean),并且可以作用在任何层次。使用时只需将该注解标注在相应类上即可。
- @Repository
用于将数据访问层(DAO层)的类标识为 Spring 中的 Bean,其功能与 @Component 相同。
- 3@Service
通常作用在业务层(Service 层),用于将业务层的类标识为 Spring 中的 Bean,其功能与 @Component 相同。
- @Controller
通常作用在控制层(如 Struts2 的 Action、SpringMVC 的 Controller),用于将控制层的类标识为 Spring 中的 Bean,其功能与 @Component 相同。
- @Autowired
可以应用到 Bean 的属性变量、属性的 setter 方法、非 setter 方法及构造函数等,配合对应的注解处理器完成 Bean 的自动配置工作。默认按照 Bean 的类型进行装配。
- @Resource
作用与 Autowired 相同,区别在于 @Autowired 默认按照 Bean 类型装配,而 @Resource 默认按照 Bean 实例名称进行装配。
@Resource 中有两个重要属性:name 和 type。
Spring 将 name 属性解析为 Bean 的实例名称,type 属性解析为 Bean 的实例类型。如果指定 name 属性,则按实例名称进行装配;如果指定 type 属性,则按 Bean 类型进行装配。如果都不指定,则先按 Bean 实例名称装配,如果不能匹配,则再按照 Bean 类型进行装配;如果都无法匹配,则抛出 NoSuchBeanDefinitionException 异常。
- @Qualifier
与 @Autowired 注解配合使用,会将默认的按 Bean 类型装配修改为按 Bean 的实例名称装配,Bean 的实例名称由 @Qualifier 注解的参数指定。
注意:
resource相当于autowired和qualifier组合使用
示例:
- spring配置文件
<?xml version="1.0" encoding="UTF-8"?>
<beans xmlns="http://www.springframework.org/schema/beans"
       xmlns:xsi="http://www.w3.org/2001/XMLSchema-instance"
       xmlns:context="http://www.springframework.org/schema/context"
       xsi:schemaLocation="http://www.springframework.org/schema/beans http://www.springframework.org/schema/beans/spring-beans.xsd http://www.springframework.org/schema/context https://www.springframework.org/schema/context/spring-context.xsd">


    <!-- 注解  扫描的基准包 -->
    <!--使用context命名空间,通知spring扫描指定目录,进行注解的解析 -->
    <context:component-scan base-package="com.ljw"></context:component-scan>
</beans>
- 定义action、service、dao三层的类
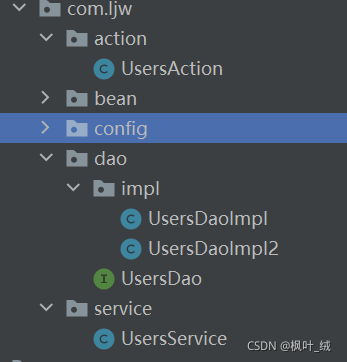
- action
@Controller
public class UsersAction {
    @Resource(name = "us")
    private UsersService usersService;
    public void add() {
        System.out.println("action中的添加方法");
        usersService.add();
    }
**- service **
@Service(value = "us")
public class UsersService {
    @Autowired
    //需要指定注入的接口实现
    @Qualifier("usersDaoImpl")
    private UsersDao usersDao;
    public int add(){
        System.out.println("service中的添加方法");
        return usersDao.add();
    }
- dao 2个实现
注意:
如果接口的实现只有一个则不需要指定
接口:
public interface UsersDao {
    public int add();
}
- 实现1
@Repository
public class UsersDaoImpl implements UsersDao {
    @Override
    public int add(){
        System.out.println("dao添加方法");
        return 1;
    }
- 实现2
@Repository
public class UsersDaoImpl2 implements UsersDao {
    @Override
    public int add(){
        System.out.println("dao添加方法2");
        return 2;
    }
基础包下注解可以忽略或者只包含某注解
    <!-- 注解  扫描的基准包 -->
    <context:component-scan base-package="com.ljw" use-default-filters="false">
        <!--可以设置忽略某些注解-->
        <!--忽略action的注解-->
<!--        <context:exclude-filter type="annotation" expression="org.springframework.stereotype.Controller"/>-->
        <!--或者只包含某注解
            需要设置该属性 use-default-filters="false"
        -->
        <context:include-filter type="annotation" expression="org.springframework.stereotype.Controller"/>
    </context:component-scan>
- 测试
    @Test
    public void test07(){
        ApplicationContext context = new ClassPathXmlApplicationContext("beans2.xml");
        //默认首字母小写 id名
        //@Repository使用此注解
        UsersDao usersDao = context.getBean(UsersDaoImpl2.class);
        System.out.println(usersDao);
        usersDao.add();
        //@Service使用此注解  起别名@Service(value = "us")
        UsersService usersService = context.getBean("us", UsersService.class);
        System.out.println(usersService);
        //service会调用Dao的方法   要注入属性@Autowired  默认按类型装配
        usersService.add();
        //@Controller使用此注解
        UsersAction usersAction = context.getBean("usersAction", UsersAction.class);
        System.out.println(usersAction);
        //action会调用service的方法  所以要属性注入
        // @Resource(name = "us")   指定接口的实现
        // private UsersService usersService;
        usersAction.add();
    }
不需要配置文件,自己创建SpringConfig 类
自定义类添加注解,用AnnotationConfigApplicationContext调用获得ApplicationContext
- 配置类
@Configuration
@ComponentScan(basePackages = {"com.ljw"})
public class SpringConfig {
}
- 注入属性
@Data
@NoArgsConstructor
@AllArgsConstructor
@Component
public class Users {
//给一般属性赋值
    @Value("1")
    private Integer id;
    @Value("zhangsan")
    private String name;
}
- 测试
@Test
    public void test08(){
        ApplicationContext context = new AnnotationConfigApplicationContext(SpringConfig.class);
        Users users = context.getBean("users", Users.class);
        System.out.println(users.getId() + "\t" + users.getName());
        UsersDao usersDao = context.getBean(UsersDaoImpl.class);
        usersDao.add();
        UsersService usersService = context.getBean(UsersService.class);
        usersService.add();
        //正常调用注解后的类及方法
    }