上篇文章介绍了,nacos客户端底层是如何实现服务注册的,通过源码分析我们知道在客户端启动的时候,通过NacosAutoServiceRegistration这个类继承了ApplicaqtionListener,最终在spring容器启动的时候会回调
onApplicationEvent这个方法,最终会通过发起http请求调用的Nacos服务端提供的接口,那么这篇文章我们来聊一下Nacos服务端是如何实现服务注册的逻辑的。
一,源码下载
首先从github上面将Naocs的代码下载下来,然后通过idea导入进去,编译完以后,就可以开始看源码了,

可以看到Nacos分了很多模块,我们今天要说的服务端服务注册的逻辑就是在这个naming模块里面,

源码的入口就是这个InstanceController里面的register方法,这里面就Nacos服务注册的源码实现,下面我们一起来看看服务端注册逻辑是如何实现的,首先就是一些参数的校验的分支逻辑,我们主要看主干逻辑,我们跟进去serviceManager.registerInstance(namespaceId, serviceName, instance)方法
/**
 * Register an instance to a service in AP mode.
 *
 * <p>This method creates service or cluster silently if they don't exist.
 *
 * @param namespaceId id of namespace
 * @param serviceName service name
 * @param instance    instance to register
 * @throws Exception any error occurred in the process
 */
public void registerInstance(String namespaceId, String serviceName, Instance instance) throws NacosException {

    createEmptyService(namespaceId, serviceName, instance.isEphemeral());

    Service service = getService(namespaceId, serviceName);

    if (service == null) {
        throw new NacosException(NacosException.INVALID_PARAM,
                "service not found, namespace: " + namespaceId + ", service: " + serviceName);
    }

    addInstance(namespaceId, serviceName, instance.isEphemeral(), instance);
}
首先createEmptyService会创建一个空的Service对象,也就是将服务提供者的一些信息封装到这个Service对象里面,下面这个addInstance方法就是重点的方法,看这个方法的名字也很好理解,添加实例信息,继续跟进去这个方法里面
/**
 * Add instance to service.
 *
 * @param namespaceId namespace
 * @param serviceName service name
 * @param ephemeral   whether instance is ephemeral
 * @param ips         instances
 * @throws NacosException nacos exception
 */
public void addInstance(String namespaceId, String serviceName, boolean ephemeral, Instance... ips)
        throws NacosException {

    String key = KeyBuilder.buildInstanceListKey(namespaceId, serviceName, ephemeral);

    Service service = getService(namespaceId, serviceName);

    synchronized (service) {
        List<Instance> instanceList = addIpAddresses(service, ephemeral, ips);

        Instances instances = new Instances();
        instances.setInstanceList(instanceList);

        consistencyService.put(key, instances);
    }
}
首先会生成一个存放servie的key。然后拿到当前所有的服务实例,掉用接口consistencyService.put(key, instances)方法,这个接口有以下的实现类

这里如何知道这个put方法会调用到哪个实现类的方法呢,这里我们点击这个consistencyService,

可以看做这个接口注入的时候,指定了名称,而这几个实现类,里面只有DelegateConsistencyServiceImpl这个实现类,指定的Bean的名称也是这个consitencyDelegate

也就是最终会调用DelegateCoonsistencyServiceImpl里面的put方法
@Override
public void put(String key, Record value) throws NacosException {
    mapConsistencyService(key).put(key, value);
}
这个mapConsistencyService(key)会根据是否临时实例,来判断选择对应的实现类
private ConsistencyService mapConsistencyService(String key) {
    return KeyBuilder.matchEphemeralKey(key) ? ephemeralConsistencyService : persistentConsistencyService;
}
而Nacos默认是使用临时实例实现了,也就是AP模式的架构

可以看到这个DistroConsistencyServiceImpl实现了EphemeralConsistencyService接口,最后会调用DistroConsistencyServiceImpl的put方法,我们来看这个put方法做了什么
@Override
public void put(String key, Record value) throws NacosException {
    onPut(key, value);
    distroProtocol.sync(new DistroKey(key, KeyBuilder.INSTANCE_LIST_KEY_PREFIX), DataOperation.CHANGE,
            globalConfig.getTaskDispatchPeriod() / 2);
}
这个方法里面主要有两个逻辑,一个是onPut方法,一个是distroProtocol.sync方法,后面这个是同步服务实例数据,这个就不在今天这篇文章主要讲解了,后面会有单独的篇幅来说明,那我们来看这个onPut方法
/**
 * Put a new record.
 *
 * @param key   key of record
 * @param value record
 */
public void onPut(String key, Record value) {

    if (KeyBuilder.matchEphemeralInstanceListKey(key)) {
        Datum<Instances> datum = new Datum<>();
        datum.value = (Instances) value;
        datum.key = key;
        datum.timestamp.incrementAndGet();
        dataStore.put(key, datum);
    }

    if (!listeners.containsKey(key)) {
        return;
    }

    notifier.addTask(key, DataOperation.CHANGE);
}
这个方法首先会将待注册的服务实例封装成Datum对象,然后放到这个DataStore对象里面的一个map里面
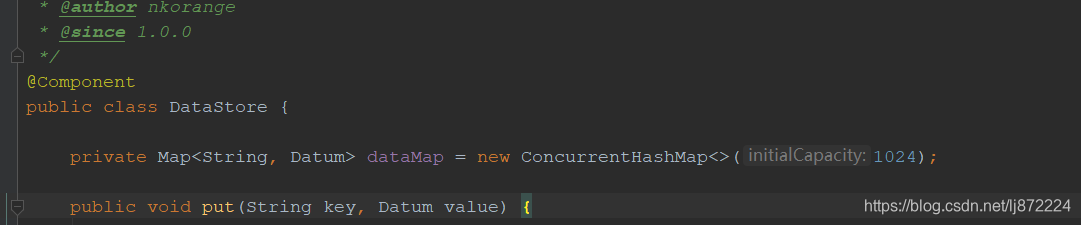
然后调用notifier.addTask(key, DataOperation.CHANGE);这个方法,
/**
 * Add new notify task to queue.
 *
 * @param datumKey data key
 * @param action   action for data
 */
public void addTask(String datumKey, DataOperation action) {

    if (services.containsKey(datumKey) && action == DataOperation.CHANGE) {
        return;
    }
    if (action == DataOperation.CHANGE) {
        services.put(datumKey, StringUtils.EMPTY);
    }
    tasks.offer(Pair.with(datumKey, action));
}
在这个addTask方法里面,会往一个阻塞队列放入信息,这里涉及到了经典的生产消费模型,那么问题来了这个阻塞队列的消息,在什么时候会被拿出来使用了
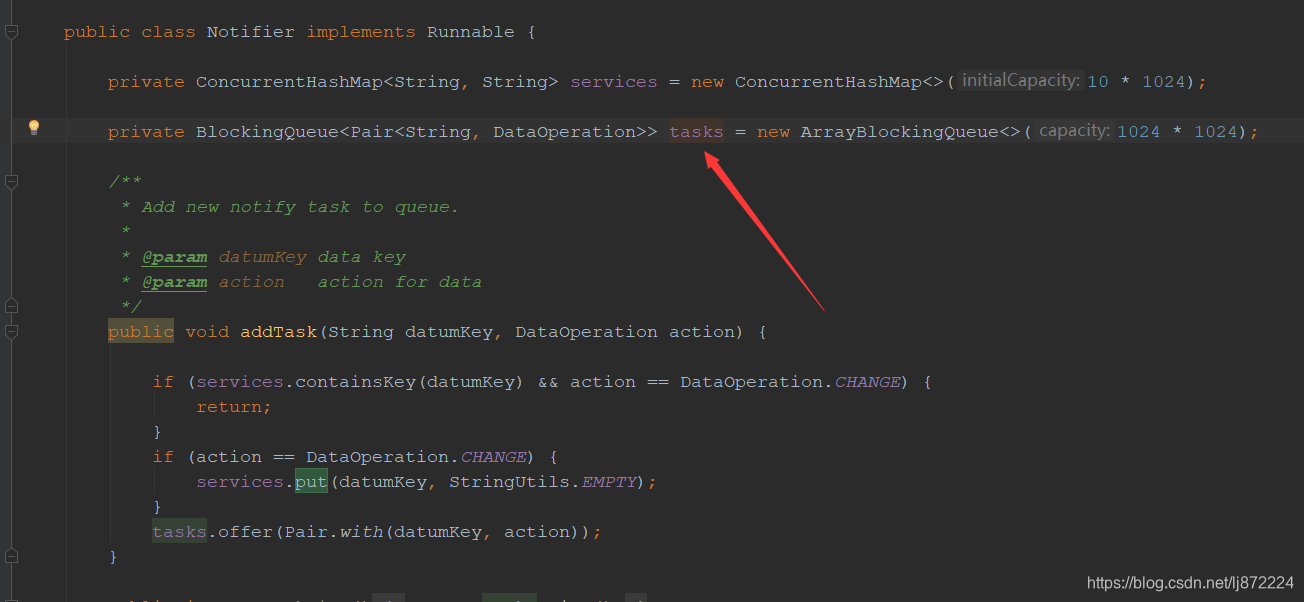
这里很明显的这个Notifier实现了Runnable接口,是一个线程类,这个Notifier其实是DistroConsistencyServiceImpl的一个内部类,也是他的一个成员变量
@DependsOn("ProtocolManager")
@org.springframework.stereotype.Service("distroConsistencyService")
public class DistroConsistencyServiceImpl implements EphemeralConsistencyService, DistroDataProcessor {

    private final DistroMapper distroMapper;

    private final DataStore dataStore;

    private final Serializer serializer;

    private final SwitchDomain switchDomain;

    private final GlobalConfig globalConfig;

    private final DistroProtocol distroProtocol;

    private volatile Notifier notifier = new Notifier();

    private Map<String, ConcurrentLinkedQueue<RecordListener>> listeners = new ConcurrentHashMap<>();

    private Map<String, String> syncChecksumTasks = new ConcurrentHashMap<>(16);

    public DistroConsistencyServiceImpl(DistroMapper distroMapper, DataStore dataStore, Serializer serializer,
            SwitchDomain switchDomain, GlobalConfig globalConfig, DistroProtocol distroProtocol) {
        this.distroMapper = distroMapper;
        this.dataStore = dataStore;
        this.serializer = serializer;
        this.switchDomain = switchDomain;
        this.globalConfig = globalConfig;
        this.distroProtocol = distroProtocol;
    }

    @PostConstruct
    public void init() {
        GlobalExecutor.submitDistroNotifyTask(notifier);
    }
上面这个段代码是DistroConsistencyServiceImpl这个类的部分代码,我们可以看到有一个被@PostConstruct的注解的init方法,相信看过spring源码的同学,都很清楚这个方法会在spring实例化Bean对象的时候调用,也就是Spring实例化这个DistroConsistencyServiceImpl这个类的时候,会调用这个init方法,而这个init方法里面调用了GlobalExecutor.submitDistroNotifyTask(notifier)方法,把notifier做为参数传入进去,
public static void submitDistroNotifyTask(Runnable runnable) {
    DISTRO_NOTIFY_EXECUTOR.submit(runnable);
}
private static final ScheduledExecutorService DISTRO_NOTIFY_EXECUTOR = ExecutorFactory.Managed
.newSingleScheduledExecutorService(ClassUtils.getCanonicalName(NamingApp.class),
new NameThreadFactory("com.alibaba.nacos.naming.distro.notifier"));很明显最后调用了线程池的sumit方法,也就是说最后会执行这个Notifier里面的run方法,我们来看看这个Notifier类里面的run方法的具体逻辑
public class Notifier implements Runnable {

    private ConcurrentHashMap<String, String> services = new ConcurrentHashMap<>(10 * 1024);

    private BlockingQueue<Pair<String, DataOperation>> tasks = new ArrayBlockingQueue<>(1024 * 1024);

    /**
     * Add new notify task to queue.
     *
     * @param datumKey data key
     * @param action   action for data
     */
    public void addTask(String datumKey, DataOperation action) {

        if (services.containsKey(datumKey) && action == DataOperation.CHANGE) {
            return;
        }
        if (action == DataOperation.CHANGE) {
            services.put(datumKey, StringUtils.EMPTY);
        }
        tasks.offer(Pair.with(datumKey, action));
    }

    public int getTaskSize() {
        return tasks.size();
    }

    @Override
    public void run() {
        Loggers.DISTRO.info("distro notifier started");

        for (; ; ) {
            try {
                Pair<String, DataOperation> pair = tasks.take();
                handle(pair);
            } catch (Throwable e) {
                Loggers.DISTRO.error("[NACOS-DISTRO] Error while handling notifying task", e);
            }
        }
    }
可以看到这个run方法里面,开启了一个自旋操作,通俗点讲就是通过一个死循环去tasks这个阻塞队列里面去取消息,我们上面已经把消息放到这个阻塞队列里面了,队列里面就会有数据,就会执行到handle(pair)方法,
private void handle(Pair<String, DataOperation> pair) {
    try {
        String datumKey = pair.getValue0();
        DataOperation action = pair.getValue1();

        services.remove(datumKey);

        int count = 0;

        if (!listeners.containsKey(datumKey)) {
            return;
        }

        for (RecordListener listener : listeners.get(datumKey)) {

            count++;

            try {
                if (action == DataOperation.CHANGE) {
                    listener.onChange(datumKey, dataStore.get(datumKey).value);
                    continue;
                }

                if (action == DataOperation.DELETE) {
                    listener.onDelete(datumKey);
                    continue;
                }
            } catch (Throwable e) {
                Loggers.DISTRO.error("[NACOS-DISTRO] error while notifying listener of key: {}", datumKey, e);
            }
        }

        if (Loggers.DISTRO.isDebugEnabled()) {
            Loggers.DISTRO
                    .debug("[NACOS-DISTRO] datum change notified, key: {}, listener count: {}, action: {}",
                            datumKey, count, action.name());
        }
    } catch (Throwable e) {
        Loggers.DISTRO.error("[NACOS-DISTRO] Error while handling notifying task", e);
    }
}
这里面拿出DataOperation判断事件类型,因为我们这里是Change事件,就会进入 listener.onChange(datumKey, dataStore.get(datumKey).value)里面的逻辑,这里会调用Service类的onChange方法,因为Service实现了Record,RecordListener接口

@Override
public void onChange(String key, Instances value) throws Exception {

    Loggers.SRV_LOG.info("[NACOS-RAFT] datum is changed, key: {}, value: {}", key, value);

    for (Instance instance : value.getInstanceList()) {

        if (instance == null) {
            // Reject this abnormal instance list:
            throw new RuntimeException("got null instance " + key);
        }

        if (instance.getWeight() > 10000.0D) {
            instance.setWeight(10000.0D);
        }

        if (instance.getWeight() < 0.01D && instance.getWeight() > 0.0D) {
            instance.setWeight(0.01D);
        }
    }

    updateIPs(value.getInstanceList(), KeyBuilder.matchEphemeralInstanceListKey(key));

    recalculateChecksum();
}
在这里我们重点看updateIPs这个方法
public void updateIPs(Collection<Instance> instances, boolean ephemeral) {
    Map<String, List<Instance>> ipMap = new HashMap<>(clusterMap.size());
    for (String clusterName : clusterMap.keySet()) {
        ipMap.put(clusterName, new ArrayList<>());
    }

    for (Instance instance : instances) {
        try {
            if (instance == null) {
                Loggers.SRV_LOG.error("[NACOS-DOM] received malformed ip: null");
                continue;
            }

            if (StringUtils.isEmpty(instance.getClusterName())) {
                instance.setClusterName(UtilsAndCommons.DEFAULT_CLUSTER_NAME);
            }

            if (!clusterMap.containsKey(instance.getClusterName())) {
                Loggers.SRV_LOG
                        .warn("cluster: {} not found, ip: {}, will create new cluster with default configuration.",
                                instance.getClusterName(), instance.toJson());
                Cluster cluster = new Cluster(instance.getClusterName(), this);
                cluster.init();
                getClusterMap().put(instance.getClusterName(), cluster);
            }

            List<Instance> clusterIPs = ipMap.get(instance.getClusterName());
            if (clusterIPs == null) {
                clusterIPs = new LinkedList<>();
                ipMap.put(instance.getClusterName(), clusterIPs);
            }

            clusterIPs.add(instance);
        } catch (Exception e) {
            Loggers.SRV_LOG.error("[NACOS-DOM] failed to process ip: " + instance, e);
        }
    }

    for (Map.Entry<String, List<Instance>> entry : ipMap.entrySet()) {
        //make every ip mine
        List<Instance> entryIPs = entry.getValue();
        clusterMap.get(entry.getKey()).updateIps(entryIPs, ephemeral);
    }

    setLastModifiedMillis(System.currentTimeMillis());
    getPushService().serviceChanged(this);
    StringBuilder stringBuilder = new StringBuilder();

    for (Instance instance : allIPs()) {
        stringBuilder.append(instance.toIpAddr()).append("_").append(instance.isHealthy()).append(",");
    }

    Loggers.EVT_LOG.info("[IP-UPDATED] namespace: {}, service: {}, ips: {}", getNamespaceId(), getName(),
            stringBuilder.toString());

}
继续跟入 clusterMap.get(entry.getKey()).updateIps(entryIPs, ephemeral);这个方法里面,
/**
 * Update instance list.
 *
 * @param ips       instance list
 * @param ephemeral whether these instances are ephemeral
 */
public void updateIps(List<Instance> ips, boolean ephemeral) {

    Set<Instance> toUpdateInstances = ephemeral ? ephemeralInstances : persistentInstances;

    HashMap<String, Instance> oldIpMap = new HashMap<>(toUpdateInstances.size());

    for (Instance ip : toUpdateInstances) {
        oldIpMap.put(ip.getDatumKey(), ip);
    }

    List<Instance> updatedIPs = updatedIps(ips, oldIpMap.values());
    if (updatedIPs.size() > 0) {
        for (Instance ip : updatedIPs) {
            Instance oldIP = oldIpMap.get(ip.getDatumKey());

            // do not update the ip validation status of updated ips
            // because the checker has the most precise result
            // Only when ip is not marked, don't we update the health status of IP:
            if (!ip.isMarked()) {
                ip.setHealthy(oldIP.isHealthy());
            }

            if (ip.isHealthy() != oldIP.isHealthy()) {
                // ip validation status updated
                Loggers.EVT_LOG.info("{} {SYNC} IP-{} {}:{}@{}", getService().getName(),
                        (ip.isHealthy() ? "ENABLED" : "DISABLED"), ip.getIp(), ip.getPort(), getName());
            }

            if (ip.getWeight() != oldIP.getWeight()) {
                // ip validation status updated
                Loggers.EVT_LOG.info("{} {SYNC} {IP-UPDATED} {}->{}", getService().getName(), oldIP.toString(),
                        ip.toString());
            }
        }
    }

    List<Instance> newIPs = subtract(ips, oldIpMap.values());
    if (newIPs.size() > 0) {
        Loggers.EVT_LOG
                .info("{} {SYNC} {IP-NEW} cluster: {}, new ips size: {}, content: {}", getService().getName(),
                        getName(), newIPs.size(), newIPs.toString());

        for (Instance ip : newIPs) {
            HealthCheckStatus.reset(ip);
        }
    }

    List<Instance> deadIPs = subtract(oldIpMap.values(), ips);

    if (deadIPs.size() > 0) {
        Loggers.EVT_LOG
                .info("{} {SYNC} {IP-DEAD} cluster: {}, dead ips size: {}, content: {}", getService().getName(),
                        getName(), deadIPs.size(), deadIPs.toString());

        for (Instance ip : deadIPs) {
            HealthCheckStatus.remv(ip);
        }
    }

    toUpdateInstances = new HashSet<>(ips);

    if (ephemeral) {
        ephemeralInstances = toUpdateInstances;
    } else {
        persistentInstances = toUpdateInstances;
    }
}
这里首先会初始化一个新的hashmap来接收以前的服务实例信息,然后就比对一下服务信息是否有变化,服务是否健康等校验,这里就不做重点阐述了,最后会将新加入的服务实例赋值给之前的内存

@JsonIgnore
private Set<Instance> persistentInstances = new HashSet<>();

@JsonIgnore
private Set<Instance> ephemeralInstances = new HashSet<>();
这里会判断这个是临时实例模式还是持久模式,会将这个最新的服务实例集合赋值给这个两个set中的一个,这里用到了经典的写时复制的思想,写入新的实例的时候会将以前的实例复制一份出来,进行操作,操作完以后然后赋值回去,这样做的大大提升了Naocs的的吞吐能力,并且naocs通过单线程的模式进行异步队列的写入新的额注册实例,并不会存在线程安全问题,这种设计思想很值得我们借鉴和学习的,可能有的同学会说,如果注册实例很多,这个复制操作是不是会内存溢出呢,其实Nacos通过粒度控制,我们来看看Nacos的注册表的数据结构,这里参考了网上一张图片
Nacos服务注册表结构:Map<namespace, Map<group::serviceName, Service>>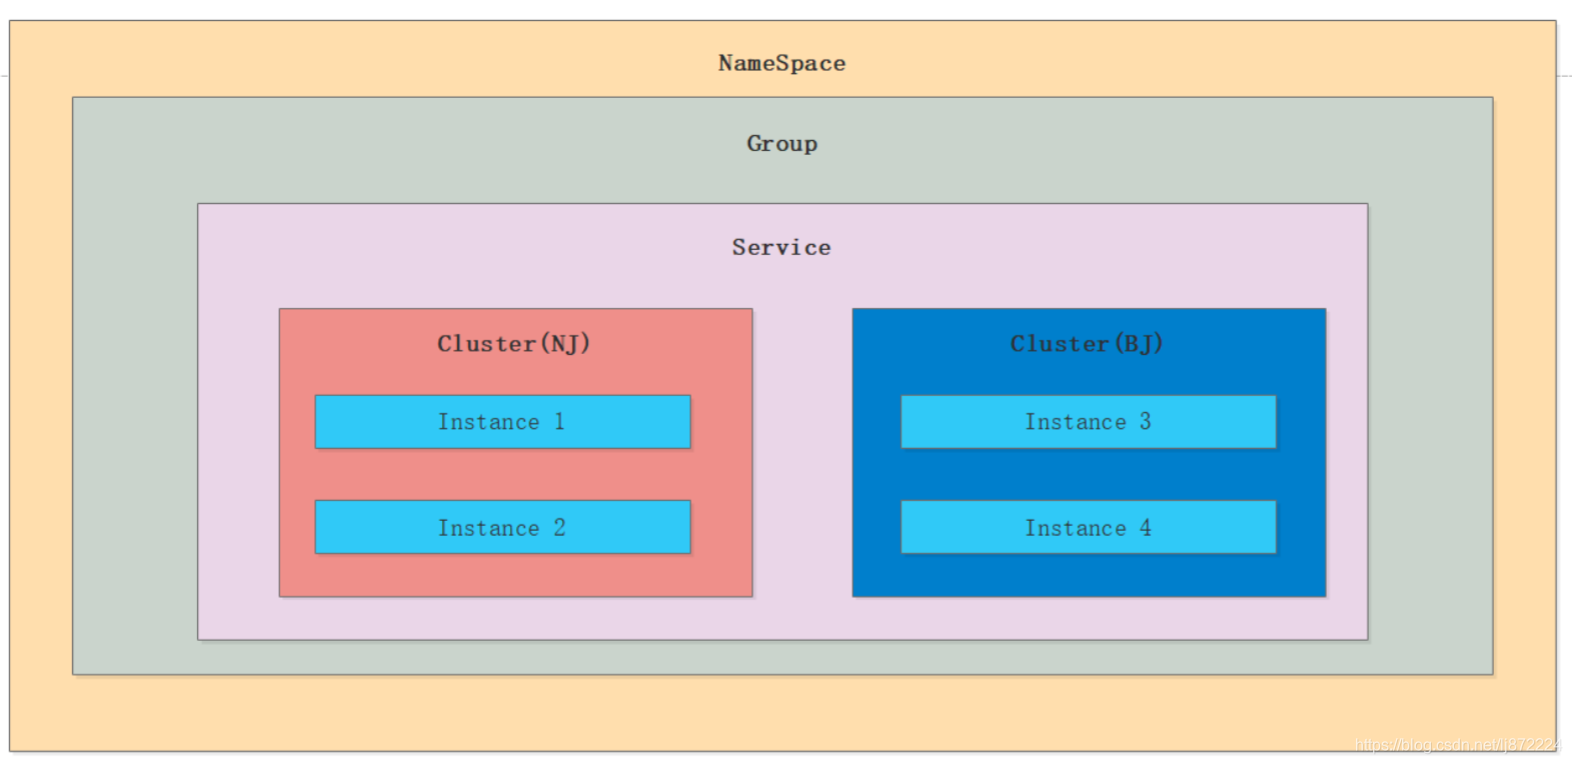
Nacos写时复制的时候,只会复制 同一集群下面的 Instance实例,不同集群下面的实例是不会复制的,通过粒度大小的精细控制,大大筛选出来了大量的数据,通过过滤出来,最后复制的实例数据是很小的,回到开头,我们来看看这个Nacos的内存注册表的数据结构
/**
 * Register an instance to a service in AP mode.
 *
 * <p>This method creates service or cluster silently if they don't exist.
 *
 * @param namespaceId id of namespace
 * @param serviceName service name
 * @param instance    instance to register
 * @throws Exception any error occurred in the process
 */
public void registerInstance(String namespaceId, String serviceName, Instance instance) throws NacosException {

    createEmptyService(namespaceId, serviceName, instance.isEphemeral());

    Service service = getService(namespaceId, serviceName);

    if (service == null) {
        throw new NacosException(NacosException.INVALID_PARAM,
                "service not found, namespace: " + namespaceId + ", service: " + serviceName);
    }

    addInstance(namespaceId, serviceName, instance.isEphemeral(), instance);
}
我们看看这个createEmptyService方法调用链
/**
 * Create service if not exist.
 *
 * @param namespaceId namespace
 * @param serviceName service name
 * @param local       whether create service by local
 * @param cluster     cluster
 * @throws NacosException nacos exception
 */
public void createServiceIfAbsent(String namespaceId, String serviceName, boolean local, Cluster cluster)
        throws NacosException {
    Service service = getService(namespaceId, serviceName);
    if (service == null) {

        Loggers.SRV_LOG.info("creating empty service {}:{}", namespaceId, serviceName);
        service = new Service();
        service.setName(serviceName);
        service.setNamespaceId(namespaceId);
        service.setGroupName(NamingUtils.getGroupName(serviceName));
        // now validate the service. if failed, exception will be thrown
        service.setLastModifiedMillis(System.currentTimeMillis());
        service.recalculateChecksum();
        if (cluster != null) {
            cluster.setService(service);
            service.getClusterMap().put(cluster.getName(), cluster);
        }
        service.validate();

        putServiceAndInit(service);
        if (!local) {
            addOrReplaceService(service);
        }
    }
}
private void putServiceAndInit(Service service) throws NacosException {
    putService(service);
    service.init();
    consistencyService
            .listen(KeyBuilder.buildInstanceListKey(service.getNamespaceId(), service.getName(), true), service);
    consistencyService
            .listen(KeyBuilder.buildInstanceListKey(service.getNamespaceId(), service.getName(), false), service);
    Loggers.SRV_LOG.info("[NEW-SERVICE] {}", service.toJson());
}
/**
 * Put service into manager.
 *
 * @param service service
 */
public void putService(Service service) {
    if (!serviceMap.containsKey(service.getNamespaceId())) {
        synchronized (putServiceLock) {
            if (!serviceMap.containsKey(service.getNamespaceId())) {
                serviceMap.put(service.getNamespaceId(), new ConcurrentSkipListMap<>());
            }
        }
    }
    serviceMap.get(service.getNamespaceId()).put(service.getName(), service);
}
最后会发现Nacos的内存注册表其实就是一个双层的hashmap结构,首先外层的Map的key是命名空间naespace,里层的Map的key是通过分组名称拼接服务名称,value是Service
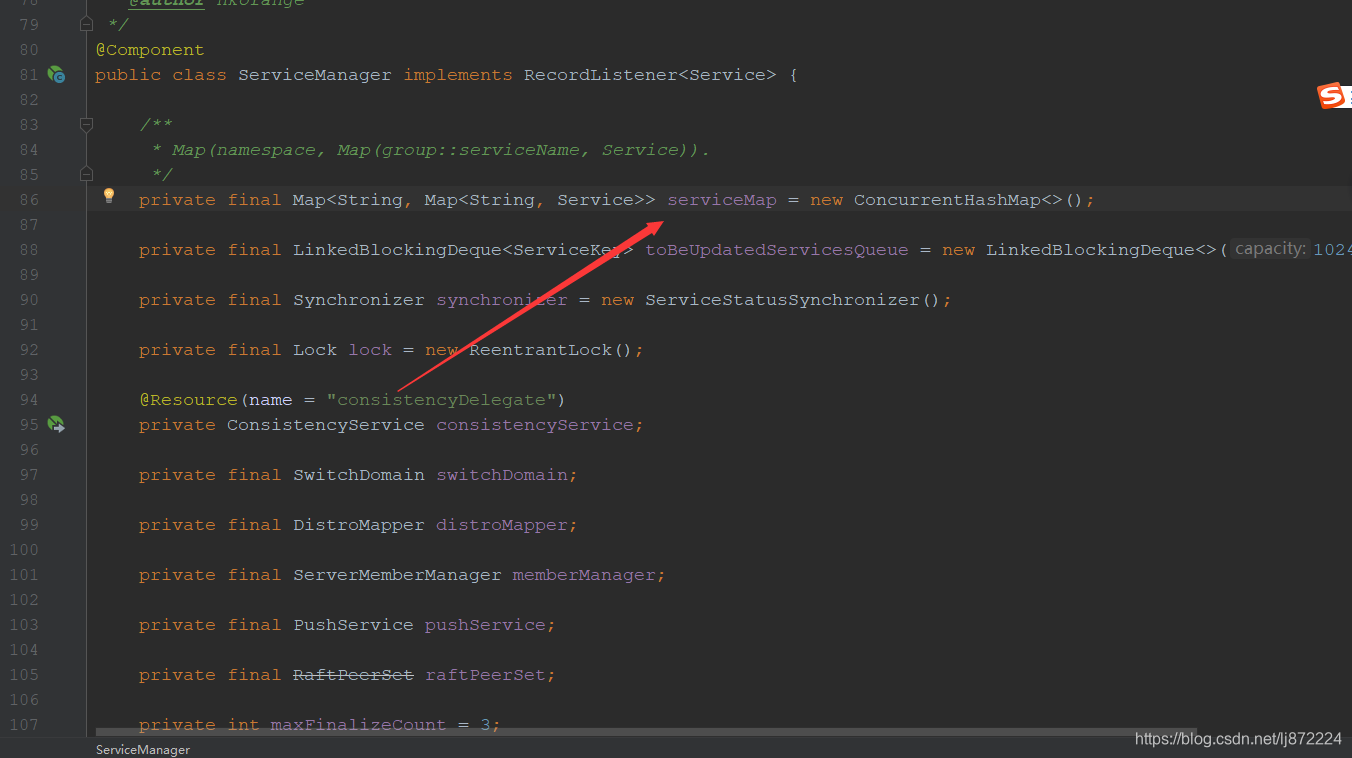
我们点击Service类进去,可以看到里面有一个hashmap的成员变量
private Map<String, Cluster> clusterMap = new HashMap<>();
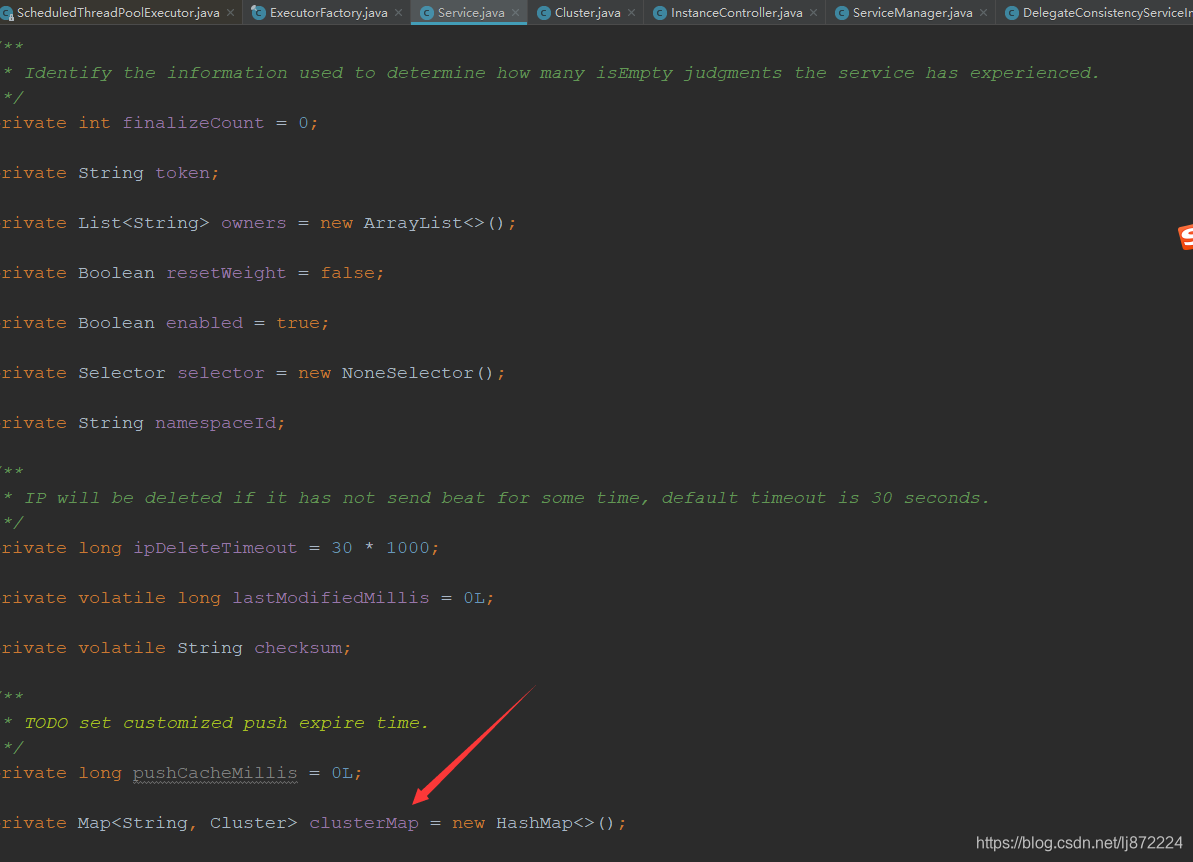
这个map成员变量里面的value 是Cluster这个类,继续点入
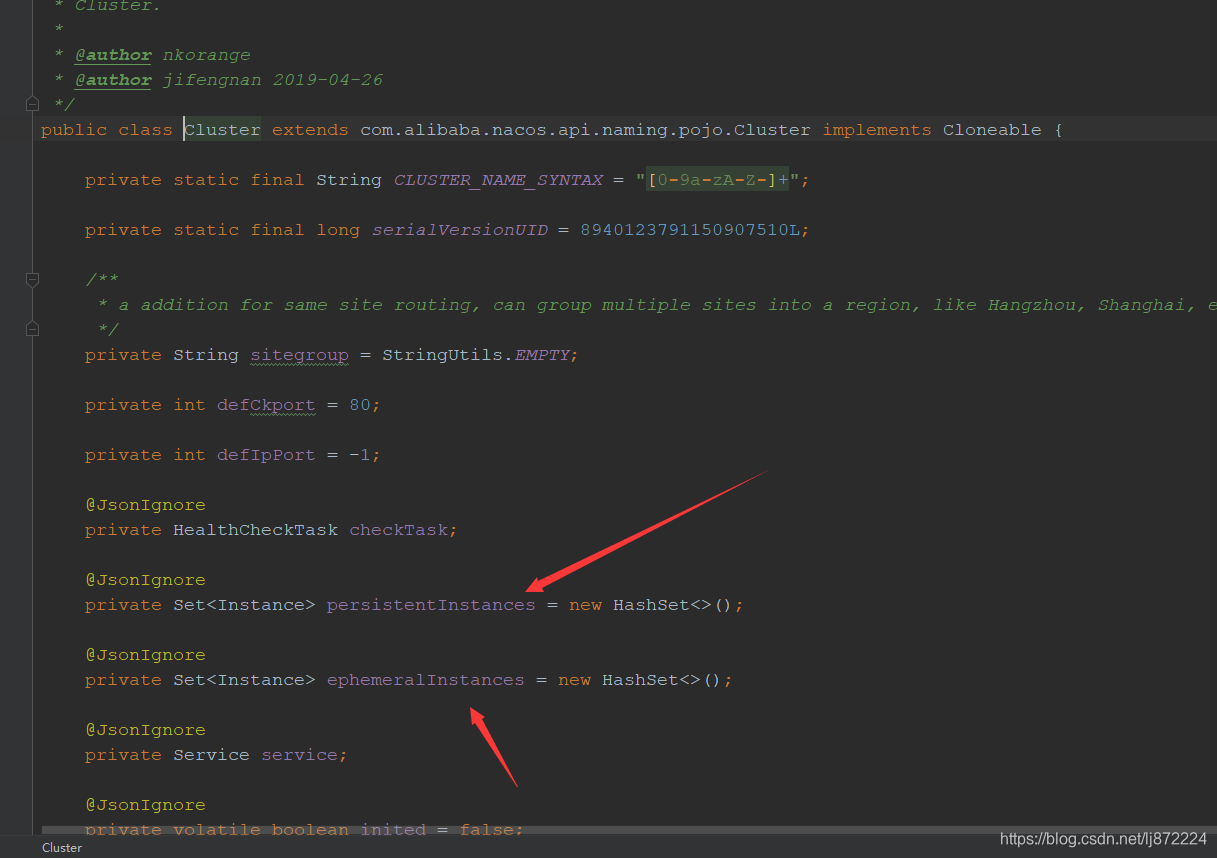
可以很清楚看到,Cluster有两个set集合变量,也就是我们之前分析的服务注册,最后新增的实例会赋值给这两个变量,所以通过Nacos的注册表的数据结构,可以看出Nacos通过细粒度来控制写时复制的实例的内存大小,当然Nacos的内存表设计的这么复杂,也是考虑到很好的扩展性,毕竟是一个商用的中间件,好了,自此整个Nacos服务端服务注册的源码就分析完了,后续有时间会讲一下服务发现,服务同步等源码,大家有兴趣的可以交流一下