本文是Spring Boot系列文集中关于LDAP连接相关操作的一文。仅仅涉及基本的使用ODM来快速实现LDAP增删改查操作。详细的关于Spring LDAP的其他操作,可以参考翻译的官方文档。
本文目的:使用Spring Boot构建项目,帮助读者快速配置并使用Spring LDAP操作LDAP。大致步骤如下:
1.创建Spring Boot项目(约1分钟)
2.添加pom.xml文件中Spring LDAP依赖(约1分钟)
3.配置Spring LDAP连接信息(约1分钟)
4.创建实体类作为LDAP中的entry映射(ODM映射功能,类似ORM)
5.使用ldapTemplate书写service层的方法(约3分钟)
6.编写controller层(约3分钟)
1.创建Spring Boot项目(约1分钟)
IDEA中点击file - new - project
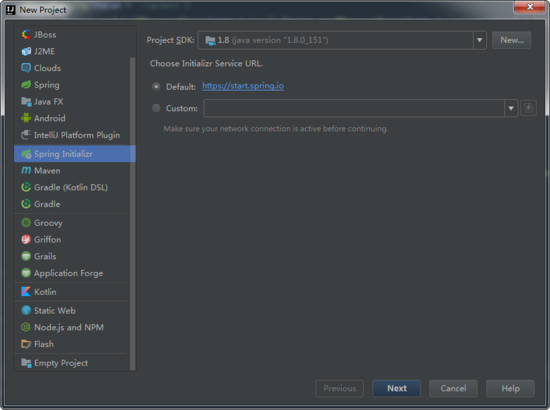
图1
如上图,选择左侧的 Spring Initializr帮助初始化spring项目,配置好SDK后,点击next。
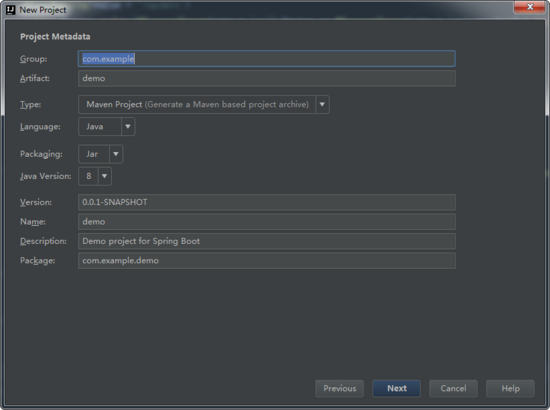
图2
点击后,如图2,如果只是做demo,该页面默认即可,点击next。

图3
如图3,我们选择web,右侧会显示web相关的组件,我们选择右侧中的Web,将其前面的框勾选上。这代表在创建的spring boot项目中会引入web相关的依赖。点击next。
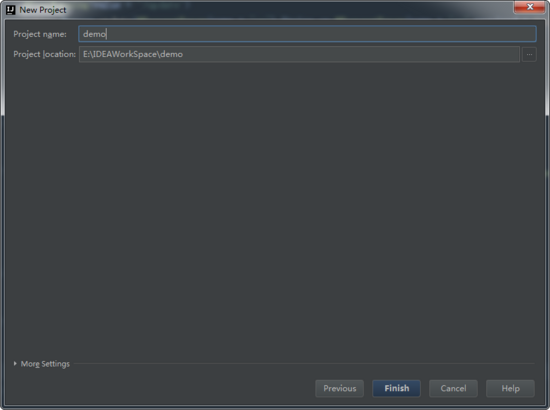
图4
如图4,这里自己命名即可,点击finish。
2.添加pom.xml文件中Spring LDAP依赖(约1分钟)
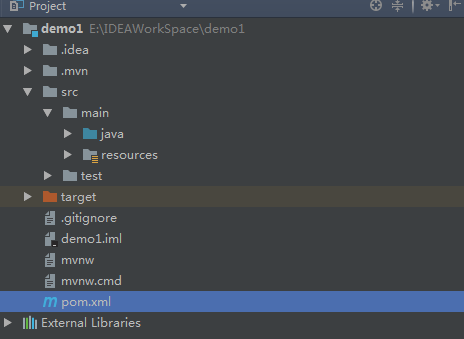
图5
如上图图5,在项目中双击pom.xml来添加依赖。
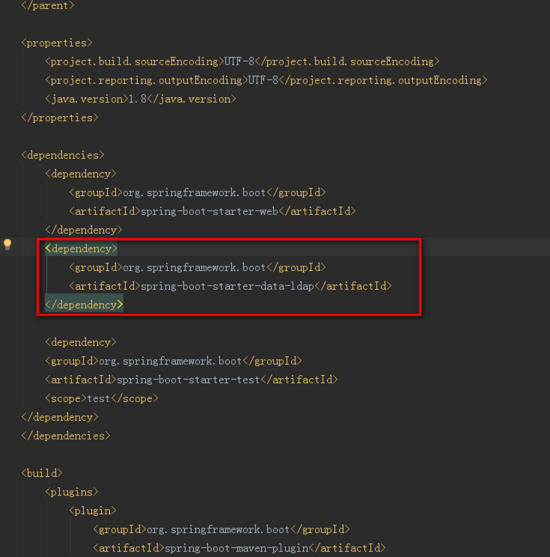
图6
如图6所示,文件中已经加载了spring-boot-starter-web依赖,我们要使用Spring LDAP来操作LDAP服务器需要添加spring-boot-starter-data-ldap。该依赖会自动加载spring-ldap-core 与 spring-data-ldap依赖。其中spring-ldap-core是ldap操作的核心依赖,而spring-data-ldap提供了ODM的功能,能够简化操作。我们可以在项目的External Libraries中看到这两个依赖,如下图图7中三个黄色高亮处:
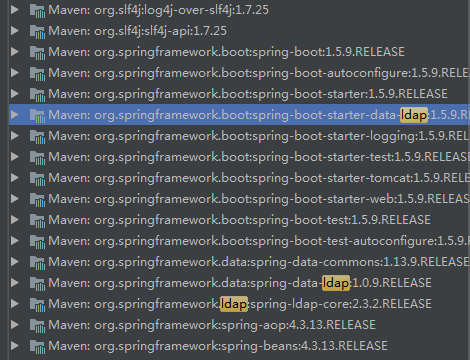
图7
3.配置Spring LDAP连接信息

图8
如上图图8,根据spring boot官网对ldap配置的说明来配置,可以看这里。这样配置之后,spring boot会自动读取该配置。
4.创建实体类作为LDAP中的entry映射
本例中使用ODM功能,极大的简化了LDAP的操作,关于ODM更多的信息,可以参考翻译的官方文档。
我们在项目中创建如下结构:

图9
现在,我们在entry包下写与entry互相映射的实体类。其中,我的LDAP结构如下
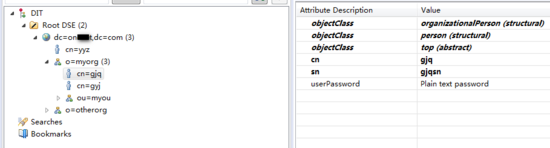
图10
新建Person类
package com.example.demo.entry;
import com.fasterxml.jackson.annotation.JsonIgnore;
import org.springframework.ldap.odm.annotations.Attribute;
import org.springframework.ldap.odm.annotations.Entry;
import org.springframework.ldap.odm.annotations.Id;
import org.springframework.ldap.support.LdapNameBuilder;
import javax.naming.Name;
/**
* @Author: geng_pool
* @Description:
* @Date: Created in 2017/12/27 10:24
* @Modified by:
*/
@Entry(objectClasses = {"organizationalPerson","person","top"},base = "o=myorg")
public class Person {
@Id
@JsonIgnore
private Name dn;
@Attribute(name="cn")
private String cn;
@Attribute(name="sn")
private String sn;
@Attribute(name="userPassword")
private String userPassword;
public Person(String cn) {
Name dn = LdapNameBuilder.newInstance()
.add("o", "myorg")
.add("cn", cn)
.build();
this.dn = dn;
}
public Person(){}
/* getter */
public Name getDn() {
return dn;
}
public String getCn() {
return cn;
}
public String getSn() {
return sn;
}
public String getUserPassword() {
return userPassword;
}
/* setter */
public void setDn(Name dn) {
this.dn = dn;
}
public void setCn(String cn) {
this.cn = cn;
if(this.dn==null){
Name dn = LdapNameBuilder.newInstance()
.add("o", "myorg")
.add("cn", cn)
.build();
this.dn = dn;
}
}
public void setSn(String sn) {
this.sn = sn;
}
public void setUserPassword(String userPassword) {
this.userPassword = userPassword;
}
@Override
public String toString() {
return "Person{" +
"dn=" + dn.toString() +
", cn='" + cn + '\'' +
", sn='" + sn + '\'' +
", userPassword='" + userPassword + '\'' +
'}';
}
}
注意@Entry与@Id为必须的。而@JsonIgnore是为了将person传给前端时不报错,因为Name类型的无法自动解析成json格式。注意我为了方便,在 public Person(String cn) {}构造方法中写上了DN值的生成方法,在setCn中也写上了该方法,当然存在代码重复问题,忽略就好。
5.使用ldapTemplate书写service层的方法
在service包中,新建OdmPersonRepo类
package com.example.demo.service;
import com.example.demo.entry.Person;
import org.springframework.beans.factory.annotation.Autowired;
import org.springframework.ldap.core.LdapTemplate;
import org.springframework.stereotype.Service;
import static org.springframework.ldap.query.LdapQueryBuilder.query;
/**
* @Author: geng_pool
* @Description:
* @Date: Created in 2017/12/27 10:37
* @Modified by:
*/
@Service
public class OdmPersonRepo {
@Autowired
private LdapTemplate ldapTemplate;
public Person create(Person person){
ldapTemplate.create(person);
return person;
}
public Person findByCn(String cn){
return ldapTemplate.findOne(query().where("cn").is(cn),Person.class);
}
public Person modifyPerson(Person person){
ldapTemplate.update(person);
return person;
}
public void deletePerson(Person person){
ldapTemplate.delete(person);
}
}
可以看到,基本的增删改查操作都帮我们实现了,我们只要调用一下ldapTemplate中的方法即可。若要更自由的操作ldap的增删改查,可参阅翻译的官方文档。
6.编写controller层
在controller包下,新建一个testController类来测试LDAP的操作。
package com.example.demo.controller;
import com.example.demo.entry.Person;
import com.example.demo.service.OdmPersonRepo;
import org.springframework.beans.factory.annotation.Autowired;
import org.springframework.ldap.core.LdapTemplate;
import org.springframework.web.bind.annotation.*;
/**
* @Author: geng_pool
* @Description:
* @Date: Created in 2017/12/27 10:50
* @Modified by:
*/
@RestController
public class testController {
@Autowired
private OdmPersonRepo odmPersonRepo;
@RequestMapping(value = "/findOne",method = RequestMethod.POST)
public Person findByCn(@RequestParam(name = "cn",required = true) String cn){
return odmPersonRepo.findByCn(cn);
}
@PostMapping(value = "/create")
public Person create(@RequestParam(name = "cn") String cn,@RequestParam(name = "sn") String sn,@RequestParam(name = "userPassword") String userPassworld){
Person person = new Person();
person.setCn(cn);
person.setSn(sn);
person.setUserPassword(userPassworld);
return odmPersonRepo.create(person);
}
@PostMapping(value = "/update")
public Person update(@RequestParam(name = "cn") String cn,@RequestParam(name = "sn") String sn,@RequestParam(name = "userPassword") String userPassworld){
Person person = new Person();
person.setCn(cn);
person.setSn(sn);
person.setUserPassword(userPassworld);
return odmPersonRepo.modifyPerson(person);
}
@PostMapping(value = "/delete")
public void delete(@RequestParam(name = "cn")String cn){
Person person = new Person();
person.setCn(cn);
odmPersonRepo.deletePerson(person);
}
}
至此,一个基本的demo完成啦。下面我们测试一下
测试
为了大家都能跟着步骤来,我就不使用Postman来测试,而是在浏览器中测试接口。、
启动spring boot,没有报错的话,打开浏览器到 localhost:8080/ ,按下F12,弹出开发者模式,找到console控制台方便我们发送测试语句。
首先,引入jquery.js。打开jquery.js,全选-复制-在console中粘贴-回车,如下图:
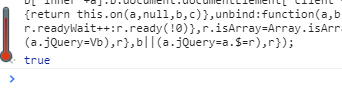
图11
显示为true,代表加载成功,我们可以使用jquery的ajax来测试了。
新增数据
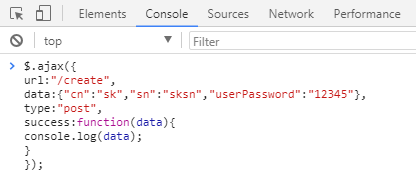
图12
正如controller层的testController要求的那样,我们在地址 /create 上使用post方法,将数据cn sn userPassword传过去
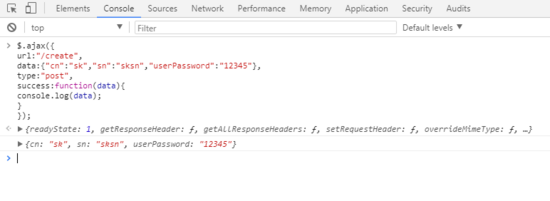
图13
而在LDAP服务器中,也显示了新增的数据
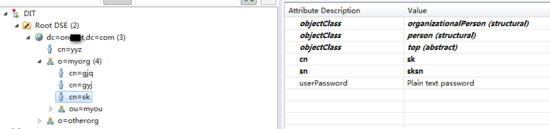
图14
查找数据
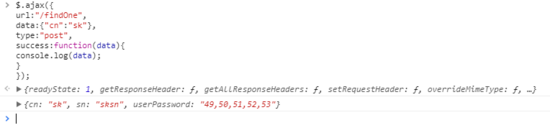
图15
也能根据cn正确查找到数据。
修改数据
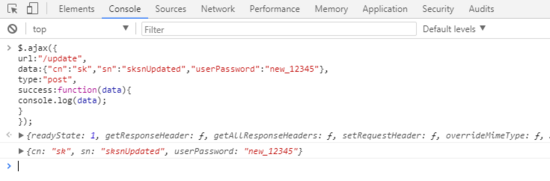
图16
我们查看LDAP中是否修改
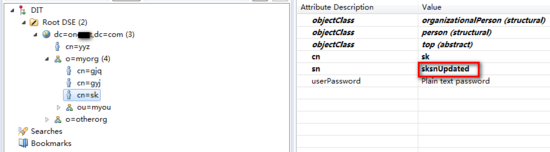
图17
可以看到能够正常修改数据
删除数据
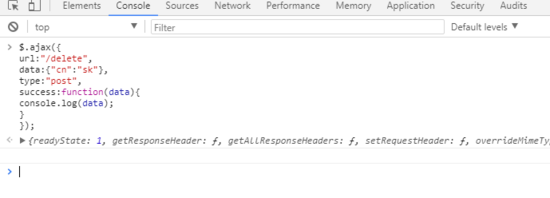
图18
查看LDAP中是否删除

图19
可以看到,数据被正确删除了。
其他说明
刚才的例子中,代码有需要完善的地方,但对于demo演示来说完全可以忍受。大家可能也看到了这么做也有些缺点,我在update的时候,需要将修改后的person的所有属性值都传到后台来(这也不算啥缺点,关系数据库的更新也是这样),并且不能修改cn的值(这就是为什么其他例子中都是使用uid来作为dn的一部分,类似于关系数据库的主键的作用),因为修改后该entry的dn值就变化了,ODM就无法确定更新哪个数据。会报 javax.naming.NameNotFoundException: [LDAP: error code 32 - No Such Object] 错误。
删除操作也像关系数据库的操作一样,直接给cn即可,这是因为我们在person类中setCn()方法内写了dn的生成函数,这样ODM才能根据被@Id所注释的dn来找到LDAP中的entry并执行删除操作。
我们在Person类中写了Name类型的dn值的构建方法,但是我一开始按照官网的代码来写,总是出问题,在stackOverFlow中找到了答案。链接在这里。
想要更深入的了解,可以参考翻译的官方文档。了解更自由更个性化的操作。
以上就是本文的全部内容,希望对大家的学习有所帮助,也希望大家多多支持脚本之家。