Matery主题自定义(四)修改文章分类样式
个人认为 Matery 主题的标签样式与分类样式重合,不宜分别,通过修改分类样式易于区别
找到 themes>hexo-theme-matery>layout>_widget>category-cloud.ejs 文件,后面的代码都是在基于这个文件修改代码
结构代码
Ctrl+F 查询 href="<%- url_for(category.path) %>" 定位需要修改的代码
在下面的 a 标签中
<a href="<%- url_for(category.path) %>" title="<%- category.name %>: <%- category.length %>"></a>
插入下面的代码
<div class="moleskine-wrapper">
    <div class="moleskine-notebook">
        <div class="chip notebook-cover center-align waves-effect waves-light
          <% if (isCategory && category.name == page.category) { %> chip-active <% } else { %> chip-default <% } %>"
            style="background-color: <%- color %>;">
            <div
                class="notebook-skin
                  <% if (isCategory && category.name == page.category) { %> chip-active <% } else { %> chip-default <% } %>">
                <%- category.name %>
            </div>
        </div>
        <div class="notebook-page dotted"></div>
    </div>
</div>
样式代码
将下面的代码插入在 category-cloud.ejs 文件中
<style>
    /* 文章分类书本样式 */
    .chip-container .tag-chips {
        display: flex;
        flex-wrap: wrap;
        justify-content: space-around;
    }

    .chip-container .tag-chips a {
        margin: 0 7px 10px;
    }

    .chip-container .chip {
        max-width: calc(100% / 4);
        min-width: 10em;
        height: 200px;
        position: relative;
        transition: .5s linear;
        padding: 19px 0;
        line-height: 20px;
        z-index: 990;
        border-radius: 5px 15px 15px 5px;
        transform-origin: left center 0;
    }

    .chip-container .notebook-cover::before {
        content: "";
        position: absolute;
        width: 10px;
        height: calc(100% + 2px);
        top: -1px;
        z-index: 100;
        border-radius: 2px;
        right: 25px;
        transition: 2s ease;
        background: linear-gradient(to right, #1e606e 0, #2e95aa 12%, #1e606e 25%, #2e95aa 37%, #1e606e 50%, #2e95aa 62%, #1e606e 75%, #2e95aa 87%, #1e606e 100%);
    }

    .chip .notebook-skin {
        height: 50px;
        width: 100%;
        background: #e8e8e0;
        margin-top: 42px;
        padding: 10px 32px 64px 10px;
        font-size: 19px;
        position: relative;
        z-index: 10;
        color: #222;
        text-align: left;
        box-shadow: 0 1px 1px rgba(0, 0, 0, .2);
    }

    .chip .notebook-skin:before {
        content: '';
        position: absolute;
        width: 100%;
        height: 15px;
        left: 0;
        bottom: 0;
        background: #cddc39;
    }

    .notebook-cover {
        background: #cc4b48;
        height: 200px;
        width: 140px;
        position: absolute;
        border-radius: 5px 15px 15px 5px;
        z-index: 10;
        transition: .5s linear;
        transform-style: preserve-3d;
        transform-origin: left center 0;
    }

    .moleskine-wrapper {
        max-width: calc(100% / 4);
        min-width: 10em;
    }

    .moleskine-notebook:hover .notebook-cover {
        transform: rotateY(-50deg);
        z-index: 99;
        box-shadow: 20px 10px 50px rgba(0, 0, 0, .2);
    }

    .moleskine-notebook {
        height: 200px;
        position: relative;
        display: flex;
        flex-wrap: wrap;
        justify-content: space-around;
        transition: .5s linear;
        border-radius: 5px 15px 15px 5px;
        transform-origin: left center 0;
    }

    .moleskine-notebook:hover {
        transform: rotateZ(-10deg);
    }

    .notebook-page.dotted {
        background: linear-gradient(to bottom, #fbfae8 9px, #e4e4e4 1px);
        background-size: 100% 10px;
    }

    .chip-container .chip:hover {
        filter: invert(.1);
    }

    .notebook-page {
        height: 100%;
        width: 140px;
        position: absolute;
        top: 10px;
        background-color: #fbfae8;
        z-index: 0;
        border-radius: 5px 16px 16px 5px;
        overflow: hidden;
    }
</style>
完成上面的步骤,基本样式就完成了,但运行查看效果的时候,感觉还是有些不满意,我就进行下面的修改
微调
在 themes>hexo-theme-matery>source>css>matery.css 文件中修改下面的代码
使用 Ctrl+F 查询关键字,定位代码进行修改
.chip-container .chip:hover {
    color: #2ea451;
    opacity: .8;
}

.chip-container .chip-active {
    color: #2ea451 !important;
    box-shadow: 2px 5px 10px #aaa !important;
}
完成微调之后就算完成效果了
效果图
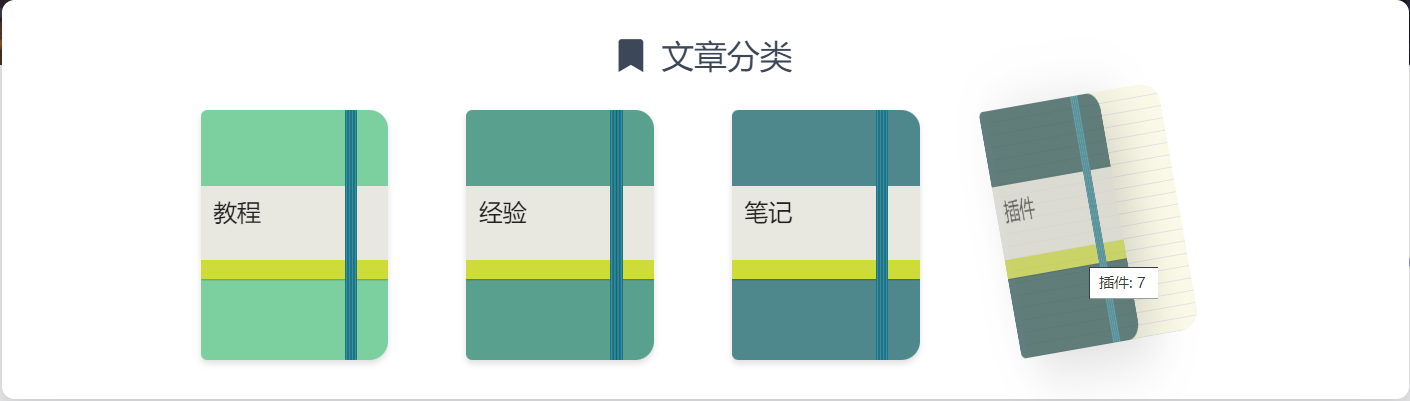
在 category-cloud.ejs 的第二行代码,这个数组存储的就是分类标签的背景颜色,可以根据你的喜好进行配置
在这里推荐一个网站,可以方便自己选择颜色
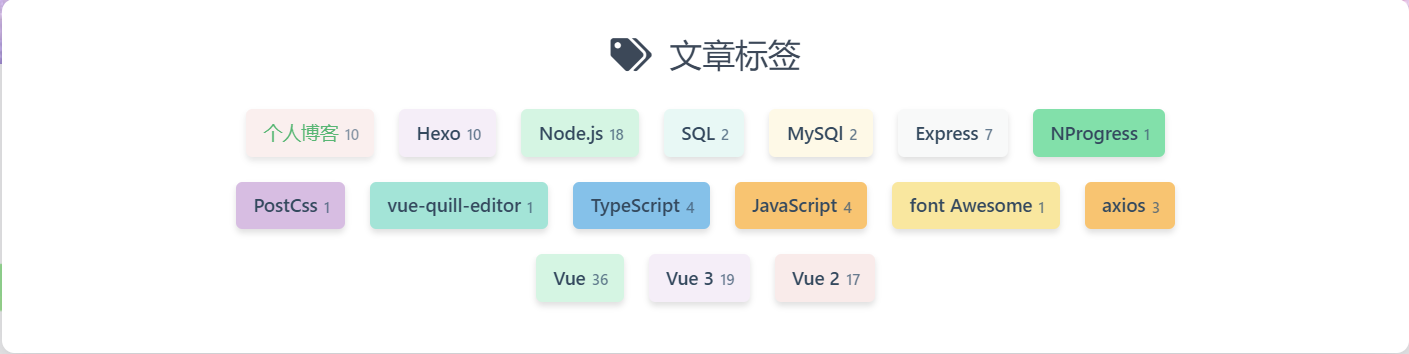
微调标签样式
我对标签样式也进行了修改
.chip-default .tag-length {
    color: rgba(66, 92, 118, .8);
    margin-top: 1px;
}

.chip-active .tag-length {
    color: #64c45b;
}
Matery 主题自定义持续更新中…
参考
版权声明:本文为weixin_43662760原创文章,遵循CC 4.0 BY-SA版权协议,转载请附上原文出处链接和本声明。