这篇文章主要为刚入门目标检测的人提供一些tensorflow/models模块中object_detection的使用步骤。
1.数据准备
首先需要有训练用的数据集,可以下载网上的开源数据,也可以自己制作。自己制作通常使用LabelImg工具地址:https://github.com/tzutalin/labelImg.git label尽量使用英文。使用LabelImg工具标注产生xml文件,每个xml文件对应一个图片文件,每个xml文件里面包含图片中多个物体的位置和种类信息。
然后,还需要建立一个labels_items.txt文档用来声明模型输出的数字跟分类类别对应的关系。书写格式如下: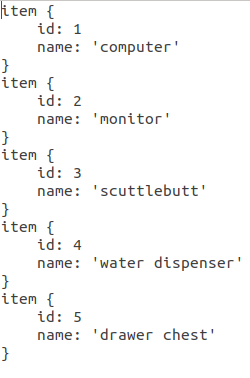
最后把训练用的图片,制作的xml文件和labels_items.txt放在一个单独的文件夹里,这样数据准备工作就ok了。
2.创建训练数据
object_detection/dataset_tools/ 文件下自带了一些生成tfrecord的py文件。也可以先把xml文件转换为csv文件,再将csv文件转换为tfrecord文件,可参考目标检测第2步-数据准备
注: 1.在生成数据之前,说明一下。因为用的object_detection需要用到同级目录slim里面的东西,所以需要先设置环境变量,把slim的路径加上
export PYTHONPATH=$PYTHONPATH:./models/research:./models/research/slim:
./models/research/object_detection
其实加前两个就可以了,最后这个可以不加。这里用的是相对路径,也可以改成绝对路径。
有时候加上这个路径也还会出错
然后你可以在报错的文件加上
2.object_detection里使用proto buffer定义了一些class,这些proto buffer需要预先编译成python代码,如果没有编译,在使用object_detection时会出现如下报错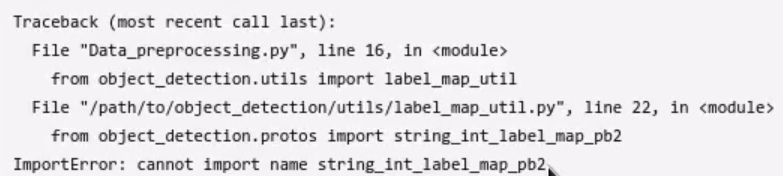
解决方式是直接在research目录下运行如下代码
sudo apt install protobuf-compiler
protoc object_detection/protos/*.proto --python_out=.
现在可以生成tfrecord数据了。
python3 quiz-object-detection/create_data.py --data_dir ./quiz-w8-data/ --label_map_path ./quiz-w8-data/labels_items.txt --output_dir ./

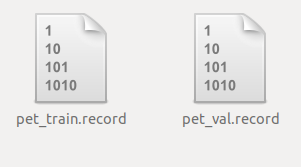
执行完上面命令后,然后就可以看到这两个文件了。
3.下载预训练模型
从model_zoo中下载预训练模型。本文选了ssd_mobilenet_v1_coco下载。
然后编辑config文件,文件在object_detection/samples/configs文件夹中,找到你所下载的模型对应的config文件ssd_mobilenet_v1_pets.config。
打开config文件,将num_classes改成你的类别数目
fine_tune_checkpoint改到你的ckpt文件的存放路径、原始的训练步数num_steps是200k,可以根据自己需要改变训练步数。
input_path(tfrecord文件的路径)、label_map_path(labels_items.txt文件的路径)、num_examples(验证集中数据的个数,本文是47)、max_evals(验证集验证的次数,本文是10次) 分别作出相应的修改。
然后,我建立了一个data的文件夹,里边存放了tfrecord文件、config文件、ckpt文件、labels_items.txt文件。代码就是research文件下的object_detection和slim两个文件夹。
4.训练
先添加环境变量,上面已经说过了。然后运行下面代码训练数据。
python3 research/object_detection/train.py --train_dir=./train_dir --pipeline_config_path=./data/ssd_mobilenet_v1_pets.config
可能会出现下面的报错,可以改变一下tensorflow的版本试试看,tensorflow_gpu==1.8亲测可用。比改变cudnn可能简单一点,当然也可以改变cudnn的版本。
验证数据
python3 research/object_detection/eval.py --checkpoint_dir=./train_dir --eval_dir=./eval_dir --pipeline_config_path=./data/ssd_mobilenet_v1_pets.config
导出模型
1.先添加环境变量。
2.导出
python3 research/object_detection/export_inference_graph.py --input_type image_tensor --pipeline_config_path ./data/ssd_mobilenet_v1_pets.config --trained_checkpoint_prefix ./train_dir/model.ckpt-433 --output_directory ./exported
exported文件夹中的frozen_inference_graph.pb就是导出的模型文件。
3.使用导出的模型文件验证图片。
python3 research/object_detection/inference.py --output_dir exported --dataset_dir ./data
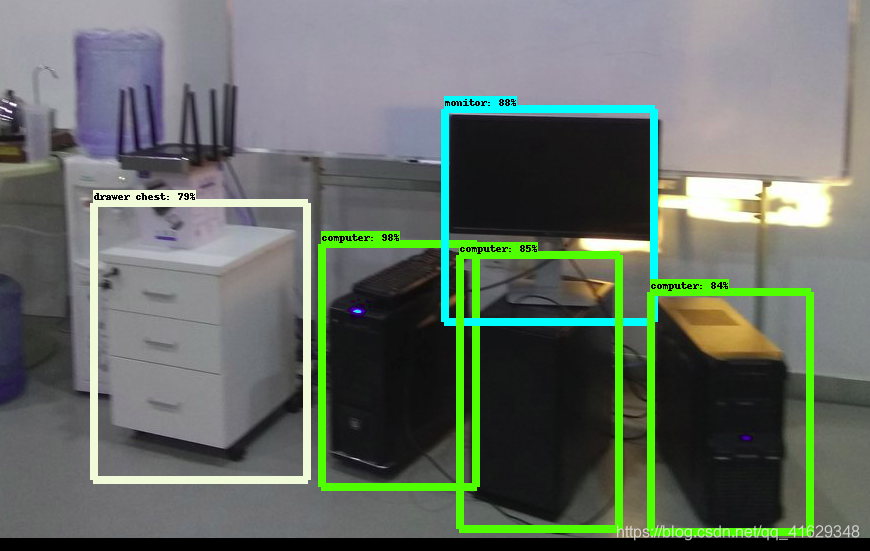
训练次数太少可能模型不太好,很明显水桶没有识别出来。
inference.py代码如下:
import argparse
import os

import numpy as np
import tensorflow as tf
from matplotlib import pyplot as plt
from PIL import Image

from utils import visualization_utils as vis_util
from utils import label_map_util

NUM_CLASSES = 5


def parse_args(check=True):
    parser = argparse.ArgumentParser()
    parser.add_argument('--output_dir', type=str, required=True)
    parser.add_argument('--dataset_dir', type=str, required=True)
    FLAGS, unparsed = parser.parse_known_args()
    return FLAGS, unparsed


if __name__ == '__main__':
    FLAGS, unparsed = parse_args()

    PATH_TO_CKPT = os.path.join(FLAGS.output_dir, 'frozen_inference_graph.pb')
    PATH_TO_LABELS = os.path.join(FLAGS.dataset_dir, 'labels_items.txt')

    detection_graph = tf.Graph()
    with detection_graph.as_default():
        od_graph_def = tf.GraphDef()
        with tf.gfile.GFile(PATH_TO_CKPT, 'rb') as fid:
            serialized_graph = fid.read()
            od_graph_def.ParseFromString(serialized_graph)
            tf.import_graph_def(od_graph_def, name='')

    label_map = label_map_util.load_labelmap(PATH_TO_LABELS)
    categories = label_map_util.convert_label_map_to_categories(label_map, max_num_classes=NUM_CLASSES, use_display_name=True)
    category_index = label_map_util.create_category_index(categories)

    def load_image_into_numpy_array(image):
        (im_width, im_height) = image.size
        return np.array(image.getdata()).reshape(
            (im_height, im_width, 3)).astype(np.uint8)

    test_img_path = os.path.join(FLAGS.dataset_dir, 'test.jpg')

    with detection_graph.as_default():
        with tf.Session(graph=detection_graph) as sess:
            image_tensor = detection_graph.get_tensor_by_name('image_tensor:0')
            detection_boxes = detection_graph.get_tensor_by_name('detection_boxes:0')
            detection_scores = detection_graph.get_tensor_by_name('detection_scores:0')
            detection_classes = detection_graph.get_tensor_by_name('detection_classes:0')
            num_detections = detection_graph.get_tensor_by_name('num_detections:0')
            image = Image.open(test_img_path)
            image_np = load_image_into_numpy_array(image)
            image_np_expanded = np.expand_dims(image_np, axis=0)
            (boxes, scores, classes, num) = sess.run(
                [detection_boxes, detection_scores, detection_classes, num_detections],
                feed_dict={image_tensor: image_np_expanded})
            vis_util.visualize_boxes_and_labels_on_image_array(
                image_np,
                np.squeeze(boxes),
                np.squeeze(classes).astype(np.int32),
                np.squeeze(scores),
                category_index,
                use_normalized_coordinates=True,
                line_thickness=8)
            plt.imsave(os.path.join(FLAGS.output_dir, 'output.png'), image_np)