接上篇《Apache Shiro 接管Swagger认证授权》,有热心网友反应Apache Shiro似乎太简单。针对这个问题,个人不做任何评价(一切技术服务于需求)。今天主要分享内容为:在Spring Security下如何接管Swagger的认证授权工作。
1.添加依赖
假定你对Swagger和Spring Security已经有一定的基础,现在开始检查你的项目中是否添加了Swagger和Spring Security的依赖。以Maven为例,向pom.xml文件添加如下配置信息:
org.springframework.boot spring-boot-starter-securityio.springfox springfox-swagger2 2.9.2io.springfox springfox-swagger-ui 2.9.22.配置Swagger
Swagger的配置相对比较简单,最主要的是配置其扫描的包路径,其他信息可以选配。你可以按照下列方式进行配置:
@Configuration@EnableSwagger2public class SwaggerConfiguration { @Bean public Docket docket(){ return new Docket(DocumentationType.SWAGGER_2) .pathMapping("/") .select() .apis( RequestHandlerSelectors.basePackage("com.ramostear.apisecurity.controller")) .paths(PathSelectors.any()) .build() .apiInfo( new ApiInfoBuilder() .title("Spring Security接管Swagger认证授权") .description("Spring Security and Swagger") .version("1.0.0") .contact( new Contact( "树下魅狐", "https://www.ramostear.com", "ramostear@163.com" ) ).build() ); }}Swagger的配置基本与上一篇的内容一致,只是调整了basePackage的路径。
3.配置Spring Security
Spring Security的配置是本篇的重点。首先,基于内存设置两个登录时使用的账号,然后再将Swagger的资源路径添加到Spring Security的Authorize Filters中。创建Spring Security配置类,并添加如下代码(如果你已经配置过Spring Security,且基于JDBC获得登录账号信息,那么可以省略账户的配置)。
SpringSecurityConfiguration.java
@Configuration@EnableWebSecuritypublic class SpringSecurityConfiguration extends WebSecurityConfigurerAdapter { private static final String[] AUTH_LIST = { "/v2/api-docs", "/configuration/ui", "/swagger-resources/**", "/configuration/security", "/swagger-ui.html", "/webjars/**" }; @Override protected void configure(AuthenticationManagerBuilder auth) throws Exception { auth.inMemoryAuthentication() .passwordEncoder(passwordEncoder()) .withUser("user") .password(passwordEncoder().encode("password")) .roles("USER"); } @Override protected void configure(HttpSecurity http) throws Exception { http.authorizeRequests() .antMatchers(AUTH_LIST) .authenticated() .and() .formLogin() .and() .httpBasic(); } @Bean public PasswordEncoder passwordEncoder(){ return new BCryptPasswordEncoder(); }}在配置类中,AUTH_LIST数组存放了Swagger需要加入Spring Security认证的URL:
private static final String[] AUTH_LIST = { "/v2/api-docs", "/swagger-resources/**", "/swagger-ui.html", "/webjars/**" };这和Apache Shiro中的配置如出一辙,下面是Apache Shiro中配置Swagger的代码:
@Beanpublic ShiroFilterFactoryBean shiroFilterFactoryBean(SecurityManager securityManager){ ShiroFilterFactoryBean filterFactoryBean = new ShiroFilterFactoryBean(); Map filterChainDefinition = new LinkedHashMap<>(); filterChainDefinition.put("/swagger-ui.html","authc"); filterChainDefinition.put("/v2/**","authc"); filterChainDefinition.put("/swagger-resources/**","authc"); filterFactoryBean.setFilterChainDefinitionMap(filterChainDefinition); return filterFactoryBean;}让Spring Security接管Swagger认证授权的核心是configure(HttpSecurity http)方法:
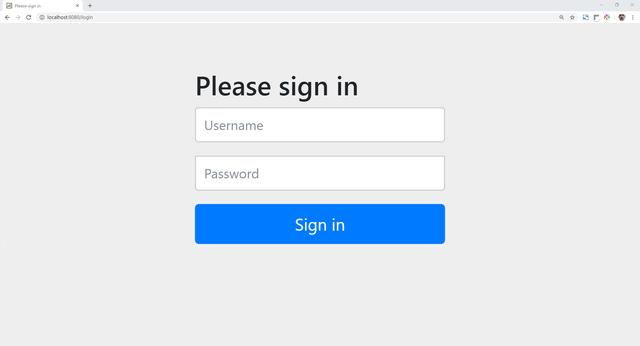
@Overrideprotected void configure(HttpSecurity http) throws Exception { http.authorizeRequests() .antMatchers(AUTH_LIST) .authenticated() .and() .httpBasic();}只需将Swagger的相关URLs加入到Spring Security认证过滤链中即可。当未经认证的用户访问Swagger文档时(http://localhost:8080/swagger-ui.html),页面将跳转到用户登录页面。
4.测试
现在,启动应用程序,并在浏览器地址栏输入:http://localhost:8080/swagger-ui.html 。按下回车键后,页面被跳转到登录页面。
接下来,使用之前配置的账号和密码登录(用户名:user,密码:password)。成功登录后,便可浏览Swagger文档页面信息。
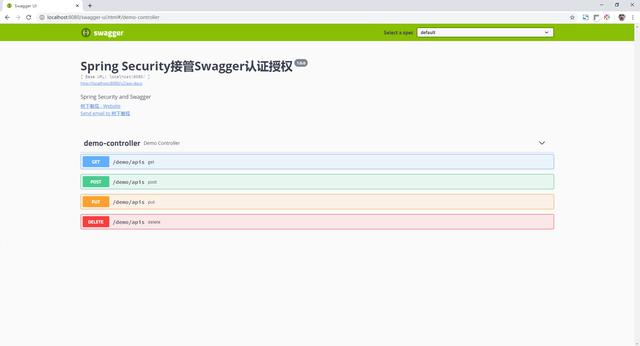
通过下面的动态图片,你可以更直观的了解测试过程:
5.总结
本文详细介绍了在Spring Boot下,如果使用Spring Security接管Swagger默认的身份认证工作。通过与Apache Shiro管理Swagger认证授权会发现,Spring Security和Apache Shiro管理Swagger权限的逻辑基本一致,即将Swagger的URLs加入到各自的认证和授权过滤链中,当用户访问Swagger对应的资源时,Apache Shiro和Spring Security都会对当前请求路径进行检查(包括用户是否登录,当前用户是否有权限访问url)。