浏览器端HTML/JS实现WebAssembly
在浏览器端实现WebAssembly,首先需要将要访问的html文件和wasm文件,放在服务器端,通过浏览器进行资源访问和执行。然后还需要对服务器端和浏览器端实现简单的配置。
服务器端配置
服务器端需要设置允许.wasm文件的访问,如在IIS里进行设置: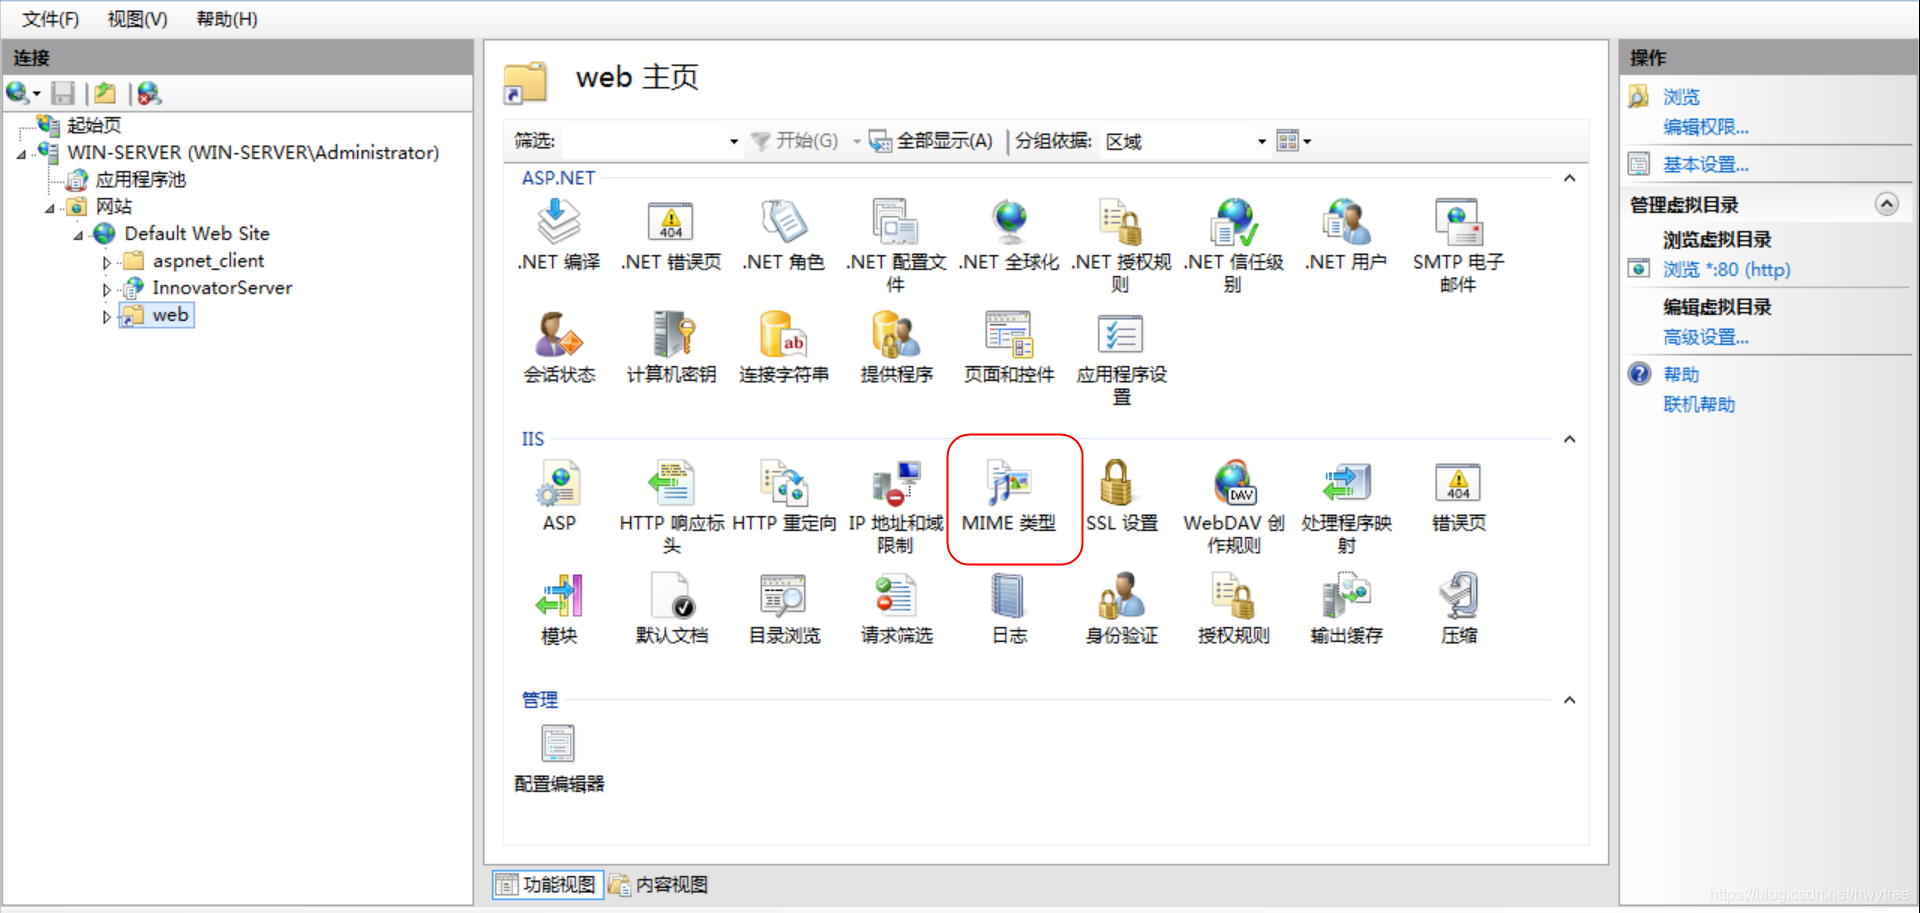
增加对.wasm文件的访问(类型:application/octet-stream)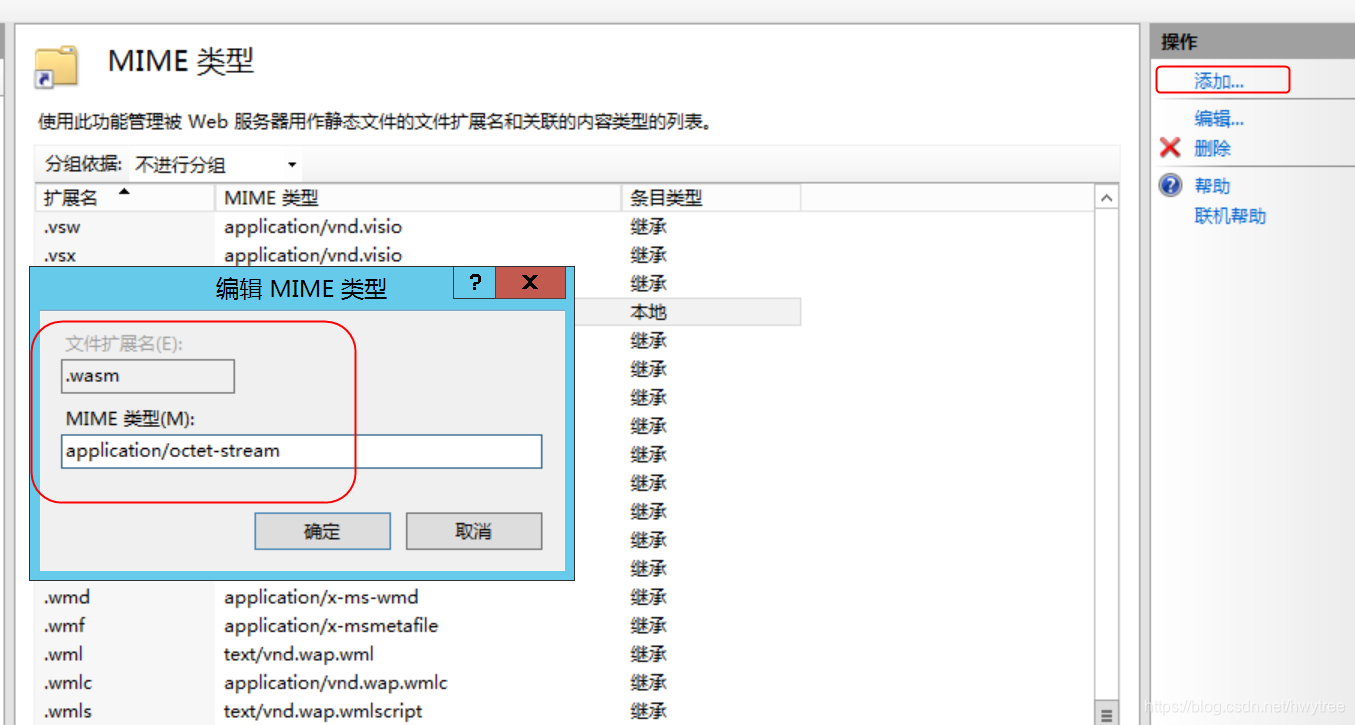
然后重启服务器生效。对于其它WEB服务器代理工具,等效于对配置文件做修改,如web.xml: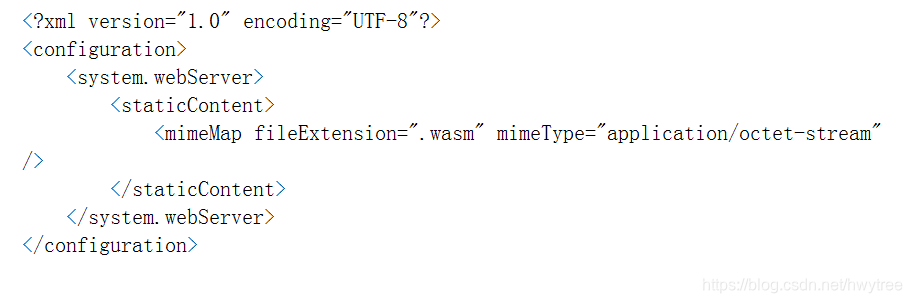
浏览器端配置
浏览器端需要打开对WebAssembly的支持功能: WebAssembly 在 Firefox 52+ 和 Chrome 57+/latest Opera 是默认支持的(你也可以运行 wasm 代码 在 Firefox 47+ 通过将 about:config 中的 javascript.options.wasm flag 设置为 enabling , 或者在 Chrome (51+) 以及 Opera (38+) 通过访问 chrome://flags 并且将 Experimental WebAssembly flag 设置为 enabling.)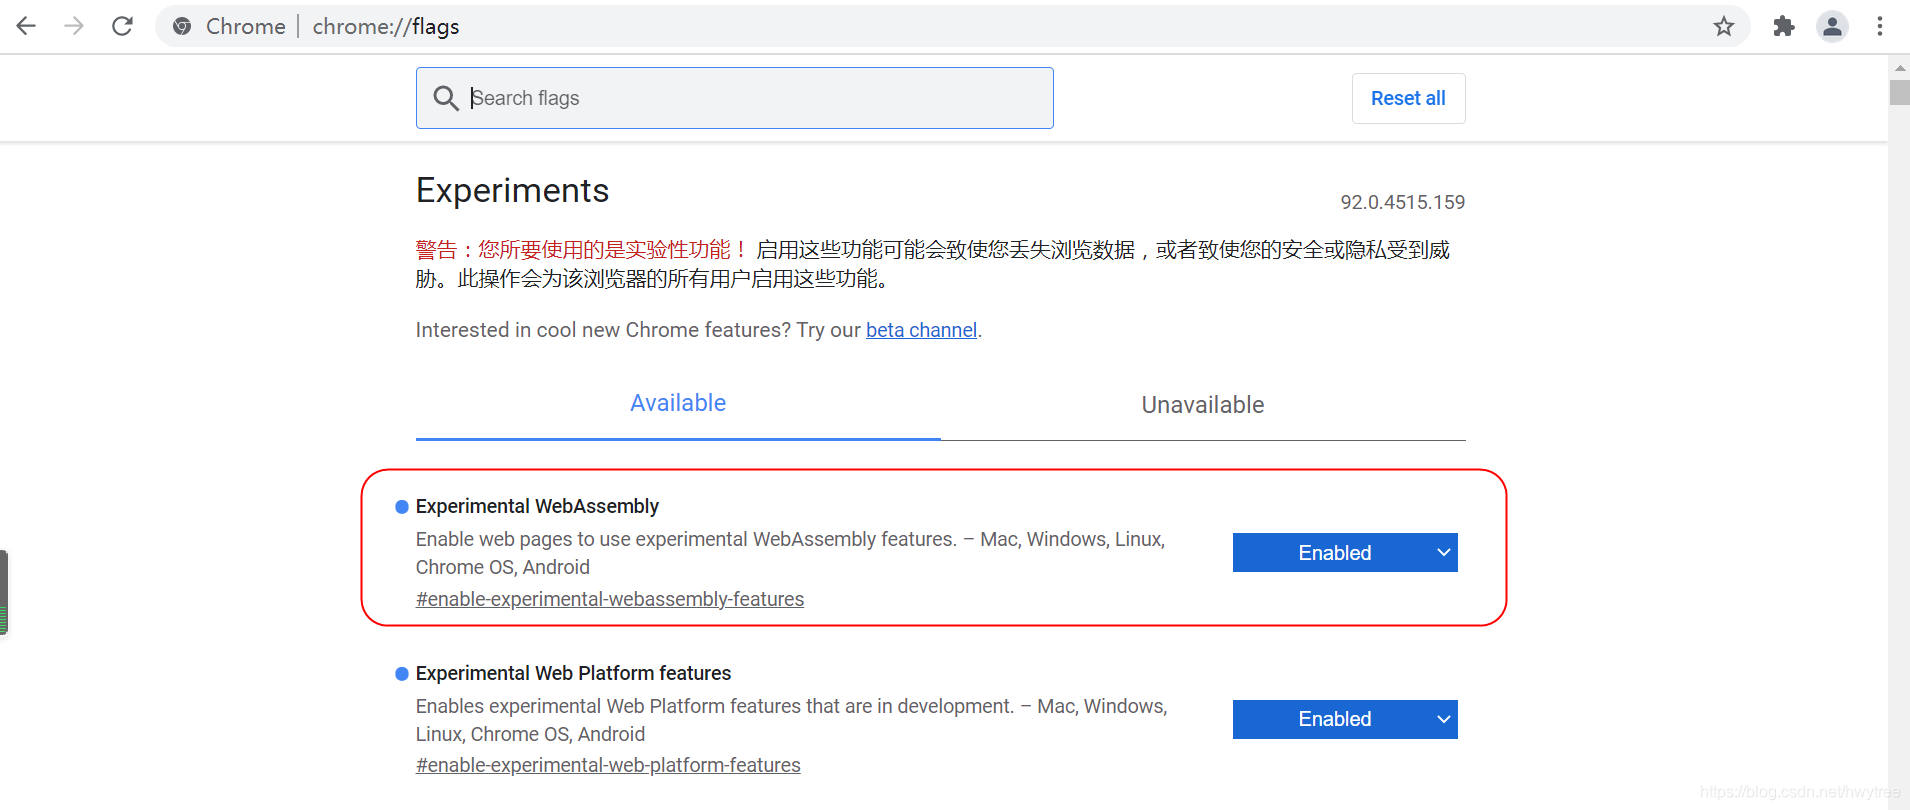
准备WebAssembly文件
- 编写test.c源文件,内容如下,为一个简单的加法函数。
int add(int a, int b) {
    return a + b;
}
- 调用emcc命令进行文件编译,得到test.wasm
emcc test.c -Os -s WASM=1 -s SIDE_MODULE=1 -o test.wasm
编写HTML文件调用WebAssembly函数
新建并编写watest.html文件,通过Fetch方式调用.wasm文件:
<!doctype html>

<html>
  <head>
    <meta charset="utf-8">
    <title>Emscripten:Export instance export</title>
  </head>
  <body>
<p> see console </p>

<script>

function RunWebAssembly(wasmurl) {
  return fetch(wasmurl)
    .then(response => response.arrayBuffer())
    .then(bits => WebAssembly.compile(bits))
    .then(module => { return new WebAssembly.Instance(module) });
};

RunWebAssembly('test.wasm')
  .then(instance => {

    console.log(instance.exports);
    alert(instance.exports.add(2000,21));

  });


</script>

  </body>
</html>
访问服务器上的html文件
打开Chrome浏览器,访问watest.html所在地址,看到WebAssembly函数的执行效果:
参考
js端函数注入c端函数的方式可参考:
https://developer.mozilla.org/zh-CN/docs/WebAssembly/Using_the_JavaScript_API
Fetch方式的介绍:
https://developer.mozilla.org/zh-CN/docs/Web/API/Fetch_API/Using_Fetch
–End–