1.导入依赖
 <!--jetcache坐标-->

        <dependency>
            <groupId>com.alicp.jetcache</groupId>
            <artifactId>jetcache-starter-redis</artifactId>
            <version>2.6.2</version>
        </dependency>
2.编写配置.yml
#jetcahe远程依赖(使用的redis)
jetcache:
  remote:
    default:
      type: redis
      host: localhost
      port: 6379
      poolConfig:
          maxTotal: 50
      keyConvertor: fastjson  #对象转换成字符串的工具
      valueEncode: java
      valueDecode: java
使用jetcache
1.在启动类上添加注解
@SpringBootApplication
//开启注解
@EnableCreateCacheAnnotation
public class SpringbootJetcacheApplication {

    public static void main(String[] args) {
        SpringApplication.run(SpringbootJetcacheApplication.class, args);
    }

}
2.在需要开启注解的类中注入

3.使用缓存
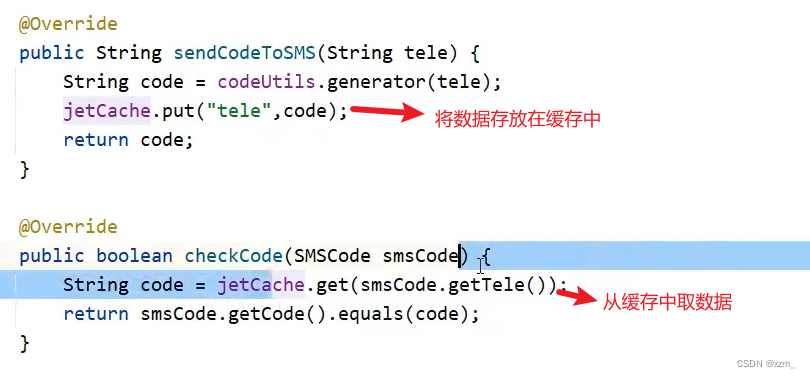
注:在@CreateCache()中添加area=""可以指定使用的环境默认为default
本地缓存使用
1.编写配置
#  jetcahe本地缓存
  local:
    default:
      type: linkedhashmap
      keyConvertor: fastjson  #对象转换成字符串的工具
2.在@CreateCache()中设定是否使用本地缓存(其余与远程都一样)
//cacheType = CacheType.LOCAL 只用本地
//cacheType = CacheType.BOTH 本地和远程都使用
//cacheType = CacheType.REMOTE 只用远程
在方法上加注解,直接使用缓存的过程
1.在启动类上添加注解

2.将实体类反序列化

3.在类上添加注解
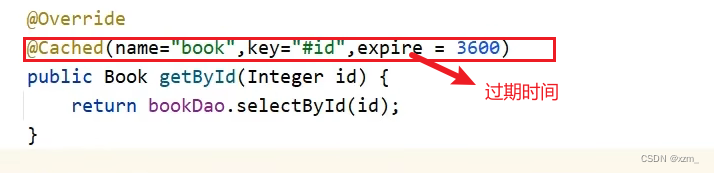
查询
修改

删除

解决多终端访问时结果不同步——设定按时刷新@CacheRefresh(refresh = 10)10s刷新,每十秒执行一次此方法
版权声明:本文为weixin_64035133原创文章,遵循CC 4.0 BY-SA版权协议,转载请附上原文出处链接和本声明。