树莓派4B(64位)环境搭建
镜像烧写
使用官方工具Raspberry Pi Imager进行烧写即可,在没有屏幕的情况下,也可以设置用户名和密码以及连接wifi,非常方便。
更换软件源
换成国内源(buster)
- 把/etc/apt/sources.list所有内容替换为:
deb http://mirrors.tuna.tsinghua.edu.cn/debian buster main contrib non-free
deb http://mirrors.tuna.tsinghua.edu.cn/debian-security/ buster/updates main contrib non-free
deb http://mirrors.tuna.tsinghua.edu.cn/debian buster-updates main contrib non-free
- 然后在把/etc/apt/sources.list.d/raspi.list所有内容替换为:
deb http://mirrors.tuna.tsinghua.edu.cn/raspberrypi/ buster main ui
- 更新
sudo apt-get update
sudo apt-get upgrade
安装wiringPI
介绍:http://wiringpi.com/
github项目地址:https://github.com/WiringPi/WiringPi.git
源码编译方式:
git clone https://github.com/WiringPi/WiringPi.git
cd WiringPi/
./build
# 测试
gpio -v
gpio readall
重要提示信息(编译的时候要链接的库):
NOTE: To compile programs with wiringPi, you need to add:
    -lwiringPi
  to your compile line(s) To use the Gertboard, MaxDetect, etc.
  code (the devLib), you need to also add:
    -lwiringPiDev
  to your compile line(s).
测试成功结果: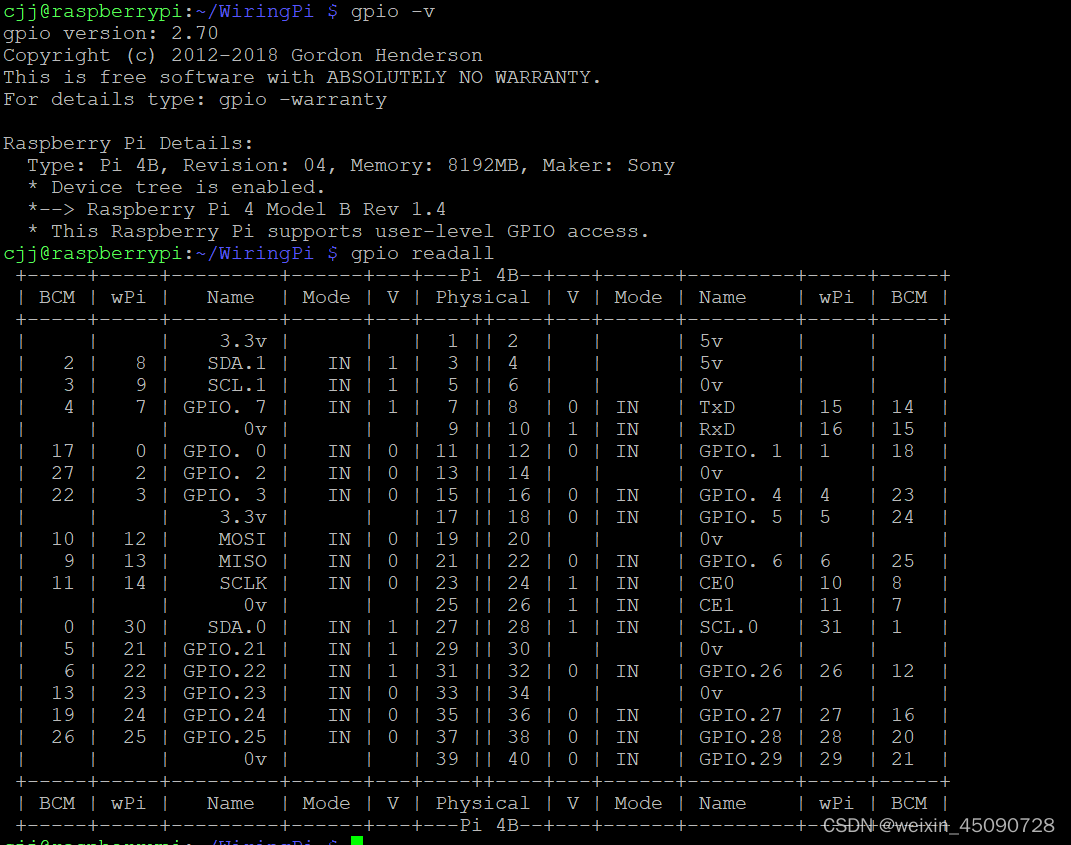
开发环境
可以用ssh进行远程调试,有各种各样的工具,推荐使用vscode进行远程开发。
开启远程桌面连接
sudo apt-get install xrdp
sudo apt-get install tightvncserver
参考文章
版权声明:本文为weixin_45090728原创文章,遵循CC 4.0 BY-SA版权协议,转载请附上原文出处链接和本声明。