Spring Boot 自动配置
1. 条件注解
具体原理是:
- Spring在解析某个自动配置类时,会先检查该自动配置类上是否有条件注解,如果有,则进一步判断该条件注解所指定的条件当前能不能满足,如果满足了则继续解析该配置类,如果不满足则不进行解析了,也就是配置类所定义的Bean都得不到解析,也就是相当于没有这些Bean了。
- 同理,Spring在解析某个@Bean的方法时,也会先判断方法上是否有条件注解,然后进行解析,如果不满足条件,则该Bean不会生效
SpringBoot中的条件注解有:
- ConditionalOnBean:是否存在某个某类或某个名字的Bean
- ConditionalOnMissingBean:是否缺失某个某类或某个名字的Bean
- ConditionalOnSingleCandidate:是否符合指定类型的Bean只有一个
- ConditionalOnClass:是否存在某个类
- ConditionalOnMissingClass:是否缺失某个类
- ConditionalOnExpression:指定的表达式返回的是true还是false
- ConditionalOnJava:判断Java版本
- ConditionalOnJndi:JNDI指定的资源是否存在
- ConditionalOnWebApplication:当前应用是一个Web应用
- ConditionalOnNotWebApplication:当前应用不是一个Web应用
- ConditionalOnProperty:Environment中是否存在某个属性
- ConditionalOnResource:指定的资源是否存在
- ConditionalOnWarDeployment:当前项目是不是以War包部署的方式运行
- ConditionalOnCloudPlatform:是不是在某个云平台上
我们也可以利用@Conditional来自定义条件注解
2. Starter机制
Starter,就是一个Maven依赖,当我们在项目的pom.xml文件中添加某个Starter依赖时,其实就是简单的添加了很多其他的依赖,比如:
- spring-boot-starter-web:引入了spring-boot-starter、spring-boot-starter-json、spring-boot-starter-tomcat等和Web开发相关的依赖包
- spring-boot-starter-tomcat:引入了tomcat-embed-core、tomcat-embed-el、tomcat-embed-websocket等和Tomcat相关的依赖包
- …

如果硬要把Starter机制和自动配置联系起来,那就是通过@ConditionalOnClass这个条件注解,因为这个条件注解的作用就是用来判断当前应用的依赖中是否存在某个类或某些类,比如:
@Configuration(proxyBeanMethods = false)
@ConditionalOnClass({ Servlet.class, Tomcat.class, UpgradeProtocol.class })
@ConditionalOnMissingBean(value = ServletWebServerFactory.class, search = SearchStrategy.CURRENT)
static class EmbeddedTomcat {

    @Bean
    TomcatServletWebServerFactory tomcatServletWebServerFactory(
        ObjectProvider<TomcatConnectorCustomizer> connectorCustomizers,
        ObjectProvider<TomcatContextCustomizer> contextCustomizers,
        ObjectProvider<TomcatProtocolHandlerCustomizer<?>> protocolHandlerCustomizers) {
        TomcatServletWebServerFactory factory = new TomcatServletWebServerFactory();

        // orderedStream()调用时会去Spring容器中找到TomcatConnectorCustomizer类型的Bean,默认是没有的,程序员可以自己定义
        factory.getTomcatConnectorCustomizers()
            .addAll(connectorCustomizers.orderedStream().collect(Collectors.toList()));
        factory.getTomcatContextCustomizers()
            .addAll(contextCustomizers.orderedStream().collect(Collectors.toList()));
        factory.getTomcatProtocolHandlerCustomizers()
            .addAll(protocolHandlerCustomizers.orderedStream().collect(Collectors.toList()));
        return factory;
    }

}
上面代码中就用到了@ConditionalOnClass,用来判断项目中是否存在Servlet.class、Tomcat.class、UpgradeProtocol.class这三个类,如果存在就满足当前条件,如果项目中引入了spring-boot-starter-tomcat,那就有这三个类,如果没有spring-boot-starter-tomcat那就可能没有这三个类(除非你自己单独引入了Tomcat相关的依赖)。
如果我们在项目中要用Tomcat,那就依赖spring-boot-starter-web就够了,因为它默认依赖了spring-boot-starter-tomcat,从而依赖了Tomcat,从而Tomcat相关的Bean能生效。
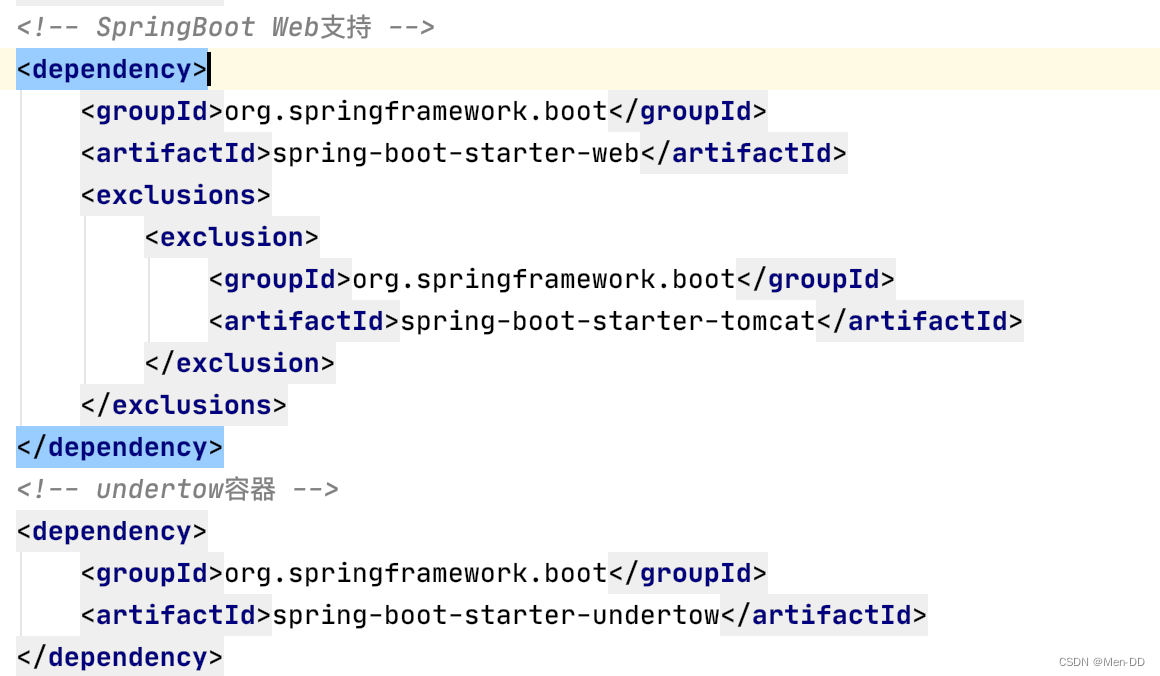
而如果不想用Tomcat,那就得这么写:
<dependency>
	<groupId>org.springframework.boot</groupId>
	<artifactId>spring-boot-starter-web</artifactId>
	<exclusions>
		<exclusion>
			<groupId>org.springframework.boot</groupId>
      <artifactId>spring-boot-starter-tomcat</artifactId>
      </exclusion>
	</exclusions>
</dependency>

<dependency>
	<groupId>org.springframework.boot</groupId>
	<artifactId>spring-boot-starter-undertow</artifactId>
</dependency>
得把spring-boot-starter-tomcat给排除掉,再添加上spring-boot-starter-undertow的依赖,这样Tomcat的Bean就不会生效,Undertow的Bean就能生效,从而项目中用的就是Undertow
3. @ConditionalOnMissingBean & ServletWebServerFactory 是否存在顺序问题
问题:先解析自动配置类中定义的Bean,还是用户定义的Bean
不管是用户定义的配置类还是自动配置类,都是配置类(简单理解就是加了@Configuration注解)
SpringBoot启动时,最核心的也就是创建一个Spring容器,而创建Spring容器的过程中会注解做几件事情:
- 把SpringApplication.run(MyApplication.class)传入进来的MyApplication类做为配置类进行解析
- 由于MyApplication类上定义了@SpringBootApplication,相当于定义了@SpringBootConfiguration、@EnableAutoConfiguration、@ComponentScan注解
- 所以SpringBoot会进一步解析这些注解
- @EnableAutoConfiguration:通过@import注解导入AutoConfigurationImportSelector这个配置类,因为它实现了DeferredImportSelector接口,所以Spring会在把其他配置类都解析完之后才解析AutoConfigurationImportSelector(Spring Framework中的知识)
- @ComponentScan:扫描,扫描时会扫描到用户所定义的配置类,并解析用户的配置类,注意:扫描是扫描不到SpringBoot的自动配置的类,因为扫描的包路径不匹配,SpringBoot的包都是org.springframework.boot.xxxx,用户都是自己的包路径。
Spring会在最后才来解析AutoConfigurationImportSelector这个配置类,而这个类的作用就是用来解析SpringBoot的自动配置类,那既然无法扫描到SpringBoot中的自动配置类,那怎么知道SpringBoot中有哪些自动配置类呢,这就需要spring.factories文件,默认情况下,SpringBoot会提供一个spring.factories文件,并把所有自动配置类的名字记录在这个文件中,到时候启动过程中解析这个文件就知道有哪些自动配置类了,并且这件事也是发生在解析完用户的配置类之后的。
4. 自动配置开启原理之@EnableAutoConfiguration
1. @SpringBootApplication是一个三合一注解
可以发现这个注解上有另外三个注解:
- @SpringBootConfiguration
- @EnableAutoConfiguration
- @ComponentScan
2. @EnableAutoConfiguration
@Target(ElementType.TYPE)
@Retention(RetentionPolicy.RUNTIME)
@Documented
@Inherited
@AutoConfigurationPackage
@Import(AutoConfigurationImportSelector.class)
public @interface EnableAutoConfiguration {
}
3. AutoConfigurationImportSelector 的selectImports方法
AutoConfigurationImportSelector实现了DeferredImportSelector这个接口,Spring容器在启动时,会在解析完其他所有程序员定义的配置类之后,来调用AutoConfigurationImportSelector中的selectImports方法,然后把该方法返回的类名对应的类作为配置类进行解析。
利用SpringFactoriesLoader找到所有的META-INF/spring.factories文件中key为EnableAutoConfiguration.class的value值,也就是众多自动配置类的类名
- SpringFactoriesLoader.loadFactoryNames(getSpringFactoriesLoaderFactoryClass(), getBeanClassLoader()); //获取spring.factories中所有的AutoConfiguration
- new ArrayList<>(new LinkedHashSet<>(list)); //去重
- getExclusions(annotationMetadata, attributes); //排除 可以通过@EnableAutoConfiguration注解的exclude属性,或者spring.autoconfigure.exclude来配置
- getConfigurationClassFilter().filter(configurations); //利用ConfigurationClassFilter对自动配置类进行进一步筛选,ConfigurationClassFilter会利用AutoConfigurationMetadata进行筛选,而AutoConfigurationMetadata对象对应的是"META-INF/spring-autoconfigure-metadata.properties"文件中的内容,这是一种加快SpringBoot启动速度的机制,默认是开启了的(不过要通过maven或gradle的方式引入springboot的依赖来使用才能看到效果,因为这个文件的内容是在SpringBoot源码工程编译的时候自动生成出来的,当然我们也可以手动创建这个文件,以及这个文件的内容),自动生成的这个文件内容样例
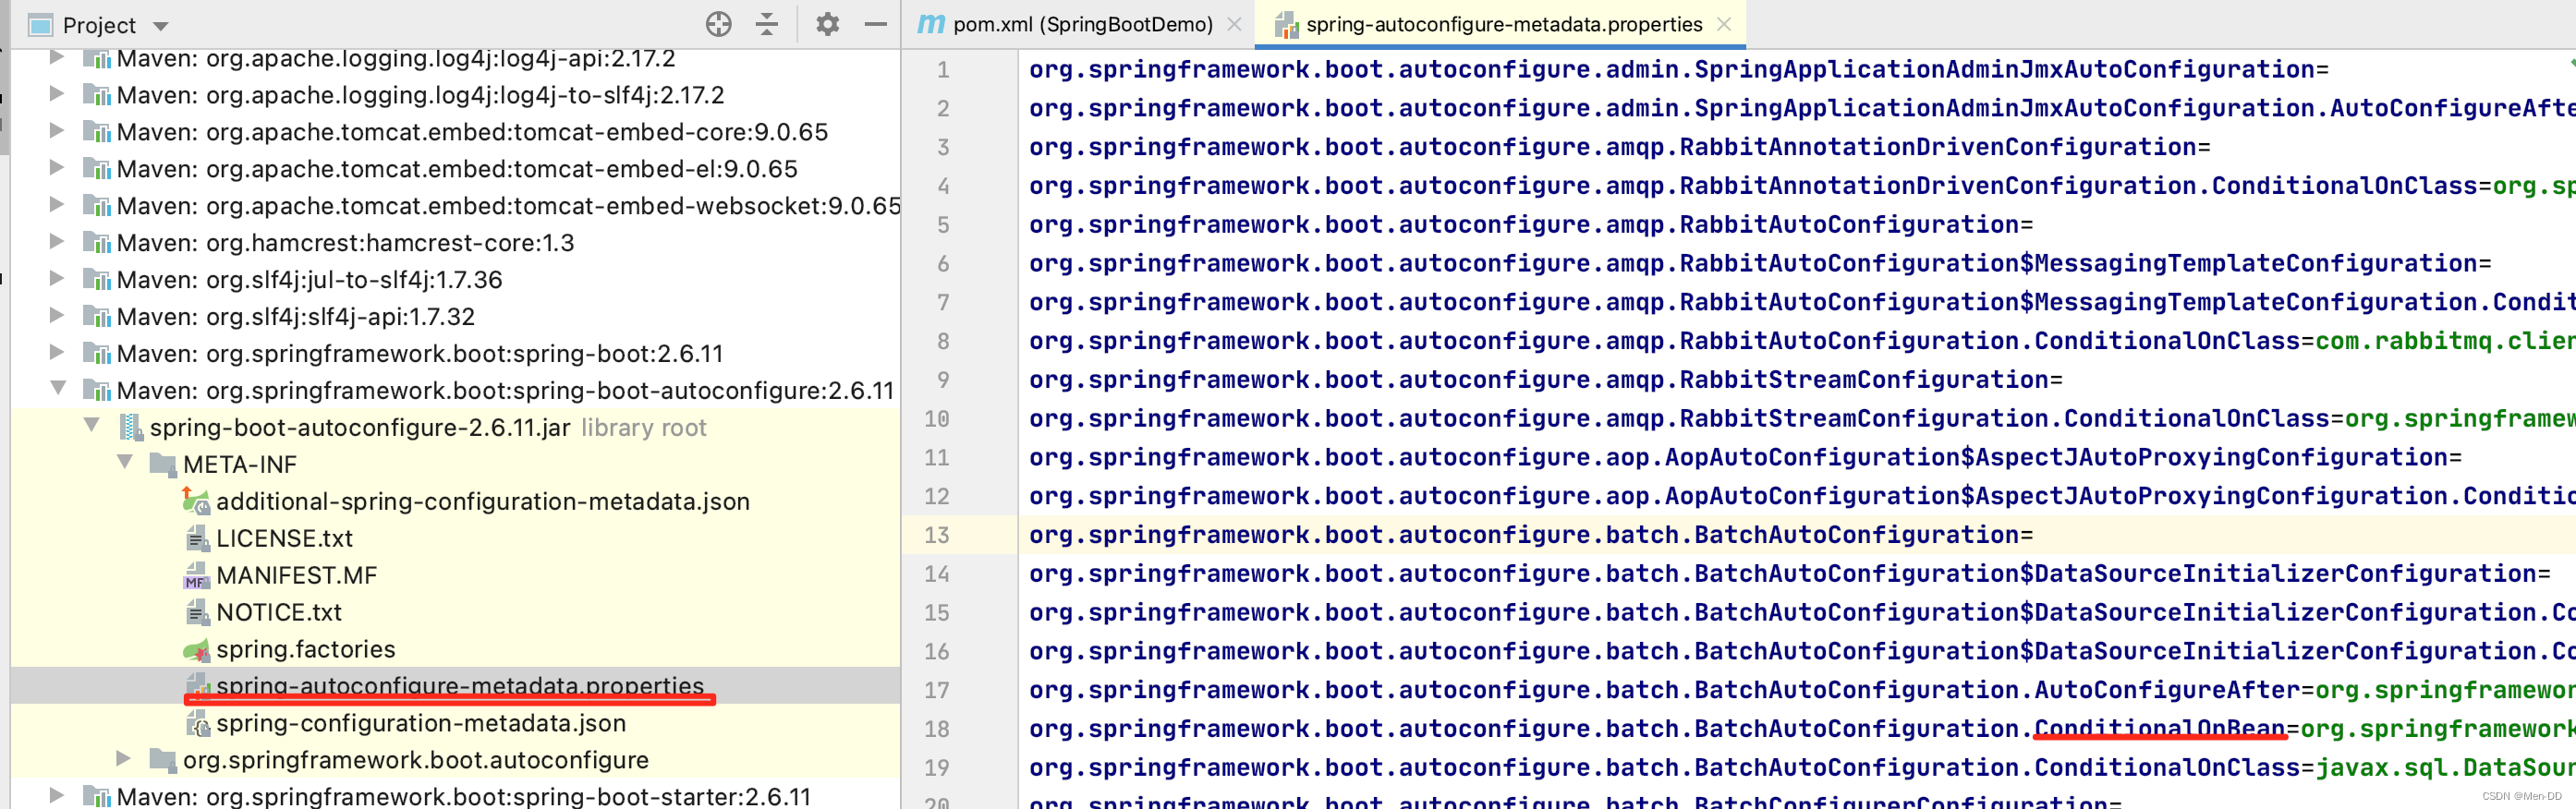 有了这个文件的内容,SpringBoot会在通过spring.facotries文件找到所有的自动配置类后,会把这个文件中的内容读出来,然后利用AutoConfigurationImportFilter对所有的自动配置类进行条件匹配,这里的条件判断,只会判断所需要的类是否存在,如果需要的类,或者需要的Bean对应的类,都不存在,那么肯定不符合条件了,对于像@ConditionalOnMissingBean这样的条件,在这一步是不会去判断的,最后条件匹配成功的自动配置类就会记录下来,并最终返回给Spring容器,继续进行其他条件的匹配。
所以通过这个机制,使得Spring并不需要解析所有的自动配置类,从而提高了效率
protected AutoConfigurationEntry getAutoConfigurationEntry(AnnotationMetadata annotationMetadata) {
		if (!isEnabled(annotationMetadata)) {
			return EMPTY_ENTRY;
		}
		// 获取@EnableAutoConfiguration的属性
		AnnotationAttributes attributes = getAttributes(annotationMetadata);
		// 获取spring.factories中所有的AutoConfiguration
		List<String> configurations = getCandidateConfigurations(annotationMetadata, attributes);
		// 去重(也就是按类名去重)
		configurations = removeDuplicates(configurations);
		// 获取需要排除的AutoConfiguration,可以通过@EnableAutoConfiguration注解的exclude属性,或者spring.autoconfigure.exclude来配置
		Set<String> exclusions = getExclusions(annotationMetadata, attributes);

		// 排除
		checkExcludedClasses(configurations, exclusions);
		configurations.removeAll(exclusions);

		// 获取spring.factories中的AutoConfigurationImportFilter对AutoConfiguration进行过滤
		// 默认会拿到OnBeanCondition、OnClassCondition、OnWebApplicationCondition
		// 这三个会去判断上面的AutoConfiguration是否符合它们自身所要求的条件,不符合的会过滤掉,表示不会进行解析了
		// 会利用spring-autoconfigure-metadata.properties中的配置来进行过滤
		// spring-autoconfigure-metadata.properties文件中的内容是利用Java中的AbstractProcessor技术在编译时生成出来的
		configurations = getConfigurationClassFilter().filter(configurations);
		// configurations表示合格的,exclusions表示被排除的,把它们记录在ConditionEvaluationReportAutoConfigurationImportListener中
		fireAutoConfigurationImportEvents(configurations, exclusions);

		// 最后返回的AutoConfiguration都是符合条件的
		return new AutoConfigurationEntry(configurations, exclusions);
	}
5. Spring Boot 没有引入代码,是如何做到不报错的 (Mybatis)
Spring Boot 作者通过编译得到class文件
Spring 引起通过ASM技术跳过类加载机制获取注解上类的字符串信息,在通过反射catch错误
Spring Boot 启动流程
return new SpringApplication(primarySources).run(args);
构造SpringApplication对象
- 推测web应用类型
- 获取BootstrapRegistryInitializer对象, 没有Spring容器之前就利用BootstrapRegistry来共享一些对象,有了Spring容器之后就利用Spring容器来共享一些对象
- 获取ApplicationContextInitializer对象初始化Spring容器ApplicationContext对象的
- 获取ApplicationListener对象Spring中的监听器
- 推测出Main类(main()方法所在的类)没什么具体的作用,逻辑是根据当前线程的调用栈来判断main()方法在哪个类,哪个类就是Main类
public SpringApplication(ResourceLoader resourceLoader, Class<?>... primarySources) {
		this.resourceLoader = resourceLoader;
		Assert.notNull(primarySources, "PrimarySources must not be null");

		this.primarySources = new LinkedHashSet<>(Arrays.asList(primarySources));

		// 1. 推测web应用类型(NONE、REACTIVE、SERVLET)
		this.webApplicationType = WebApplicationType.deduceFromClasspath();

		// 2. 从spring.factories中获取BootstrapRegistryInitializer对象
		this.bootstrapRegistryInitializers = new ArrayList<>(
				getSpringFactoriesInstances(BootstrapRegistryInitializer.class));

		// 3. 从spring.factories中获取ApplicationContextInitializer对象
		setInitializers((Collection) getSpringFactoriesInstances(ApplicationContextInitializer.class));

		// 4. 从spring.factories中获取ApplicationListener对象
		setListeners((Collection) getSpringFactoriesInstances(ApplicationListener.class));

		// 5. 推测出Main类(main()方法所在的类)
		this.mainApplicationClass = deduceMainApplicationClass();
	}
run(String… args)方法
- 触发SpringApplicationRunListener的starting()
- 从spring.factories中获取SpringApplicationRunListener对象, 默认会拿到一个EventPublishingRunListener,它会启动过程的各个阶段发布对应的ApplicationEvent事件
- 发布ApplicationStartingEvent
- 将run()的参数封装为DefaultApplicationArguments对象
- 准备Environment 包括操作系统,JVM、ServletContext、properties、yaml等等配置, 同时会发布一个ApplicationEnvironmentPreparedEvent
- EnvironmentPostProcessorApplicationListener来消费这个事件,而这个ApplicationListener接收到这个事件之后,就会解析application.properties、application.yml文件,并添加到Environment对象中去
- 根据应用类型创建Spring容器
- 利用ApplicationContextInitializer初始化Spring容器
- 发布ApplicationContextInitializedEvent
- 关闭DefaultBootstrapContext
- 注册primarySources类,就是run方法存入进来的配置类, 将SpringApplication.run(MyApplication.class);中传入进来的类,比如MyApplication.class,作为Spring容器的配置类
- 发布ApplicationPreparedEvent事件
- 刷新Spring容器,会解析配置类、扫描、启动WebServer
- 发布ApplicationStartedEvent事件,表示Spring容器已经启动
- 从Spring容器中获取ApplicationRunner和CommandLineRunner,并执行其run()
- 发布ApplicationFailedEvent事件
- 发布ApplicationReadyEvent事件,表示Spring容器已经准备好了
public ConfigurableApplicationContext run(String... args) {
		long startTime = System.nanoTime();

		// 1、创建引导启动器,类似一个ApplicationContext,可以往里面添加一些对象
		DefaultBootstrapContext bootstrapContext = createBootstrapContext();

		ConfigurableApplicationContext context = null;
		configureHeadlessProperty();

		// 2、从spring.factories中获取SpringApplicationRunListener对象
		// 默认会拿到一个EventPublishingRunListener,它会启动过程的各个阶段发布对应的ApplicationEvent事件
		SpringApplicationRunListeners listeners = getRunListeners(args);

		// 3、发布ApplicationStartingEvent
		listeners.starting(bootstrapContext, this.mainApplicationClass);
		try {

			// 4、将run()的参数封装为DefaultApplicationArguments对象
			ApplicationArguments applicationArguments = new DefaultApplicationArguments(args);

			// 5、准备Environment
			// 包括操作系统,JVM、ServletContext、properties、yaml等等配置
			// 会发布一个ApplicationEnvironmentPreparedEvent
			ConfigurableEnvironment environment = prepareEnvironment(listeners, bootstrapContext, applicationArguments);

			// 默认spring.beaninfo.ignore=true,表示不需要jdk缓存beanInfo信息,Spring自己会缓存
			configureIgnoreBeanInfo(environment);

			Banner printedBanner = printBanner(environment);

			// 6、根据应用类型创建Spring容器
			context = createApplicationContext();
			context.setApplicationStartup(this.applicationStartup);

			// 7、利用ApplicationContextInitializer初始化Spring容器
			// 8、发布ApplicationContextInitializedEvent
			// 9、关闭DefaultBootstrapContext
			// 10、注册primarySources类,就是run方法存入进来的配置类
			// 11、发布ApplicationPreparedEvent事件
			prepareContext(bootstrapContext, context, environment, listeners, applicationArguments, printedBanner);

			// 12、刷新Spring容器,会解析配置类、扫描、启动WebServer
			refreshContext(context);

			// 空方法
			afterRefresh(context, applicationArguments);

			// 启动时间
			Duration timeTakenToStartup = Duration.ofNanos(System.nanoTime() - startTime);
			if (this.logStartupInfo) {
				new StartupInfoLogger(this.mainApplicationClass).logStarted(getApplicationLog(), timeTakenToStartup);
			}

			// 13、发布ApplicationStartedEvent事件,表示Spring容器已经启动
			listeners.started(context, timeTakenToStartup);

			// 14、从Spring容器中获取ApplicationRunner和CommandLineRunner,并执行其run()
			callRunners(context, applicationArguments);
		}
		catch (Throwable ex) {
			// 15、发布ApplicationFailedEvent事件
			handleRunFailure(context, ex, listeners);
			throw new IllegalStateException(ex);
		}

		try {
			Duration timeTakenToReady = Duration.ofNanos(System.nanoTime() - startTime);

			// 16、发布ApplicationReadyEvent事件,表示Spring容器已经准备好了
			listeners.ready(context, timeTakenToReady);
		}
		catch (Throwable ex) {
			handleRunFailure(context, ex, null);
			throw new IllegalStateException(ex);
		}
		return context;
	}
配置文件解析
https://www.processon.com/view/link/62d399e71e08530a89222b23