MakeFile和Vscode简单配置,附带Android.mk简单认识
1.makefile
c和c++开发中少不了makefile,这里先简单写个代码加注释便于后面的学习和查阅吧
#文件名为 makefile
#自定义变量 表示源文件,源文件是 Student.cpp和 main.cpp
#会递归进行c++编译
files = Student.o main.o
#makefile会将第一个定义的方法设为主方法
#引用files变量 即为指定依赖
#依赖的下一行为执行的命令
#注意要有两个tab,否则格式不对 make会报错
main:$(files)
		g++ $(files) -o main
# .PHONY 相当于自定义函数
#这里就定义了一个clean函数
#使用的时候就 make clean 命令输入
.PHONY:clean
clean:
		-rm -f $(files)
2.VSCode 运用makefile 操作
我们都知道 vscode 基于 tasks.json 可以实现编译, 然后launch.json实现启动程序,所以就很简单了
先写 tasks.json
{
    "tasks": [
        {
            "type": "shell",
            //task name ,后面用的上
            "label": "g++ build active file",
            "command": "",
            "args": [
                "make",
                "clean;",
                "make"
            ],
        }
    ],
    "version": "2.0.0"
}
接下来就是launch.json 了
{
    // Use IntelliSense to learn about possible attributes.
    // Hover to view descriptions of existing attributes.
    // For more information, visit: https://go.microsoft.com/fwlink/?linkid=830387
    "version": "0.2.0",
    "configurations": [
        {
            "name": "g++ build and debug active file",
            "type": "cppdbg",
            "request": "launch",
             //make file 生成的执行路径
            "program": "${fileDirname}/main",
            "args": [],
            "stopAtEntry": false,
            "cwd": "${workspaceFolder}",
            "environment": [],
            "externalConsole": false,
            "MIMode": "lldb",
            //前面定义的task name
            "preLaunchTask": "g++ build active file"
        }
    ]
}
3 Android的mk
Android.mk文件是比较早的ndk使用方式了,现在主推还是cmake了,所以了解基本语法使用就好了,老项目维护,新项目还得是cmake
3.1 简单的Android.mk文件
多个源文件 用空格隔开即可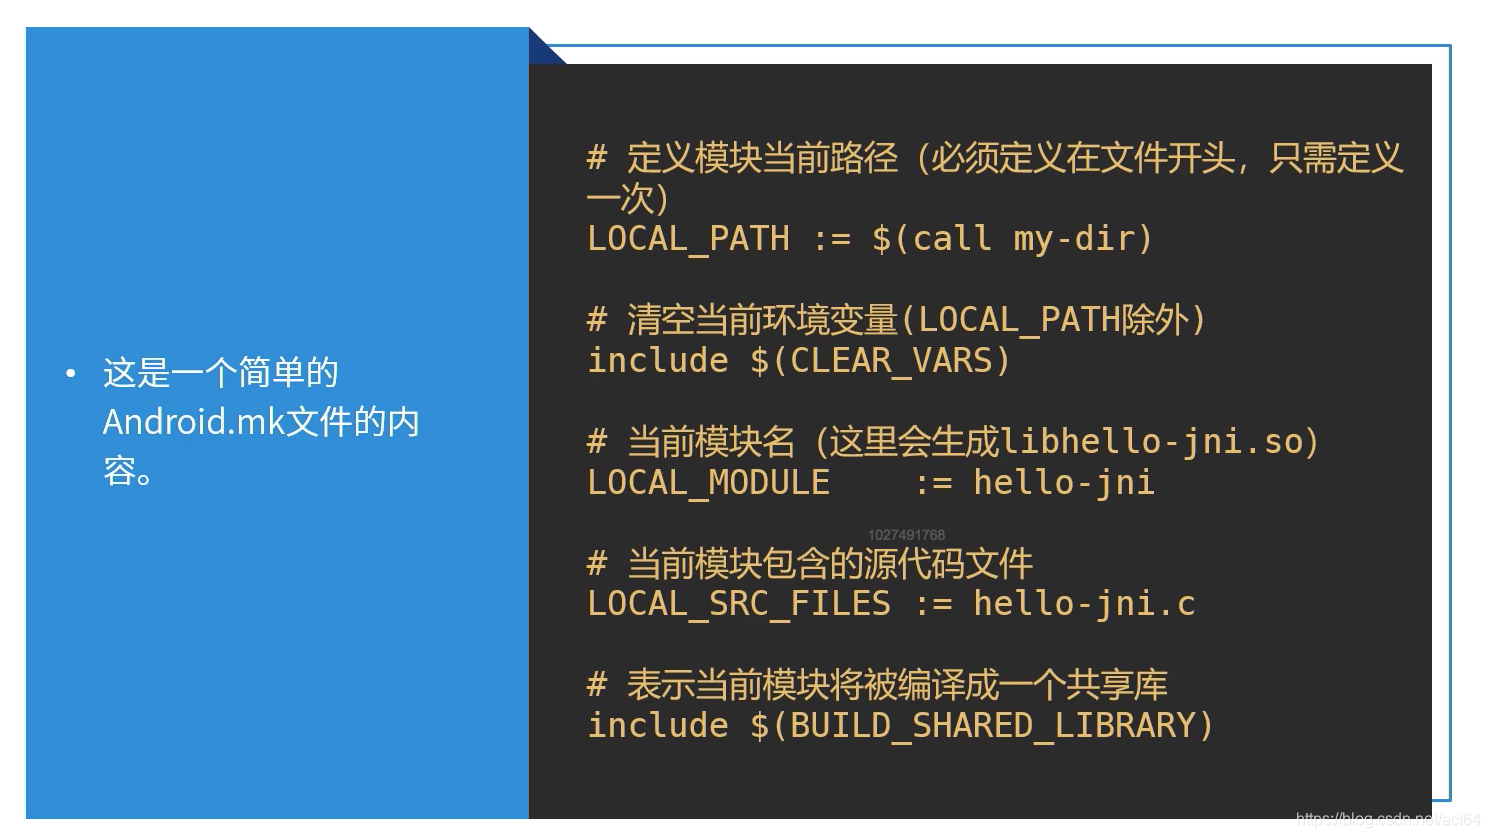
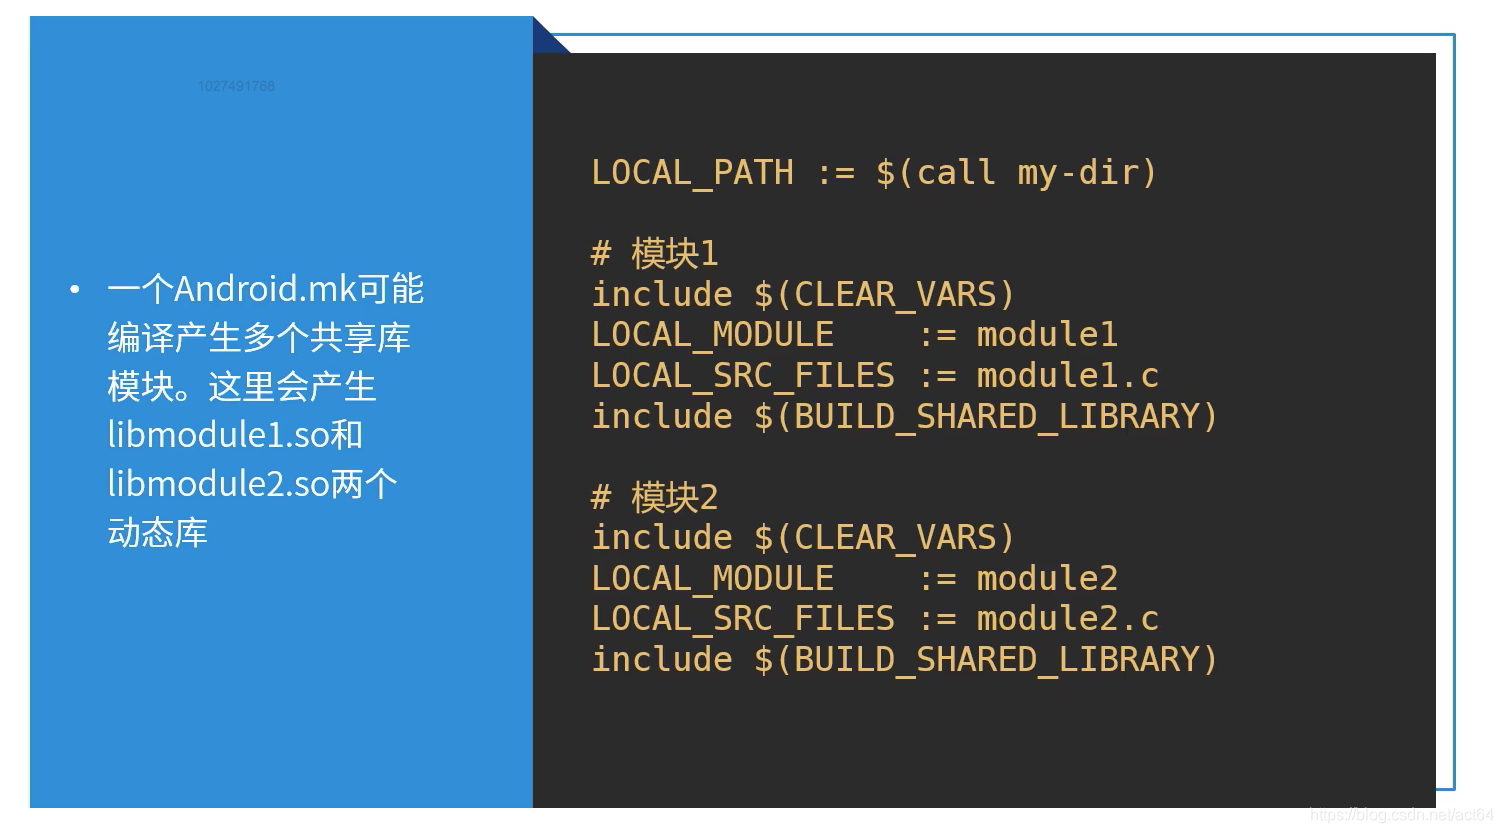
3.2编译多个共享库模块
3.3使用第三方源码编译为静态库 然后引用静态库

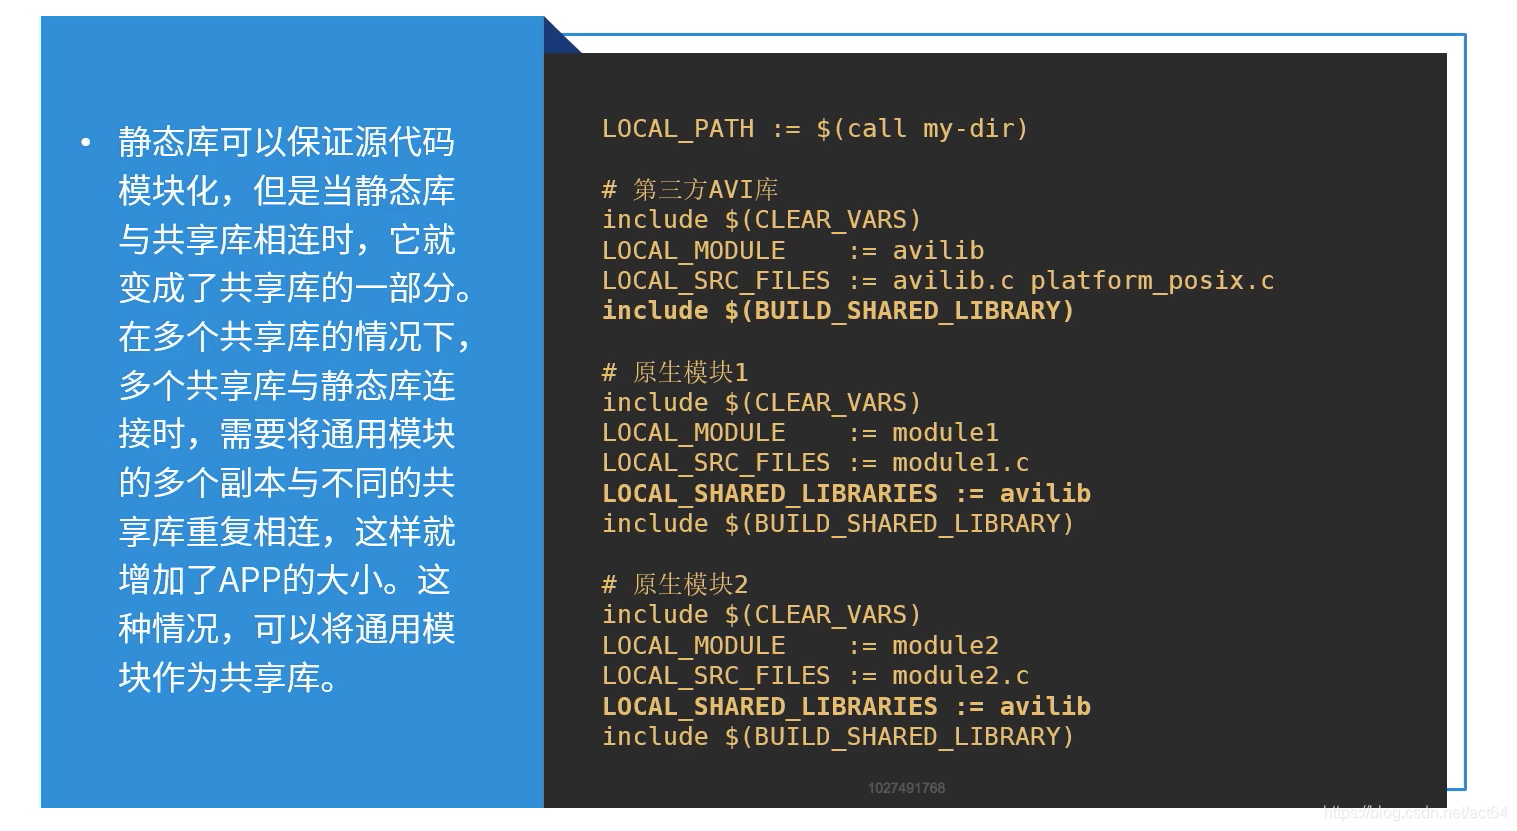
3.4多个模块使用第三方源码
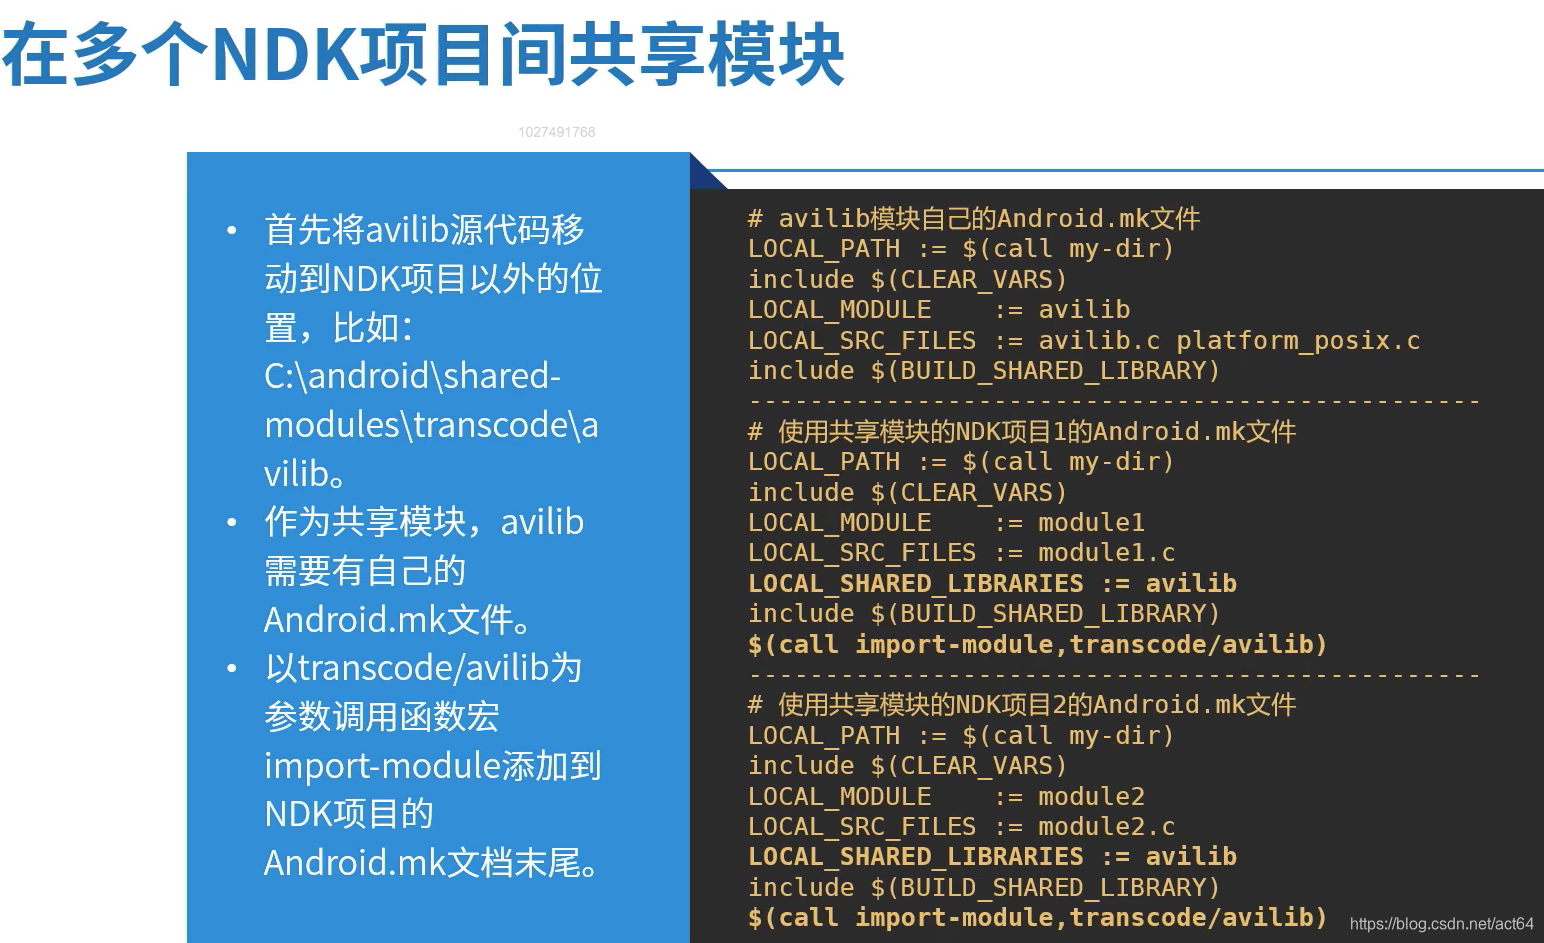
3.5 多个工程共用第三方源码
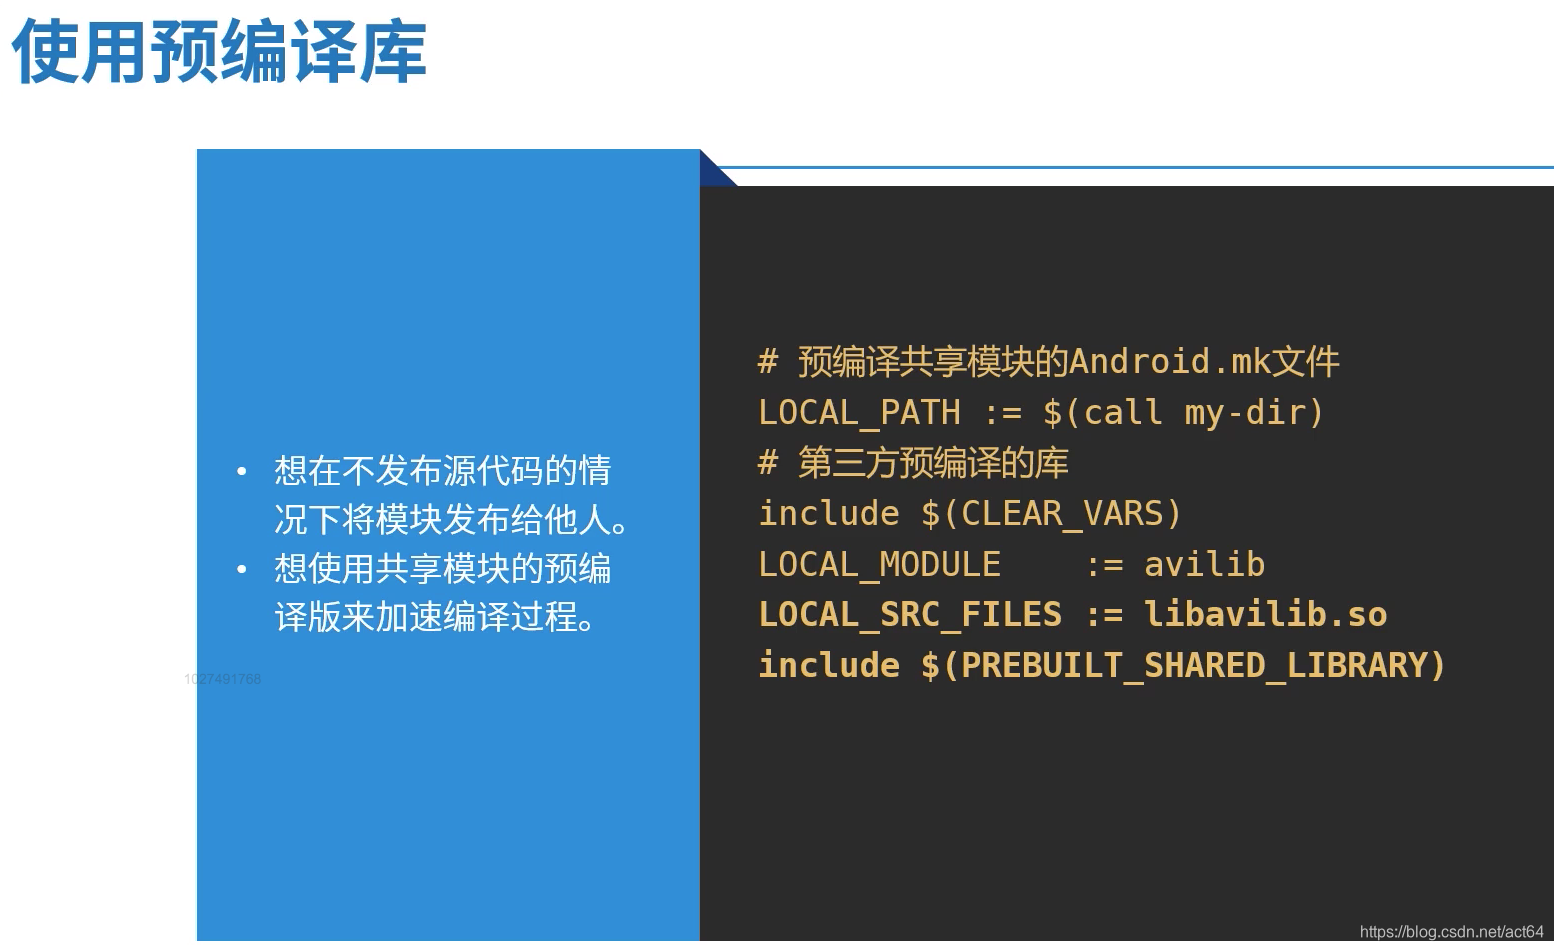
3.6使用第三方预编译库
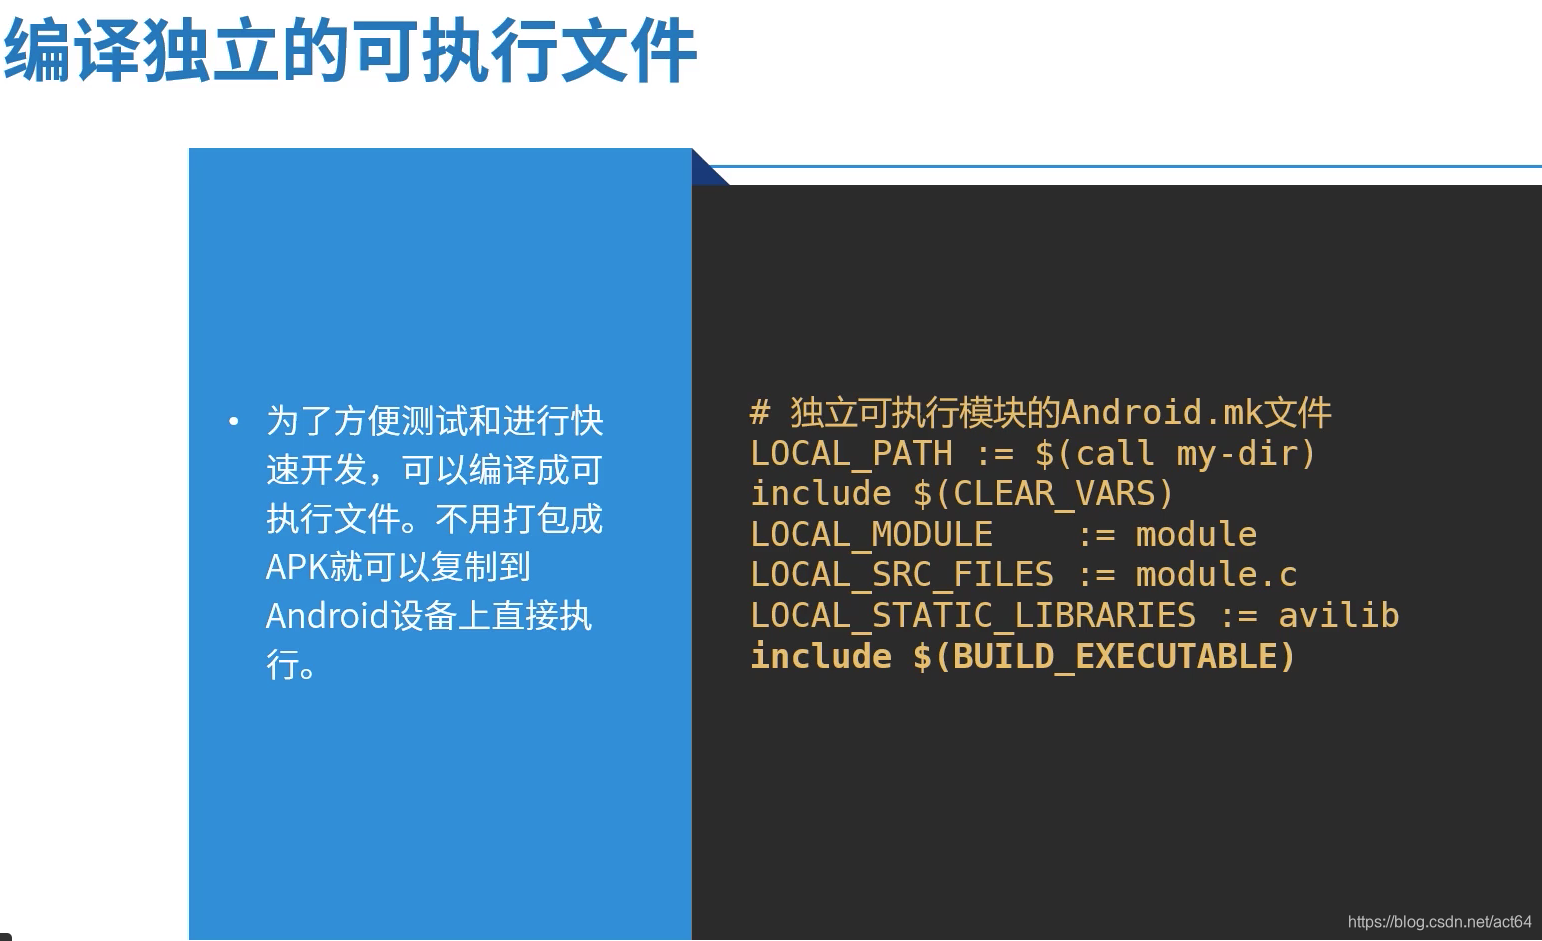
3.7编译可执行文件
版权声明:本文为act64原创文章,遵循CC 4.0 BY-SA版权协议,转载请附上原文出处链接和本声明。