目录
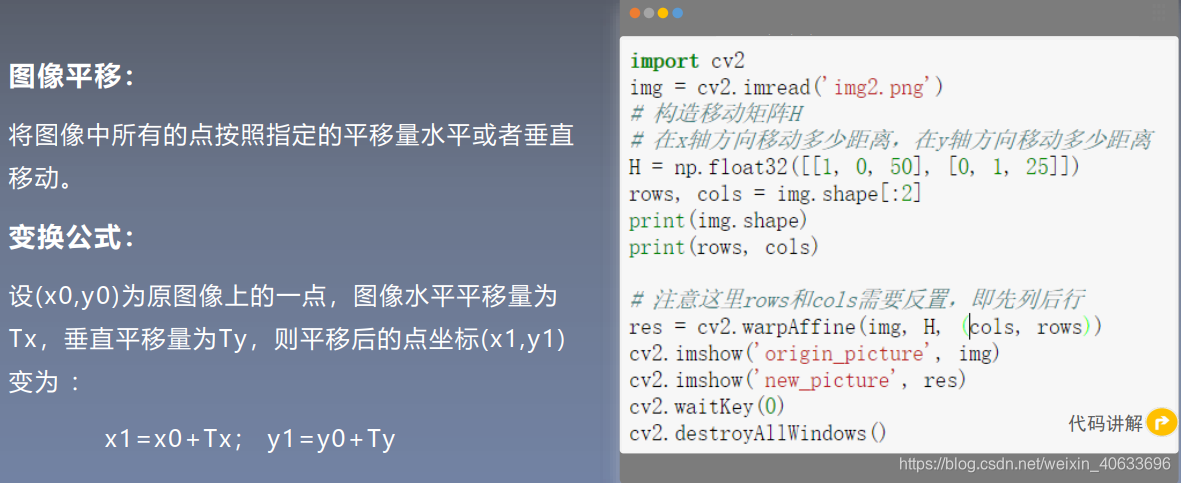
1.图像平移
 代码:
代码:
import cv2
import numpy as np
img = cv2.imread('img2.png')
# 构造移动矩阵H
# 在x轴方向移动多少距离,在y轴方向移动多少距离
H = np.float32([[1, 0, 50], [0, 1, 25]])
rows, cols = img.shape[:2]
print(img.shape)
print(rows, cols)

# 注意这里rows和cols需要反置,即先列后行
res = cv2.warpAffine(img, H, (cols, rows))
cv2.imshow('origin_picture', img)
cv2.imshow('new_picture', res)
cv2.waitKey(0)
cv2.destroyAllWindows()
输出:
(297, 221, 3)
297 221
平移后:
平移后: 
2.图像缩放
2.1上采样和下采样
 2.2插值法
图像放缩
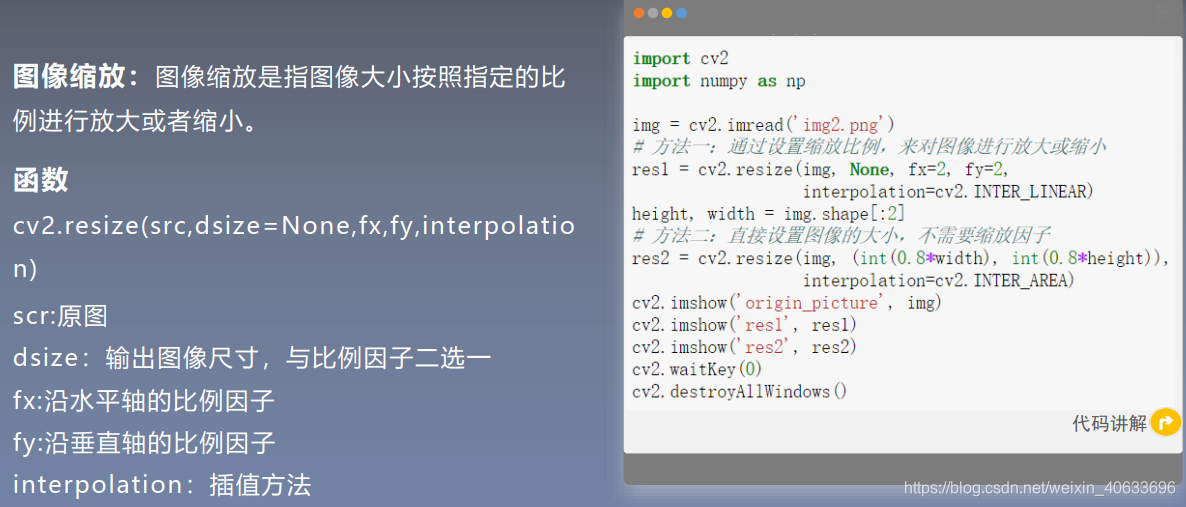
插值法

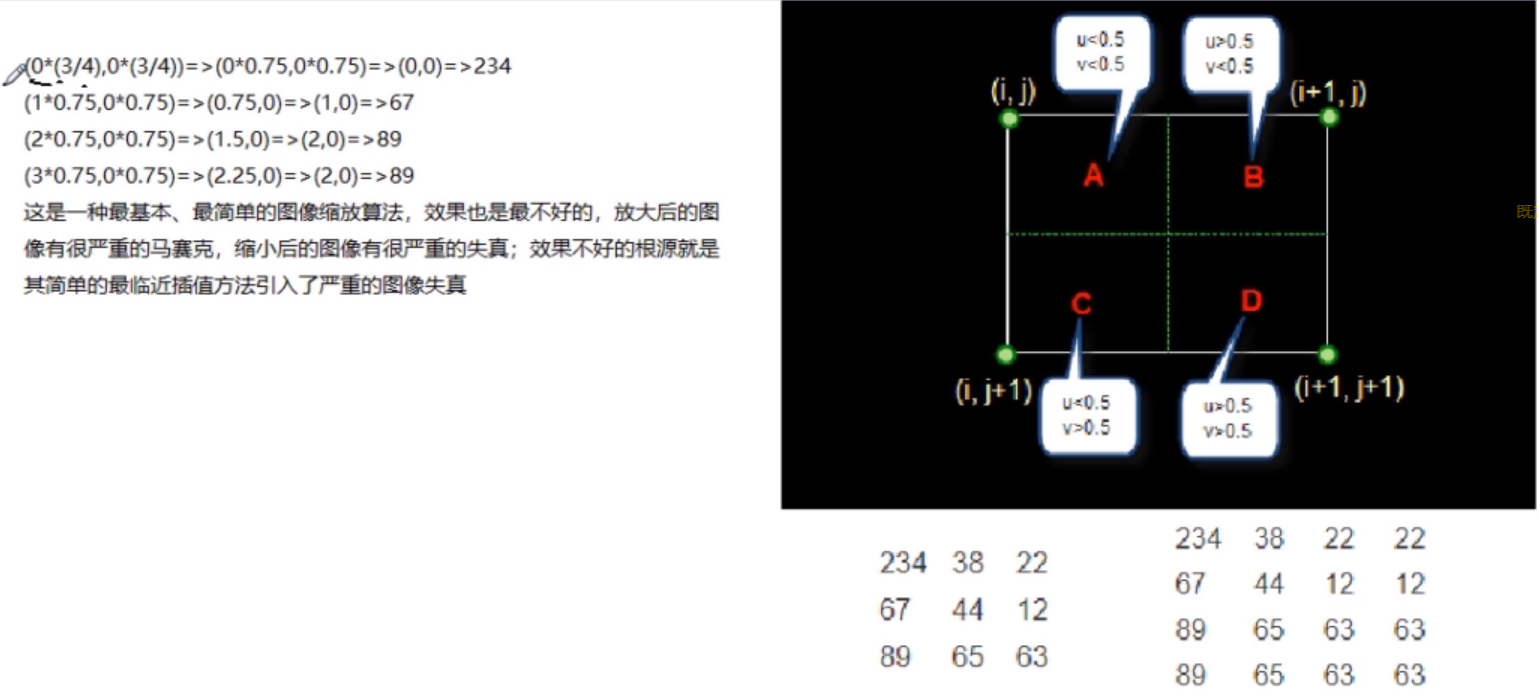
2.2.1最近邻插值

举个栗子:
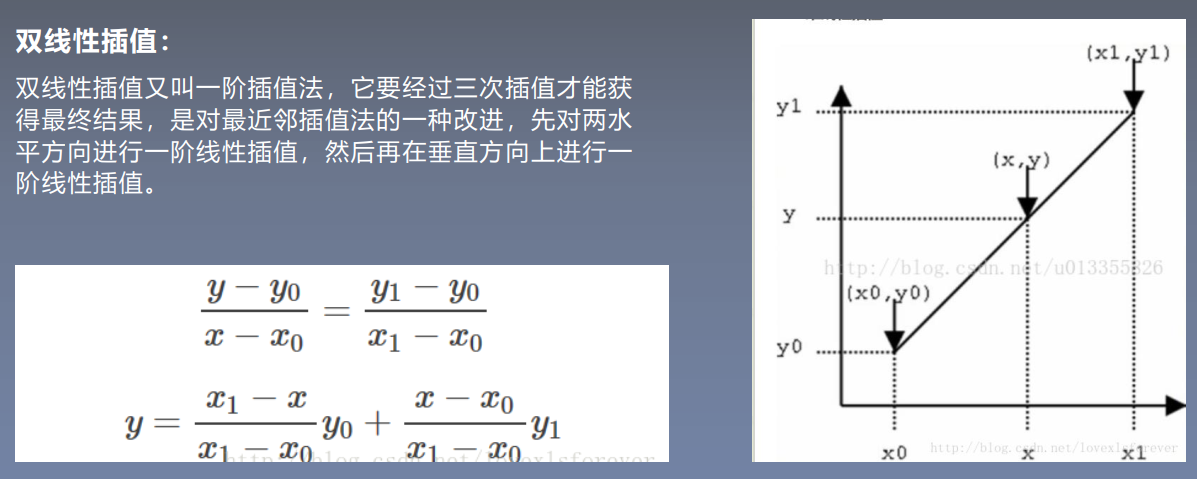
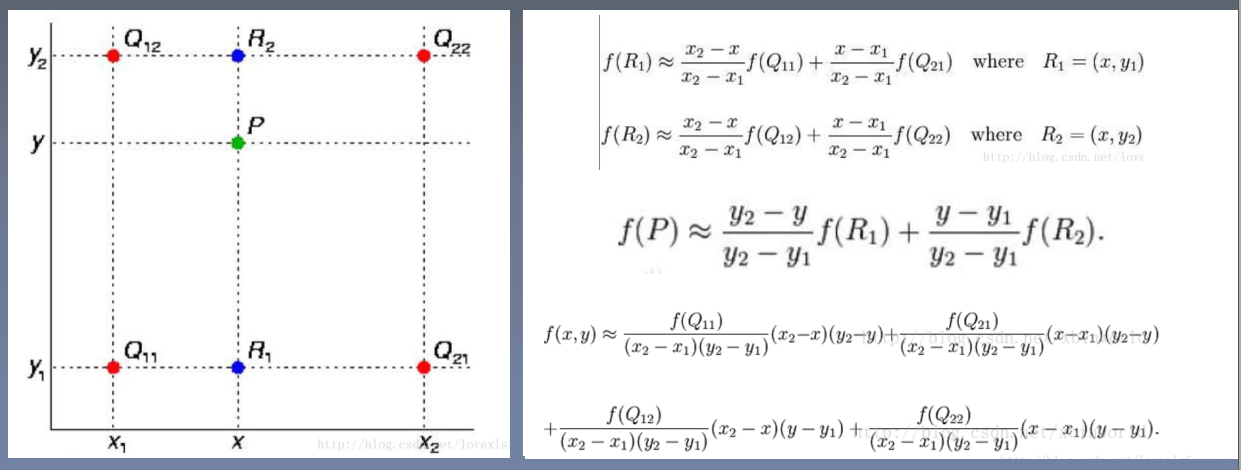
2.2.2双线性插值
举个栗子:
2.3代码实现
 代码:
代码:
import cv2
import numpy as np
img = cv2.imread('img2.png')
# 方法一:通过设置缩放比例,来对图像进行放大或缩小
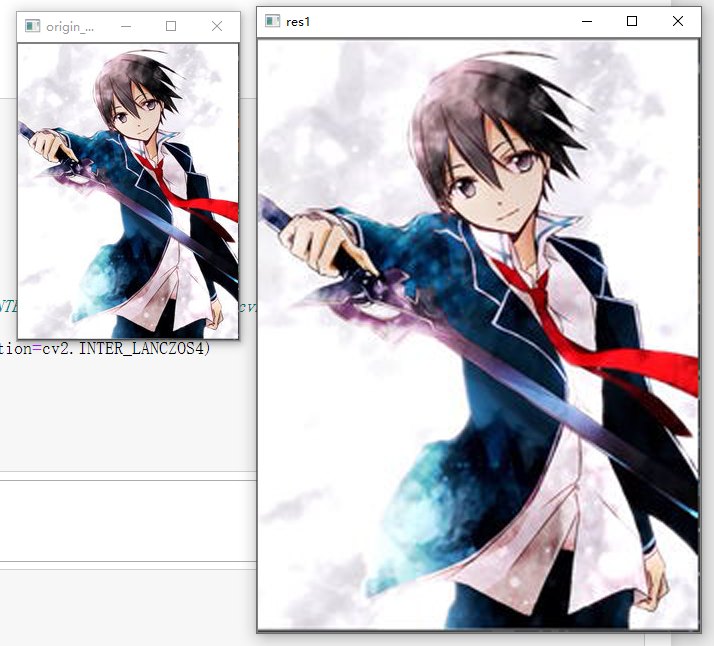
res1 = cv2.resize(img, None, fx=2, fy=2,
interpolation=cv2.INTER_CUBIC)
height, width = img.shape[:2]
# 方法二:直接设置图像的大小,不需要缩放因子
#cv2.INTER_NEAREST(最近邻插值) cv2.INTER_AREA (区域插值) cv2.INTER_CUBIC(三次样条插值) cv2.INTER_LANCZOS4(Lanczos插值)
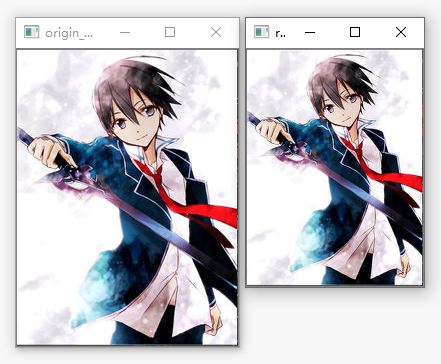
res2 = cv2.resize(img, (int(0.8*width), int(0.8*height)),interpolation=cv2.INTER_LANCZOS4)
cv2.imshow('origin_picture', img)
cv2.imshow('res1', res1)
# cv2.imshow('res2', res2)
cv2.waitKey(0)
cv2.destroyAllWindows()方法一输出:
方法二输出:
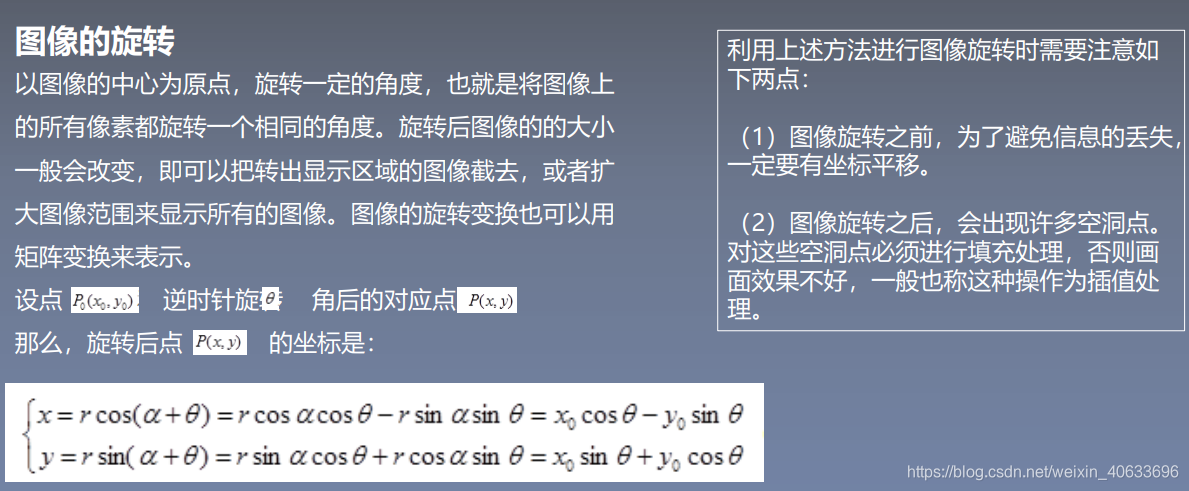
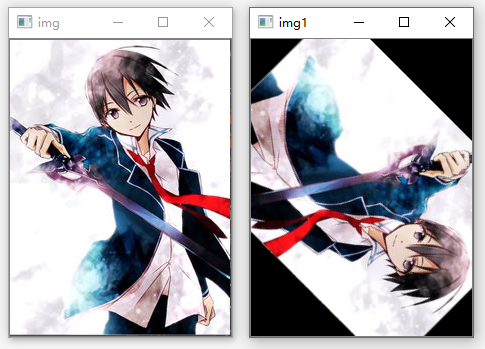
3.图像旋转
 代码:
代码:
import cv2
import numpy as np
img=cv2.imread('img2.png',1)
rows,cols=img.shape[:2]
#参数1:旋转中心,参数2:旋转角度,参数3:旋转因子,正为逆时针,负值为顺时针
M=cv2.getRotationMatrix2D((cols/2,rows/2),45,-1,)
print(M)
#第三个参数是输出图像的尺寸中心
dst=cv2.warpAffine(img,M,(cols,rows))
#dst=cv2.warpAffine(img,M,(cols,rows),borderValue=(255,255,255))
while(1):
    cv2.imshow('img', img)
    cv2.imshow('img1',dst)
    #0xFF==27  ESC
    if cv2.waitKey(1)&0xFF==27:
        break
cv2.destroyAllWindows()
输出:
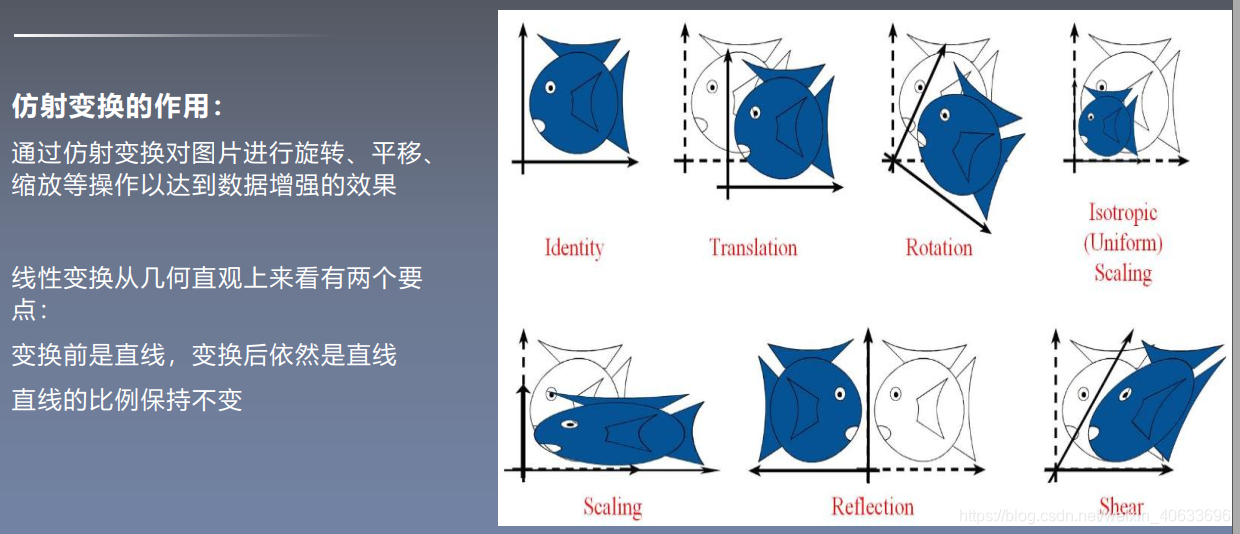
4.仿射变换
 代码:
代码:
import cv2
import numpy as np
import matplotlib.pyplot as plt
#读取图片
src = cv2.imread('bird.png')
#获取图像大小
rows, cols = src.shape[:2]
#设置图像仿射变换矩阵
pos1 = np.float32([[50,50], [200,50], [50,200]])
pos2 = np.float32([[10,100], [200,50], [100,250]])
M = cv2.getAffineTransform(pos1, pos2)
print(M)
#图像仿射变换
result = cv2.warpAffine(src, M, (2*cols, 2*rows))
#显示图像
cv2.imshow("original", src)

cv2.imshow("result", result)
#等待显示
cv2.waitKey(0)
cv2.destroyAllWindows()
输出:
[[  1.26666667   0.6        -83.33333333]
 [ -0.33333333   1.          66.66666667]]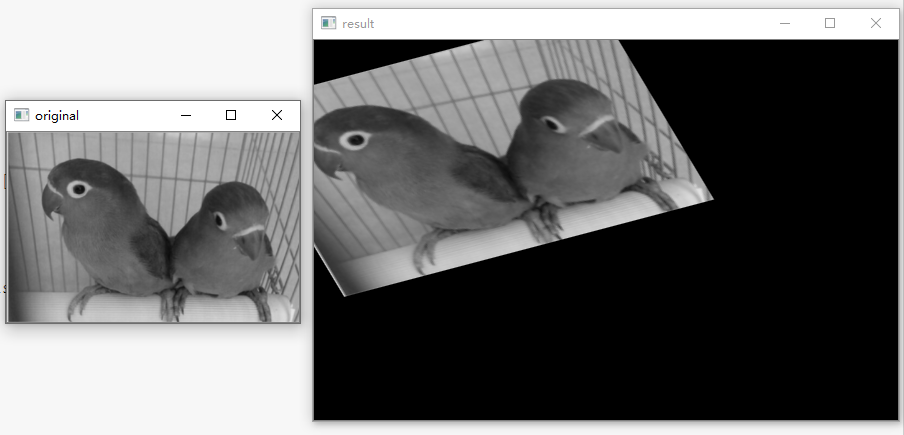
5.透视变换
 代码:
代码:
import cv2
import numpy as np
import matplotlib.pyplot as plt
#读取图片
src = cv2.imread('bird.png')
#获取图像大小
rows, cols = src.shape[:2]
#设置图像透视变换矩阵
pos1 = np.float32([[114, 82], [287, 156],
                   [8, 100], [143, 177]])
pos2 = np.float32([[0, 0], [188, 0],
                   [0, 262], [188, 262]])
M = cv2.getPerspectiveTransform(pos1, pos2)
#图像透视变换
result = cv2.warpPerspective(src, M, (2*cols,2*rows))
#显示图像
cv2.imshow("original", src)
cv2.imshow("result", result)
#等待显示
cv2.waitKey(0)
cv2.destroyAllWindows()
输出:

6.几何变换小结
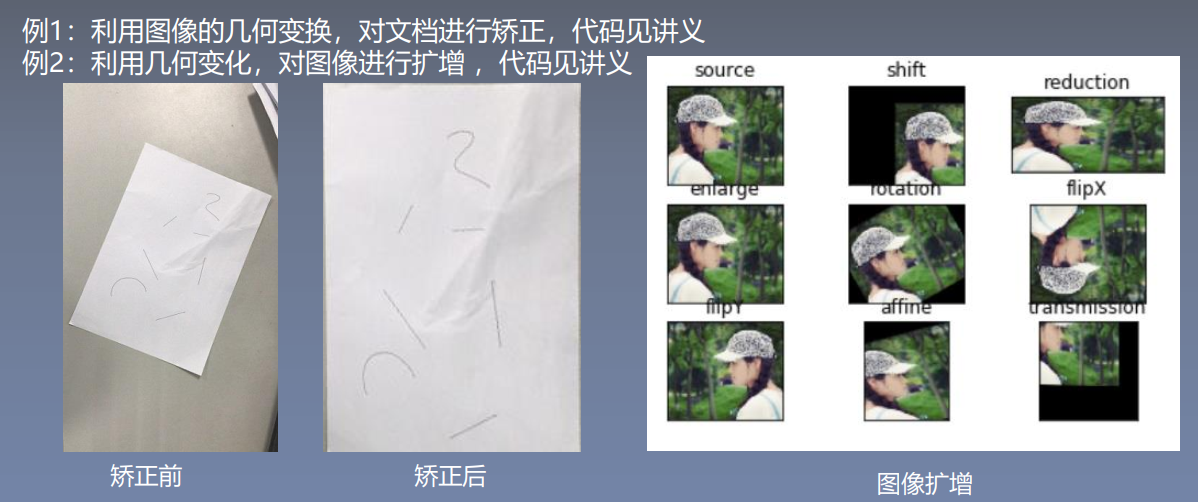
6.1例1:文档矫正
代码:
#encoding:utf-8
import cv2
import numpy as np
import matplotlib.pyplot as plt

#读取图片
src = cv2.imread('paper.png')

#获取图像大小
rows, cols = src.shape[:2]

#将源图像高斯模糊,去除图像中的噪声
img = cv2.GaussianBlur(src, (3,3), 0)
#进行灰度化处理
gray = cv2.cvtColor(img,cv2.COLOR_BGR2GRAY)

#边缘检测(检测出图像的边缘信息)
edges = cv2.Canny(gray,50,250,apertureSize = 3)
cv2.imwrite("canny.jpg", edges)
cv2.imshow("canny", edges)
#通过霍夫变换得到A4纸边缘
lines = cv2.HoughLinesP(edges,1,np.pi/180,50,minLineLength=90,maxLineGap=10)
print(lines)
#下面输出的四个点分别为四个顶点
for x1,y1,x2,y2 in lines[0]:
    print(x1,y1)
    print(x2,y2)
for x3,y3,x4,y4 in lines[1]:
    print(x3,y3)
    print(x4,y4)

#绘制边缘
for x1,y1,x2,y2 in lines[0]:
    cv2.line(gray, (x1,y1), (x2,y2), (0,0,255), 1)

#根据四个顶点设置图像透视变换矩阵
pos1 = np.float32([[114, 82], [287, 156], [8, 322], [216, 333]])
pos2 = np.float32([[0, 0], [188, 0], [0, 262], [188, 262]])
M = cv2.getPerspectiveTransform(pos1, pos2)
# pos1 = np.float32([[114, 82], [287, 156], [8, 322]])
# pos2 = np.float32([[0, 0], [188, 0], [0, 262]])
# M = cv2.getAffineTransform(pos1,pos2)
print(M)
#图像仿射变换
#result = cv2.warpAffine(src, M, (2*cols, 2*rows))

#图像透视变换
result = cv2.warpPerspective(src, M, (190, 272))

#显示图像
cv2.imshow("original", src)
cv2.imshow("result", result)

cv2.imshow("gray", gray)
#等待显示
cv2.waitKey(0)
cv2.destroyAllWindows()
输出:
[[[  8 332 114  82]]

 [[217 330 287 155]]

 [[  8 333 160 392]]

 [[116  83 286 155]]

 [[255  20 294 136]]

 [[  9 331  84 154]]]
8 332
114 82
217 330
287 155
[[ 5.66589226e-01  2.50243575e-01 -8.51111449e+01]
 [-3.46690724e-01  8.10506692e-01 -2.69388062e+01]
 [-1.14188388e-03 -3.35875357e-04  1.00000000e+00]]
6.2例2:图像几何变化
代码:
#encoding:utf-8
import cv2
import numpy as np
import matplotlib.pyplot as plt

#读取图片
img = cv2.imread('test2.png')
image = cv2.cvtColor(img,cv2.COLOR_BGR2RGB)

#图像平移矩阵
M = np.float32([[1, 0, 80], [0, 1, 30]])
rows, cols = image.shape[:2]
img1 = cv2.warpAffine(image, M, (cols, rows))

#图像缩小
img2 = cv2.resize(image, (200,100))

#图像放大
img3 = cv2.resize(image, None, fx=1.1, fy=1.1)

#绕图像的中心旋转
#源图像的高、宽 以及通道数
rows, cols, channel = image.shape
#函数参数:旋转中心 旋转度数 scale
M = cv2.getRotationMatrix2D((cols/2, rows/2), 30, 1)
#函数参数:原始图像 旋转参数 元素图像宽高
img4 = cv2.warpAffine(image, M, (cols, rows))

#图像翻转
img5 = cv2.flip(image, 0)   #参数=0以X轴为对称轴翻转
img6 = cv2.flip(image, 1)   #参数>0以Y轴为对称轴翻转

#图像的仿射
pts1 = np.float32([[50,50],[200,50],[50,200]])
pts2 = np.float32([[10,100],[200,50],[100,250]])
M = cv2.getAffineTransform(pts1,pts2)
img7 = cv2.warpAffine(image, M, (rows,cols))

#图像的透射
pts1 = np.float32([[56,65],[238,52],[28,237],[239,240]])
pts2 = np.float32([[0,0],[200,0],[0,200],[200,200]])
M = cv2.getPerspectiveTransform(pts1,pts2)
img8 = cv2.warpPerspective(image,M,(200,200))


#循环显示图形
titles = [ 'source', 'shift', 'reduction', 'enlarge', 'rotation', 'flipX', 'flipY', 'affine', 'transmission']
images = [image, img1, img2, img3, img4, img5, img6, img7, img8]
for i in range(9):
    plt.subplot(3, 3, i+1), plt.imshow(images[i], 'gray')
    plt.title(titles[i])
    plt.xticks([]),plt.yticks([])
plt.show()
输出:

版权声明:本文为weixin_40633696原创文章,遵循CC 4.0 BY-SA版权协议,转载请附上原文出处链接和本声明。