我也是第一次接触yaf框架,在安装使用的过程中也碰到一些问题。今天写这篇文章,一来做个记录, 二来也是希望可以对想要接触yaf框架的同学们有所帮助。
废话不多少,直接进入正题。
第一步,安装yaf扩展。
我个人的开发环境是windows10 + phpstudy小皮面板。 小皮面板本身不直接支持yaf扩展。 需要自己下载安装yaf扩展。
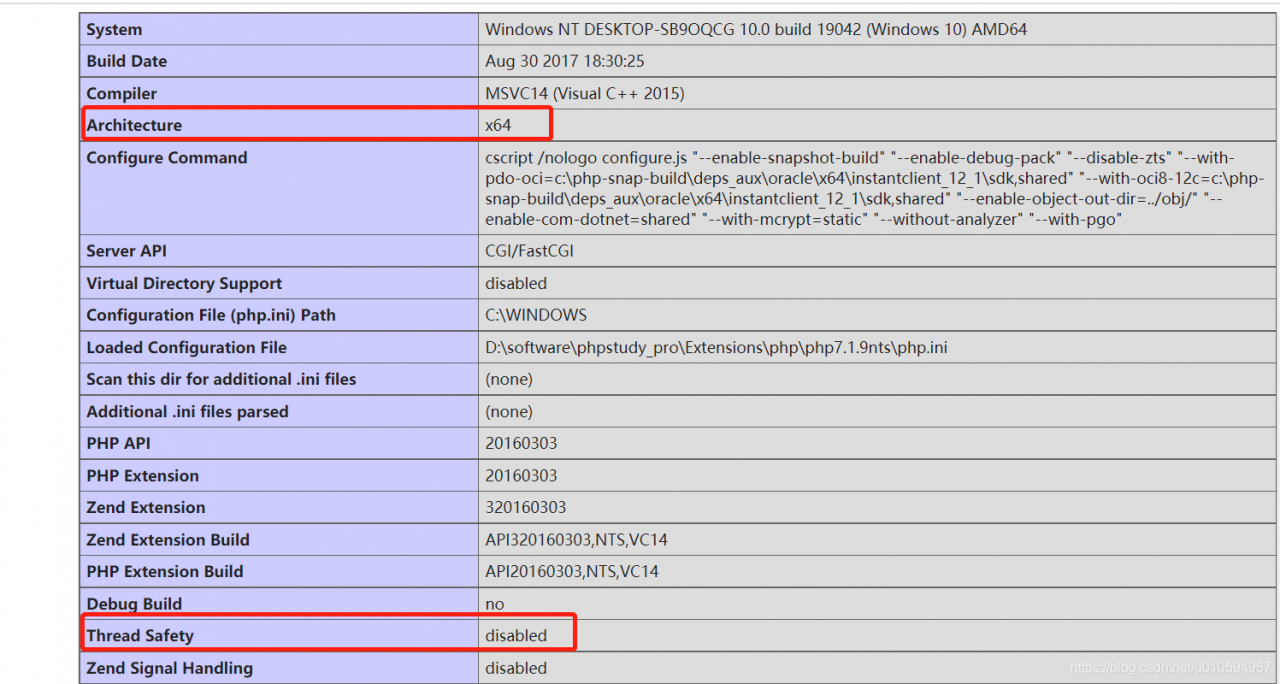
在下载扩展前,我们需要使用phpinfo()查看下需要的版本信息
yaf扩展下载地址
https://pecl.php.net/package/yaf/3.0.8/windows
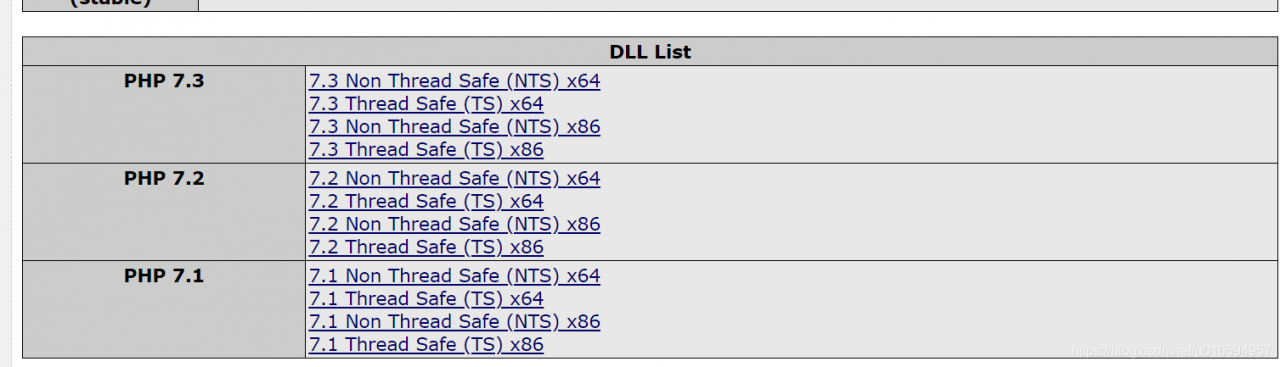
上图是我的本地环境,需要选择php7.1+ x64+nts的yaf扩展版本,大家可以根据自己的环境跟需求进行选择。
下载后解压缩可以得到一个php_yaf.dll文件。 需要把这个文件放到php的扩展目录。
例如我的环境是:phpstudy安装目录\Extensions\php\php7.1.9nts
编辑php.ini文件添加扩展
extension=php_yaf
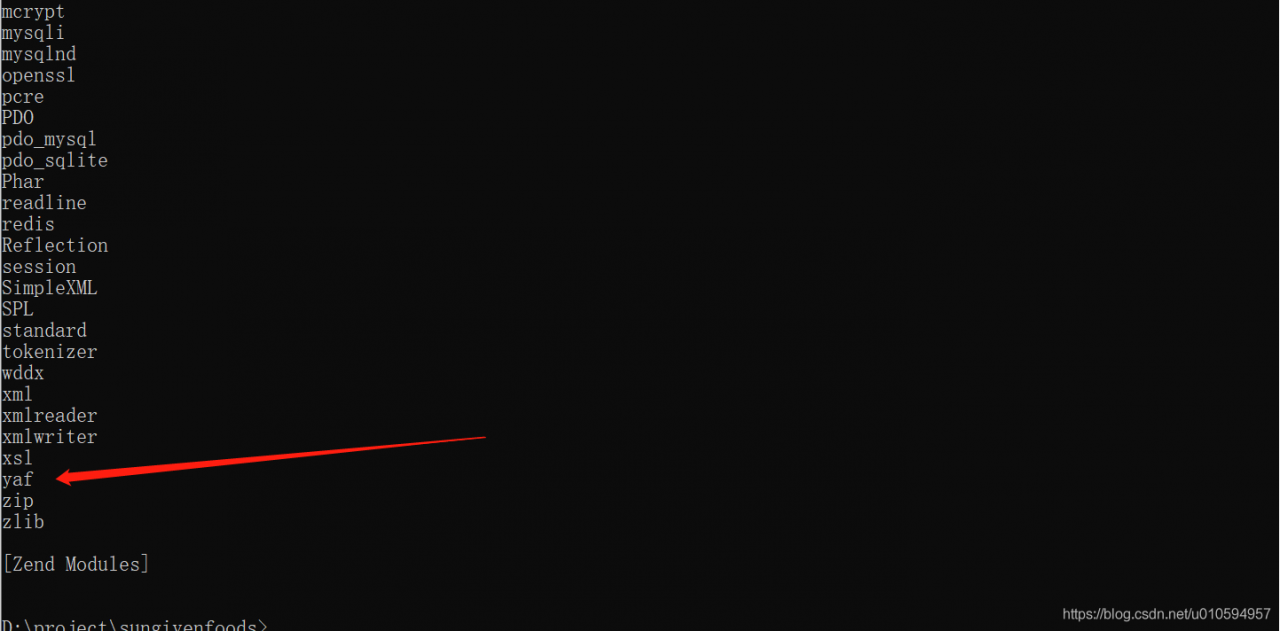
添加后重启nginx,使用php -m 查看是否安装成功
第二步,生成yaf框架文件
有两种方式
第一种是使用yaf_cg工具生成
git clone https://github.com/laruence/yaf/tree/master/tools/cg
切换到 gitclone目录/yaf/tools/cg目录,然后执行命令
php yaf_cg 项目名称
然后复制 gitclone目录/yaf/tools/cg/OUTOUT/项目名称 下所有的文件到网站根目录
第二种是手动创建
目录结构如下
+ public
| - .htaccess // Rewrite rules
| - index.php // Application entry
| + css
| + js
| + img
+ conf
| - application.ini // Configure
- application/
- Bootstrap.php // Bootstrap
+ controllers
- Index.php // Default controller
+ views
|+ index
- index.phtml // View template for default controller
+ library // libraries
+ models // Models
+ plugins // Plugins
这里需要注意下, 根目录需要指向 public
接下来说下一些基础文件内容
public/index.php,单入口文件,所有的请求都会通过这个文件来分发, 后面会讲伪静态怎么写
<?php
define("APPLICATION_PATH",  dirname(dirname(__FILE__)));

$app  = new Yaf_Application(APPLICATION_PATH . "/conf/application.ini");
//call bootstrap methods defined in Bootstrap.php
$app->bootstrap()->run();
conf/application.ini
[product]
;CONSTANTS is supported
application.directory = APPLICATION_PATH . "/application/"
application/controllers/Index.php
<?php
class IndexController extends Yaf_Controller_Abstract {
   // default action name
   public function indexAction() {
        $this->getView()->content = "Hello World";
   }
}
?>
application/views/index/index.phtml
<html>
 <head>
   <title>Hello World</title>
 </head>
 <body>
   <?php echo $content; ?>
 </body>
</html>
public/.htaccess
Apache
#.htaccess
RewriteEngine On
RewriteCond %{REQUEST_FILENAME} !-f
RewriteRule .* index.php
Nginx
server {
  listen ****;
  server_name  domain.com;
  root   document_root;
  index  index.php index.html index.htm;

  if (!-e $request_filename) {
    rewrite ^/(.*)  /index.php/$1 last;
  }
}
文件都创建完成以后,就可以访问了。
最后,说一下这次安装碰到的一些问题
1,扩展安装不成功,这个主要是TS跟X86没有根据phpinfo()里面的信息来进行选择
2,找不到Yaf_Application类。这个是因为我在php.ini配置文件添加yaf.use_namespace = On,这个配置开启了yaf的命名空间,因此要做一些修改
public/index.php
<?php
define("APPLICATION_PATH",  dirname(dirname(__FILE__)));

$app  = new Yaf_Application(APPLICATION_PATH . "/conf/application.ini");
//call bootstrap methods defined in Bootstrap.php
$app->bootstrap()->run();
修改成
<?php
define("APPLICATION_PATH",  dirname(dirname(__FILE__)));

$app  = new \Yaf\Application(APPLICATION_PATH . "/conf/application.ini");
//call bootstrap methods defined in Bootstrap.php
$app->bootstrap()->run();
application/controllers/Index.php
<?php
class IndexController extends Yaf_Controller_Abstract {
   // default action name
   public function indexAction() {
        $this->getView()->content = "Hello World";
   }
}
?>
修改成
<?php
class IndexController extends \Yaf\Controller_Abstract {
   // default action name
   public function indexAction() {
        $this->getView()->content = "Hello World";
   }
}
?>