启动流程
1.运行主启动类
对项目进行编译、测试 ---- 此时会执行到mven的test生命周期
a. 导入maven依赖jar包
b.加载build配置和profile配置
build
0).设置编译后文件的存放位置
下面展示一些 内联代码片。
<outputDirectory>${basedir}/target/aaa</outputDirectory>
1). finalName -->设置打成jar包的名字
<finalName>${project.artifactId}-release-${project.version}</finalName>
2).resources 指定资源文件夹
<resources>
    <resource>
        <directory>src/main/resources</directory>
        <excludes>
            <exclude>env/dev/*</exclude>
            <exclude>env/qatest/*</exclude>
            <exclude>env/staging/*</exclude>
            <exclude>env/prod/*</exclude>
        </excludes>
    </resource>
    <resource>
        <directory>src/main/resources/env/${profiles.active}</directory>
    </resource>
</resources>
3).配置插件,设置属性、对应的生命周期以及目标
<plugins>
    <plugin>
        <groupId>org.apache.maven.plugins</groupId>
        <artifactId>maven-compiler-plugin</artifactId>
        <version>2.3.2</version>
        <configuration>
            <source>1.8</source>
            <target>1.8</target>
        </configuration>
    </plugin>
    <plugin>
        <groupId>org.springframework.boot</groupId>
        <artifactId>spring-boot-maven-plugin</artifactId>
        <version>1.4.1.RELEASE</version>
    </plugin>
    <plugin>
        <artifactId>maven-assembly-plugin</artifactId>
        <executions>
            <execution>
                <id>movie-predication</id>
                <phase>package</phase>
                <goals>
                    <goal>single</goal>
                </goals>
                <configuration>
                    <descriptors>
                        <descriptor>src/main/resources/assemble.xml</descriptor>
                    </descriptors>
                </configuration>
            </execution>
        </executions>
    </plugin>
</plugins>
profile
更多的是用于激活不同的编译配置,从而达到区分环境的效果
可以设置id, 唯一标识一个profile
activation 设置默认激活
properties 设置属性
buid 指定表一配置
注:profile的激活方式
- 设置activation 默认激活
- 在settings文件中执行激活的profile
<activeProfiles>
    <activeProfile>dev</activeProfile>
    <activeProfile>release</activeProfile>
</activeProfiles>
3.通过-P 命令指定激活的profile
mvn package -P dev
<profiles>
    <profile>
        <activation>
            <activeByDefault>true</activeByDefault>
        </activation>
        <id>dev</id>
        <properties>
            <profiles.active>dev</profiles.active>
        </properties>
        <build>
            <resources>
                <resource>
                    <directory>src/main/profiles/dev/</directory>
                </resource>
                <resource>
                    <directory>src/main/resources/</directory>
                </resource>
            </resources>
        </build>
    </profile>
    <profile>
        <activation>
            <activeByDefault>false</activeByDefault>
        </activation>
        <id>qatest</id>
        <properties>
            <profiles.active>qatest</profiles.active>
        </properties>
        <build>
            <resources>
                <resource>
                    <directory>src/main/profiles/qatest/</directory>
                </resource>
                <resource>
                    <directory>src/main/resources/</directory>
                </resource>
            </resources>
        </build>
    </profile>
    <profile>
        <activation>
            <activeByDefault>false</activeByDefault>
        </activation>
        <id>staging</id>
        <properties>
            <profiles.active>staging</profiles.active>
        </properties>
        <build>
            <resources>
                <resource>
                    <directory>src/main/profiles/staging/</directory>
                </resource>
                <resource>
                    <directory>src/main/resources/</directory>
                </resource>
            </resources>
        </build>
    </profile>
    <profile>
        <activation>
            <activeByDefault>false</activeByDefault>
        </activation>
        <id>prod</id>
        <properties>
            <profiles.active>prod</profiles.active>
        </properties>
        <build>
            <resources>
                <resource>
                    <directory>src/main/profiles/prod/</directory>
                </resource>
                <resource>
                    <directory>src/main/resources/</directory>
                </resource>
            </resources>
        </build>
    </profile>
</profiles>
c.进行编译测试
执行maven 编译和测试生命周期插件对应的目标
maven-resources-plugin: resource
maven-compiler-plugin: compile
mven-resources-plugin:test-resource
maven-compiler-plugin:test-compile
maven-surefire-plugin:test
启动springboot应用
启动的过程分为三个部分
一、SpringApplication的初始化,配置一些基本的环境变量、资源、监听器
二、部分实现了应用具体的启动方案、包括 启动流程的监听模块、加载配置环境模块、及核心的创建上下文环境模块
三、自动化配置模块
一、
调用SpringApplication.run()方法启动主程序
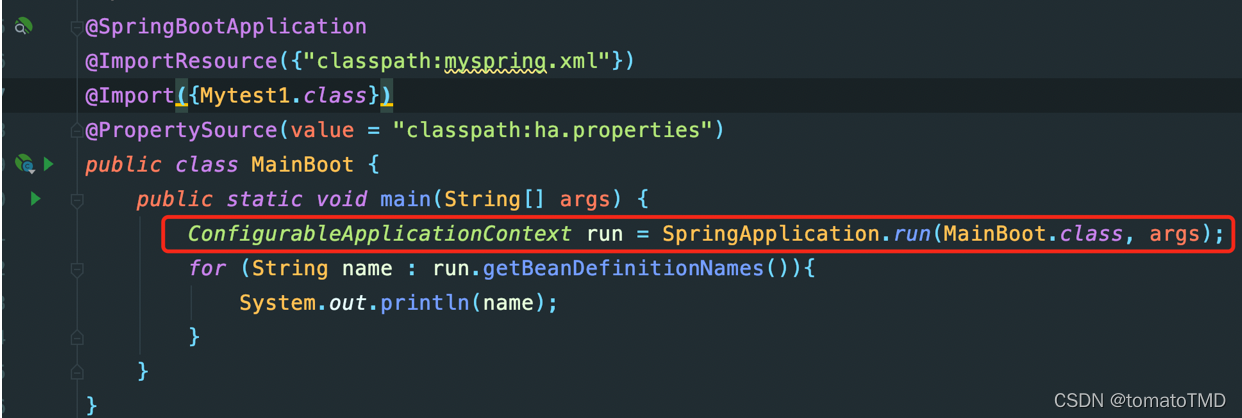
调用单参构造方法,创建SpringApplication对象

判断应用类型,如果导入了web启动器,则就是web应用,主要思想是在当前classpath下搜索特定类
特定类主要是
WEBMVC_INDICATOR_CLAS="org.springframework.web.servlet.DispatcherServlet"
WEBFLUX_INDICATOR_CLASS="org.springframework.web.reactive.DispatcherHandler"
JERSEY_INDICATOR_CLASS="org.glassfish.jersey.servlet.ServletContainer"
SERVLET_INDICATOR_CLASSES = { "javax.servlet.Servlet",
      "org.springframework.web.context.ConfigurableWebApplicationContext" }
通过ClassUtils.isPresent()来判断指定类是否存在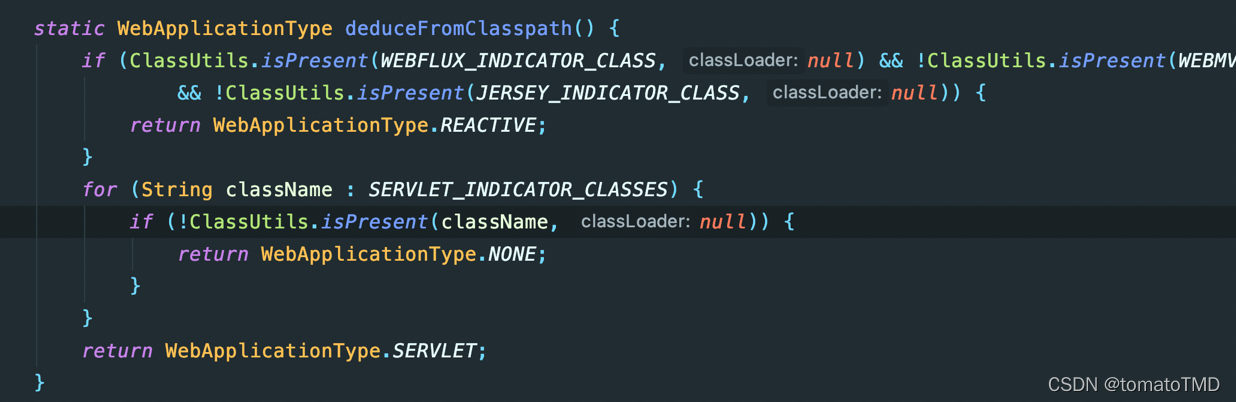
如果导入spring-web依赖就会认定当前应用时一个SERVLET应用,如果没有导入spring-web,但是导入了web-flux依赖,则认定当前应用是一个REACTIVE。
如果上述两个依赖都没有,则认定该项目为web工程,是传java工程
- 确定完应用类型,开始获取指定类型的工厂实例
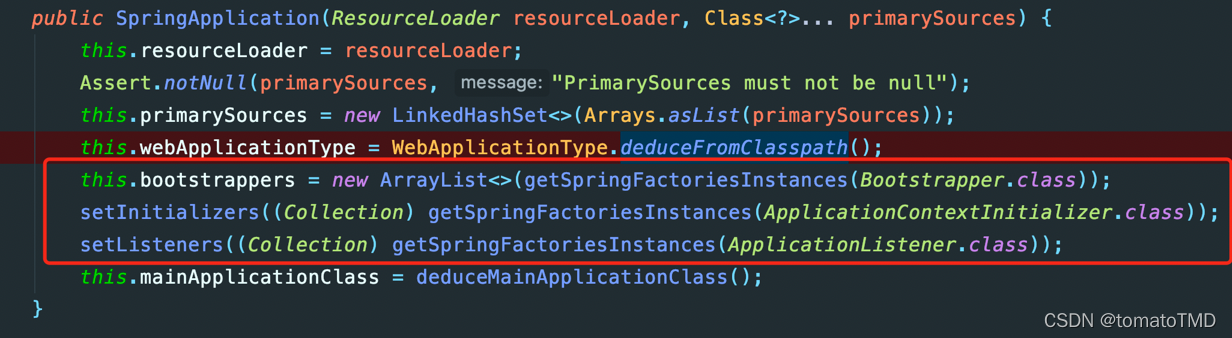
调用getSpringFactoriesInstances(Class type)方法,首次加载获取默认的类加载器,再调用loadFactoryNames(Class<?> factoryType, @Nullable ClassLoader classLoader)
方法,最终调用loadSpringFactories(ClassLoader classLoader)。
loadSpringFactories(ClassLoader classLoader)这个方法返回的是一个map, key是工厂接口的全限定类名,value是一个list, list中是key的实现类的全限定类名
key和value的来源:
来自于classpath:META-INF/spring.factories,一般通过引入springboot父工程的方式创建的项目,只有两个spring.factories文件,一个是spring-boot:x.x.x包另一个是spring-boot-autoconfigure:x.x.x包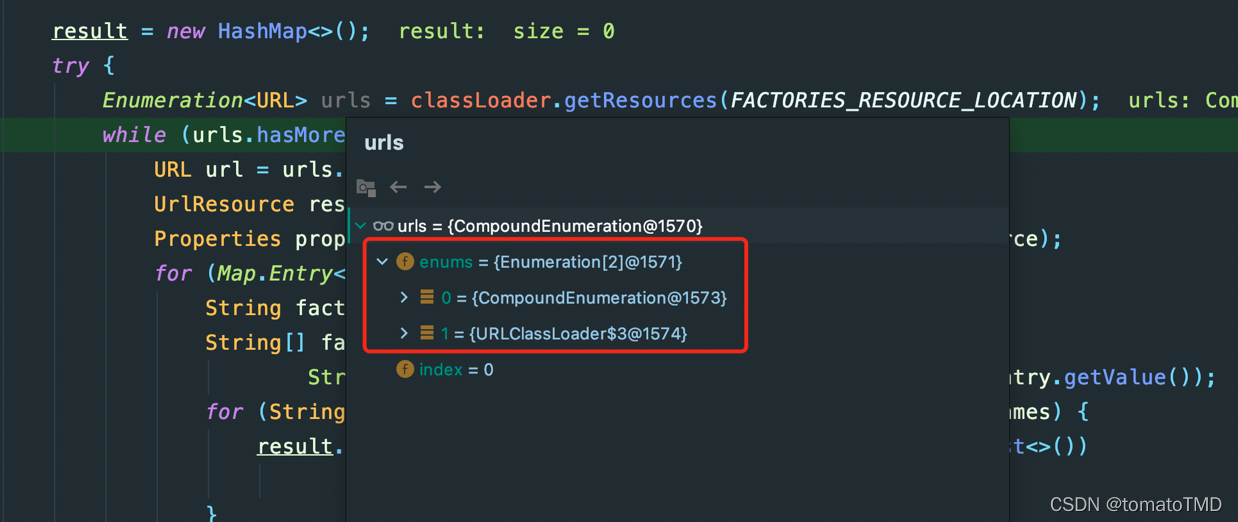
再分别遍历这两个包,读取spring.facories文件 到properties中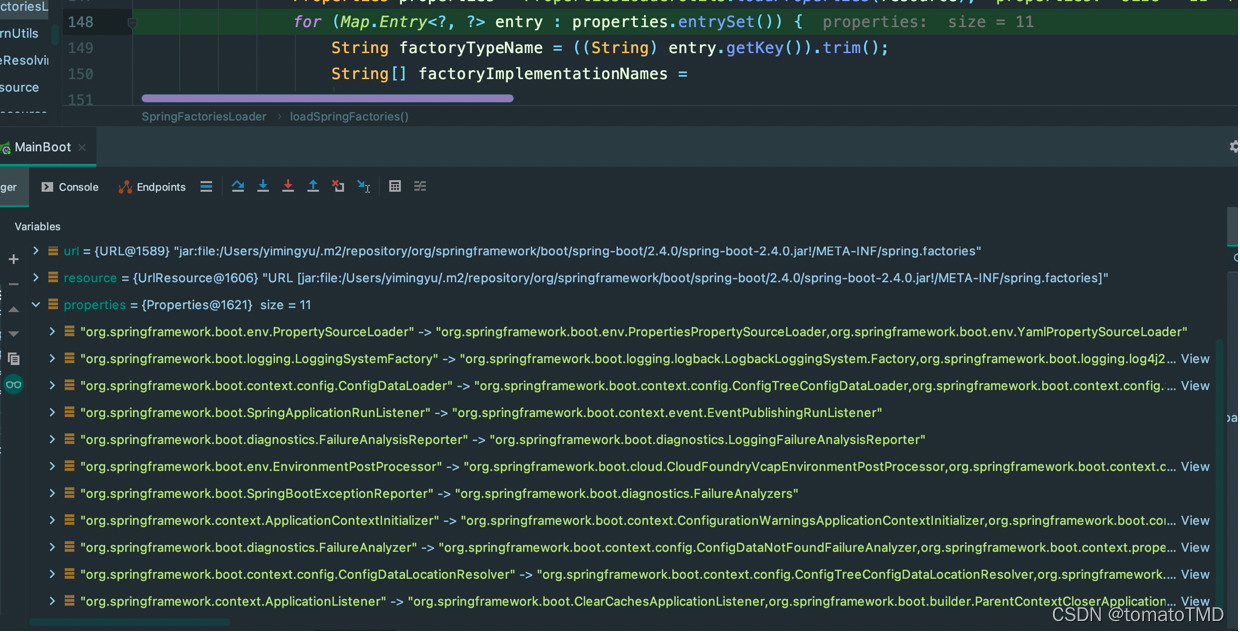
获取key并去掉两边的空格, 获取value,根据逗号分隔转换为数组,在遍历该数据,放到map的list中,最后在对map的list去重并放到缓存中并返回该map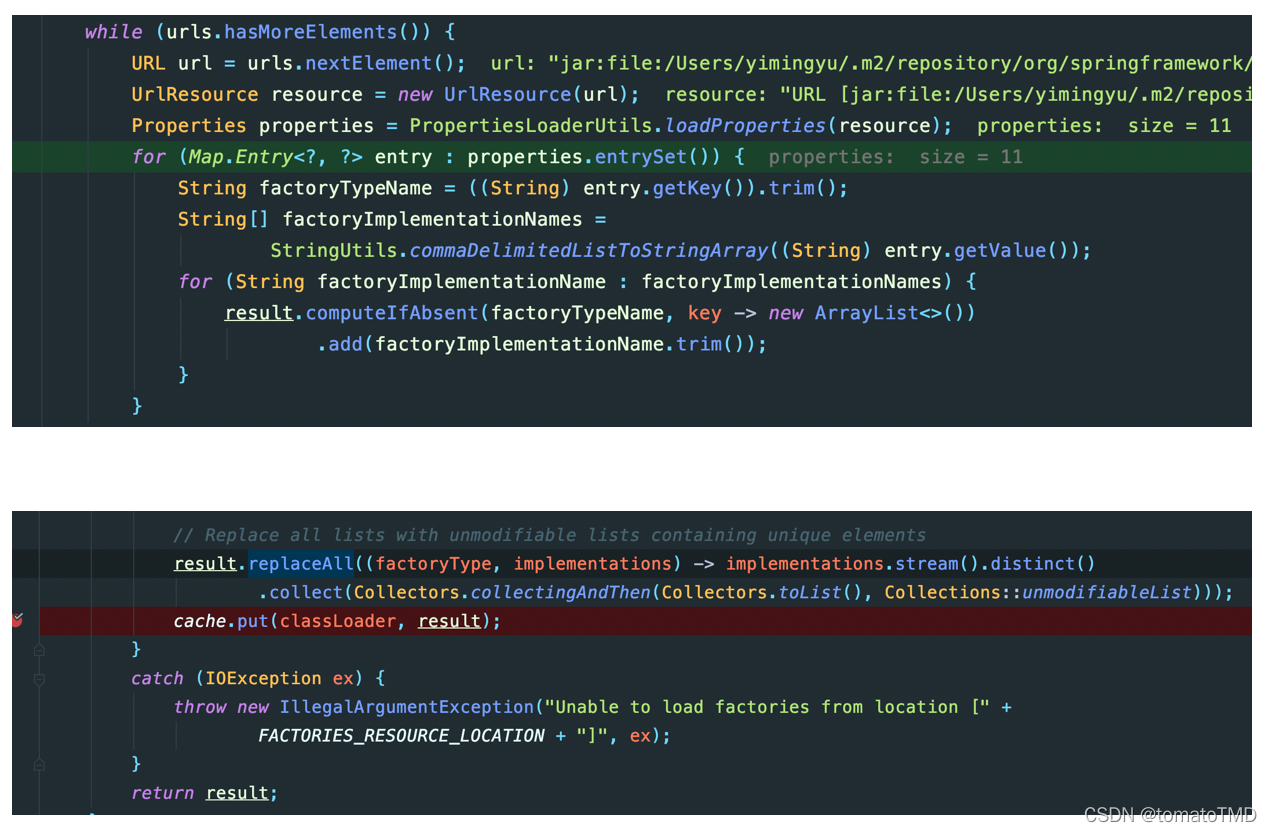
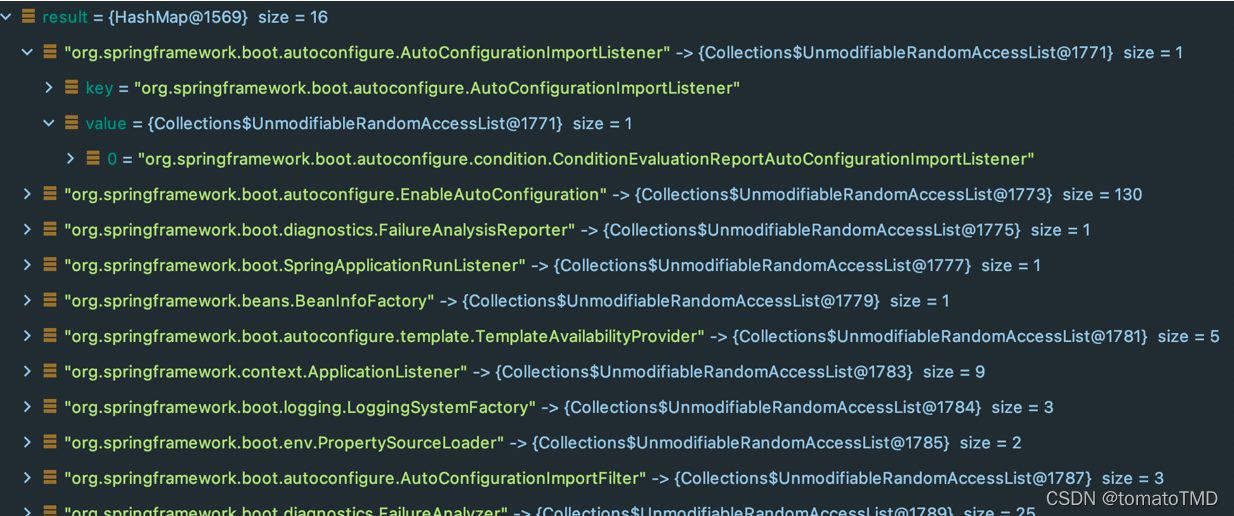
然后map再调用getOrDefault方法,获取“org.springframework.boot.Bootstrapper”对应的实例list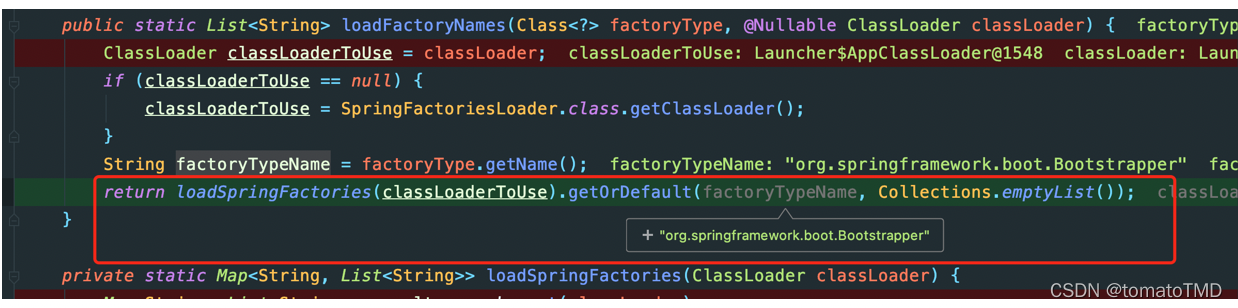
然而并没有该key,所以返回空list(内心PS:汤圆里没馅,他娘的白玩了)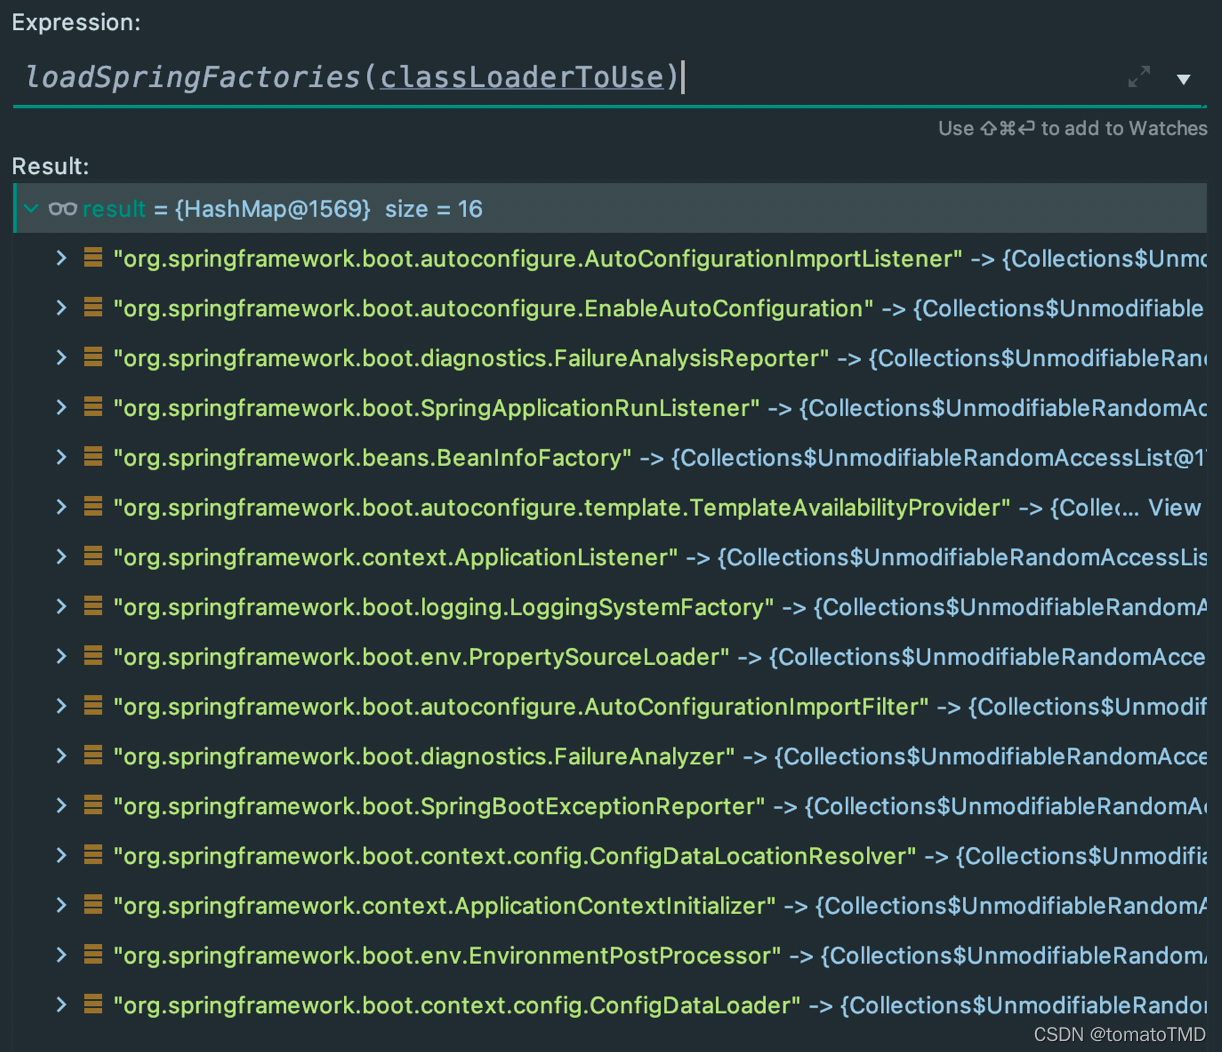
因此this.bootstrappers=null
接下来,调用getSpringFactoriesInstances(ApplicationContextInitializer.class)获取ApplicationContextInitializer接口所有的实例list,这次效率就高了,因为可以走缓存
并且map中也有这个key
通过反射生成这个key对应的value实例并放到list中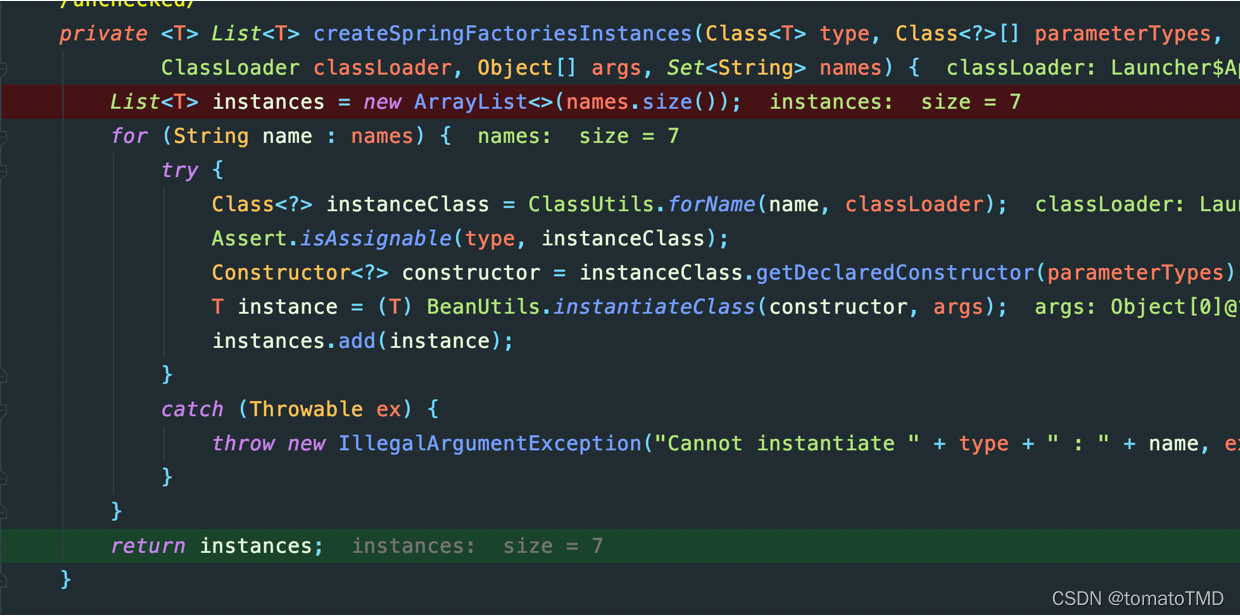
返回排序后的list并赋值给this.initializers
接下来还是调用getSpringFactoriesInstances(ApplicationListener.class设置监听器
- 确定主函数类型
this.mainApplicationClass = deduceMainApplicationClass();调用此方法并通过stackTraceElement数组获取到目前正在使用的各个方法调用栈,通过判断方法名是不是main来获取主方法所在类,并返回类对象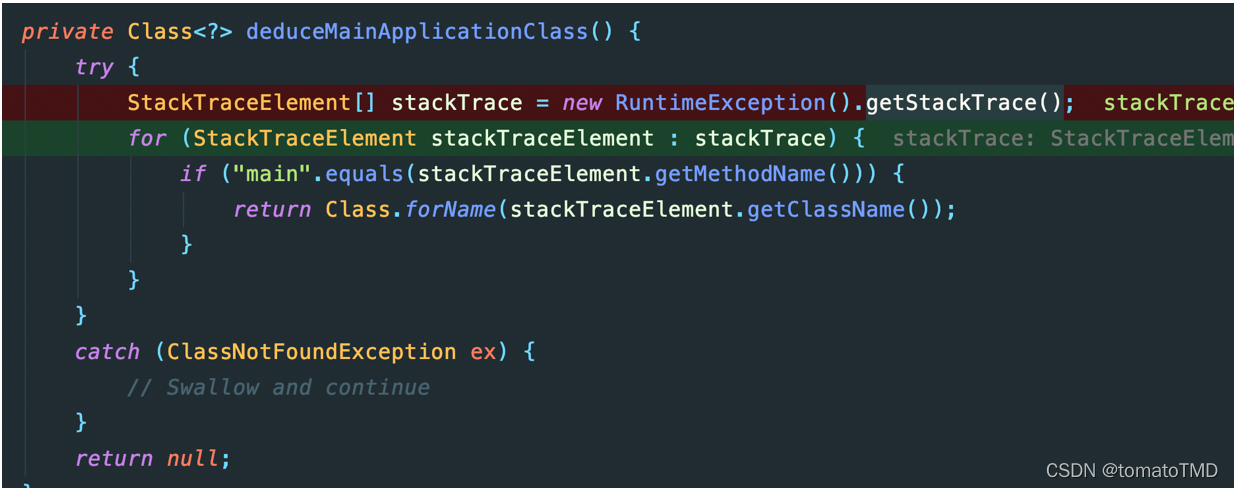
补充:getStackTrace()方法使用
StackTrace(堆栈轨迹)存放的就是方法调用栈的信息,每次调用一个方法会产生一个方法栈,当前方法调用另一个方法时会使用栈将当前方法的现场信息保存在此方法栈中,获取这个栈就可以得到方法调用的详细过程。例如:异常处理中常用的e.printStackTrace()实质就是打印异常调用的堆栈信息
//获取到堆栈轨迹的两种方法
Thread.currentThread().getStackTrace() 一般用这个,信息更全面

new Throwable().getStackTrace()
初始化流程图
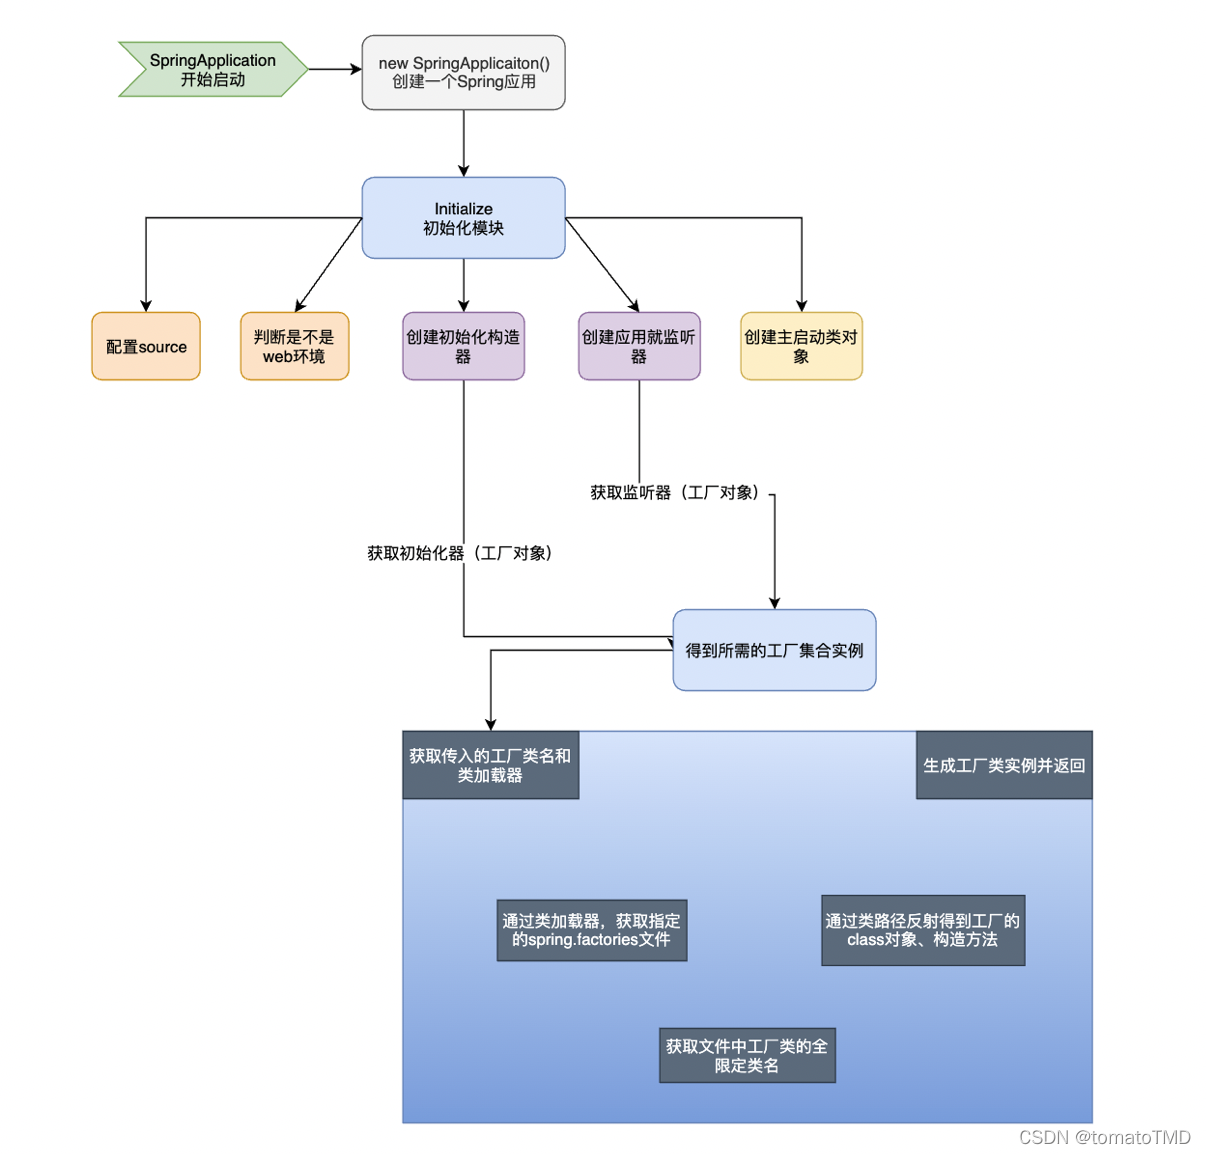
到目前为止,完成springApplication的初始化阶段,确定了应用的类型,配置初始化器list,监听器list并创建了主启动类的类对象