session是一个非常常见的概念。session的作用是为了辅助http协议,因为http是本身是一个无状态协议。为了记录用户的状态,session机制就应运而生了。同时session也是一个非常老的概念了,使用session的方法也是多种多样。就Java来说,servlet的标准本身是包含session的,Tomcat会把session的信息存储在服务器内存里,Request提供了获取session的方法。
在实际项目开发中,我们多采用Redis集群来管控缓存,因此参考了网上多数的资料信息redis管理session,基本都是单redis节点。
言归正传,springBoot项目如何使用Redis来管控Session 呢?
1、依赖的引人(说明:springBoot采用的是<version>1.5.9.RELEASE</version>)
<dependency>
<groupId>org.springframework.session</groupId>
<artifactId>spring-session-data-redis</artifactId>
</dependency>
<dependency>
<groupId>org.springframework.data</groupId>
<artifactId>spring-data-redis</artifactId>
</dependency>
<dependency>
<groupId>redis.clients</groupId>
<artifactId>jedis</artifactId>
<version>2.9.0</version>
</dependency>
2、redis哨兵模式配置(spring-redis.xml)
<?xml version="1.0" encoding="UTF-8"?>
<beans xmlns="http://www.springframework.org/schema/beans" xmlns:xsi="http://www.w3.org/2001/XMLSchema-instance"
xmlns:context="http://www.springframework.org/schema/context" xmlns:loxia="http://loxia.benjamin.cn/schema/core"
xmlns:p="http://www.springframework.org/schema/p" xmlns:util="http://www.springframework.org/schema/util"
xsi:schemaLocation="http://www.springframework.org/schema/beans http://www.springframework.org/schema/beans/spring-beans.xsd
http://www.springframework.org/schema/context http://www.springframework.org/schema/context/spring-context.xsd
http://loxia.benjamin.cn/schema/core http://loxia.benjamin.cn/schema/core/loxia-spring-ext.xsd
http://www.springframework.org/schema/util http://www.springframework.org/schema/util/spring-util.xsd
">
<bean id="redisconfig" class="redis.clients.jedis.JedisPoolConfig">
<property name="maxIdle" >
<value type="long">${redis.maxIdle}</value>
</property>
<!-- 在获取连接的时候检查有效性 -->
<property name="testOnBorrow" >
<value type="boolean">true</value>
</property>
</bean>
<bean id="sentinelConfig" class="org.springframework.data.redis.connection.RedisSentinelConfiguration">
<!-- master名称 sentinel.conf里面配置的主节点名称 -->
<constructor-arg name="master" value="${redis.mastername}" />
<!-- sentinel的ip和端口列表 -->
<constructor-arg name="sentinelHostAndPorts">
<set>
<value>${redis.sentinel1}</value>
<value>${redis.sentinel3}</value>
<value>${redis.sentinel3}</value>
</set>
</constructor-arg>
</bean>
<bean id="jedisConnectionFactory"
class="org.springframework.data.redis.connection.jedis.JedisConnectionFactory">
<constructor-arg ref="sentinelConfig" />
<constructor-arg ref="redisconfig" />
</bean>
<!-- 如下的配置是我们项目中集成的redis 缓存管理 ,如果采用springboot 的cacheManager,那么开发改动的代码量就非常大-->
<bean id="jedisSentinelPool" class="redis.clients.jedis.JedisSentinelPool">
<constructor-arg ref="redisconfig"></constructor-arg>
<constructor-arg type="java.util.Set">
<set>
<value>${redis.sentinel1}</value>
<value>${redis.sentinel2}</value>
<value>${redis.sentinel3}</value>
</set>
</constructor-arg>
<constructor-arg >
<value>${redis.mastername}</value>
</constructor-arg>
</bean>
<bean id="uacCacheManager" class="com.xxx.redis.manager.CacheManagerImpl">
<property name="cacheConfigManager" ref="cacheConfigManager"></property>
<property name="jedisPool" ref="jedisSentinelPool"></property>
</bean>
</beans>
3、springBoot加载redis配置信息
package com.xxxx.scm.baseservice.account.config;
import org.springframework.context.annotation.Configuration;
import org.springframework.context.annotation.ImportResource;
import org.springframework.context.annotation.PropertySource;
@Configuration
@ImportResource({ "classpath:spring-redis.xml" })
public class RedisConfig {
}
4、Spring容器开启redis管理session
package com.xxxx.scm.baseservice.account.config;
import org.springframework.cache.annotation.EnableCaching;
import org.springframework.context.annotation.Bean;
import org.springframework.context.annotation.Configuration;
import org.springframework.session.data.redis.config.ConfigureRedisAction;
import org.springframework.session.data.redis.config.annotation.web.http.EnableRedisHttpSession;
@EnableCaching
@EnableRedisHttpSession(maxInactiveIntervalInSeconds = 1800) //session过期时间(秒)
@Configuration
public class RedisSessionConfig
{
@Bean
public static ConfigureRedisAction configureRedisAction()
{
//让springSession不再执行config命令
return ConfigureRedisAction.NO_OP;
}
}
5、配置中心中配置session基础信息
spring:
session:
store-type: redis
redis:
namespace: spring:session
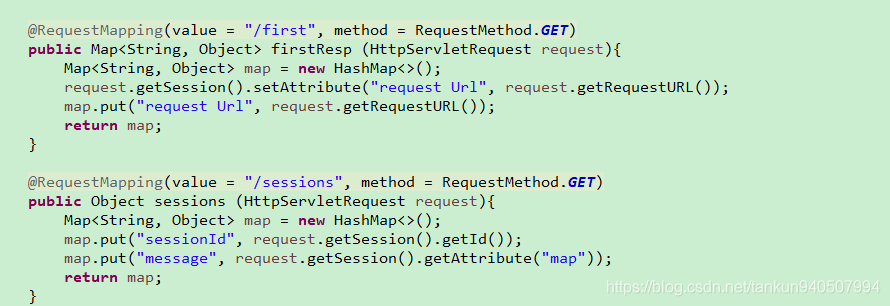
6、添加测试代码(记录session保存、获取接口)
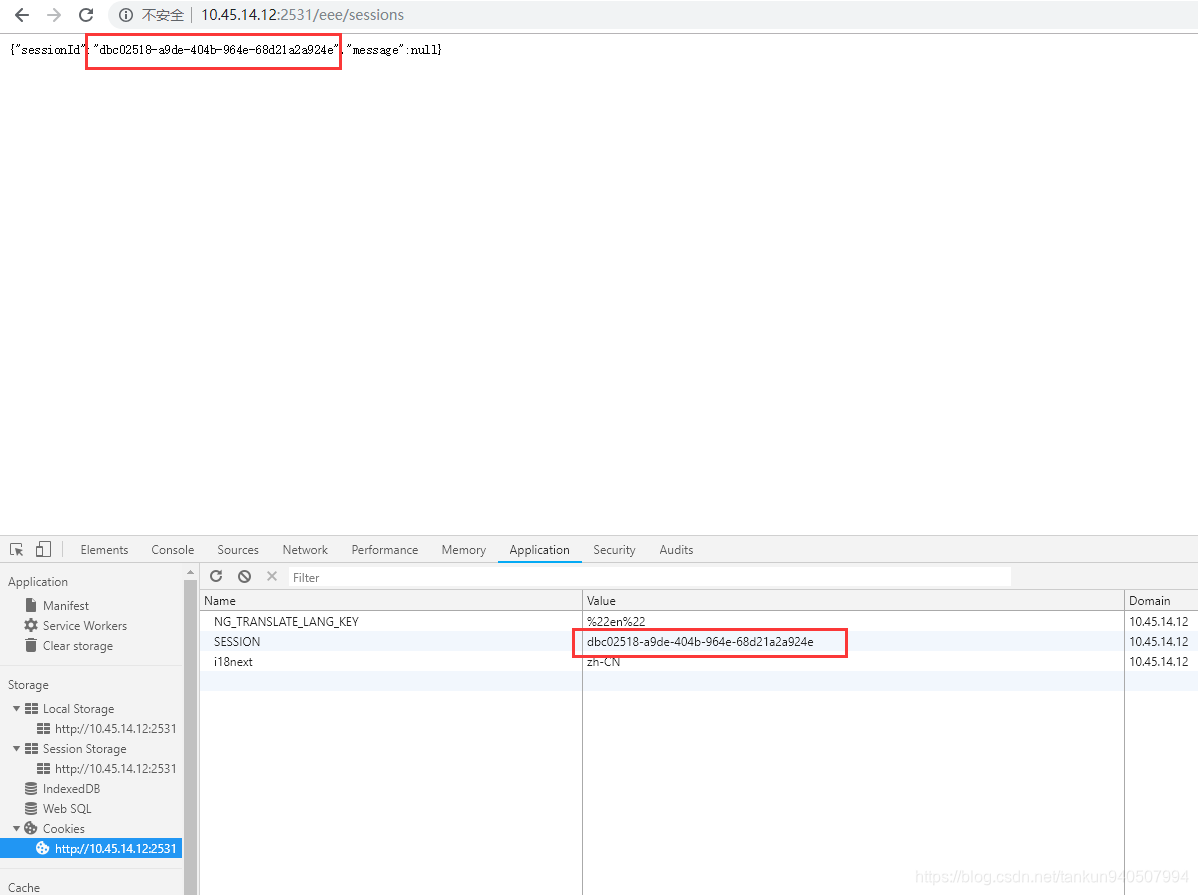
7、接口调试测试
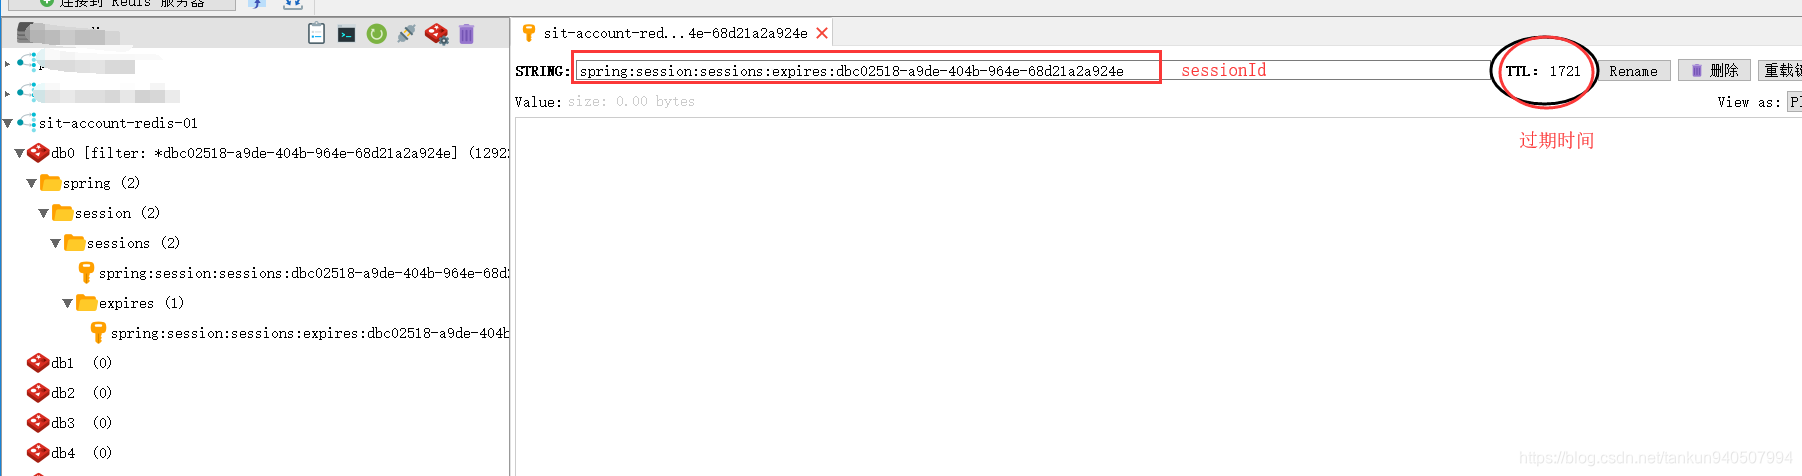
8、再启动一个节点,测试

9、至此,使用Redis管控sessionID完成。
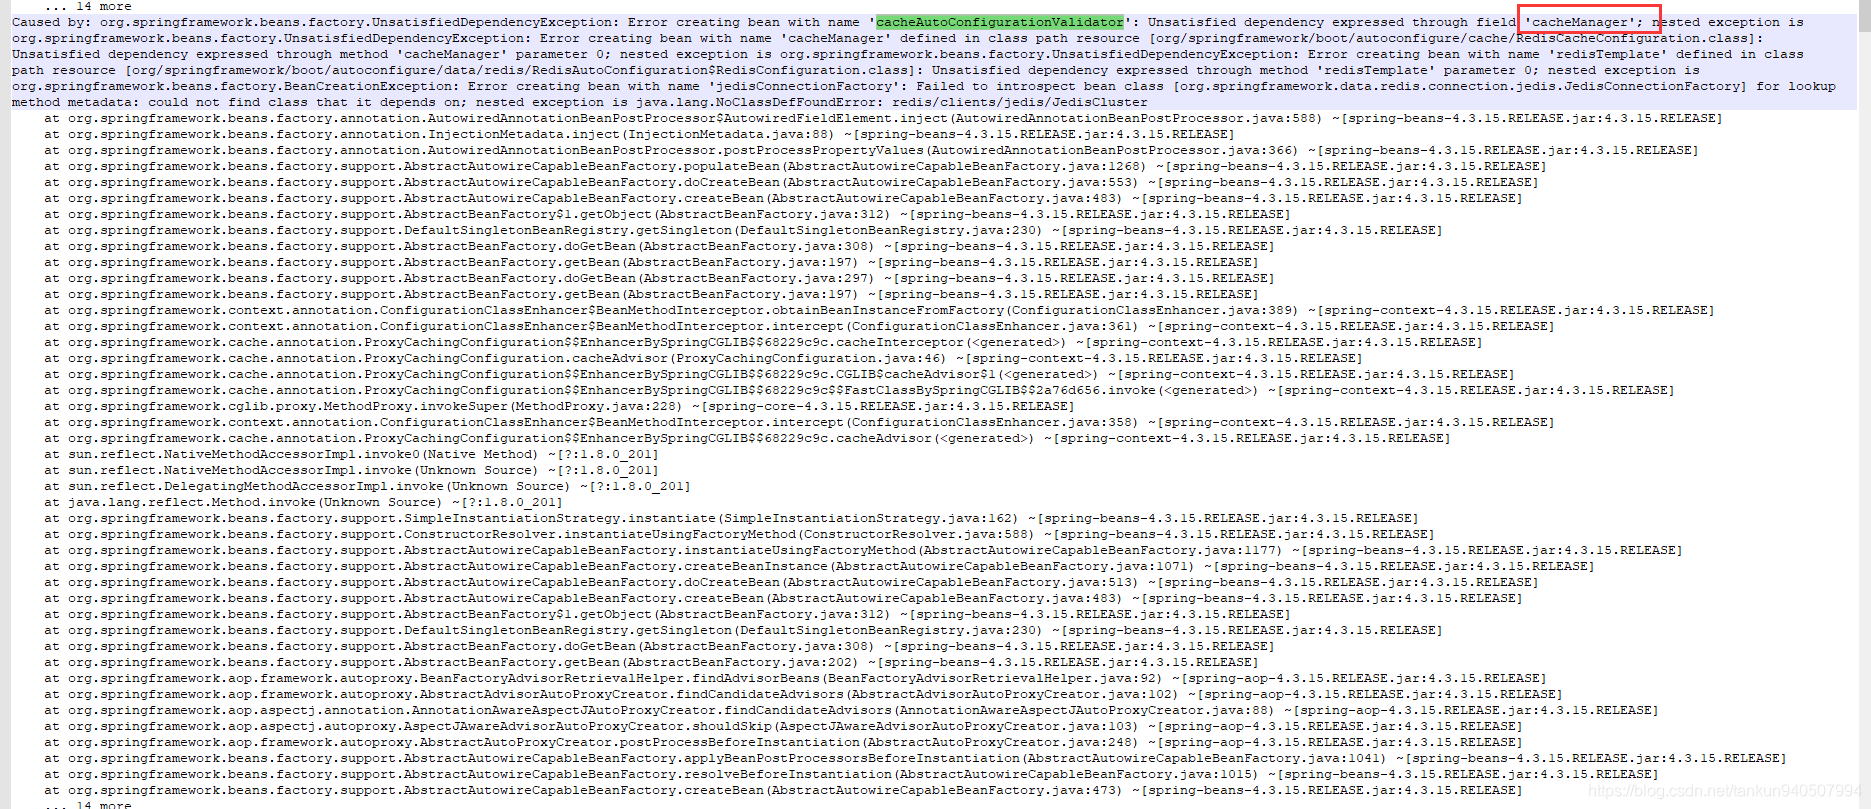
10、在开发过程中:
A、遇到了redis客户端版本不兼容的问题;
B、由于我们自身集成的缓存管理插件中默认采用的beanId为cacheManager,在引人spring-data-redis后,该包中的cacheManager 优先级高于我们插件中的cacheManager,因此,我采取让步措施,调整我们插件中的beanId名称。