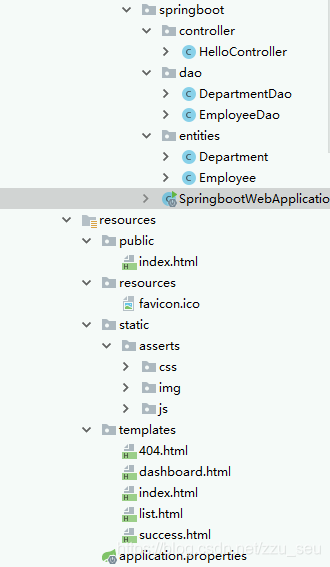
准备
- 将静态资源(css,img,js)添加到项目中,放到springboot默认的静态资源文件夹下
- 将模板文件(html)放到template文件夹下。
- 添加两个实体类和对应的DAO类
如果你的静态资源明明放到了静态资源文件夹下却无法访问,请检查一下是不是在自定义的配置类上加了@EnableWebMvc注解
1.默认访问首页
template文件夹不是静态资源文件夹,默认是无法直接访问的,所以要添加视图映射。
@Configuration
public class MyMVCConfig implements WebMvcConfigurer {
    public void addViewControllers(ViewControllerRegistry registry) {
        registry.addViewController("/").setViewName("login");
        registry.addViewController("/index").setViewName("login");
        registry.addViewController("/index.html").setViewName("login");
    }
}
然后index页面就可以通过以下几个地址访问:http://localhost:8080/ http://localhost:8080/index http://localhost:8080/index.html
i18n国际化
- 编写国际化配置文件,抽取页面需要显示的国际化消息
SpringBoot自动配置好了管理国际化资源文件的组件:
@ConfigurationProperties(prefix = "spring.messages")
public class MessageSourceAutoConfiguration {

    /**
	 * Comma-separated list of basenames (essentially a fully-qualified classpath
	 * location), each following the ResourceBundle convention with relaxed support for
	 * slash based locations. If it doesn't contain a package qualifier (such as
	 * "org.mypackage"), it will be resolved from the classpath root.
	 */
	private String basename = "messages";
    //我们的配置文件可以直接放在类路径下叫messages.properties;

    @Bean
	public MessageSource messageSource() {
		ResourceBundleMessageSource messageSource = new ResourceBundleMessageSource();
		if (StringUtils.hasText(this.basename)) {
            //设置国际化资源文件的基础名(去掉语言国家代码的)
			messageSource.setBasenames(StringUtils.commaDelimitedListToStringArray(
					StringUtils.trimAllWhitespace(this.basename)));
		}
		if (this.encoding != null) {
			messageSource.setDefaultEncoding(this.encoding.name());
		}
		messageSource.setFallbackToSystemLocale(this.fallbackToSystemLocale);
		messageSource.setCacheSeconds(this.cacheSeconds);
		messageSource.setAlwaysUseMessageFormat(this.alwaysUseMessageFormat);
		return messageSource;
	}
创建i18n文件夹存放配置文件,文件名格式为基础名(login)+语言代码(zh)+国家代码(CN)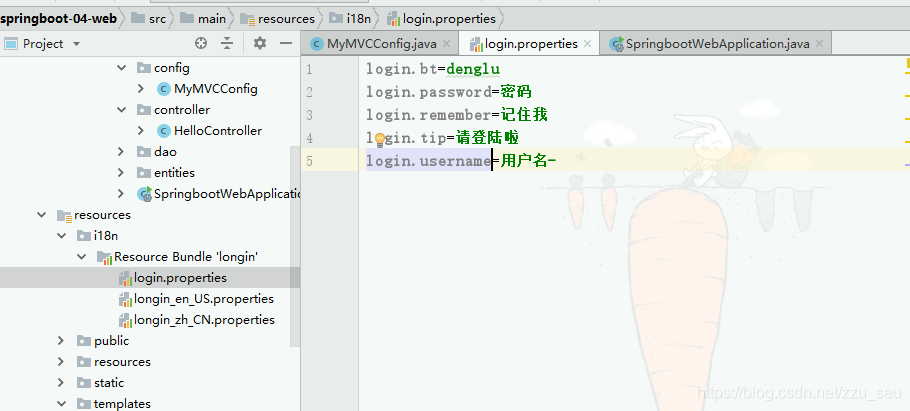
- 在配置文件中添加国际化文件的位置和基础名
spring.messages.basename=i18n.login
如果配置文件中没有配置基础名,就在类路径下找基础名为message的配置文件
- 将页面文字改为获取国际化配置,格式#{key}
    <body class="text-center">
        <form class="form-signin" action="dashboard.html">
            <img class="mb-4" src="asserts/img/bootstrap-solid.svg" alt="" width="72" height="72">
            <h1 class="h3 mb-3 font-weight-normal" th:text="#{login.tip}">Please sign in</h1>
            <label class="sr-only">Username</label>
            <input type="text" class="form-control" th:placeholder="#{login.username}" placeholder="Username" required="" autofocus="">
            <label class="sr-only">Password</label>
            <input type="password" class="form-control" th:placeholder="#{login.password}" placeholder="Password" required="">
            <div class="checkbox mb-3">
                <label>
          <input type="checkbox" value="remember-me"> [[#{login.remember}]]
        </label>
            </div>
            <button class="btn btn-lg btn-primary btn-block" type="submit" th:text="#{login.btn}">Sign in</button>
            <p class="mt-5 mb-3 text-muted">© 2017-2018</p>
            <a class="btn btn-sm">中文</a>
            <a class="btn btn-sm">English</a>
        </form>

    </body>
- 然后就可以更改浏览器语言,页面就会使用对应的国际化配置文件.
- 原理
国际化Locale(区域信息对象);
组件LocaleResolver是获取区域信息对象的组件;
在springmvc配置类WebMvcAutoConfiguration中注册了该组件:
        @Bean
        /**
          *前提是容器中不存在这个组件,
      *所以使用自己的对象就要配置@Bean让这个条件不成立(实现LocaleResolver 即可)
      */
        @ConditionalOnMissingBean

        /**
          * 如果在application.properties中有配置国际化就用配置文件的
          * 没有配置就用AcceptHeaderLocaleResolver 默认request中获取
          */
        @ConditionalOnProperty(
            prefix = "spring.mvc",
            name = {"locale"}
        )
        public LocaleResolver localeResolver() {
            if (this.mvcProperties.getLocaleResolver() == org.springframework.boot.autoconfigure.web.servlet.WebMvcProperties.LocaleResolver.FIXED) {
                return new FixedLocaleResolver(this.mvcProperties.getLocale());
            } else {
                AcceptHeaderLocaleResolver localeResolver = new AcceptHeaderLocaleResolver();
                localeResolver.setDefaultLocale(this.mvcProperties.getLocale());
                return localeResolver;
            }
        }
默认的就是根据请求头带来的区域信息获取Locale进行国际化:
    public Locale resolveLocale(HttpServletRequest request) {
        Locale defaultLocale = this.getDefaultLocale();
        if (defaultLocale != null && request.getHeader("Accept-Language") == null) {
            return defaultLocale;
        } else {
            Locale requestLocale = request.getLocale();
            List<Locale> supportedLocales = this.getSupportedLocales();
            if (!supportedLocales.isEmpty() && !supportedLocales.contains(requestLocale)) {
                Locale supportedLocale = this.findSupportedLocale(request, supportedLocales);
                if (supportedLocale != null) {
                    return supportedLocale;
                } else {
                    return defaultLocale != null ? defaultLocale : requestLocale;
                }
            } else {
                return requestLocale;
            }
        }
    }
实现点击链接切换语言
修改页面,点击连接携带语言参数
    <a class="btn btn-sm" href="?l=zh_CN">中文</a>
    <a class="btn btn-sm" href="?l=en_US">English</a>
自己实现区域信息解析器:
public class MyLocaleResolver implements LocaleResolver {

    @Override
    public Locale resolveLocale(HttpServletRequest httpServletRequest) {
        //获取请求参数中的语言
        String language = httpServletRequest.getParameter("l");
        //没带区域信息参数就用系统默认的
        Locale locale = Locale.getDefault();
        if (!StringUtils.isEmpty(language)) {
            //提交的参数是zh_CN (语言代码_国家代码)
            String[] s = language.split("_");

            locale = new Locale(s[0], s[1]);

        }

        return locale;
    }

    @Override
    public void setLocale(HttpServletRequest httpServletRequest, HttpServletResponse httpServletResponse, Locale locale) {

    }
}
在配置类中将其注册到容器中:
@Configuration
public class MyMvcConfig implements WebMvcConfigurer {

    @Override
    public void addViewControllers(ViewControllerRegistry registry) {
        registry.addViewController("/").setViewName("login");
        registry.addViewController("/index").setViewName("login");
        registry.addViewController("/index.html").setViewName("login");
    }

    @Bean
    public LocaleResolver localeResolver() {
        return new MyLocaleResolver();
    }

}
如果没有生效,请检查@Bean的那个方法的名称是否为localeResolver
实现登录功能
- 提供登录的controller
@Controller
public class LoginController {

    //@RequestMapping(value = "/user/login",method = RequestMethod.POST)
    @PostMapping("/user/login")
    //@RequestParam把请求中的指定名称的参数传递给控制器中的形参赋值
    public String login(@RequestParam("username") String username,
                        @RequestParam("password") String password,
                        Map<String,Object> map){
        if(!StringUtils.isEmpty(username) && password.equals("12345")){
            //登陆后防止表单重复提交,重定向
            return "redirect:/dashboard.html";
        }else {
            map.put("msg","用户名密码错误");
            return "index";
        }
    }
}
- 修改表单提交地址,输入框添加name值与参数名称对应
        <form class="form-signin" action="dashboard.html" th:action="@{/user/login}" method="post">
            <img class="mb-4" src="asserts/img/bootstrap-solid.svg" alt="" width="72" height="72">
            <h1 class="h3 mb-3 font-weight-normal" th:text="#{login.tip}">Please sign in</h1>
            <label class="sr-only">Username</label>
            <input type="text" name="username" class="form-control" th:placeholder="#{login.username}" placeholder="Username" autofocus="">
            <label class="sr-only">Password</label>
            <input type="password" name="password" class="form-control" th:placeholder="#{login.password}" placeholder="Password" required="">
            <div class="checkbox mb-3">
                <label>
          <input type="checkbox" value="remember-me"> [[#{login.remember}]]
        </label>
            </div>
            <button class="btn btn-lg btn-primary btn-block" type="submit" th:text="#{login.btn}">Sign in</button>
            <p class="mt-5 mb-3 text-muted">© 2017-2018</p>
            <a class="btn btn-sm" href="?l=zh_CN">中文</a>
            <a class="btn btn-sm" href="?l=en_US">English</a>
        </form>
- 由于登录失败是转发,所以页面的静态资源请求路径会不正确,使用模板引擎语法替换
<link  href="asserts/css/bootstrap.min.css" th:href="@{/asserts/css/bootstrap.min.css}" rel="stylesheet">
<!-- Custom styles for this template -->
<link href="asserts/css/signin.css" th:href="@{/asserts/css/signin.css}" rel="stylesheet">
- 防止表单重复提交,在视图解析器中增加
registry.addViewController("/dashboard.html").setViewName("dashboard");
- 添加登录失败页面显示
<h1 class="h3 mb-3 font-weight-normal" th:text="#{login.tip}">Please sign in</h1>
<!--msg存在才显示该p标签-->
<p th:text="${msg}" th:if="${not #strings.isEmpty(msg)}" style="color: red"></p>
修改页面立即生效
# 配置文件中添加禁用缓存
spring.thymeleaf.cache=false
在页面修改完成以后按快捷键ctrl+f9,重新编译;
拦截器进行登陆检查
- 实现拦截器
/**
 * 拦截器
 * @author liwenlong
 * @data 2020/6/3
 */
//登陆检查
public class LoginHandlerInterceptor implements HandlerInterceptor {
    //目标方法执行之前执行
    @Override
    public boolean preHandle(HttpServletRequest request, HttpServletResponse response, Object handler) throws Exception {
        Object user = request.getSession().getAttribute("loginUser");
        if(user==null){
            //没有登陆.拦截
            request.setAttribute("msg","请登录后查看内容");
            request.getRequestDispatcher("/index.html").forward(request,response);
            return false;
        }else {
            return true;
        }
    }

    @Override
    public void postHandle(HttpServletRequest request, HttpServletResponse response, Object handler, ModelAndView modelAndView) throws Exception {

    }

    @Override
    public void afterCompletion(HttpServletRequest request, HttpServletResponse response, Object handler, Exception ex) throws Exception {

    }
}
- 注册拦截器
@Configuration
public class MyMVCConfig implements WebMvcConfigurer {
    public void addViewControllers(ViewControllerRegistry registry) {
        registry.addViewController("/").setViewName("login");
        registry.addViewController("/index").setViewName("login");
        registry.addViewController("/index.html").setViewName("login");
        registry.addViewController("/login").setViewName("login");
        registry.addViewController("/login.html").setViewName("login");
        registry.addViewController("/dashboard.html").setViewName("dashboard");

    }
    @Bean //假如到容器中,当Springboot检测到容器中有用户定义的区域信息解析器,就不会再用默认的
    public LocaleResolver localeResolver(){
        return new MyLoacaleResolver();
    }

    //定义不拦截路径
    private static String[] excludePaths = {"/", "/index", "/index.html", "/user/login", "/asserts/**","/webjars/**"};

    //注册拦截器
    @Override
    public void addInterceptors(InterceptorRegistry registry) {
        //添加拦截与不拦截的路径
        registry.addInterceptor(new LoginHandlerInterceptor()).addPathPatterns("/**").excludePathPatterns(excludePaths);
    }
}
在spring2.0+的版本中,只要用户自定义了拦截器,则静态资源会被拦截。但是在spring1.0+的版本中,是不会拦截静态资源的。因此,在使用spring2.0+时,配置拦截器之后,我们要把静态资源的路径加入到不拦截的路径之中。
员工列表
使用rest风格:
| 普通CRUD(uri来区分操作) | RestfulCRUD | |
|---|---|---|
| 查询 | getEmp | emp—GET |
| 添加 | addEmp?xxx | emp—POST |
| 修改 | updateEmp?id=xxx&xxx=xx | emp/{id}—PUT |
| 删除 | deleteEmp?id=1 | emp/{id}—DELETE |
实验的请求架构;
| 实验功能 | 请求URI | 请求方式 |
|---|---|---|
| 查询所有员工 | emps | GET |
| 查询某个员工(来到修改页面) | emp/{id} | GET |
| 来到添加页面 | emp | GET |
| 添加员工 | emp | POST |
| 来到修改页面(查出员工进行信息回显) | emp/{id} | GET |
| 修改员工 | emp | PUT |
| 删除员工 | emp/{id} | DELETE |
为了页面结构清晰,在template文件夹下新建emp文件夹,将list.html移动到emp文件夹下
将dao层和实体层java代码复制到项目中dao,entities
添加员工controller,实现查询员工列表的方法
@Controller
public class EmployeeController {
    @Autowired
    EmployeeDao employeeDao;
    //查询所有员工,返回列表页面
    @GetMapping("/emps")
    public String list(Model model){
        Collection<Employee> employees = employeeDao.getAll();
        //放在请求域当中
        model.addAttribute("emps","employees");
        //thymeleaf默认会拼串
        //classpath:/templates/xx.html
        return "emp/list";
    }
}
- 修改后台页面,更改左侧侧边栏,将customer改为员工列表,并修改请求路径
<li class="nav-item">
    <a class="nav-link" th:href="@{/emps}">
        <svg .....>
            ......
        </svg>
        员工列表
    </a>
</li>
- 同样emp/list页面的左边侧边栏是和后台页面一模一样的,每个都要修改很麻烦,接下来,抽取公共片段.
thymeleaf公共页面元素抽取
语法
~{templatename::selector}:模板名::选择器
~{templatename::fragmentname}:模板名::片段名
官方模板:
1、抽取公共片段
<div th:fragment="copy">
© 2011 The Good Thymes Virtual Grocery
</div>
2、引入公共片段
<div th:insert="~{footer :: copy}"></div>
~{templatename::selector}:模板名::选择器
~{templatename::fragmentname}:模板名::片段名
3、默认效果:
insert的公共片段在div标签中
如果使用th:insert等属性进行引入,可以不用写~{}:
行内写法可以加上:[[~{}]];[(~{})];
三种引入公共片段的th属性:
- th:insert:将公共片段整个插入到声明引入的元素中
- th:replace:将声明引入的元素替换为公共片段
- th:include:将被引入的片段的内容包含进这个标签中
/*公共片段*/
<footer th:fragment="copy">
© 2011 The Good Thymes Virtual Grocery
</footer>
/*引入方式*/
<div th:insert="footer :: copy"></div>
<div th:replace="footer :: copy"></div>
<div th:include="footer :: copy"></div>
/*效果*/
<div>
<footer>
© 2011 The Good Thymes Virtual Grocery
</footer>
</div>
<footer>
© 2011 The Good Thymes Virtual Grocery
</footer>
<div>
© 2011 The Good Thymes Virtual Grocery
</div>
后台页面抽取
将后台主页中的顶部导航栏作为片段,在list页面引入
dashboard.html:
        <nav th:fragment="topbar" class="navbar navbar-dark sticky-top bg-dark flex-md-nowrap p-0">
            <a class="navbar-brand col-sm-3 col-md-2 mr-0" href="http://getbootstrap.com/docs/4.0/examples/dashboard/#">Company name</a>
            <input class="form-control form-control-dark w-100" type="text" placeholder="Search" aria-label="Search">
            <ul class="navbar-nav px-3">
                <li class="nav-item text-nowrap">
                    <a class="nav-link" href="http://getbootstrap.com/docs/4.0/examples/dashboard/#">Sign out</a>
                </li>
            </ul>
        </nav>
list.html:
<body>

<div th:replace="dashboard::topbar"></div>

......
使用选择器的方式 抽取左侧边栏代码
dashboard.html:
<div class="container-fluid">
    <div class="row">
        <nav id="sidebar" class="col-md-2 d-none d-md-block bg-light sidebar" ......
list.html:
<div class="container-fluid">
    <div class="row">
    	<!--引入侧边栏-->
        <div th:replace="dashboard::#sidebar"></div>
        ......
引入片段传递参数
实现点击当前项高亮
将dashboard.html中的公共代码块抽出为单独的html文件,放到commos文件夹下
在引入代码片段的时候可以传入参数,然后在sidebar代码片段模板中判断当前点击的链接。
语法:
~{templatename::selector(变量名=值)}

/*或者在定义代码片段时,定义参数*/
<nav th:fragment="topbar(A,B)"
/*引入时直接传递参数*/
~{templatename::fragmentname(A值,B值)}
topbar.html
<!doctype html>
<html lang="en" xmlns:th="http://www.thymeleaf.org">
<body>
<nav th:fragment="topbar" class="navbar navbar-dark sticky-top bg-dark flex-md-nowrap p-0">
    <a class="navbar-brand col-sm-3 col-md-2 mr-0" href="http://getbootstrap.com/docs/4.0/examples/dashboard/#">Company
        name</a>
    <input class="form-control form-control-dark w-100" type="text" placeholder="Search" aria-label="Search">
    <ul class="navbar-nav px-3">
        <li class="nav-item text-nowrap">
            <a class="nav-link" href="http://getbootstrap.com/docs/4.0/examples/dashboard/#">Sign out</a>
        </li>
    </ul>
</nav>
</body>
</html>
sidebar.html
<!DOCTYPE html>
<html lang="en" xmlns:th="http://www.thymeleaf.org">
<head>
    <meta charset="UTF-8">
    <title>Title</title>
</head>
<body>
<nav id="sidebar" class="col-md-2 d-none d-md-block bg-light sidebar">
    <div class="sidebar-sticky">
        <ul class="nav flex-column">
            <li class="nav-item">
                <a class="nav-link active" th:class="${currentURI}=='main.html'?'nav-link active':'nav-link'" th:href="@{/main.html}">
      .....
</body>
</html>
然后在dashboard.html和list.html中引入
<body>
<div th:replace="commons/topbar::topbar"></div>
<div class="container-fluid">
    <div class="row">
        <div th:replace="commons/sidebar::#sidebar(currentURI='main.html')"></div>
        ......
<body>
<div th:replace="commons/topbar::topbar"></div>

<div class="container-fluid">
    <div class="row">
        <div th:replace="commons/sidebar::#sidebar(currentURI='emps')"></div>
        ......
- 显示员工数据,添加增删改按钮
        <main role="main" class="col-md-9 ml-sm-auto col-lg-10 pt-3 px-4">
            <h2>
                <button class="btn btn-sm btn-success">添加员工</button>
            </h2>
            <div class="table-responsive">
                <table class="table table-striped table-sm">
                    <thead>
                    <tr>
                        <th>员工号</th>
                        <th>姓名</th>
                        <th>邮箱</th>
                        <th>性别</th>
                        <th>部门</th>
                        <th>生日</th>
                        <th>操作</th>
                    </tr>
                    </thead>
                    <tbody>
                    <tr th:each="emp:${emps}">
                        <td th:text="${emp.id}"></td>
                        <td th:text="${emp.lastName}"></td>
                        <td th:text="${emp.email}"></td>
                        <td th:text="${emp.gender}==1?'男':'女'"></td>
                        <td th:text="${emp.department.departmentName}"></td>
                        <td th:text="${#dates.format(emp.birth,'yyyy-MM-dd')}"></td>
                        <td>
                            <button class="btn btn-sm btn-primary">修改</button>
                            <button class="btn btn-sm btn-danger">删除</button>
                        </td>
                    </tr>
                    </tbody>
                </table>
            </div>
        </main>