一、ElasticSearch介绍
官网:https://www.elastic.co/cn/
安装es:https://blog.csdn.net/promsing/article/details/122722302
1.1 简单介绍
- ElasticSearch 6.x版本和7.x版本使用差别挺大的。
- ES是一个基于lucene的一个分布式全文检索引擎(高可用,实时存储检索数据);
- ES的目的:通过RESTFUL api 来隐藏lucene的复杂性,从而让全文检索变得简单;
- 在ES中索引就是数据库
1.2 es和solr的区别
| 区别 | es | solr |
|---|---|---|
| api | restful api | web-service api |
| 大数据 | 效率高 | 效率一般 |
| 实时查询 | 支持 | 不支持 |
1.3 ES的核心概念
ElasticSearch是面向文档的,只要按了ES那就是一个集群
ES与数据库对比
| DB | ES |
|---|---|
| 数据库database | 索引 indices-----相当于文档集合 |
| 表tables | 类型types-----将被弃用 |
| 行rows | 文档document |
| 字段columns | 字段fields |
- es中的数据一切都是json格式。
- 索引和搜索数据的最小单位就是文档
- 文档其实就是一条条数据
- es底层是使用倒排索引
(假如有三个文档,会把每个文档拆分成独立的不重复的词,然后假如搜索 to forever,to在文1和文2中都有,forever只要文1有,那么文1的权重score就比文2的权重高,从而文1匹配度更高,文档3会直接被过滤掉不搜索)
1.4 查出数据的解释

took:查询花费时间,单位是毫秒
 time_out:是否超时
 _shards:分片信息
 hits:搜索结果总览对象
   total:搜索到的总条数
   max_score:所有结果中文档得分的最高分
   hits:搜索结果的文档对象数组,每个元素是一条搜索到的文档信息
     _index:索引库
     _type:文档类型
     _id:文档id
     _score:文档得分
     _source:文档的源数据
二、ElasticSearch安装
从 https://www.elastic.co/ 官网(拉倒最下面)下载安装包
2.1 windows版本的安装
https://www.elastic.co/cn/downloads/past-releases#elasticsearch
jdk至少得是1.8+,es的版本和java的核心jar包要一致;
2.1.1 安装ElasticSearch
压缩包:elasticsearch-7.12.1
解压即使用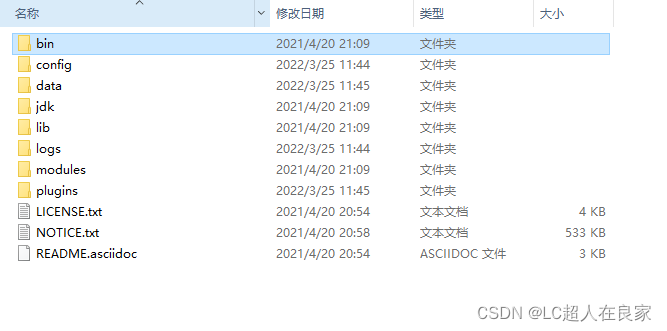
bin:启动文件
config:配置文件
log4j2:日志配置文件
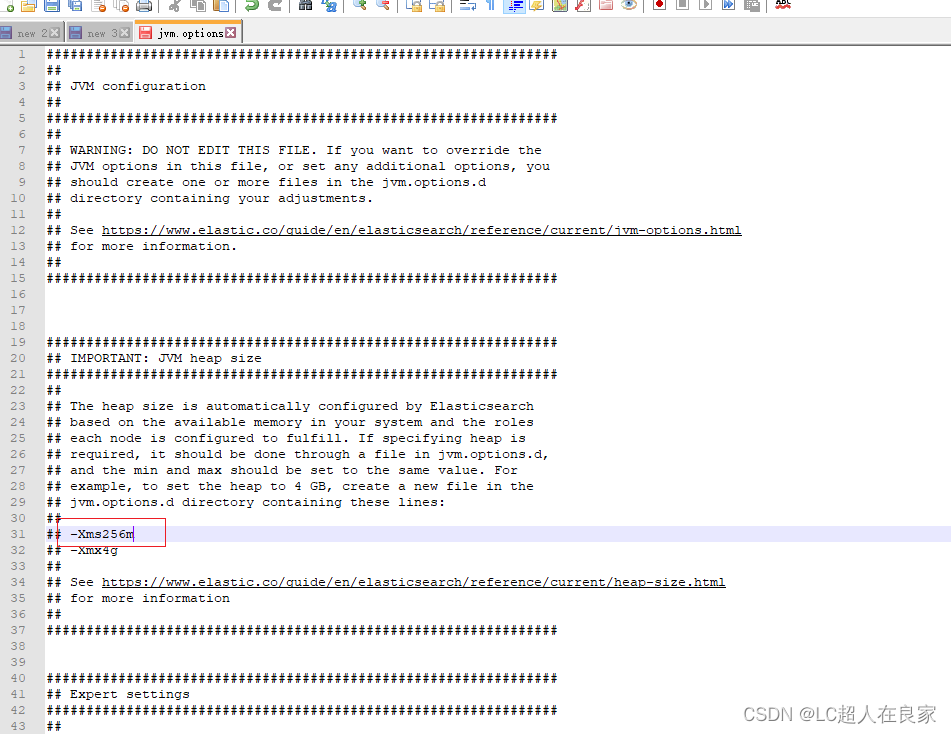
jvm.options:java虚拟机相关的配置
elasticsearch.yml:elasticsearch的配置文件!默认9200端口!跨域!
lib:相关jar包
logs:日志
modules:功能模块
plugins:插件!
- 修改jvm配置文件-jvm.options的内存使用
根据自己的实际情况设置
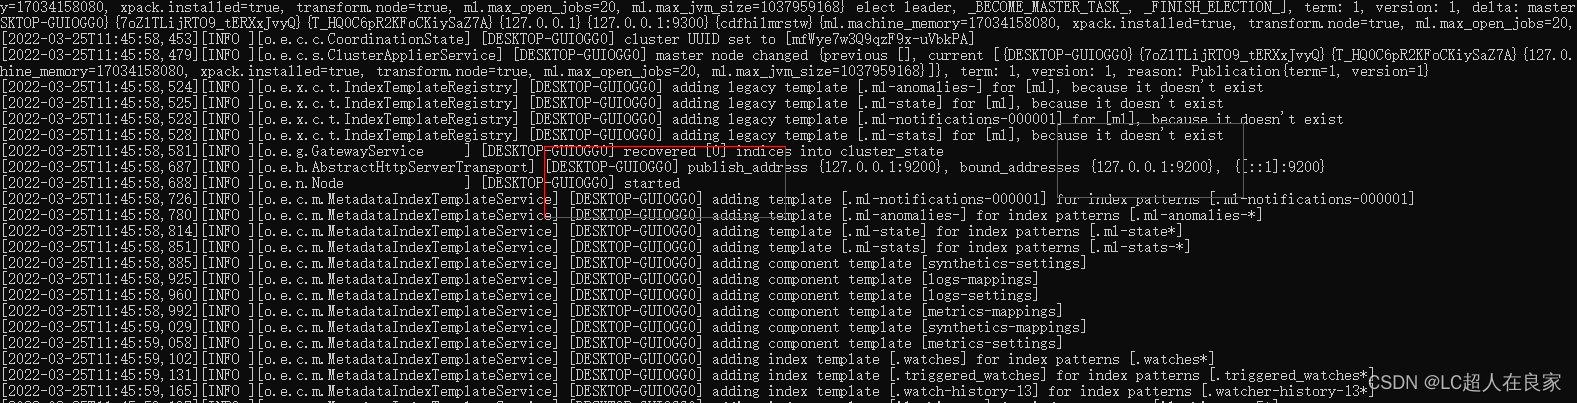
- 启动,打开bin’目录,双击elasticsearch.bat
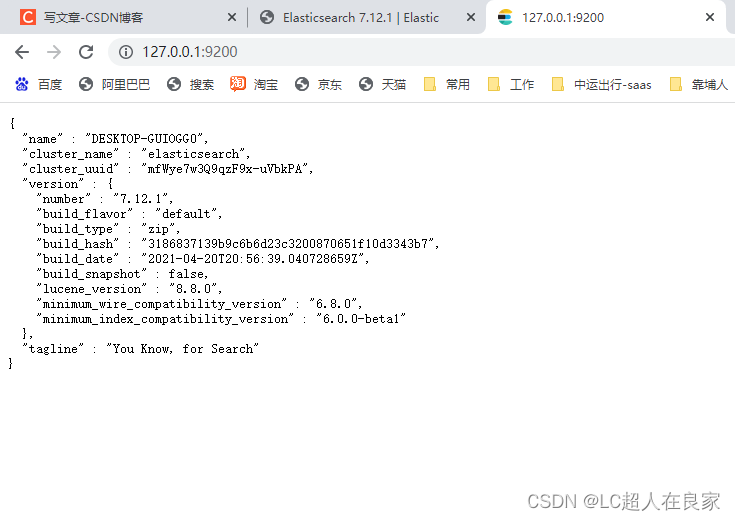
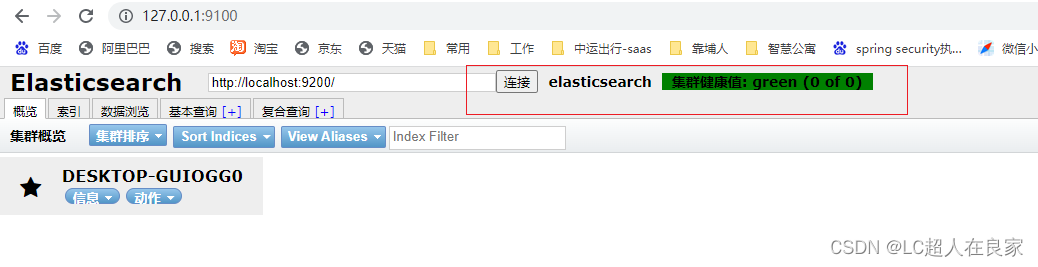
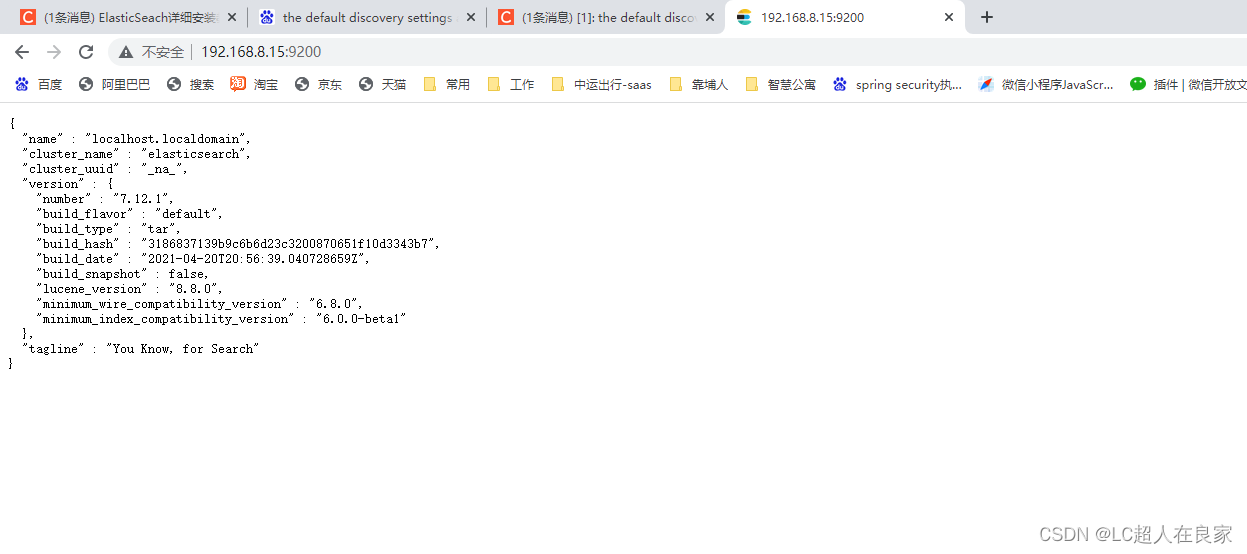
- 访问测试 http://127.0.0.1:9200/
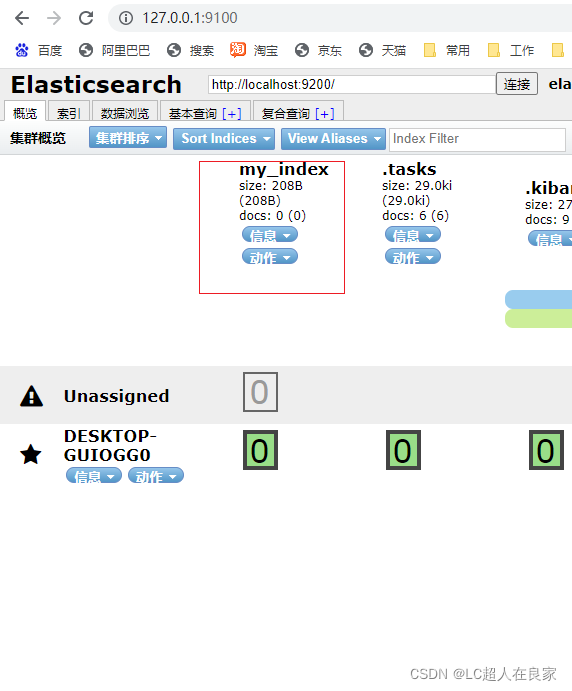
2.1.2 安装es的可视化界面head
head插件下载地址:https://github.com/mobz/elasticsearch-head/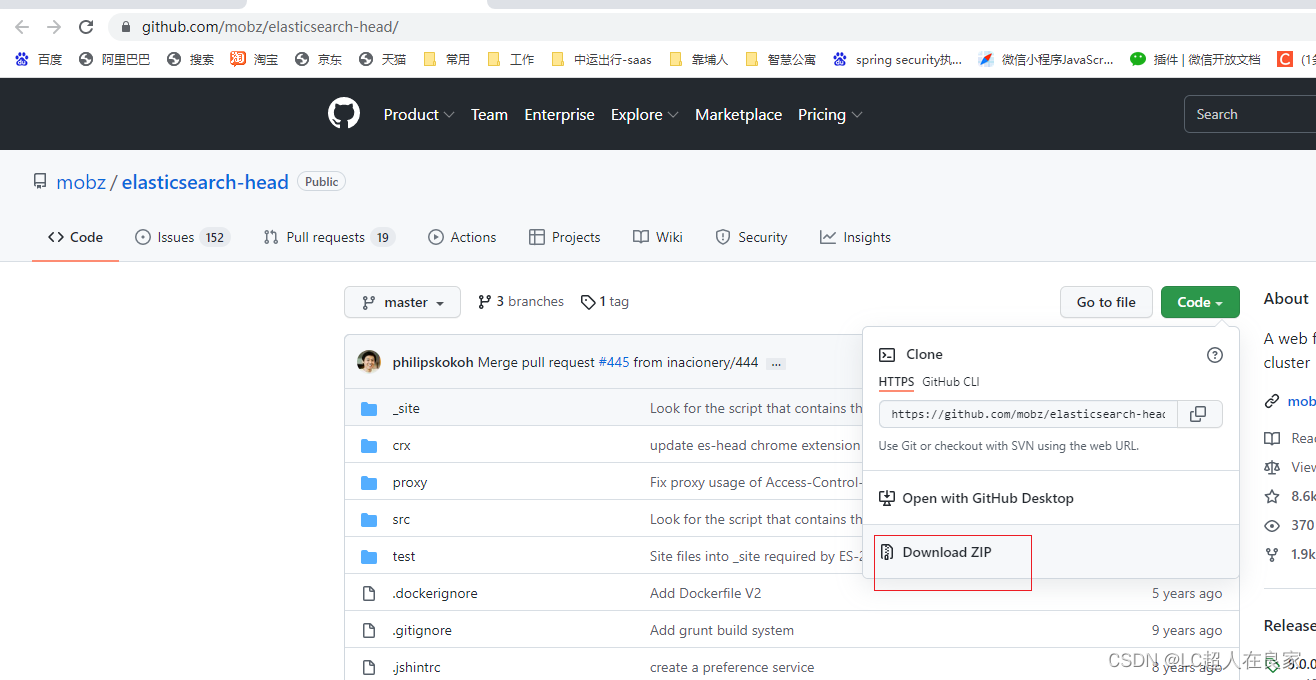

用head插件(需要前端的node.js环境),默认9100
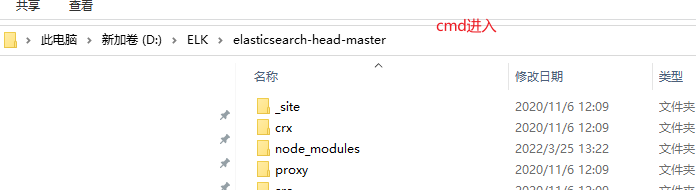
解压即使用,再用命令启动和下载依赖(npm run start,再起文件cmd进入命令窗口)
# 安装cnpm的命令
npm install -g cnpm -registry=https://registry.npm.taobao.org
# cnpm下载资源更快
cnpm install
npm run start
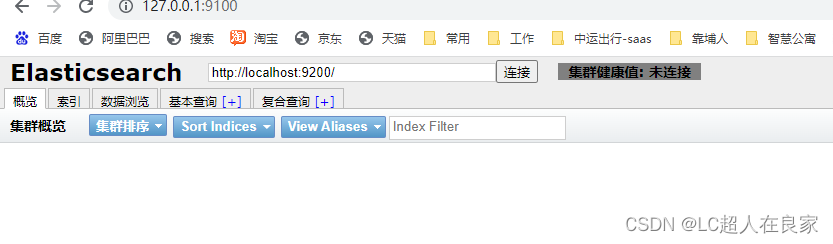
注意:此时会有9100访问9200的跨域问题
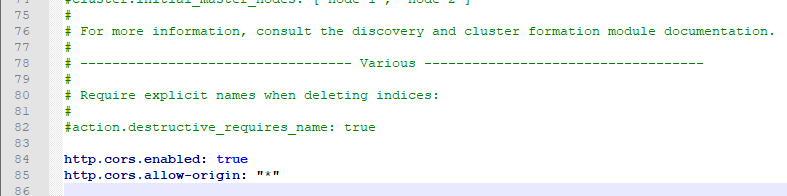
在es的配文elasticSearch.yml中设置跨域
// 支持跨域 + // 支持所有人访问
http.cors.enabled: true
http.cors.allow-origin: "*"
在重启es,此时在http://127.0.0.1:9001/的可视化界面就可以访问http://127.0.0.1:9002
2.1.3 ELK介绍
ELK是elaseticsearch(搜索)、logstash(中央数据流)、kibana(展示) 三大开源框架的简称,多用于日志分析。
Logstash是ELK的中央数据流引擎,用于从不同目标(文件/数据存储/MQ)收集的不同格式数据,经过过滤后支持输出到不同目的地(件/MQ/redis/elasticsearch/kafka等)。Kibana可以将elasticsearch的数据通过友好的页面展示出来,提供实时分析的功能。市面上很多开发只要提到ELK能够一致说出它是一个日志分析架构技术栈总称,但实际上ELK不仅仅适用于日志分析,它还可以支持其它任何数据分析收集的场景,日志分析和收集只是更具有代表性,并非唯一性。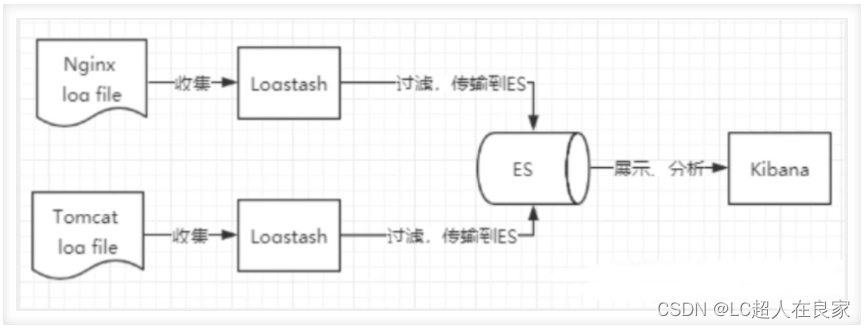
2.1.4 kibana安装
官网:https://www.elastic.co/cn/kibana/
kibana的版本要与ElasticSearch一致,解压即使用;
①启动,bin中的kibana.bat双击
②http://localhost:5601 访问测试
③使用,在左边有一个扳手一样的开发工具,在console上面进行操作编写
④汉化界面,在kibana的config文件夹下的kibana.yml上修改,在最后面加上 i18n.locale: “zh-CN”
⑤ 重启kibana即可
选择开发工具Dev Tools,点击控制台
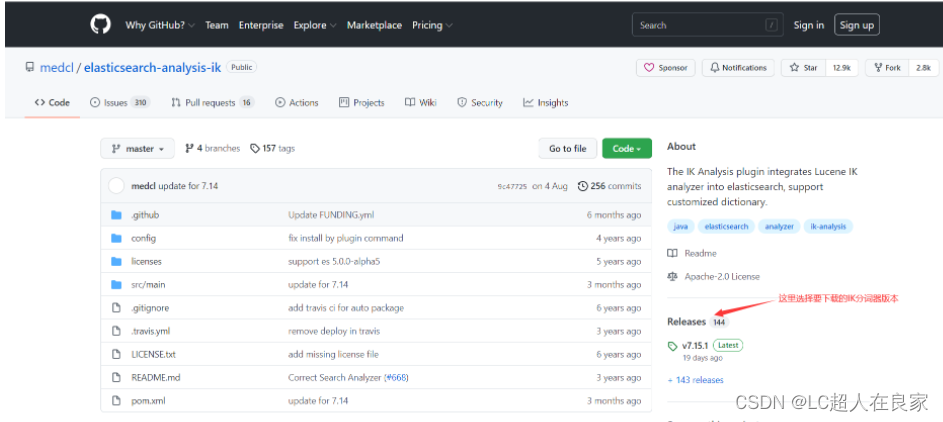
2.1.5 IK分词器的安装
分词:把字段文字划分成一个个关键字
IK提供了两个分词算法:(是一个中文分词器)
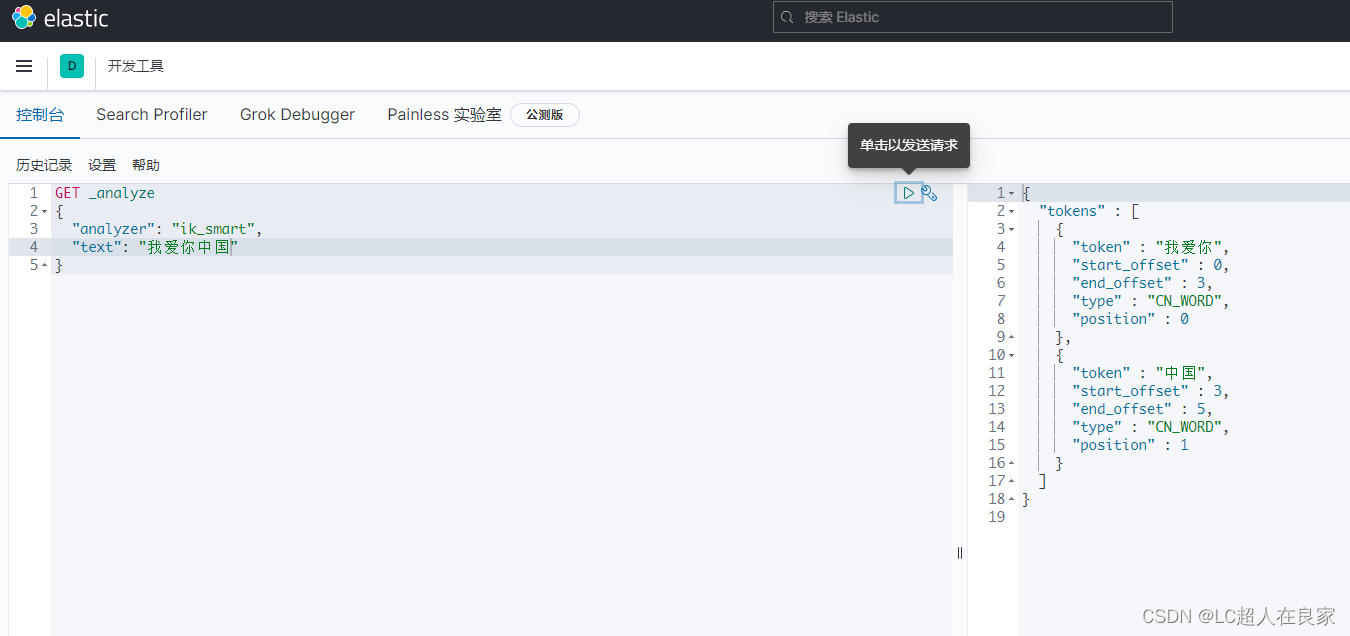
- ik_smart 最小切分
- ik_max_word 最细颗粒划分
下载地址:https://github.com/medcl/elasticsearch-analysis-ik 注意要和es版本一致
下载完成之后,解压放在elasticsearch的plugins文件(自建一个ik文件夹)下
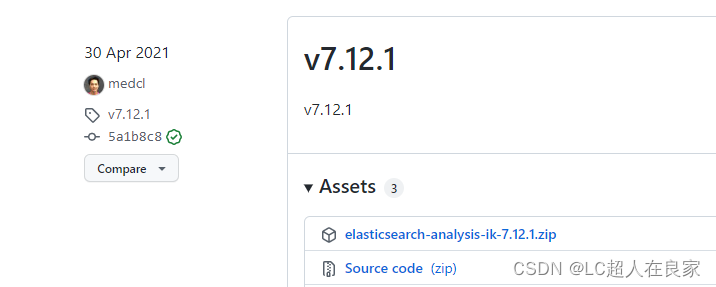
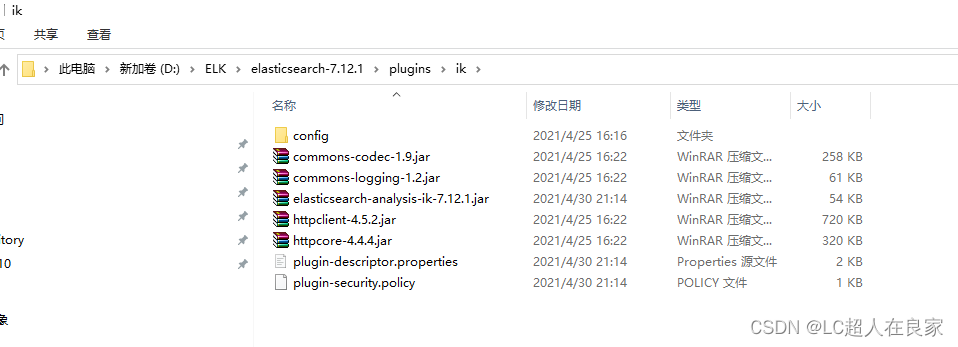
安装:把ik的压缩包,解压到es下的plugins文件中(自建一个ik文件夹),重启es
测试:
GET _analyze
{
  "analyzer": "ik_smart",
  "text": "我爱你中国"
}
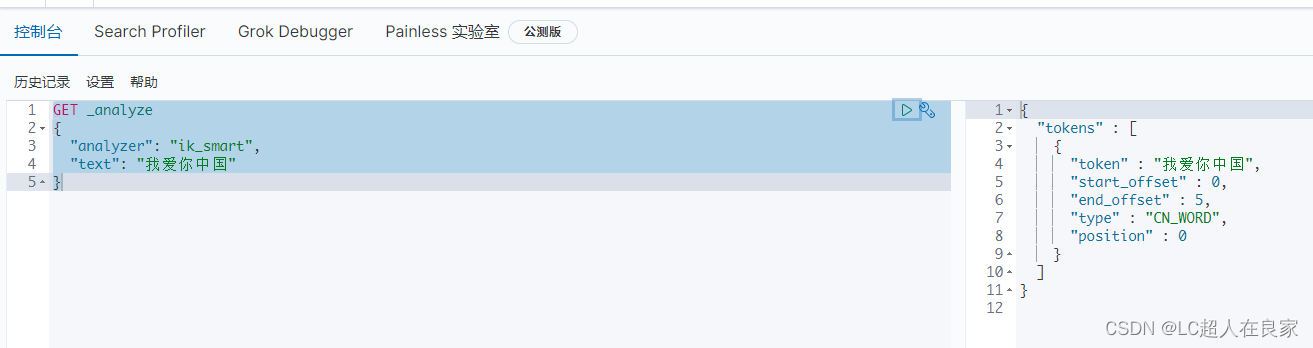
拓展:有时候,自己造的词不想被拆分,就需要自己加到分词器的字典中
第一步:在es的plugins/ik/config 下创建mytext.dic字段文档(写入 我爱你中国,且是 UTF8 编码)
第二步:打开IKAnalyzer.cfg.xml,然后 设置
<entry key="ext_dict">mytext.dic</entry>
重启es
2.2 linux版本的安装
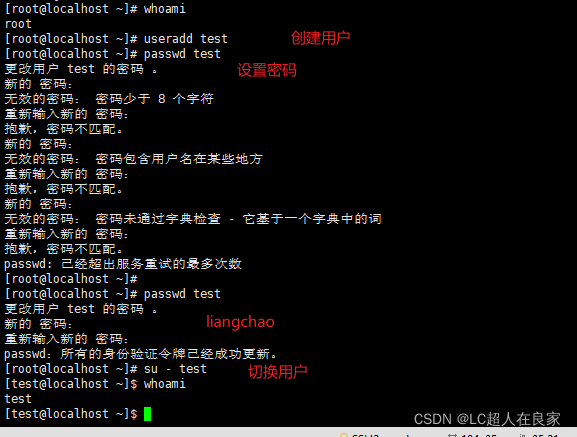
出于安全考虑,elasticsearch默认不允许以root账号运行。
2.2.1 ES 无法使用root用户安装,需要使用普通用户。
# 创建用户
useradd leyou

# 设置密码
passwd leyou

# 切换用户
su - leyou
2.2.2 解压ElasticSeach的安装包
下载:https://www.elastic.co/cn/downloads/past-releases/elasticsearch-7-12-1
# 解压缩安装包
tar -zxvf elasticsearch-7.12.1-linux-aarch64.tar.gz

# 将文件夹重命名
mv elasticsearch-7.12.1/ elasticsearch

# 进入config目录
cd elasticsearch/
cd config/
2.2.3 修改配置文件
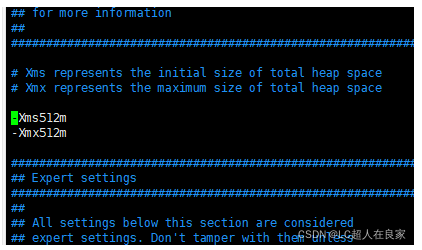
2.2.3.1 修改配置项jvm.options
# 编辑jvm.options:

vim jvm.options

# 默认配置如下:

-Xms1g
-Xmx1g

内存占用太多了,我们调小一些:

-Xms512m
-Xmx512m
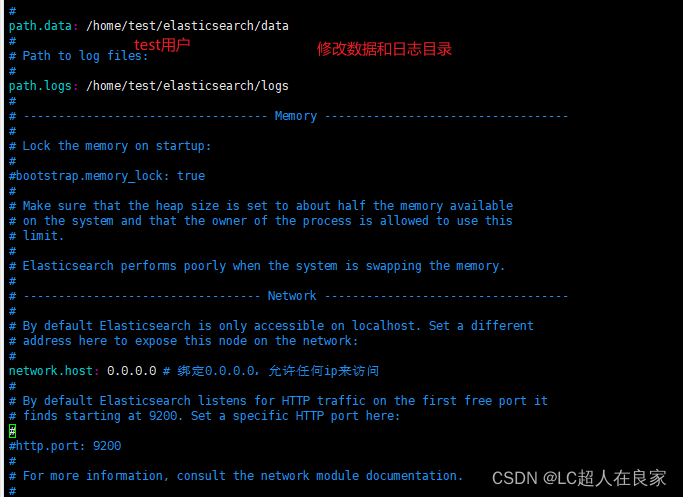
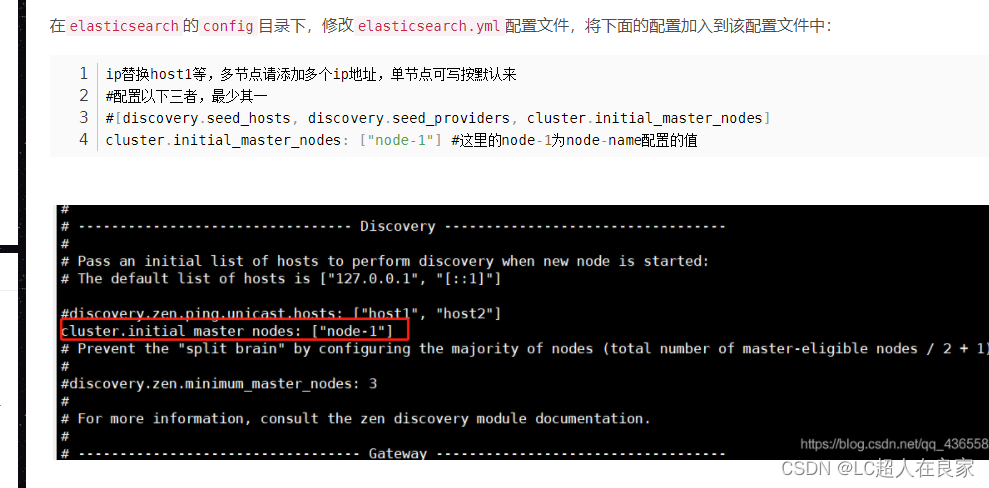
2.2.3.2 修改配置文件elasticsearch.yml
vim elasticsearch.yml
2.2.4 启动elasticsearch
进入bin目录,输入启动命令(注意得是test用户)
./elasticsearch
启动失败,配置项存在问题,需要解决。
2.2.4.1 错误情况
- 情况1:内核过低
修改elasticsearch.yml文件,在最下面添加如下配置:
bootstrap.system_call_filter: false
- 情况2:es没有权限操作挂载目录,无法绑定节点
报错日志: ElasticsearchException[failed to bind service]; nested: AccessDeniedException[/home/test/elasticsea
[root@localhost elasticsearch]# chown test:test -R ./*
用root用户输入命令,把data和logs的权限给test用户(前面创建的安装elasticsearch的用户)
- 情况3:文件权限不足
报错日志: max file descriptors [4096] for elasticsearch process likely too low, increase to at least
# 退出当前用户
exit
# 提升文件权限
vim /etc/security/limits.conf

# 添加下面的内容:

* soft nofile 65536

* hard nofile 131072

* soft nproc 4096

* hard nproc 4096
- 情况4:线程数不够
报错日志:max number of threads [1024] for user [leyou] is too low, increase to at least [4096]
# 修改线程数
vim /etc/security/limits.d/90-nproc.conf
或者 vim /etc/security/limits.d/20-nproc.conf

# 将soft nproc 改为:

* soft nproc 4096

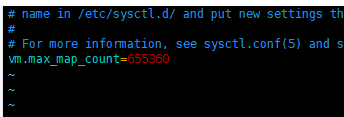
- 情况5:进程虚拟内存
报错日志: max virtual memory areas vm.max_map_count [65530] likely too low, increase to at least [262144]
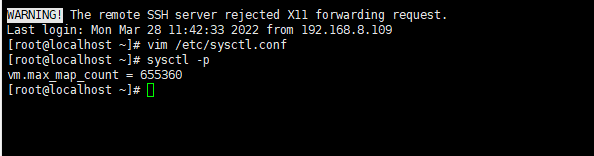
vim /etc/sysctl.conf

# 添加下面内容:
vm.max_map_count=655360

# 然后执行命令:
sysctl -p
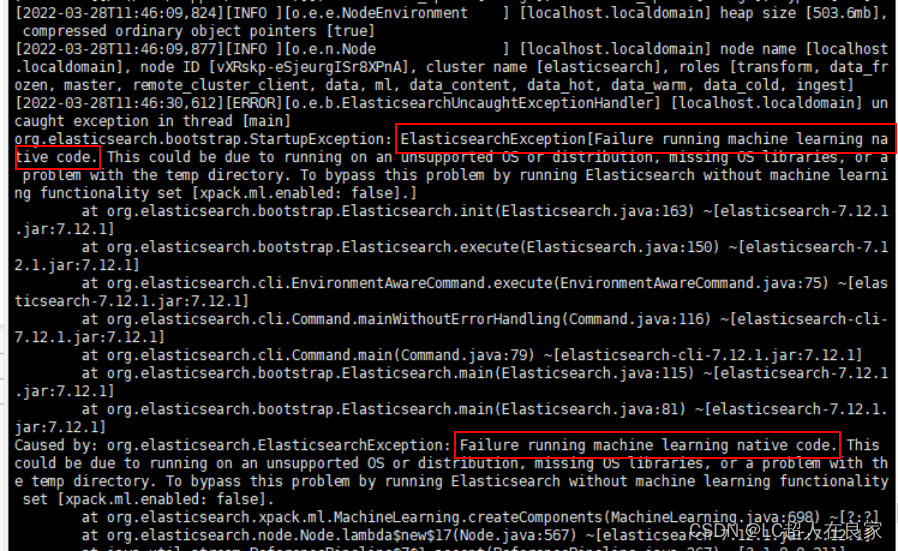
- 情况6:Efailure running machine learning native code
打开config目录下的elasticsearch.yml,添加如下一行配置:
xpack.ml.enabled: false
- 情况7:综合错误,比如max什么什么
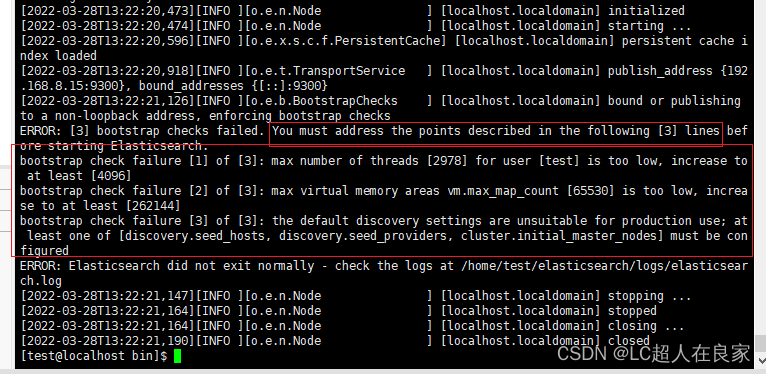
- 报错日志: max file descriptors [4096] for elasticsearch process likely too low, increase to at least
# 退出当前用户
exit
# 提升文件权限
vim /etc/security/limits.conf

# 添加下面的内容:

* soft nofile 65536

* hard nofile 131072

* soft nproc 4096

* hard nproc 4096
- 报错日志:max number of threads [1024] for user [leyou] is too low, increase to at least [4096]
# 修改线程数
vim /etc/security/limits.d/90-nproc.conf
或者 vim /etc/security/limits.d/20-nproc.conf

# 将soft nproc 改为:

* soft nproc 4096

- 报错日志: max virtual memory areas vm.max_map_count [65530] likely too low, increase to at least [262144]
vim /etc/sysctl.conf

# 添加下面内容:
vm.max_map_count=655360

# 然后执行命令:
sysctl -p

- 情况8:the default discovery settings are unsuitable for production use; at least one of [d…]
错误提示:
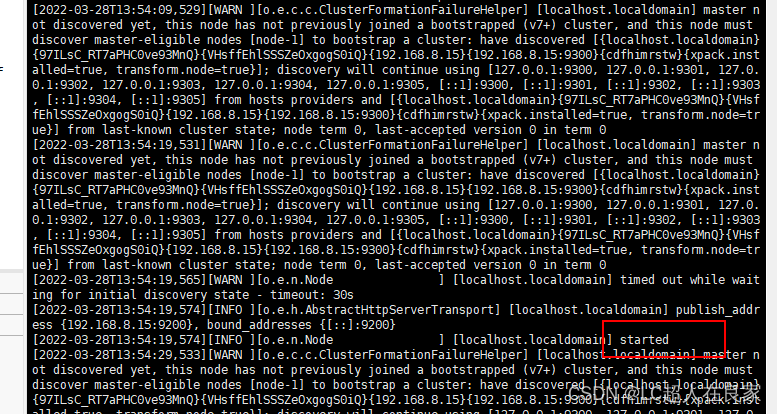
2.2.4.2 尝试启动(后台长期启动)
再次尝试启动:./elasticsearch(注意得是test用户)
注意查看9200端口开了吗?
查看防火墙状态:sudo systemctl status firewalld
开启firewall:service firewalld start
停止firewall:systemctl stop firewalld.service
查询端口是否开放:firewall-cmd --query-port=8080/tcp
开放8080端口:firewall-cmd --permanent --add-port=8080/tcp
移除端口:firewall-cmd --permanent --remove-port=8080/tcp
重启防火墙(修改配置后要重启防火墙!!!):firewall-cmd --reload
但是此时按了ctrl+z就退出启动了,停止了es,那我们如何后台启动呢
需要使用:./elasticsearch -d
这时执行的时候会出现没有权限./elasticsearch: Permission denied
需要授权执行命令:chmod +x bin/elasticsearch
再次执行./elasticsearch -d即可启动 (es的bin下面输入)
使用ps aux|grep elasticsearch可以查看是否启动
三、springboot集成ElasticSearch
3.1 依赖
<dependencies>
      <dependency>
          <groupId>org.springframework.boot</groupId>
          <artifactId>spring-boot-starter-data-elasticsearch</artifactId>
      </dependency>

 </dependencies>
3.2 配置
为es起名,和设置ip及其端口
spring:
  data:
    elasticsearch:
      cluster-name: elasticsearch
      cluster-nodes: 192.168.7.132:9300
3.3 配置类
import org.apache.http.HttpHost;
import org.elasticsearch.client.RestClient;
import org.elasticsearch.client.RestHighLevelClient;
import org.springframework.context.annotation.Bean;
import org.springframework.context.annotation.Configuration;

/**
 * ES配置类
 *
 * @author lc
 * @version 1.0
 * @date 2022/3/25 10:53
 */
@Configuration
public class ElasticSearchClientConfig {

    @Bean
    public RestHighLevelClient restHighLevelClient() {
        RestHighLevelClient client = new RestHighLevelClient(
                RestClient.builder(new HttpHost("127.0.0.1", 9200, "http")));
        return client;
    }
}
3.4 使用
在哪里使用就注入使用
    @Autowired
    private RestHighLevelClient restHighLevelClient;
注意@Bean默认小写首字母的同名,若不同名需要使用@Qualifier(“名字”)
3.4.1 索引
3.4.1.1 创建索引
package com.zykj.healthcode.controller;

import com.zykj.healthcode.HealthcodeApplication;
import com.zykj.healthcode.config.ElasticSearchClientConfig;
import org.elasticsearch.client.RequestOptions;
import org.elasticsearch.client.RestHighLevelClient;
import org.elasticsearch.client.indices.CreateIndexRequest;
import org.elasticsearch.client.indices.CreateIndexResponse;
import org.junit.Test;
import org.junit.runner.RunWith;
import org.springframework.beans.factory.annotation.Autowired;
import org.springframework.boot.test.context.SpringBootTest;
import org.springframework.test.context.junit4.SpringRunner;

import java.io.IOException;

/**
 * @author lc
 * @version 1.0
 * @date 2022/3/25 15:26
 */

@SpringBootTest(classes = HealthcodeApplication.class)
@RunWith(SpringRunner.class)
public class ElasticsearchTest {

    @Autowired
    private RestHighLevelClient restHighLevelClient;

    /**
     * 创建索引
     */
    @Test
    public void test1() throws IOException {
        System.out.println("test1");

        CreateIndexRequest request = new CreateIndexRequest("my_index");
        CreateIndexResponse response = restHighLevelClient.indices().create(request, RequestOptions.DEFAULT);
        System.out.println(response);

    }

}
3.4.1.2 获取索引
 /**
     * 获取索引
     */
    @Test
    public void test2() throws IOException {
        System.out.println("test2");

        GetIndexRequest request = new GetIndexRequest("my_index");


        boolean exists = restHighLevelClient.indices().exists(request, RequestOptions.DEFAULT);
        if (exists) {
            GetIndexResponse response = restHighLevelClient.indices().get(request, RequestOptions.DEFAULT);
            System.out.println(response);
        }
    }
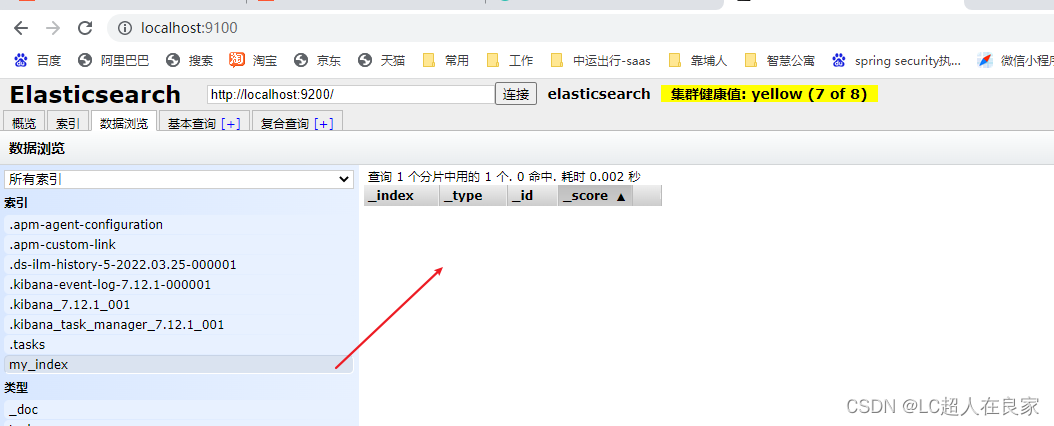
3.4.1.3 删除索引
 /**
     * 删除索引
     */
    @Test
    public void test3() throws IOException {
        System.out.println("test3");
        GetIndexRequest request = new GetIndexRequest("my_index");

        boolean exists = restHighLevelClient.indices().exists(request, RequestOptions.DEFAULT);
        DeleteIndexRequest deleteRequest = new DeleteIndexRequest("my_index");
        if (exists) {
            AcknowledgedResponse response = restHighLevelClient.indices().delete(deleteRequest, RequestOptions.DEFAULT);
        }
    }
3.4.2 文档
3.4.2.1 创建文档
引入fastjson依赖,方便把实体类转换成json字符串
 /**
     * 创建文档
     */
    @Test
    public void test4() throws IOException {
        System.out.println("test4");
        User user = new User();
        user.setId(1);
        user.setAge(18);
        user.setName("我只是一个小小的测试");

        IndexRequest request = new IndexRequest("my_index");
        // 设置规则
        request.id("1");
        request.timeout(TimeValue.timeValueSeconds(1)); // 超时1秒
        request.source(JSON.toJSONString(user), XContentType.JSON);

        // 执行请求
        IndexResponse response = restHighLevelClient.index(request, RequestOptions.DEFAULT);

    }
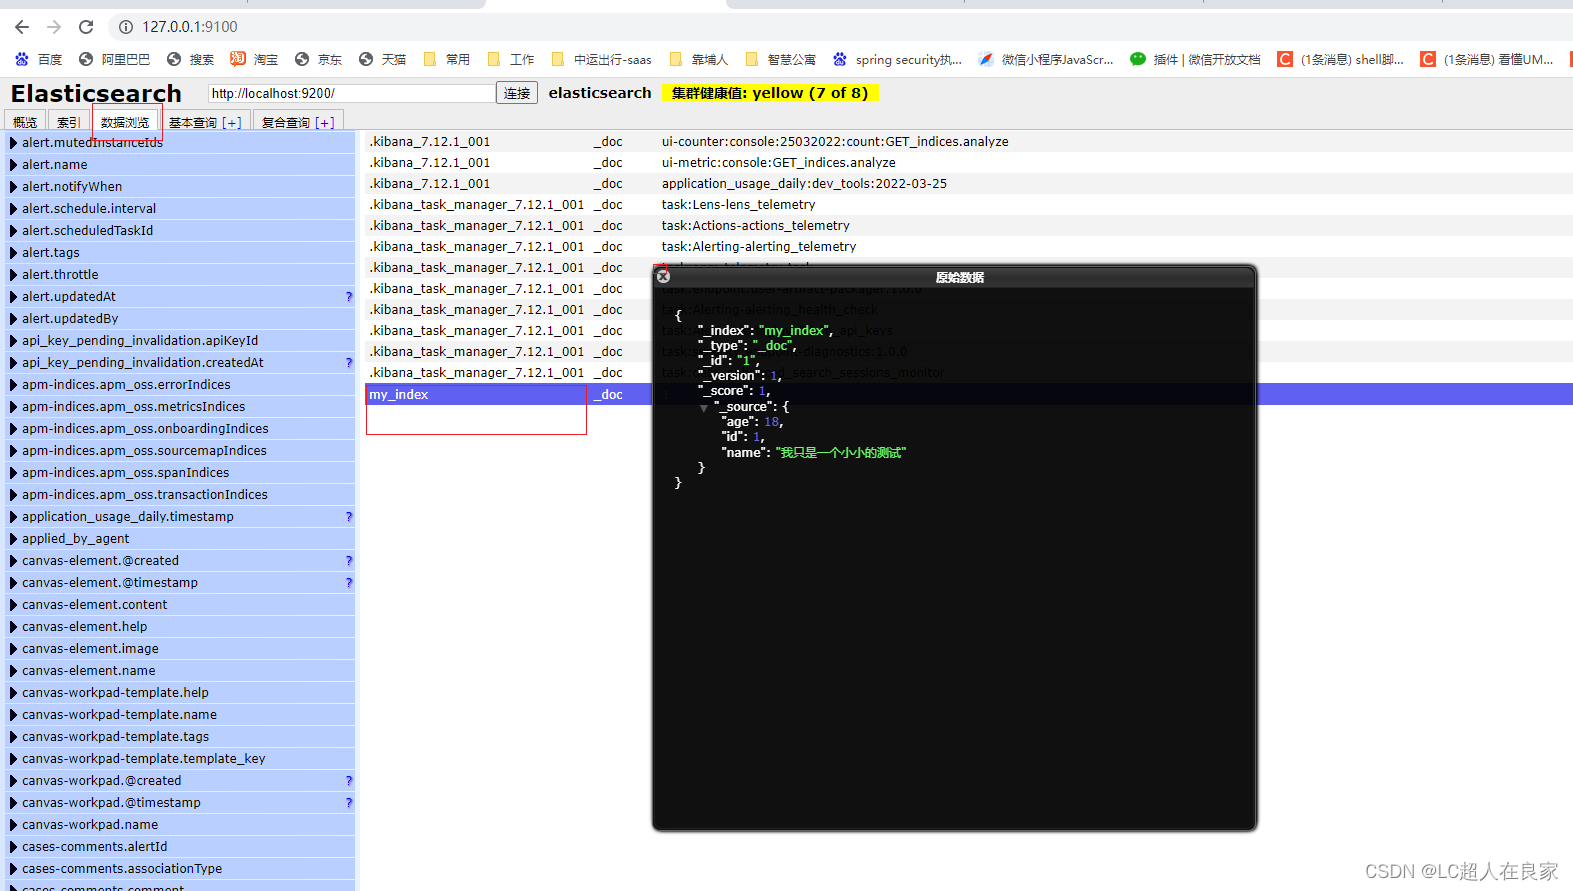
3.4.2.2 获取文档
/**
     * 获取文档
     */
    @Test
    public void test5() throws IOException {
        System.out.println("test5");
        // 获取my_index这个索引的,_id为i的文档数据
        GetRequest request = new GetRequest("my_index", "1");
        GetIndexRequest request1 = new GetIndexRequest("my_index");

        // 执行请求
        boolean exists = restHighLevelClient.indices().exists(request1, RequestOptions.DEFAULT);
        if (exists) {
            GetResponse response = restHighLevelClient.get(request, RequestOptions.DEFAULT);
            System.out.println(response.toString());
            System.out.println("================");
            System.out.println(response.getSource());
        }

    }
输出
test5
{"_index":"my_index","_type":"_doc","_id":"1","_version":1,"_seq_no":0,"_primary_term":1,"found":true,"_source":{"age":18,"id":1,"name":"我只是一个小小的测试"}}
===================
{name=我只是一个小小的测试, id=1, age=18}
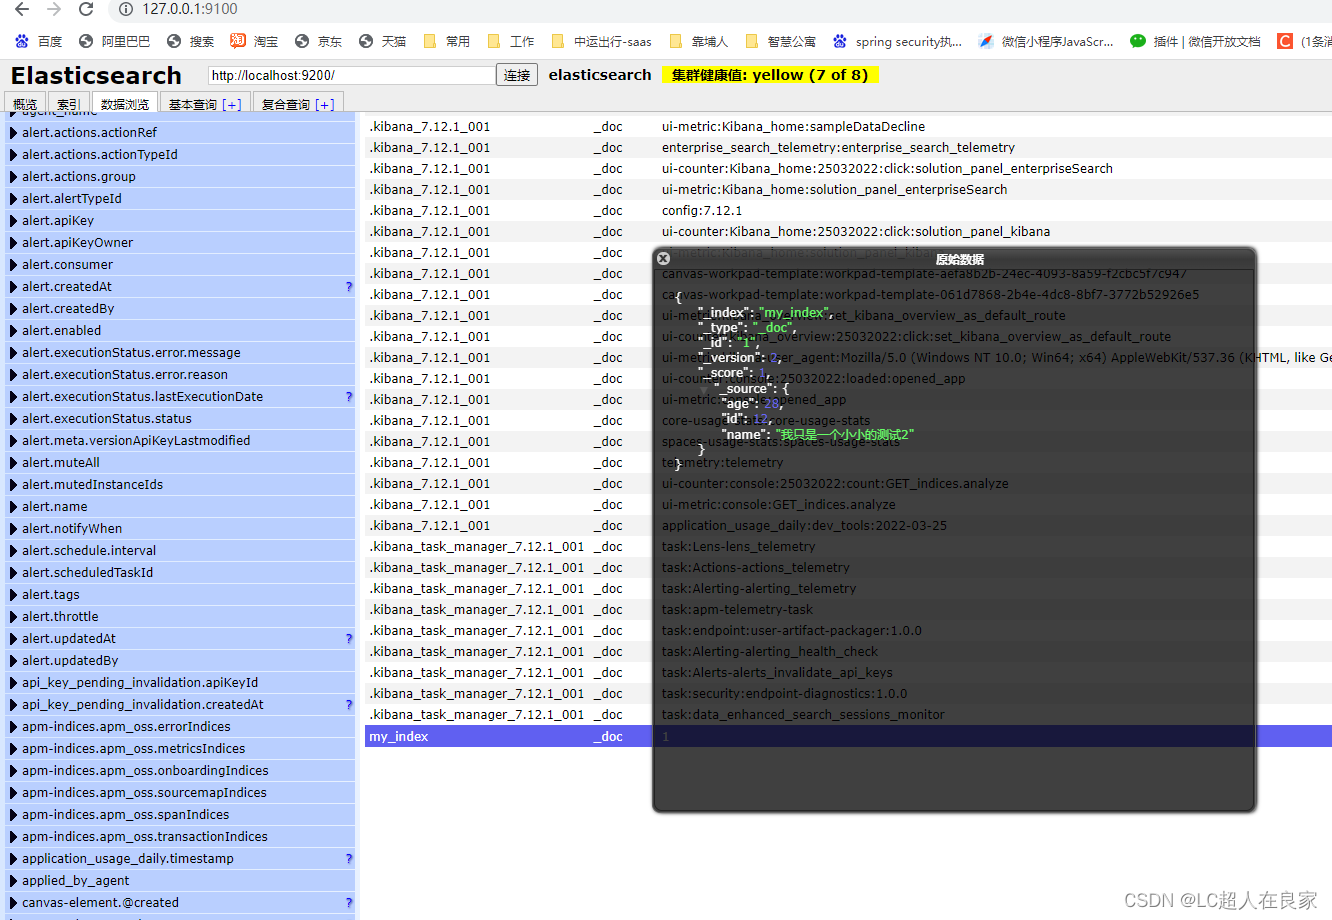
3.4.2.3 更新文档
   /**
     * 更新文档
     */
    @Test
    public void test6() throws IOException {
        System.out.println("test6");
        // 获取my_index这个索引的,_id为i的文档数据
        UpdateRequest request = new UpdateRequest("my_index","1");
        request.timeout("5s");

        User user = new User();
        user.setId(12);
        user.setAge(28);
        user.setName("我只是一个小小的测试2");
        request.doc(JSON.toJSONString(user),XContentType.JSON);

        // 执行请求
        UpdateResponse response = restHighLevelClient.update(request, RequestOptions.DEFAULT);
    }
3.4.2.4 删除文档
/**
     * 删除文档
     */
    @Test
    public void test7() throws IOException {
        System.out.println("test7");
        // 获取my_index这个索引的,_id为i的文档数据
        DeleteRequest request = new DeleteRequest("my_index", "1");
        request.timeout("1s");

        // 执行请求
        restHighLevelClient.delete(request, RequestOptions.DEFAULT);
    }
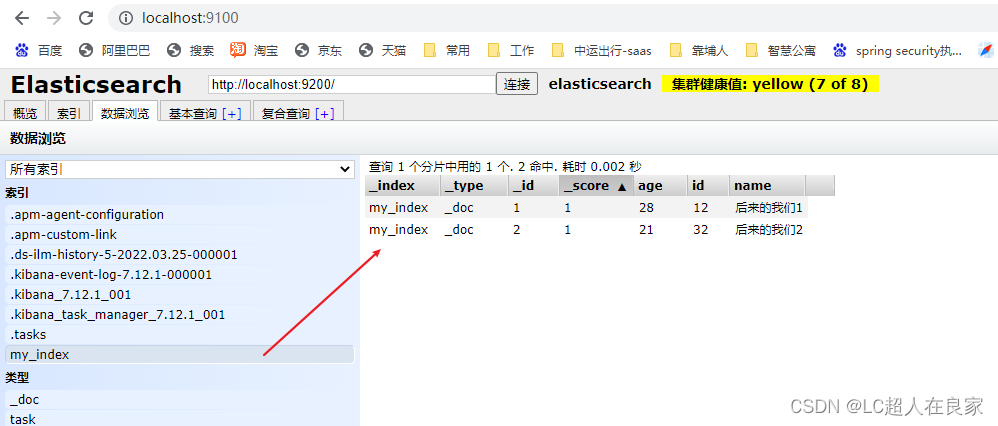
3.4.2.5 批量插入(删除,修改)文档数据
 /**
     * 批量操作文档
     */
    @Test
    public void test8() throws IOException {
        System.out.println("test8");
        BulkRequest request = new BulkRequest();
        request.timeout("10s");
        List<User> list = new ArrayList<>();

        User user1 = new User();
        user1.setId(12);
        user1.setAge(28);
        user1.setName("后来的我们1");
        User user2 = new User();
        user2.setId(32);
        user2.setAge(21);
        user2.setName("后来的我们2");

        list.add(user1);
        list.add(user2);

        for (int i = 0; i < list.size(); i++) {
            // 执行请求
            request.add(
                    new IndexRequest("my_index")
                            .id("" + (i + 1))
                            .source(JSON.toJSONString(list.get(i)), XContentType.JSON)
            );
        }
        restHighLevelClient.bulk(request, RequestOptions.DEFAULT);
    }
request.add()这个是新增,update,delete等是修改、删除。
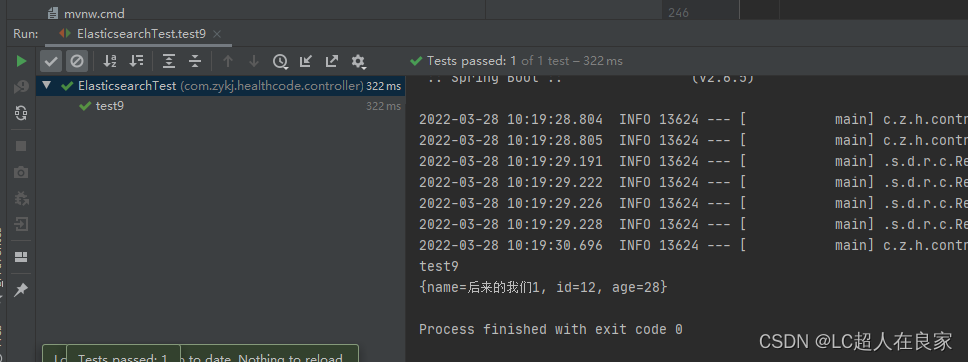
3.4.3 文档查询
 /**
     * 查询操作文档
     */
    @Test
    public void test9() throws IOException {
        System.out.println("test9");
        // 构建搜索条件
        SearchRequest request = new SearchRequest("my_index");
        SearchSourceBuilder builder = new SearchSourceBuilder();
        builder.query(QueryBuilders.termQuery("age", 28));
        builder.timeout(new TimeValue(60, TimeUnit.SECONDS));

        // SearchSourceBuilder可以高亮,分页,条件等
        builder.from(0);
        builder.size(10);

        request.source(builder);

        //分页
        SearchResponse response = restHighLevelClient.search(request, RequestOptions.DEFAULT);

        // 查看
        if (null != response) {
            SearchHit[] hits = response.getHits().getHits();
            for (int i = 0; i < hits.length; i++) {
                SearchHit documentFields = hits[i];
                System.out.println(documentFields.getSourceAsMap());
            }
        }


    }
请不要吝啬你发财的小手,点赞收藏评论,谢谢!
请不要吝啬你发财的小手,点赞收藏评论,谢谢!
请不要吝啬你发财的小手,点赞收藏评论,谢谢!