目的:通过vue实例调用$confirm函数弹出确认框。import导入函数使用也需要支持。
分析功能
- 实现组件基础结构和样式。
- 实现函数式调用组件方式和完成交互。
- 加上打开时动画效果。
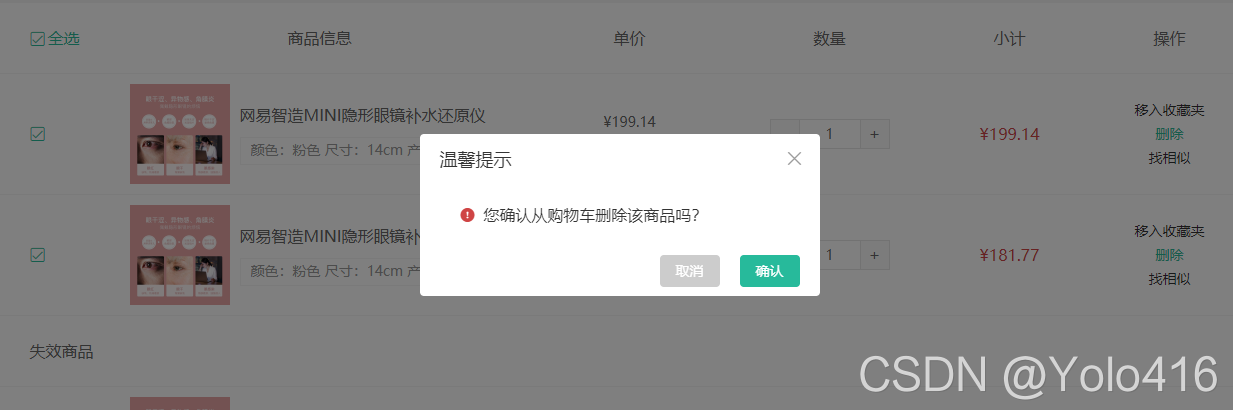
- 给购物车删除加上确认框。
- 给vue挂载原型函数$confirm
实现函数式调用组件方式和完成交互

封装确认框组件
xtx-confirm.vue
<template>
  <div class="xtx-confirm">
    <div class="wrapper" ref="target">
      <div class="header">
        <h3>{{title}}</h3>
        <a href="JavaScript:;" class="iconfont icon-close-new" @click="cancelCallback"></a>
      </div>
      <div class="body">
        <i class="iconfont icon-warning"></i>
        <span>{{text}}</span>
      </div>
      <div class="footer">
        <XtxButton @click="cancelCallback" size="mini" type="gray">取消</XtxButton>
        <XtxButton @click="confirmCallback" size="mini" type="primary">确认</XtxButton>
      </div>
    </div>
  </div>
</template>

<script>
// 注意:当前组件不是在 #app 下进行渲染,无法使用 #app 下的环境(全局组件,全局指令,原型属性函数)
import XtxButton from '@/components/library/xtx-button.vue'
import { ref } from 'vue'
import { onClickOutside } from '@vueuse/core'
export default {
  name: 'XtxConfirm',
  components: { XtxButton },
  props: {
    title: {
      type: String,
      default: '温馨提示'
    },
    text: {
      type: String,
      default: ''
    },
    // 确认按钮
    confirmCallback: {
      type: Function,
      default: () => {}
    },
    // 取消按钮
    cancelCallback: {
      type: Function,
      default: () => {}
    }
  },
  setup (props) {
    // 点击 target 目标元素外部相当于点击了取消
    const target = ref(null)
    onClickOutside(target, () => {
      props.cancelCallback()
    })
    return { target }
  }
}
</script>

<style scoped lang="less">
.xtx-confirm {
  position: fixed;
  left: 0;
  top: 0;
  width: 100%;
  height: 100%;
  z-index: 8888;
  background: rgba(0, 0, 0, 0.5);
  .wrapper {
    width: 400px;
    background: #fff;
    border-radius: 4px;
    position: absolute;
    top: 50%;
    left: 50%;
    transform: translate(-50%, -50%);
    .header,
    .footer {
      height: 50px;
      line-height: 50px;
      padding: 0 20px;
    }
    .body {
      padding: 20px 40px;
      font-size: 16px;
      .icon-warning {
        color: @priceColor;
        margin-right: 3px;
        font-size: 16px;
      }
    }
    .footer {
      text-align: right;
      .xtx-button {
        margin-left: 20px;
      }
    }
    .header {
      position: relative;
      h3 {
        font-weight: normal;
        font-size: 18px;
      }
      a {
        position: absolute;
        right: 15px;
        top: 15px;
        font-size: 20px;
        width: 20px;
        height: 20px;
        line-height: 20px;
        text-align: center;
        color: #999;
        &:hover {
          color: #666;
        }
      }
    }
  }
}
</style>
动态渲染组件
定义函数 Confirm.js
// 预期需求:
// Confirm({ title: '标题', text: '您确定从购物车删除选中的商品吗?' }).then(() => {
//   store.dispatch('cart/batchDeleteCart')
// }).catch(e => {})
import { createVNode, render } from 'vue'
import XtxConfirm from './xtx-confirm.vue'

// 准备div容器
const divNode = createVNode('div', { class: 'xtx-confirm-container' })
render(divNode, document.body)
// 获取 DOM 节点, 用于挂载组件或卸载组件
const container = divNode.el

// 导出函数可通过调用 Confirm() 函数动态创建 XtxConfirm 组件
const Confirm = ({ title, text }) => {
  // 返回 Promise 对象
  return new Promise((resolve, reject) => {
    // 2. 点击确认按钮,触发resolve同时销毁组件
    const confirmCallback = () => {
      render(null, container)
      resolve('点击确认')
    }
    // 3. 点击取消按钮,触发reject同时销毁组件
    const cancelCallback = () => {
      render(null, container)
      reject(new Error('点击取消'))
    }
    // 1. 创建 XtxConfirm 组件
    const VNode = createVNode(XtxConfirm, { title, text, confirmCallback, cancelCallback })
    render(VNode, container)
  })
}
export default Confirm
使用组件
import Confirm from '@/components/library/Confirm.js'
// 确认框
Confirm({ text: '亲,您确认删除该商品吗?' }).then((res) => {
	console.log(res)
  }).catch((err) => {
	console.log(err)
})
vue3.0 使用 全局 挂载原型方法
src/components/library/index.js
import Message from './Message.js'
// 导出一个配置,用于 app.use() 安装组件库使用
export default {
  install (app) {
    // 全局挂载 原型函数 过组件实例调用的属性   this.$message
    app.config.globalProperties.$message = Message
  }
}
main.js 注册
// 导入自己封装的组件
import XtxUI from '@/components/library/index'
// 创建 Vue 应用实例
const app = createApp(App)
// 注册,安装自己的组件库
app.use(XtxUI)
版权声明:本文为m0_50125215原创文章,遵循CC 4.0 BY-SA版权协议,转载请附上原文出处链接和本声明。