目录
TFTP启动linux内核
1 - 资源准备
使用ubootpxelinux功能从TFTP下载并启动Linux内核,首先我们需要准备好各种文件。笔者这里直接从USB升级固件中获取这些文件。
在 i2som-image-bootfs-openstlinux-eglfs-pangu-20200524101136.bootfs.ext4 中有uImage和dtb文件。
2 - ubuntu下TFTP服务器搭建
具体过程略。如读者对搭建服务器这块有疑问,可联系笔者添加上。
笔者TFTP根目录设置为/tftpboot/,一般默认的根目录在/srv/tftpboot下。读者可查看/etc/default/tftpd-hpa确认。
3 - uboot网络设置
设置ethaddr和serverip,serverip设置成ubuntu ip地址
setenv ethaddr 00:01:02:03:04:05
setenv serverip 192.168.1.118
测试网络
ping ${serverip}

4 - tftpboot中文件准备
4.1 - 准备image和dtb文件
拷贝i2som-image-bootfs-openstlinux-eglfs-pangu-20200524101136.bootfs.ext4到~/Downloads目录。
执行如下命令挂载ext4文件到~/Downloads下的bootfs:
cd ~/Downloads
mkdir bootfs
sudo mount ~/Downloads/i2som-image-bootfs-openstlinux-eglfs-pangu-20200524101136.bootfs.ext4 ~/Downloads/bootfs
挂载后,~/Downloads/bootfs下会出现dtb和image文件:
将其拷贝至/tftpboot目录:
cd ~/Downloads/bootfs
cp *.dtb /tftpboot/
cp uImage /tftpboot/
4.2 - 准备pxelinux.cfg
cd /tftpboot
mkdir pxelinux.cfg
cd pxelinux.cfg
touch 01-00-01-02-03-04-05
编辑配置文件
vim 01-00-01-02-03-04-05
文件内容如下:
menu title Select the boot mode
DEFAULT nfs
LABEL initramfs
    KERNEL uImage
    FDT stm32mp157a-panguboard.dtb
    INITRD uInitrd
    APPEND rootwait rw earlyprintk console=ttySTM0,115200
LABEL nfs
    KERNEL uImage
    FDT stm32mp157a-panguboard.dtb
    APPEND root=/dev/nfs nfsroot=192.168.1.118:/srv/stm32mp/rootfs ip=dhcp rootwait rw earlyprintk console=ttySTM0,115200
LABEL sdcard
    KERNEL uImage
    FDT stm32mp157a-panguboard.dtb
    APPEND root=/dev/mmcblk0p4 rootwait rw earlyprintk console=ttySTM0,115200
LABEL eMMC
    KERNEL uImage
    FDT stm32mp157a-panguboard.dtb
    APPEND root=/dev/mmcblk1p4 rootwait rw earlyprintk console=ttySTM0,115200
4 启动
PanGu开发板执行run bootcmd_pxe启动系统
run bootcmd_pxe
启动方式选择eMMC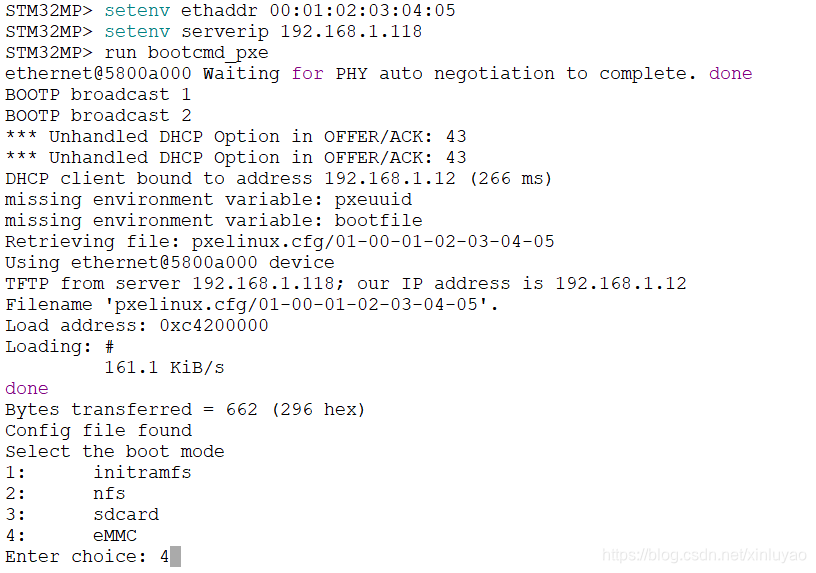
启动成功后,会自动进入系统。
5 挂载nfs
5.1 nfs配置
笔者nfsroot位于/srv/stm32mp/rootfs/目录下,固笔者/etc/exports目录下配置如下:
# /etc/exports: the access control list for filesystems which may be exported
#               to NFS clients.  See exports(5).
#
# Example for NFSv2 and NFSv3:
# /srv/homes       hostname1(rw,sync,no_subtree_check) hostname2(ro,sync,no_subtree_check)
#
# Example for NFSv4:
# /srv/nfs4        gss/krb5i(rw,sync,fsid=0,crossmnt,no_subtree_check)
# /srv/nfs4/homes  gss/krb5i(rw,sync,no_subtree_check)
#
/srv/imx6ull/rootfs  *(rw,nohide,insecure,no_subtree_check,async,no_root_squash)
/srv/stm32mp/rootfs  *(rw,nohide,insecure,no_subtree_check,async,no_root_squash)
5.2 挂载fs
将需要nfs共享的文件放于ubuntu /srv/stm32mp/rootfs目录下。将其挂载到开发板/home/root/nfs目录下
开发板执行如下命令就行挂载:
cd /home/root/
mkdir nfs
sudo mount -t nfs 192.168.1.118:/srv/stm32mp/rootfs /home/root/nfs
欢迎加QQ群:105335490 一起交流噢。
版权声明:本文为xinluyao原创文章,遵循CC 4.0 BY-SA版权协议,转载请附上原文出处链接和本声明。