解压到相关目录
[zhang@ecs-88194-0001 package]$ tar -zxvf elasticsearch-7.8.0-linux-x86_64.tar.gz -C ../software/
切换到conf目录下修改elasticsearch.yml , jvm.options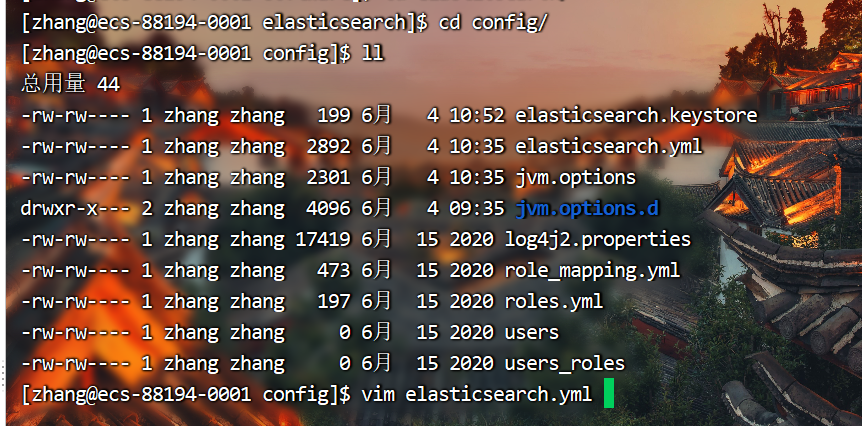
[zhang@ecs-88194-0001 config]$ vim elasticsearch.yml
修改如下部分
# ---------------------------------- Cluster -----------------------------------
#
# 为你的集群使用一个描述性的名称(所有节点都一样):
#
cluster.name: zhanges
#
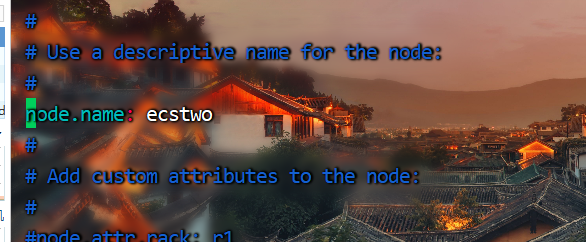
# ------------------------------------ Node ------------------------------------
#
# 使用一个描述性的名称的节点(每个节点名称唯一):
#
node.name: ecsone
#
# Add custom attributes to the node:
#
#node.attr.rack: r1
#
# ----------------------------------- Paths ------------------------------------
#
# 存储数据的目录路径(多个位置用逗号分隔)(此目录需要提前创建):
#
path.data: /opt/software/elasticsearch/data
#
# 日志文件路径:
#
path.logs: /opt/software/elasticsearch/logs
#
# ----------------------------------- Memory -----------------------------------
#
# 在启动时锁定内存:
#
bootstrap.memory_lock: true
#
# Make sure that the heap size is set to about half the memory available
# on the system and that the owner of the process is allowed to use this
# limit.
#
# Elasticsearch performs poorly when the system is swapping the memory.
#
# ---------------------------------- Network -----------------------------------
#
# 设置绑定地址为特定的IP地址(IPv4或IPv6)(此地址为允许访问的地址,可以设置为所有):
#
network.host: 0.0.0.0
#
# 设置HTTP的自定义端口(WEUI页面访问端口):
#
http.port: 9200
#
# For more information, consult the network module documentation.
#
# --------------------------------- Discovery ----------------------------------
#
# 当这个节点启动时,通过一个初始的主机列表来执行发现:
# The default list of hosts is ["127.0.0.1", "[::1]"]
#
discovery.seed_hosts: ["192.168.0.87:9304", "192.168.0.198:9304","192.168.0.180:9304"]
#
# 使用一组符合主条件的初始节点引导集群(master节点的ip):
#
cluster.initial_master_nodes: ["192.168.0.198"]
#
# For more information, consult the discovery and cluster formation module documentation.
#
检查如下是否配置
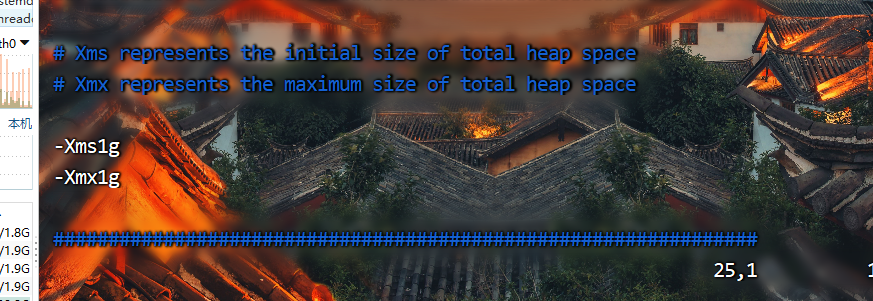
[zhang@ecs-88194-0001 config]$ vim jvm.options
分发各个节点
[zhang@ecs-88194-0001 software]$ /home/zhang/bin/xsync elasticsearch/
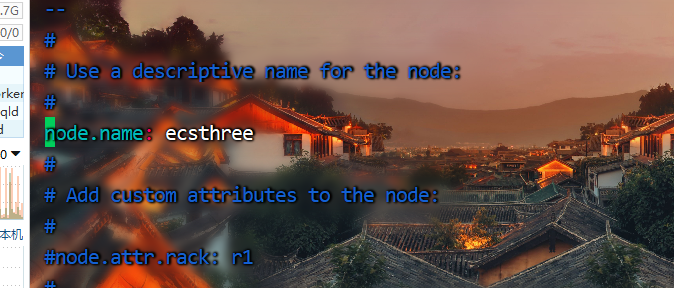
修改各个节点的名称
[zhang@ecs-88194-0002 config]$ vim elasticsearch.yml
[zhang@ecs-88194-0003 config]$ vim elasticsearch.yml
启动es,首先在master节点启动,在依次启动其他节点
[zhang@ecs-88194-0002 elasticsearch]$ bin/elasticsearch -d
[zhang@ecs-88194-0001 elasticsearch]$ bin/elasticsearch -d
[zhang@ecs-88194-0003 elasticsearch]$ bin/elasticsearch -d
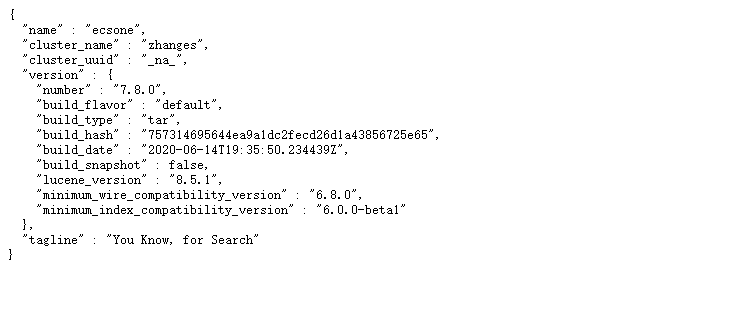
浏览器访问master节点 http://master:9200/_cat/nodes?v

其它节点
**
如果出现如下错误信息:
**
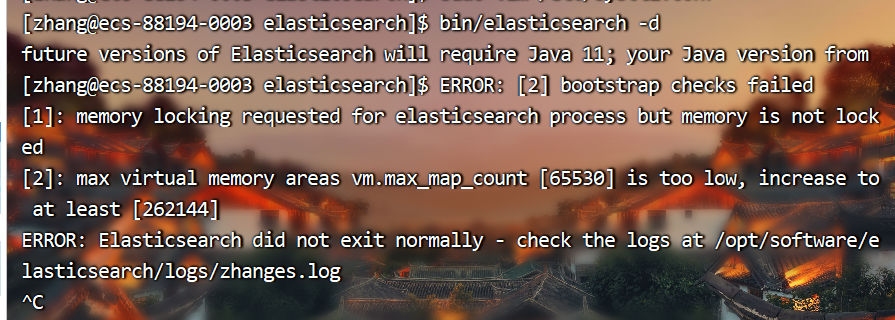
解决方法一(关闭bootstrap.memory_lock:,会影响性能):
# vim /etc/elasticsearch/elasticsearch.yml // 设置成false就正常运行了。
bootstrap.memory_lock: false
解决方法二(开启bootstrap.memory_lock:):
- 修改文件/etc/elasticsearch/elasticsearch.yml,上面那个报错就是开启后产生的,如果开启还要修改其它系统配置文件
bootstrap.memory_lock: true
修改文件/etc/security/limits.conf,最后添加以下内容。
* soft nofile 65536

* hard nofile 65536

* soft nproc 32000

* hard nproc 32000

* hard memlock unlimited

* soft memlock unlimited
- 修改文件 /etc/systemd/system.conf ,分别修改以下内容。
DefaultLimitNOFILE=65536

DefaultLimitNPROC=32000

DefaultLimitMEMLOCK=infinity
版权声明:本文为m0_52606060原创文章,遵循CC 4.0 BY-SA版权协议,转载请附上原文出处链接和本声明。