一,修改基本配置
- vue.config.js文件,注释代理配置
- publicPath 改成 ‘./’
//vue.config.js

module.exports = {
  publicPath: "./",
  //outputDir: "dist", // 输出文件目录
  //assetsDir: "static", // 配置js、css静态资源二级目录的位置
  devServer: {
    open: true, //设置启动项目时默认打开浏览器
    // proxy: {
    //   "/api": {
    //     //target: 'http://192.168.0.136:8080',
    //     target: "http://120.197.144.207:8080",
    //     changeOrigin: true,
    //     pathRewrite: {
    //       "^/api": "",
    //     },
    //   },
    // },
  },
};
- 注释路由mode hsitory模式
//router/index.js

const router = new VueRouter({
  //mode: "history",
  routes,
});
- 拦截请求,在请求的每个接口前面加上baseUrl
const baseUrl = "http://120.197.144.207:8080";

interceptors(install) {
        install.interceptors.request.use(
            config=>{
                config.url = baseUrl+config.url;
                return config;
            },
            err=>{
                return Promise.reject(err)
            }
        )
}
二,安装配置vconsole调试插件
- 安装
npm install vconsole
- assets目录下新建 vconsole.js 文件(新建位置随意) ,在文件中写入
import Vconsole from 'vconsole'
const vConsole = new Vconsole()
export default vConsole
- 在main.js中引入插件并使用
import vConsole from '@/assets/js/vconsole.js'

Vue.use(vConsole)
三, 打包并运行
- vue项目打包
npm run build
- 打开Hbuild, 新建一个5+App项目

将打包后的dist文件夹内的文件全部复制替换到这个项目
然后修改manifest.json文件
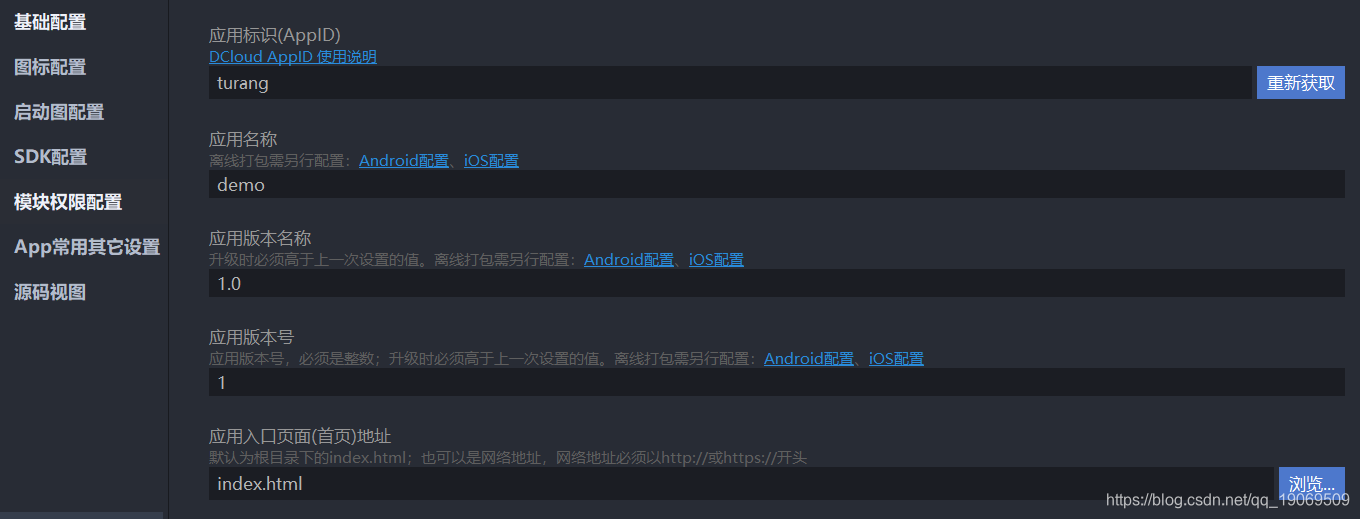
usb连接手机,点击菜单栏中的运行,找到运行手机或模拟器,运行到检测到的设备,查看效果
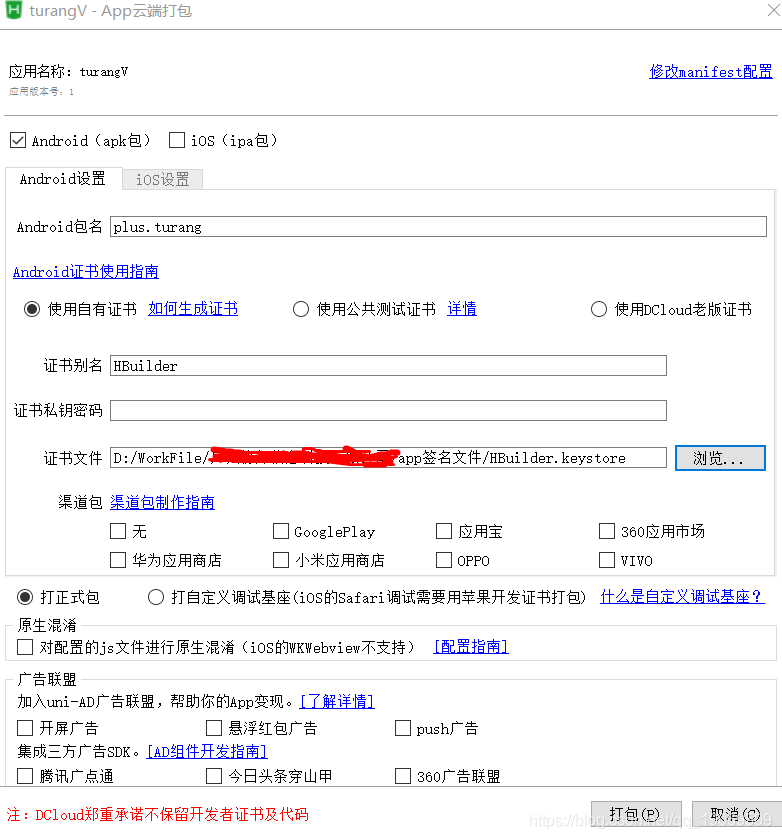
在线打包成apk文件
菜单栏找到 发行–>原生APP-云打包,填写包名,和证书信息(没有证书需要先生成证书),点击打包生成apk文件。
版权声明:本文为qq_19069509原创文章,遵循CC 4.0 BY-SA版权协议,转载请附上原文出处链接和本声明。