给节点添加属性:
1.首先在stencilset.json上模仿其他属性添加新的节点属性的基础配置 注意type属性前端根据这个属性值去确认改节点属性在页面上所要表现得形式
{
"name": "approveTypepackage",
"properties": [{
"id": "approveType",
"type": "zidingyi",
"title": "附件",
"value": "附件管理",
"description": "附件",
"popular": true,
"refToView": "text_name"
}]
},
加入需要扩展的节点这里我们的属性是 approveTypepackage,所以在propertyPackages数组中加入这个属性就好了
{
        "type" : "node",
        "id" : "UserTask",
        "title" : "用户活动",
        "description" : "分配给特定人的任务 ",
        "view" : "<?xml version=\"1.0\" encoding=\"UTF-8\" standalone=\"no\"?>\n<svg\n   xmlns=\"http://www.w3.org/2000/svg\"\n   xmlns:svg=\"http://www.w3.org/2000/svg\"\n   xmlns:oryx=\"http://www.b3mn.org/oryx\"\n   xmlns:xlink=\"http://www.w3.org/1999/xlink\"\n\n   width=\"102\"\n   height=\"82\"\n   version=\"1.0\">\n  <defs></defs>\n  <oryx:magnets>\n  \t<oryx:magnet oryx:cx=\"1\" oryx:cy=\"20\" oryx:anchors=\"left\" />\n  \t<oryx:magnet oryx:cx=\"1\" oryx:cy=\"40\" oryx:anchors=\"left\" />\n  \t<oryx:magnet oryx:cx=\"1\" oryx:cy=\"60\" oryx:anchors=\"left\" />\n  \t\n  \t<oryx:magnet oryx:cx=\"25\" oryx:cy=\"79\" oryx:anchors=\"bottom\" />\n  \t<oryx:magnet oryx:cx=\"50\" oryx:cy=\"79\" oryx:anchors=\"bottom\" />\n  \t<oryx:magnet oryx:cx=\"75\" oryx:cy=\"79\" oryx:anchors=\"bottom\" />\n  \t\n  \t<oryx:magnet oryx:cx=\"99\" oryx:cy=\"20\" oryx:anchors=\"right\" />\n  \t<oryx:magnet oryx:cx=\"99\" oryx:cy=\"40\" oryx:anchors=\"right\" />\n  \t<oryx:magnet oryx:cx=\"99\" oryx:cy=\"60\" oryx:anchors=\"right\" />\n  \t\n  \t<oryx:magnet oryx:cx=\"25\" oryx:cy=\"1\" oryx:anchors=\"top\" />\n  \t<oryx:magnet oryx:cx=\"50\" oryx:cy=\"1\" oryx:anchors=\"top\" />\n  \t<oryx:magnet oryx:cx=\"75\" oryx:cy=\"1\" oryx:anchors=\"top\" />\n  \t\n  \t<oryx:magnet oryx:cx=\"50\" oryx:cy=\"40\" oryx:default=\"yes\" />\n  </oryx:magnets>\n  <g pointer-events=\"fill\" oryx:minimumSize=\"50 40\">\n\t<rect id=\"text_frame\" oryx:anchors=\"bottom top right left\" x=\"1\" y=\"1\" width=\"94\" height=\"79\" rx=\"10\" ry=\"10\" stroke=\"none\" stroke-width=\"0\" fill=\"none\" />\n\t<rect id=\"bg_frame\" oryx:resize=\"vertical horizontal\" x=\"0\" y=\"0\" width=\"100\" height=\"80\" rx=\"10\" ry=\"10\" stroke=\"#bbbbbb\" stroke-width=\"1\" fill=\"#f9f9f9\" />\n\t\t<text \n\t\t\tfont-size=\"12\" \n\t\t\tid=\"text_name\" \n\t\t\tx=\"50\" \n\t\t\ty=\"40\" \n\t\t\toryx:align=\"middle center\"\n\t\t\toryx:fittoelem=\"text_frame\"\n\t\t\tstroke=\"#373e48\">\n\t\t</text>\n\t\n\t<g id=\"userTask\" transform=\"translate(3,3)\">\n\t\t<path oryx:anchors=\"top left\"\n       \t\tstyle=\"fill:#d1b575;stroke:none;\"\n       \t\t d=\"m 1,17 16,0 0,-1.7778 -5.333332,-3.5555 0,-1.7778 c 1.244444,0 1.244444,-2.3111 1.244444,-2.3111 l 0,-3.0222 C 12.555557,0.8221 9.0000001,1.0001 9.0000001,1.0001 c 0,0 -3.5555556,-0.178 -3.9111111,3.5555 l 0,3.0222 c 0,0 0,2.3111 1.2444443,2.3111 l 0,1.7778 L 1,15.2222 1,17 17,17\" \n         />\n\t\t\n\t</g>\n  \n\t<g id=\"parallel\">\n\t\t<path oryx:anchors=\"bottom\" fill=\"none\" stroke=\"#bbbbbb\" d=\"M46 70 v8 M50 70 v8 M54 70 v8\" stroke-width=\"2\" />\n\t</g>\n\t\n\t<g id=\"sequential\">\n\t\t<path oryx:anchors=\"bottom\" fill=\"none\" stroke=\"#bbbbbb\" stroke-width=\"2\" d=\"M46,76h10M46,72h10 M46,68h10\"/>\n\t</g>\n\t\n\n\t<g id=\"compensation\">\n\t\t<path oryx:anchors=\"bottom\" fill=\"none\" stroke=\"#bbbbbb\" d=\"M 62 74 L 66 70 L 66 78 L 62 74 L 62 70 L 58 74 L 62 78 L 62 74\" stroke-width=\"1\" />\n\t</g>\n  </g>\n</svg>",
        "icon" : "activity/list/type.user.png",
        "groups" : [ "活动列表" ],
        "propertyPackages" : [ "overrideidpackage","isforcompensationpackage","multiinstance_typepackage", "namepackage", "documentationpackage", "multiinstance_conditionpackage","usertaskassignmentpackage","duedatedefinitionpackage", "prioritydefinitionpackage","approveTypepackage"],
        "hiddenPropertyPackages" : [ ],
        "roles" : [ "Activity", "sequence_start", "sequence_end", "ActivitiesMorph", "all" ]
    },
2.在editor-app/configuration/properties.js上增加
“zidingyi”: {
“readModeTemplateUrl”: “editor-app/configuration/properties/default-value-display-template.html”,
“writeModeTemplateUrl”: “editor-app/configuration/properties/zidingyi-property-write-template.html”
}
,这两个页面主要是用来表现出该属性在前端页面上的效果
zidingyi-properties-write-template.html
<!-- Just need to instantiate the controller, and it will take care of showing the modal dialog -->
<span ng-controller="KisBpmZDYPropertyCtrl">
</span>
查看控制器 editor-app/configuration/properties-default-controller.js
ar KisBpmZDYPropertyCtrl = [ '$scope', '$modal',"$rootScope", function($scope, $modal,$rootScope) {
    var opts = {
        template:  'editor-app/configuration/properties/zidingyi-popup.html?version=' + Date.now(),
        scope: $scope
    };

    // Open the dialog
    $modal(opts);
}];
该控制器只是用来打开我们自定义的第二个页面的(这个页面主要是用来做附件上传的)
zidingyi-popup.html
<div class="modal" ng-controller="KisBpmZDYPropertyPopupCtrl" ng-init="getData()">
<div class="modal-dialog">
<div class="modal-content">
<div class="modal-header">
<button type="button" class="close" data-dismiss="modal" aria-hidden="true" ng-click="close()">×</button>
<h3>附件管理</h3>
</div>
<div class="modal-body">
<button type="button" class="btn btn-primary" id="upload" ng-click="upload()">附件上传</button>
<input name="file" type="file" id="file" onchange="angular.element(this).scope().ajax(this)" ng-model="myValue" style="display: none;">
<table class="table table-hover" ng-if="count!=0">
<tr class="row">
<td class="col-ms-1">序号</td>
<td class="col-ms-5">文件名</td>
<td class="col-ms-3">上传时间</td>
<td class="col-ms-3">操作</td>
</tr>
<tr ng-repeat="(index,data) in aValue" class="row">
<td class="col-ms-1">{{index+1}}</td>
<td class="col-ms-5">{{data.filename}}</td>
<td class="col-ms-3">{{data.createTime}}</td>
<td class="col-ms-3"><!-- <a class="btn btn-primary btn-small">下载</a> --><a class="btn btn-primary btn-small" ng-click="delete(data.id)">删除</a></td>
</tr>
</table>
<p style="display:none;"><textarea auto-focus class="form-control" ng-model="property.value" style="width:70%; height:100%; max-width: 100%; max-height: 100%; min-height: 200px;"/></p>
</div>
<div class="modal-footer">
<button ng-click="save()" class="btn btn-primary" translate >ACTION.SAVE</button>
</div>
</div>
</div>
</div>
3.在 editor-app/configuration/properties-default-controller.js找到控制器在这里就可以撸代码了(注意jquery符号$在这里需要替换成jQuery)
var KisBpmZDYPropertyPopupCtrl = ['$scope',"$http","$rootScope",function($scope,$http,$rootScope) {
    $scope.aValue="";
    $scope.property.value="个附件";
    $scope.count=0;
    $scope.getData=function(){
业务需求是附件要和节点做绑定,据分析每个节点都有一个唯一的sid,捕获监听事件
1.定义点击节点时候的事件做判断获取 sid(这里使用了本地存储,而且事件不一定只有点击事件我这里是是在设置了点击事件)(在捕获会有点问题)
oryx.debug.js
_delegateEvent: function(event) {
   if(this.eventHandlerCallback) {
      if(event.type=="click"){
         var a=this.node.id.split("-").slice(1).join("-");
         localStorage.setItem("nodeId",a);
      }
      this.eventHandlerCallback(event, this);
   }
},
2.在editor-app/stencil-controller.js 这里配置也行
       $scope.editor.registerOnEvent(ORYX.CONFIG.EVENT_SELECTION_CHANGED, function (event) {
            var shapes = event.elements;
            var canvasSelected = false;
            if (shapes && shapes.length == 0) {
                shapes = [$scope.editor.getCanvas()];
                canvasSelected = true;
            }
            if (shapes && shapes.length > 0) {
                var selectedShape = shapes.first();
                var a=selectedShape.node.id.split("-").slice(1).join("-");
                $rootScope.nodeId=a;  //备用 先将节点标识存在$rootScope上
                localStorage.setItem("nodeId",a);
                var stencil = selectedShape.getStencil();
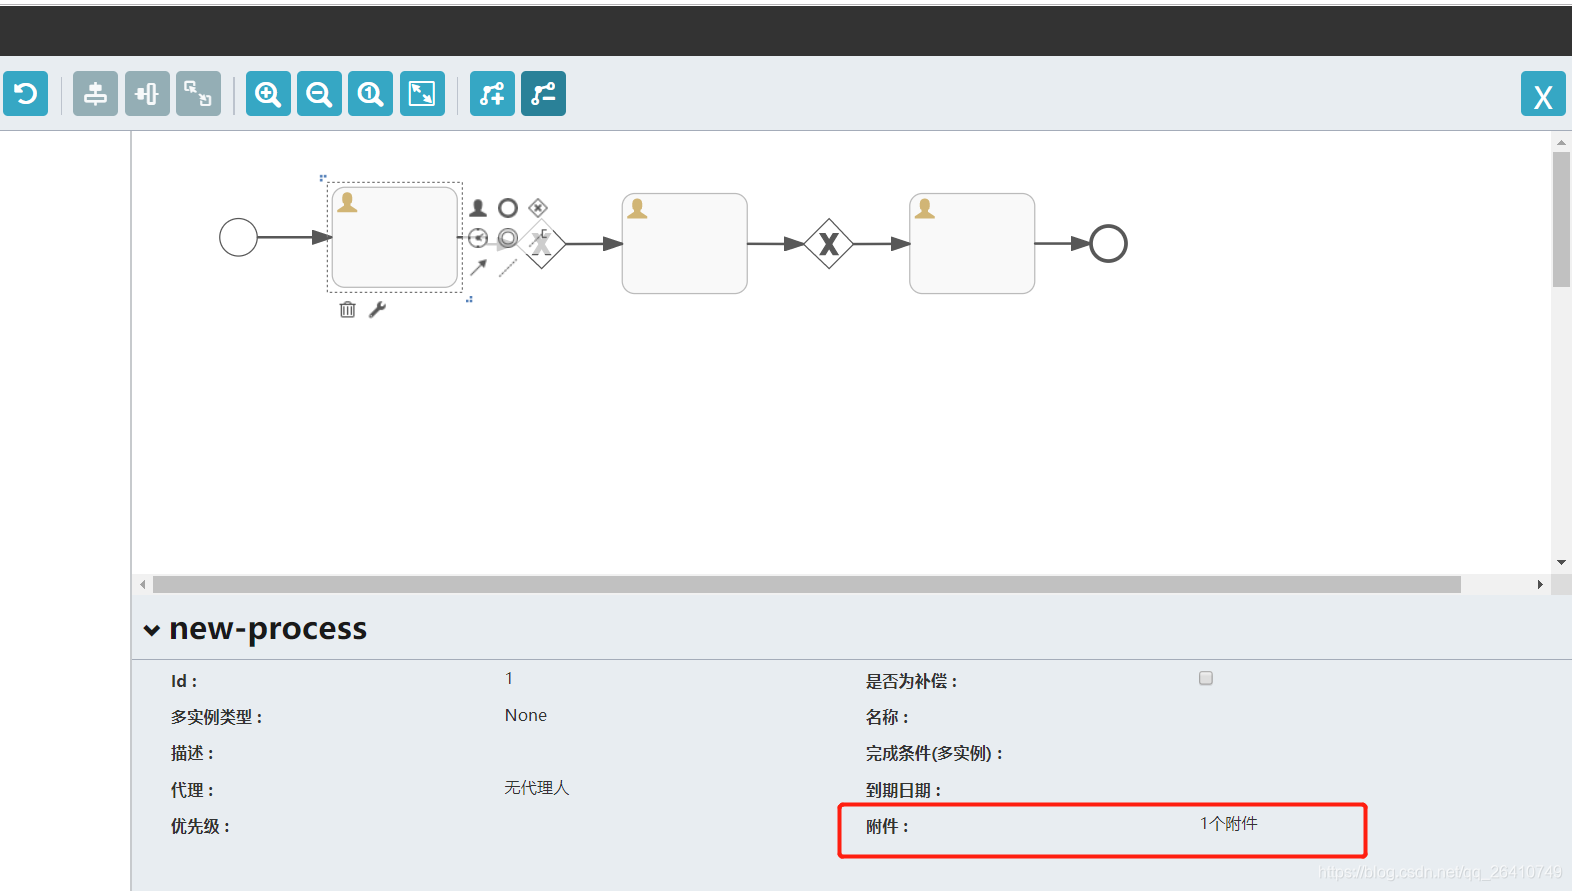
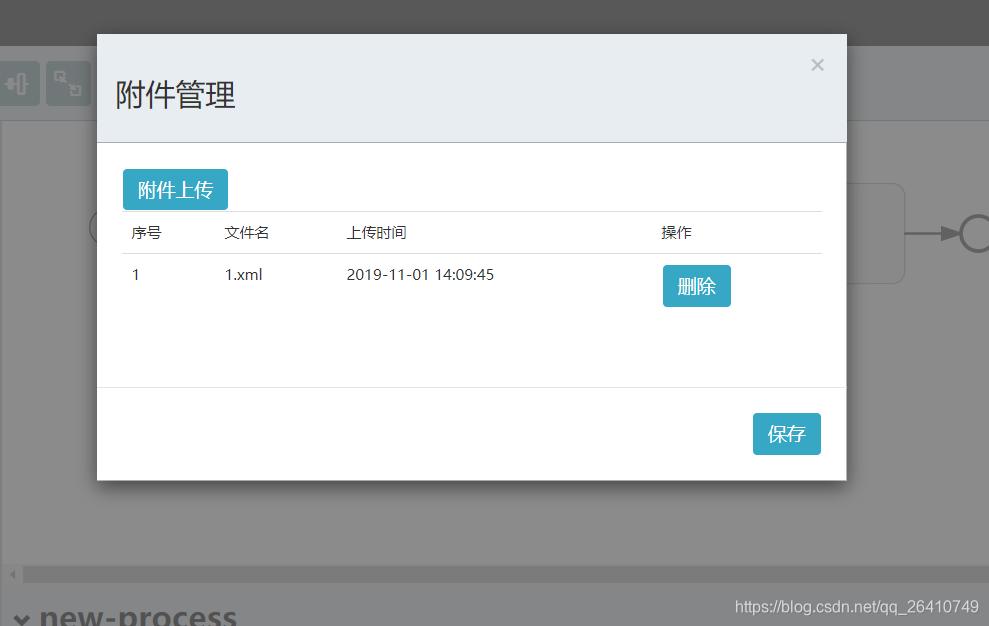
最后的效果图: