首先需要导入googel大佬的zxing。在pom.xml中导入:
<!-- 二维码生成 -->
    <dependency>
        <groupId>com.google.zxing</groupId>
        <artifactId>core</artifactId>
        <version>3.4.0</version>
    </dependency>
    <dependency>
        <groupId>com.google.zxing</groupId>
        <artifactId>javase</artifactId>
        <version>3.4.0</version>
    </dependency>
代码实现:
二维码帮助类:
package com.poi.testpoi.util;

import java.awt.AlphaComposite;
import java.awt.Color;
import java.awt.Graphics2D;
import java.awt.image.BufferedImage;
import java.io.File;
import java.util.HashMap;

import javax.imageio.ImageIO;

import com.google.zxing.BarcodeFormat;
import com.google.zxing.EncodeHintType;
import com.google.zxing.MultiFormatWriter;
import com.google.zxing.WriterException;
import com.google.zxing.client.j2se.MatrixToImageConfig;
import com.google.zxing.client.j2se.MatrixToImageWriter;
import com.google.zxing.common.BitMatrix;
import com.google.zxing.common.CharacterSetECI;
import com.google.zxing.qrcode.decoder.ErrorCorrectionLevel;
import com.itextpdf.text.Image;

public class ZxingUtils {


/**
 * // 二维码生成
 * @param contents 说明
 * @param width 宽
 * @param height 高
 * @param margin 边框
 * @return BufferedImage
 * @throws Exception
 */
public static BufferedImage createQRImage(String contents, int width, int height, int margin) throws Exception {
    BufferedImage qRImage = null;

    if (contents == null || "".equals(contents)) {
        throw new Exception("content说明不能为空");
    }

    // 二维码参数设置
    HashMap<EncodeHintType, Object> hints = new HashMap<>();
    hints.put(EncodeHintType.CHARACTER_SET, CharacterSetECI.UTF8); // 编码设置
    hints.put(EncodeHintType.ERROR_CORRECTION, ErrorCorrectionLevel.H); // 安全等级,最高h
    hints.put(EncodeHintType.MARGIN, margin); // 设置margin=0-10

    // 二维码图片的生成
    BarcodeFormat format = BarcodeFormat.QR_CODE;

    // 创建矩阵容器

    BitMatrix matrix = null;

    try {
        matrix = new MultiFormatWriter().encode(contents, format, width, height, hints);
    } catch (WriterException e) {
        e.printStackTrace();
    }

    // 设置矩阵转为图片的参数
    MatrixToImageConfig toImageConfig = new MatrixToImageConfig(Color.black.getRGB(), Color.white.getRGB());

    // 矩阵转换图像
    qRImage = MatrixToImageWriter.toBufferedImage(matrix, toImageConfig);

    return qRImage;
}

// 二维码添加logo,这样用工具类来写,之后使用我们可以采用加或者不加logo
/**
 * @param qrImage
 * @param width
 * @param height
 * @param logoPath
 * @param logoSize
 * @return BufferedImage
 * @throws Exception
 */

public static BufferedImage addQRImagelogo(BufferedImage qrImage, int width, int height, String logoPath, int logoSize) throws Exception {
    BufferedImage qRImageWithLogo = null;
    File logoFile = new File(logoPath);
    if (!logoFile.exists() || !logoFile.isFile()) {
        throw new Exception("指定的logo图片不存在");
    }

    // 处理logo
    BufferedImage image = ImageIO.read(logoFile);
    // 设置logo的高和宽
    int logoHeight = qrImage.getHeight()/logoSize;
    int logoWidth = qrImage.getWidth()/logoSize;
    // 设置放置位置
    int x = (qrImage.getHeight() - logoHeight) / 2;
    int y = (qrImage.getWidth() - logoWidth) / 2;

    // 新建画板
    qRImageWithLogo = new BufferedImage(width, height, BufferedImage.TYPE_INT_RGB);
    // 新建画笔
    Graphics2D g = (Graphics2D) qRImageWithLogo.getGraphics();
    // 将二维码绘制到画板
    g.drawImage(qrImage, 0, 0, null);
    // 设置头透明度,可设置范围0.0f-1.0f
    g.setComposite(AlphaComposite.getInstance(AlphaComposite.SRC_OVER, 1.0f));
    // 绘制logo
    g.drawImage(image, x, y, logoWidth, logoHeight, null);

    return qRImageWithLogo;
}
}
二维码的控制类:
package com.poi.testpoi.controller;

import java.awt.image.BufferedImage;
import java.io.ByteArrayOutputStream;

import javax.imageio.ImageIO;
import javax.servlet.ServletOutputStream;
import javax.servlet.ServletResponse;
import javax.servlet.http.HttpServletResponse;

import org.springframework.stereotype.Controller;
import org.springframework.web.bind.annotation.RequestMapping;

import com.poi.testpoi.util.ZxingUtils;

@Controller
public class QRcodeController {

// 这里说明一点,想要验证放入session中或者redies中,验证让过即可。
// 和验证码的实现原理是一样,是不过换了一种验证方式。
@RequestMapping("/createQRcode")
public void createQRcode(HttpServletResponse response) {
    String contents = "这是测试用的二维码";
    int width = 500; int height = 500; int margin = 2;

    try {
        BufferedImage QRcode = ZxingUtils.createQRImage(contents, width, height, margin);

        String logoPath = "C:\\Users\\zy962\\Desktop\\临时备份\\u=1792043407,969529386&fm=26&gp=0.jpg";
        int logoSize = 4;
        BufferedImage qRImageWithLogo = ZxingUtils.addQRImagelogo(QRcode, width, height, logoPath, logoSize);

        // 写入返回
        ByteArrayOutputStream baos = new ByteArrayOutputStream();
        ImageIO.write(qRImageWithLogo, "jpg", baos);

        byte[] QRJPG = baos.toByteArray();
        response.setHeader("Cache-Control", "no-store");
        response.setHeader("Pragma", "no-cache");
        response.setDateHeader("Expires", 0);
        response.setContentType("image/jpeg");

        ServletOutputStream os = response.getOutputStream();
        os.write(QRJPG); // 自此完成一套,图片读入,写入流,转为字节数组,写入输出流
        os.flush();
        os.close();
        baos.close();
    } catch (Exception e) {
        e.printStackTrace();
    }
}
}
运行结果:
利用手机扫码结果: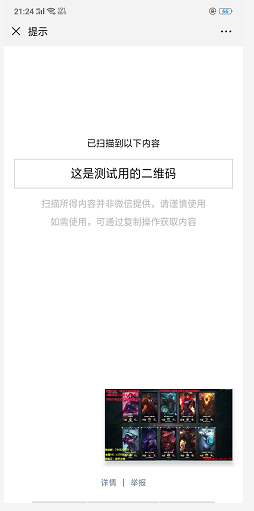
关于验证不好写,有篇博客给出了很清晰的思路:
二维码验证登陆请参考:https://www.cnblogs.com/GoodHelper/p/8641905.html
版权声明:本文为weixin_42603009原创文章,遵循CC 4.0 BY-SA版权协议,转载请附上原文出处链接和本声明。