Redux-thunk是Redux最常用的插件
Redux-thunk插件应用场景:比如在Dispatch一个Action之后,到达reducer之前,进行一些额外的操作,就需要用到middleware(中间件)。在实际工作中你可以使用中间件来进行日志记录、创建崩溃报告,调用异步接口或者路由。 这个中间件可以使用是Redux-thunk来进行增强,它就是对Redux中dispatch的加强。
1、安装redux-thunk
npm install --save redux-thunk2、配置redux-thunk组件
需要在创建store的地方引入redux-thunk,对于我们的目录来说,就是/store/index.js文件。
(1)引入applyMiddleware,如果你要使用中间件,就必须在redux中引入applyMiddleware
import {createStore, applyMiddleware, compose} from 'redux';(2)引入redux-thunk库
import thunk from 'redux-thunk';(3)/store/index.js文件对应代码
第一种配置方法:
import {createStore, applyMiddleware} from 'redux';
import reducer from './reducer';    //引入ruducer
import thunk from 'redux-thunk';

const store = createStore(
    reducer,
    applyMiddleware(thunk)
) // 创建数据存储仓库
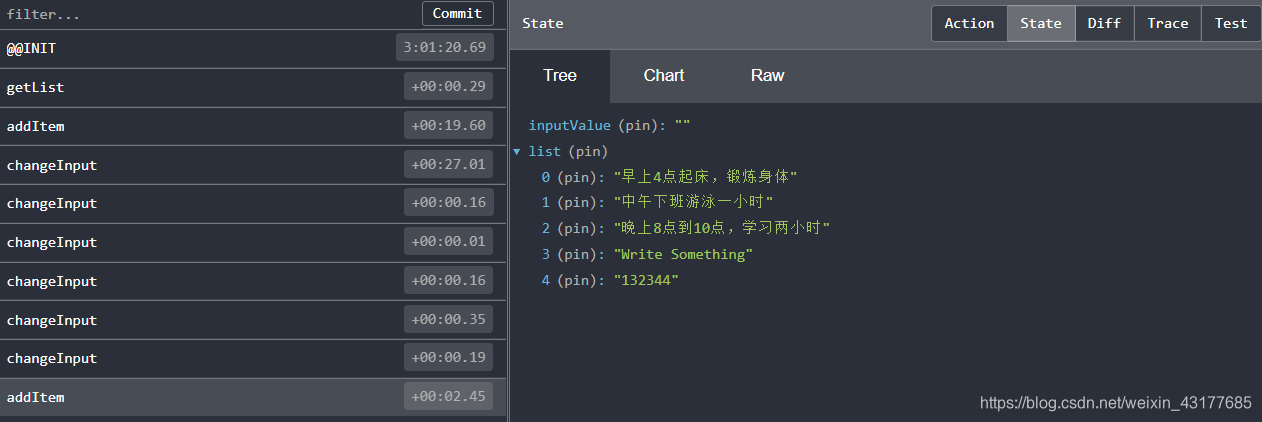
这种配置是官网给出来的配置方法,但是有一个弊端,是Redux Dev Tools插件无法使用,如果想要该插件可以使用,需要用第二种配置
第二种配置方法
import {createStore, applyMiddleware, compose} from 'redux';
import reducer from './reducer';    //引入ruducer
import thunk from 'redux-thunk';

// 利用compose创建一个compose增强函数,相当于建立了一个链式函数
const composeEnhancers =   window.__REDUX_DEVTOOLS_EXTENSION_COMPOSE__ ?
                           window.__REDUX_DEVTOOLS_EXTENSION_COMPOSE__({}) : compose;
// 增强函数和thunk结合起来
const enhancer = composeEnhancers(applyMiddleware(thunk))

// 创建数据存储仓库
const store = createStore(reducer, enhancer)

export default store;
以上配置,Redux Dev Tools插件就可以使用

例子仍是之前的TodoList的例子
store下面文件有
actionTypes.js
export const CHANGE_INPUT = 'changeInput';
export const ADD_ITEM = 'addItem';
export const DELETE_ITEM = 'deleteItem';
export const GET_LIST = 'getList';
actionCreators.js
import { CHANGE_INPUT, ADD_ITEM, DELETE_ITEM, GET_LIST } from './actionTypes';
import axios from 'axios';

export const changeInputAction = (value) => ({
    type: CHANGE_INPUT,
    value
})

export const addItemAction = () => ({
    type: ADD_ITEM,
})

export const deleteItemAction = (index) => ({
    type: DELETE_ITEM,
    index
})

export const getListAction = (data) => ({
    type: GET_LIST,
    data
})

export const getTodoList = () =>{
    return (dispatch) => {
        axios.get('/getList/mock.json')
        .then((res) => {
            const data = res.data;
            const action = getListAction(data);
            dispatch(action);
        })
    }
}
reducer.js里面的逻辑
import {CHANGE_INPUT, ADD_ITEM, DELETE_ITEM, GET_LIST} from './actionTypes';

const defaultState = {
    inputValue:'Write Something',
    list:[]
};
export default( state = defaultState, action ) => {
    // Reducer里只能接收state,不能改变state
    if(action.type === CHANGE_INPUT){
        let newState=JSON.parse(JSON.stringify(state));  // 深拷贝
        newState.inputValue=action.value;
        return newState;
    }

    if(action.type === ADD_ITEM){
        let newState=JSON.parse(JSON.stringify(state));  // 深拷贝
        newState.list.push(newState.inputValue);
        newState.inputValue='';  // 增加完设置input内容为空
        return newState;
    }

    if(action.type === DELETE_ITEM){
        let newState=JSON.parse(JSON.stringify(state));  // 深拷贝
        newState.list.splice(action.index,1);
        return newState;
    }

    if(action.type === GET_LIST){ // 根据type值,编写业务逻辑
        let newState = JSON.parse(JSON.stringify(state))
        newState.list = action.data.list // 复制性的List数组进去
        return newState
    }
    return state;
}
TodoList.js
import React, {Component} from 'react';
import store from './store';
import {getTodoList, changeInputAction, addItemAction, deleteItemAction} from './store/actionCreators';
import TodoListUI from './TodoListUI';

class TodoList extends Component {
    constructor(props){
        super(props);
        this.state=store.getState();   // store.getState()方法可以拿到reducer.js中的数据
        this.changeInputvalue=this.changeInputvalue.bind(this);
        this.storeChange=this.storeChange.bind(this);
        this.clickBtn=this.clickBtn.bind(this);
        this.deleteItem=this.deleteItem.bind(this);
        store.subscribe(this.storeChange);   // 如果想要state的状态发生变化,订阅模式必须写
    }

    // 组件挂载完成获取TodoList中的List内容
    componentDidMount(){
        const action=getTodoList();
        store.dispatch(action);
    }

    changeInputvalue(e){
        const action=changeInputAction(e.target.value);
        store.dispatch(action);
    }

    clickBtn(){
        const action=addItemAction();
        store.dispatch(action);
    }

    deleteItem(index){
        const action=deleteItemAction(index);
        store.dispatch(action);
    }

    storeChange(){
        this.setState(store.getState());
    }


    render(){
        return(
            <TodoListUI
            inputValue={this.state.inputValue}
            changeInputvalue={this.changeInputvalue}
            clickBtn={this.clickBtn}
            list={this.state.list}
            deleteItem={this.deleteItem}
            />
        )
    }
}

export default TodoList;
无状态组TodoListUi.js
import React from 'react';
import 'antd/dist/antd.css';
import {Input, Button, List} from 'antd';

// 无状态组件 没有任何逻辑,只涉及UI 性能更高
const TodoListUI = (props)=>{
    return(
        <div style={{margin:'10px'}}>
                <div>
                    <Input
                    placeholder={props.inputValue}
                    style={{width:'250px', marginRight:'10px'}}
                    onChange={props.changeInputvalue}
                    value={props.inputValue}
                    />
                    <Button type="primary"
                    onClick={props.clickBtn}>增加</Button>
                    <div style={{margin:'10px',width:'300px'}}>
                        <List
                            bordered
                            dataSource={props.list}
                            renderItem={(item, index)=>(<List.Item onClick={()=>{props.deleteItem(index)}}>{item}</List.Item>)}
                        />
                    </div>
                </div>
            </div>
    )
}


export default TodoListUI;Redux-saga是Redux的另外一种中间件
(1)安装依赖
npm install --save redux-saga(2)引入并创建redux-saga
在/src/store/index.js里引入redux-saga,并创建一个sagaMiddleware
import {createStore, applyMiddleware, compose} from 'redux';
import reducer from './reducer';    //引入ruducer
import createSagaMiddleware from 'redux-saga';   //引入saga
import mySagas from './sagas';

const sagaMiddleware = createSagaMiddleware();   //创建saga中间件

const composeEnhancers =   window.__REDUX_DEVTOOLS_EXTENSION_COMPOSE__ ?
                           window.__REDUX_DEVTOOLS_EXTENSION_COMPOSE__({}) : compose;
const enhancer = composeEnhancers(applyMiddleware(sagaMiddleware));

const store=createStore(reducer, enhancer);   // 创建数据存储仓库
sagaMiddleware.run(mySagas);

export default store;   // 暴露出去
(3)创建saga.js文件
redux-saga希望把业务逻辑单独写一个文件,在/src/store/文件夹下建立一个sagas.js文件。
import { takeEvery, put } from 'redux-saga/effects';   //监听
import { GET_MY_LIST } from './actionTypes';
import { getListAction } from './actionCreators';
import axios from 'axios';

//generator函数  用作入口函数
function* mySaga() {
    //等待捕获action
    yield takeEvery(GET_MY_LIST, getList)
}

function* getList(){
    const res = yield axios.get('/getList/mock.json');
    const action = getListAction(res.data);
    yield put(action);
}

export default mySaga;
sagas.js中有两个API,takeEvery和put,
takeEvery(pattern, saga, ...args)
在发起(dispatch)到 Store 并且匹配 pattern 的每一个 action 上派生一个 saga。
pattern: String | Array | Function- 有关更多信息,请参见take(pattern)的文档saga: Function- 一个 Generator 函数args: Array<any>- 传递给启动任务的参数。takeEvery会把当前的 action 追加到参数列表中。(即 action 将是saga的最后一个参数)
允许处理并发的 action,不会对多个任务的响应进行排序,并且不保证任务将会以它们启动的顺序结束。
put(action)
创建一个 Effect 描述信息,用来命令 middleware 向 Store 发起一个 action。 这个 effect 是非阻塞型的,并且所有向下游抛出的错误(例如在 reducer 中),都不会冒泡回到 saga 当中。
参照文档https://redux-saga-in-chinese.js.org/docs/api/index.html#takeeverypattern-saga-args
actionTypes.js
export const CHANGE_INPUT = 'changeInput';
export const ADD_ITEM = 'addItem';
export const DELETE_ITEM = 'deleteItem';
export const GET_LIST = 'getList';
export const  GET_MY_LIST = 'getMyList'
actionCreators.js
import { CHANGE_INPUT, ADD_ITEM, DELETE_ITEM, GET_LIST, GET_MY_LIST } from './actionTypes';

export const changeInputAction = (value) => ({
    type: CHANGE_INPUT,
    value
})

export const addItemAction = () => ({
    type: ADD_ITEM,
})

export const deleteItemAction = (index) => ({
    type: DELETE_ITEM,
    index
})

export const getListAction = (data) => ({
    type: GET_LIST,
    data
})

export const getMyListAction = () => ({
    type: GET_MY_LIST
})
TodoList.js
import React, { Component } from "react";
import store from "./store";
import {
  getMyListAction,
  changeInputAction,
  addItemAction,
  deleteItemAction,
} from "./store/actionCreators";
import TodoListUI from "./TodoListUI";

class TodoList extends Component {
  constructor(props) {
    super(props);
    this.state = store.getState(); // store.getState()方法可以拿到reducer.js中的数据
    this.changeInputvalue = this.changeInputvalue.bind(this);
    this.storeChange = this.storeChange.bind(this);
    this.clickBtn = this.clickBtn.bind(this);
    this.deleteItem = this.deleteItem.bind(this);
    store.subscribe(this.storeChange); // 如果想要state的状态发生变化,订阅模式必须写上
  }

  componentDidMount() {
    const action = getMyListAction();
    store.dispatch(action);
  }

  changeInputvalue(e) {
    const action = changeInputAction(e.target.value);
    store.dispatch(action);
  }

  clickBtn() {
    const action = addItemAction();
    store.dispatch(action);
  }

  deleteItem(index) {
    const action = deleteItemAction(index);
    store.dispatch(action);
  }

  storeChange() {
    this.setState(store.getState());
  }

  render() {
    return (
      <TodoListUI
        inputValue={this.state.inputValue}
        changeInputvalue={this.changeInputvalue}
        clickBtn={this.clickBtn}
        list={this.state.list}
        deleteItem={this.deleteItem}
      />
    );
  }
}

export default TodoList;
TodoListUI.js
import React from 'react';
import 'antd/dist/antd.css';
import {Input, Button, List} from 'antd';

//无状态组件  没有任何逻辑,只涉及UI  性能更高

const TodoListUI = (props)=>{
    return(
        <div style={{margin:'10px'}}>
                <div>
                    <Input
                    placeholder={props.inputValue}
                    style={{width:'250px', marginRight:'10px'}}
                    onChange={props.changeInputvalue}
                    value={props.inputValue}
                    />
                    <Button type="primary"
                    onClick={props.clickBtn}>增加</Button>
                    <div style={{margin:'10px',width:'300px'}}>
                        <List
                            bordered
                            dataSource={props.list}
                            renderItem={(item,index)=>(<List.Item onClick={()=>{props.deleteItem(index)}}>{item}</List.Item>)}
                        />
                    </div>
                </div>
            </div>
    )
}

export default TodoListUI;