A. 作者有话说
分库分表,虽然原理很简单,什么垂直分表,水平分表,多服务器多数据库存放数据。但是bourbon(我)从没有在实际项目中应用,因为我之前做过的项目都是一台服务器,而且项目数据量小得可怜,最多的数据量的表都不过10w级别。完全没必要分库分表。但是最近在学习sharding-sphere,从网上知道这玩意的大致作用,那就来用spring boot整合之后来玩一玩。bourbon之前实际项目开发都是用SSM,只用过spring boot做过练手项目的demo,不怎么熟练,如果有什么理解错误,请大佬指点指点。
这篇文章是在spring boot整合了mybatis之后进行的操作
B. sharding-sphere
该框架的作用主要有两个:
- 实现程序分库分表的功能
- 实现主从数据库读写分离的功能
C. 分库分表
C.1. 说明
将数据库分库,可以减小数据库存储的数据量,这里说明下水平分库的问题。如果只是一个程序,然后对数据库水平分库处理,那么对于程序运行效率不会有质的提升,只是减小了数据库的压力。
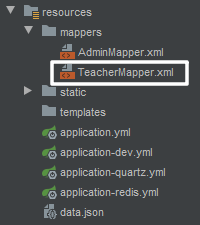
C.2. 项目结构

C.3. 实现过程
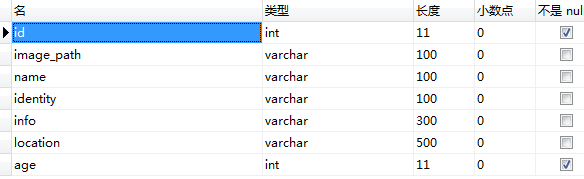
创建数据库
过程繁琐我就直接上结果了

这里两个数据库两个表的结构完全一样,如下:
导入依赖
<dependency>
    <groupId>org.apache.shardingsphere</groupId>
    <artifactId>sharding-jdbc-spring-boot-starter</artifactId>
    <version>4.0.0-RC2</version>
</dependency>
<dependency>
    <groupId>org.apache.shardingsphere</groupId>
    <artifactId>sharding-jdbc-spring-namespace</artifactId>
    <version>4.0.0-RC2</version>
</dependency>
配置
注释掉原来springboot的数据库配置(如果有的话),不然两个数据库配置会互相冲突,因为bourbon直接把原来的数据库配置删了,所以展示不了
在application.yml下进行配置:

配置内容如下:
spring:
  profiles:
    #调用项目中的application-dev.yml
    active: dev
  #整合sharding-sphere
  shardingsphere:
    datasource:
      #数据库分库名
      names: ds0,ds1
      #ds0和ds1是链接两个数据库的配置
      ds0:
        #type为数据源,如果是使用了数据库连接池,请改为连接池的配置
        type: com.zaxxer.hikari.HikariDataSource
        driver-class-name: com.mysql.cj.jdbc.Driver
        jdbc-url: jdbc:mysql://cdb-puftgui4.cd.tencentcdb.com:10060/odb0?serverTimezone=UTC
        username: root
        password: ******
      ds1:
        type: com.zaxxer.hikari.HikariDataSource
        driver-class-name: com.mysql.cj.jdbc.Driver
        jdbc-url: jdbc:mysql://cdb-puftgui4.cd.tencentcdb.com:10060/odb1?serverTimezone=UTC
        username: root
        password: ******
    #分库策略
    sharding:
      default-database-strategy:
        inline:
          #下面这个是groove的语法,好像是这么叫的。作用是按照id这一列来选择存放的数据库
          algorithm-expression: ds$->{id%2}
          sharding-column: id
      # 分表策略
      #tables.teacher.actual-data-node: ds$->{0..1}.teacher_$->{0..3}
      # 分表字段id
      #tables.teacher.table-strategy.inline.sharding-column: id
      # 分表策略 根据id取模,确定数据最终落在那个表中
      #tables.teacher.table-strategy.inline.algorithm-expression: teacher_$->{id%3}
      # 使用SNOWFLAKE算法生成主键,目前还没实现,所以主键得自己在service生成
      tables:
        teacher:
          key-generator:
            column: id
            type: SNOWFLAKE
    # 在日志中战士SQL语句
    props.sql.show: true
分表功能还没实现,所以有关于分表的配置被我注释掉了
代码实现
pojo层代码:
public class Teacher {
    private int id;
    private String imagePath;
    private String name;
    private String identity;
    private String info;
    private String location;
    private int age;

    public int getId() {
        return id;
    }

    public void setId(int id) {
        this.id = id;
    }

    public String getImagePath() {
        return imagePath;
    }

    public void setImagePath(String imagePath) {
        this.imagePath = imagePath;
    }

    public String getName() {
        return name;
    }

    public void setName(String name) {
        this.name = name;
    }

    public String getIdentity() {
        return identity;
    }

    public void setIdentity(String identity) {
        this.identity = identity;
    }

    public String getInfo() {
        return info;
    }

    public void setInfo(String info) {
        this.info = info;
    }

    public String getLocation() {
        return location;
    }

    public void setLocation(String location) {
        this.location = location;
    }

    public int getAge() {
        return age;
    }

    public void setAge(int age) {
        this.age = age;
    }

    @Override
    public boolean equals(Object o) {
        if (this == o) return true;
        if (!(o instanceof Teacher)) return false;
        Teacher teacher = (Teacher) o;
        return getId() == teacher.getId() &&
                getAge() == teacher.getAge() &&
                Objects.equals(getImagePath(), teacher.getImagePath()) &&
                Objects.equals(getName(), teacher.getName()) &&
                Objects.equals(getIdentity(), teacher.getIdentity()) &&
                Objects.equals(getInfo(), teacher.getInfo()) &&
                Objects.equals(getLocation(), teacher.getLocation());
    }

    @Override
    public int hashCode() {
        return Objects.hash(getId(), getImagePath(), getName(), getIdentity(), getInfo(), getLocation(), getAge());
    }

    @Override
    public String toString() {
        return "Teacher{" +
                "id=" + id +
                ", imagePath='" + imagePath + '\'' +
                ", name='" + name + '\'' +
                ", identity='" + identity + '\'' +
                ", info='" + info + '\'' +
                ", location='" + location + '\'' +
                ", age=" + age +
                '}';
    }
}
dao层代码:
public interface TeacherDao {
    int addTeacher(Teacher teacher);
}
mapper层代码:
<?xml version="1.0" encoding="UTF-8"?>
<!DOCTYPE mapper PUBLIC "-//mybatis.org//DTD Mapper 3.0//EN" "http://mybatis.org/dtd/mybatis-3-mapper.dtd" >
<mapper namespace="cn.blue.vegetable32.dao.TeacherDao">
    <resultMap id="TeacherMap" type="Teacher" >
        <id column="id" property="id" />
        <result column="image_path" property="imagePath" />
        <result column="name" property="name" />
        <result column="identity" property="identity" />
        <result column="info" property="info" />
        <result column="location" property="location" />
        <result column="age" property="age" />
    </resultMap>

    <insert id="addTeacher" parameterType="Teacher">
        insert into teacher
        (id,image_path,name,identity,info,location,age)
        values
        (#{id},#{imagePath},#{name},#{identity},#{info},#{location},#{age})
    </insert>

</mapper>
service层代码:
@Service
public class TeacherService {
    @Autowired
    private TeacherDao teacherDao;

    public boolean addTeacher(Teacher teacher) {
        return teacherDao.addTeacher(teacher) > 0;
    }
}
controller层代码:自动生成,自动添加数据
@Controller
@RequestMapping("teacher")
public class TeacherController {
    @Autowired
    private TeacherService teacherService;

    @ResponseBody
    @RequestMapping("addTeacher")
    public Map<String,Object> addTeacher() {
        for (int i=0;i<10;i++) {
            Teacher teacher = new Teacher();
            teacher.setId((int)(Math.random()*Integer.MAX_VALUE));
            teacher.setImagePath("/Image/"+System.currentTimeMillis()+".jpeg");
            teacher.setInfo("默认信息");

            //DataGenerator.generateLocation是我自己编写的自动生成位置的方法
            teacher.setLocation(DataGenerator.generateLocation());

            //DataGenerator.generateName是我自己编写的自动生成姓名的方法
            teacher.setName(DataGenerator.generateName());

            //DataGenerator.generateAge是我自动编写的自动生成年龄的方法
            teacher.setAge(DataGenerator.generateAge());
            teacherService.addTeacher(teacher);
        }

        //随便返回个结果给客户端
        Map<String,Object> result = new HashMap<>();
        result.put("code",0);
        result.put("msg","");
        result.put("data",null);
        return result;
    }
}
D. 总结
spring boot整合sharding-sphere4.0已经实现了最简单的分库,但是现在有以下的扩展点
- 可以按照非int字段进行分库
- 分表
- 可以按照非int字段进行分表
- 整合mybatis-plus并使用到mybatis-plus的功能
- 实现数据库读写分离
- 在分库分表的基础上实现数据库读写分离
- 在实现分库分表的情况下实现分页功能(目测为最难的目标)
版权声明:本文为getCaiBlueGiant原创文章,遵循CC 4.0 BY-SA版权协议,转载请附上原文出处链接和本声明。