SpringBoot [ 5.集成Swagger-Bootstrap-UI] - 目录
文章目录
首先Swagger它是一个API文档工具,可以通过各种注解生成接口文档,Model文档,但是我在使用Swagger的时候,觉得实用性并不高,一个机会接触到了基于Swagger开发的Swagger-Bootstrap-UI,觉得很好用;
1.引入依赖
  <!-- springfox-swagger2 -->
  <dependency>
      <groupId>io.springfox</groupId>
      <artifactId>springfox-swagger2</artifactId>
      <version>${springfox-swagger2.version}</version>
      <!-- swagger-models剔除原因: 1.5.20版本swagger-models 读取失败, 使用1.5.21替代 -->
      <exclusions>
          <exclusion>
              <groupId>io.swagger</groupId>
              <artifactId>swagger-models</artifactId>
          </exclusion>
      </exclusions>
  </dependency>
  <!-- swagger-models -->
  <dependency>
      <groupId>io.swagger</groupId>
      <artifactId>swagger-models</artifactId>
      <version>${swagger.models.version}</version>
  </dependency>
  <!-- swagger-bootstrap-ui -->
  <dependency>
      <groupId>com.github.xiaoymin</groupId>
      <artifactId>swagger-bootstrap-ui</artifactId>
      <version>${swagger-bootstrap-ui.version}</version>
  </dependency>
2.配置类
SwaggerConfiguration 类,其实这个类得配置,是有很多东西可以配置,但是我这里得话按照官方文档只配置了标题,详情,访问地址,版本。
package com.mantou.boot.config.swagger;

import com.github.xiaoymin.swaggerbootstrapui.annotations.EnableSwaggerBootstrapUI;
import org.springframework.context.annotation.Bean;
import org.springframework.context.annotation.Configuration;
import springfox.documentation.builders.ApiInfoBuilder;
import springfox.documentation.builders.PathSelectors;
import springfox.documentation.builders.RequestHandlerSelectors;
import springfox.documentation.service.ApiInfo;
import springfox.documentation.spi.DocumentationType;
import springfox.documentation.spring.web.plugins.Docket;
import springfox.documentation.swagger2.annotations.EnableSwagger2;

/**
 * Swagger2Config配置类
 * @author mantou
 */
@Configuration
@EnableSwagger2
@EnableSwaggerBootstrapUI
public class SwaggerConfiguration {

    @Bean
    public Docket createRestApi() {
        return new Docket(DocumentationType.SWAGGER_2)
                .apiInfo(apiInfo())
                .select()
                //API 路径
                .apis(RequestHandlerSelectors.basePackage("com.mantou.boot"))
                .paths(PathSelectors.any())
                .build();
    }

    private ApiInfo apiInfo() {
        return new ApiInfoBuilder()
                //标题
                .title("swagger-bootstrap-ui RESTful APIs")
                //详情
                .description("swagger-bootstrap-ui")
                //访问地址
                .termsOfServiceUrl("http://localhost:8888/")
                //版本
                .version("1.0")
                .build();
    }
}
SwaggerWebMvcConfigurer 类
package com.mantou.boot.config.swagger;

import org.springframework.context.annotation.Configuration;
import org.springframework.web.servlet.config.annotation.ResourceHandlerRegistry;
import org.springframework.web.servlet.config.annotation.WebMvcConfigurer;

/**
 * SpringBoot中访问doc.html报404的解决办法
 * @author mantou
 */
@Configuration
public class SwaggerWebMvcConfigurer implements WebMvcConfigurer {

    @Override
    public void addResourceHandlers(ResourceHandlerRegistry registry) {
        registry.addResourceHandler("doc.html").addResourceLocations("classpath:/META-INF/resources/");
        registry.addResourceHandler("/webjars/**").addResourceLocations("classpath:/META-INF/resources/webjars/");
    }
}
配置好后,将项目启动,访问
http://localhost:8888/m-boot/doc.html
如下图,即成功:
3.常用注解
swagger得注解其实有很多,但是没必要每一个都去掌握,掌握几个最实用得注解就好了,其他得注解可以在学习或者工作得过程中去了解,我们可以打开它得引入得jar大概得了解一下,让自己心里有个数:
3.1.Api类注解
3.1.1.@Api
@Api顾名思义,它就是打在接口(controller类)上的注解。
@Api(tags = "用户管理")


3.1.2.@ApiOperation
@ApiOperation这个注解,打在接口里得方法上,与@Api注解结合使用
@ApiOperation(value = "新增用户")
如果你不希望某个接口通过这个文档暴露出去,可以这样
@ApiOperation(value = "批量新增用户", hidden = true)


3.2.Model类注解
Model类得注解主要是使用在一些entity,dto,vo,model上,可以在swagger-bootstrap-UI里得swagger-models里查看,可以在接口里的请求实例或者响应示例里查看
3.2.1.@ApiModel
@ApiModel(value="SysUser对象")


3.2.2.@ApiModelProperty
这个注解用来打在entity,vo …这些类得字段上,与@ApiModel注解配合使用,
说
@ApiModelProperty(value = “主键:用户ID”)
如果你不希望某个字段通过这个文档暴露出去,你可以这样
@ApiModelProperty(value = "用户登录密码", hidden = true)


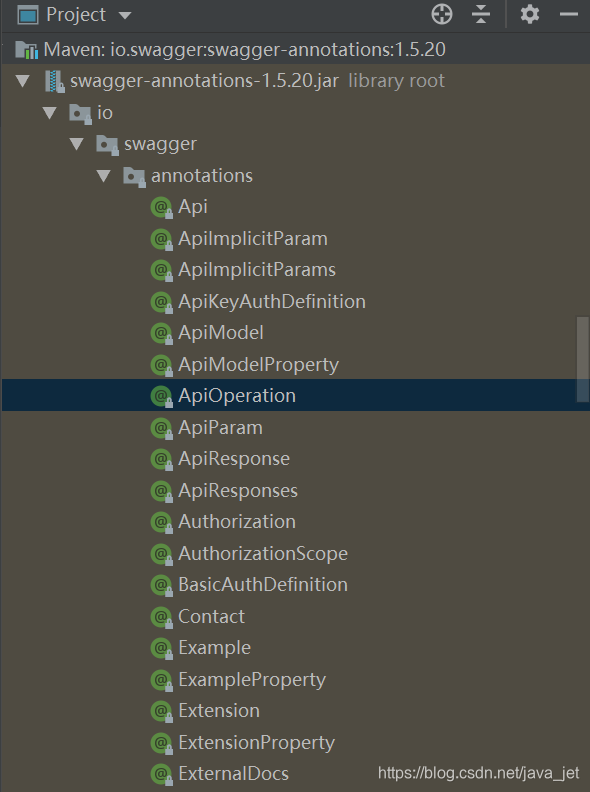
3.3.参数类注解
其实参数类注解之前我也没有用过,这个时候我们可以看一下是哪个注解,首先打开jar,找一下:

@ApiParam就是参数的注解,接下来我们再来看一下这个注解的内容。


value是参数的名称含义了,这个defaultValue和required在@RequestParam注解里都有,它们意思分别是默认值和是否必填,再看hidden和readOnly,一个是隐藏,另一个就是只读,最后我们看一下example,这个是参数的填写示例
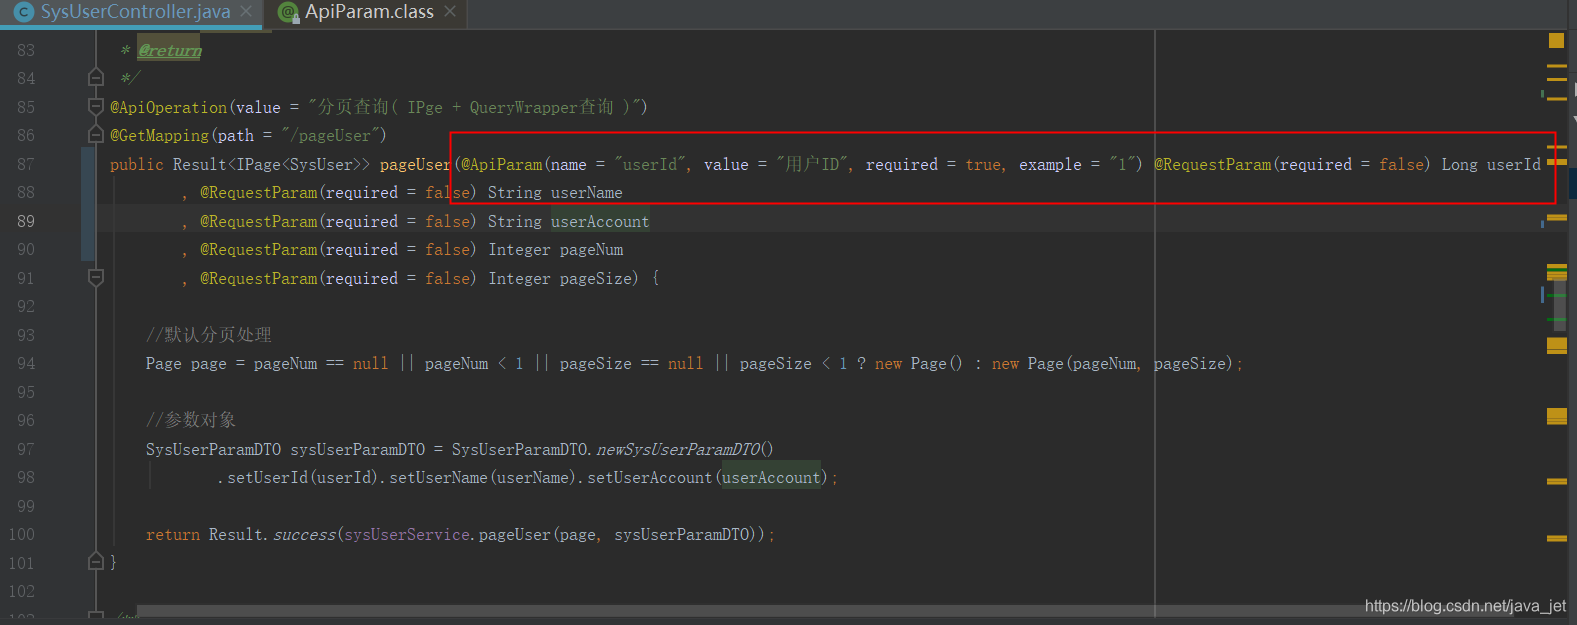
3.3.1.@ApiParam
nvalue参数的含义,然后这个example的确是示例值,只不过这个示例值与value不能同时使用,因为它们显示的地方是一个。
@ApiParam(name = "userId", value = "用户ID", required = true, example = "1") @RequestParam(required = false) Long userId
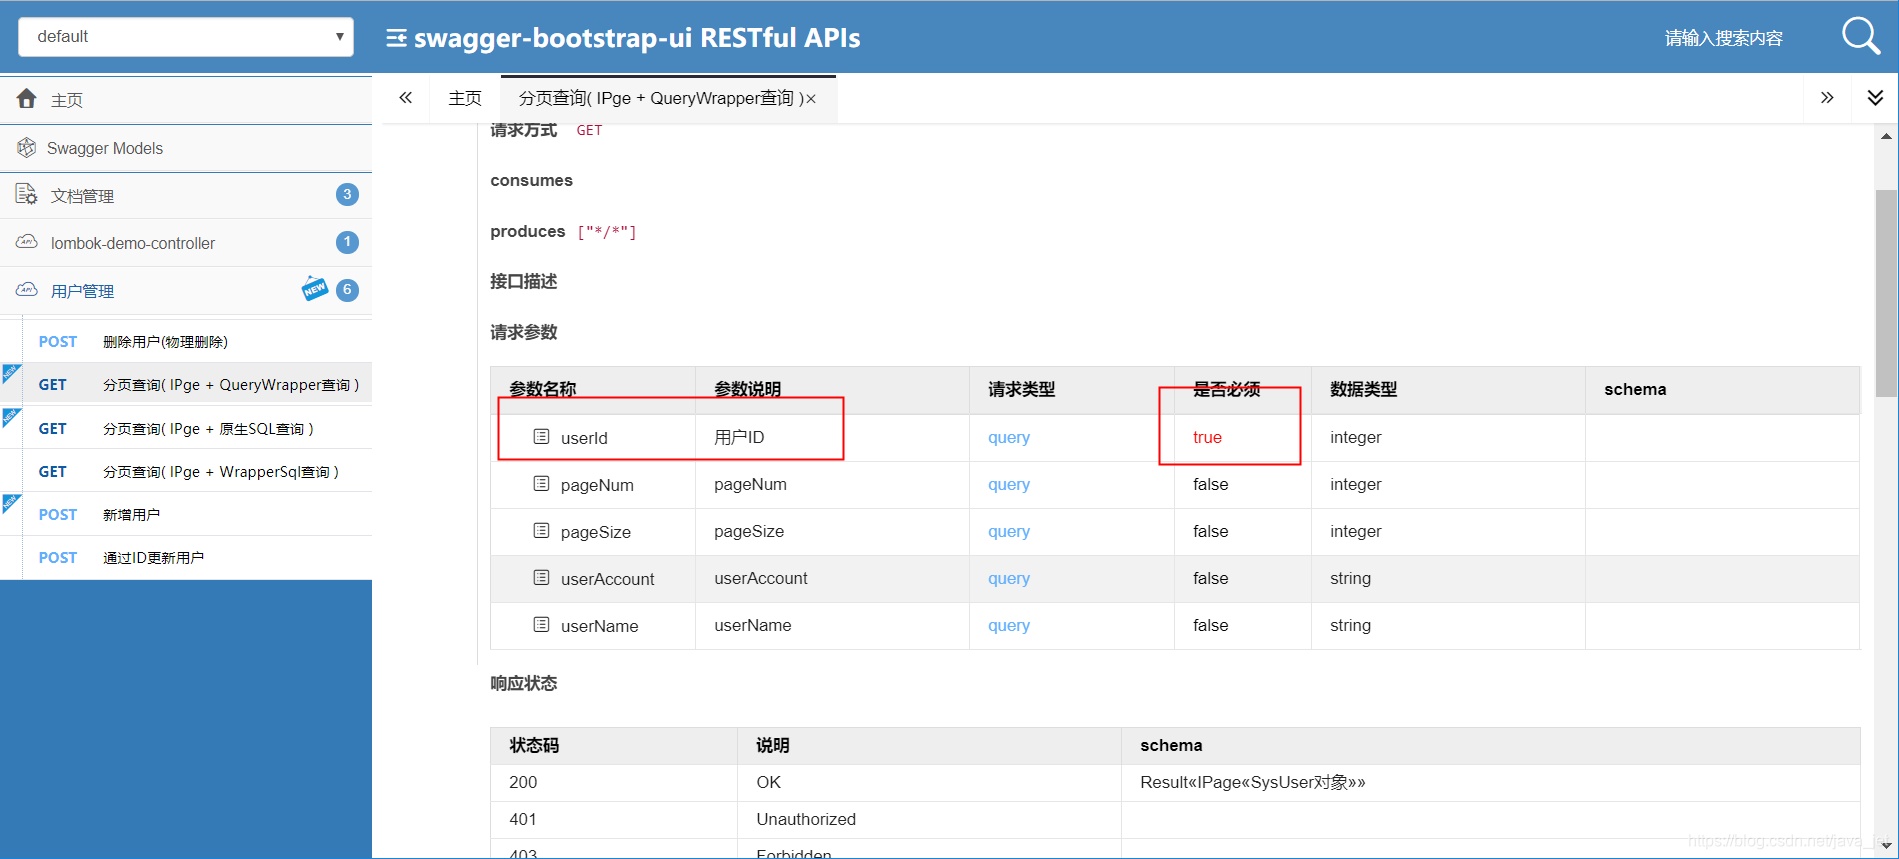

然后我们再来看一下hidden属性,加上这个后文档中的这个参数就消失了.
@ApiParam(name = "userId", value = "用户ID", required = true, example = "1", hidden = true

在项目当中按下面的这个示例来,就已经满足项目的需求了
//如果参数为非必填,可将required 去掉
@ApiParam(value = "XXX", required = true)
4.接口调试
接口调试的话,打开接口文档,找到调试,填写参数,点击发送即可

5.集成SpringCloud 网关
swagger-bootstrap-ui还有一个很好的功能就是,可以集成SpringCloud的网关zuul和gateway,形成一个聚合文档,通过网关配置的路由,就可以查看访问各个微服务的接口
集成zuul的文档在官方文档上有
官方文档: https://doc.xiaominfo.com/