1.body占满全屏,在最外层的入口html中,即index.html中加入CSS样式
  <style>
    html {
      position: absolute;
      margin: 0;
      height: 100vh;
      width: 100vw;
    }

    body {
      position: absolute;
      margin: 0;
      height: 100%;
      width: 100%;
    }
  </style>
2。修改入口组件App.vue中的样式为:
#app {
font-family: Avenir, Helvetica, Arial, sans-serif;
-webkit-font-smoothing: antialiased;
-moz-osx-font-smoothing: grayscale;
text-align: center;
color: #2c3e50;
margin-top: 0px;
height: 100%;
width: 100%;
position: absolute;
}
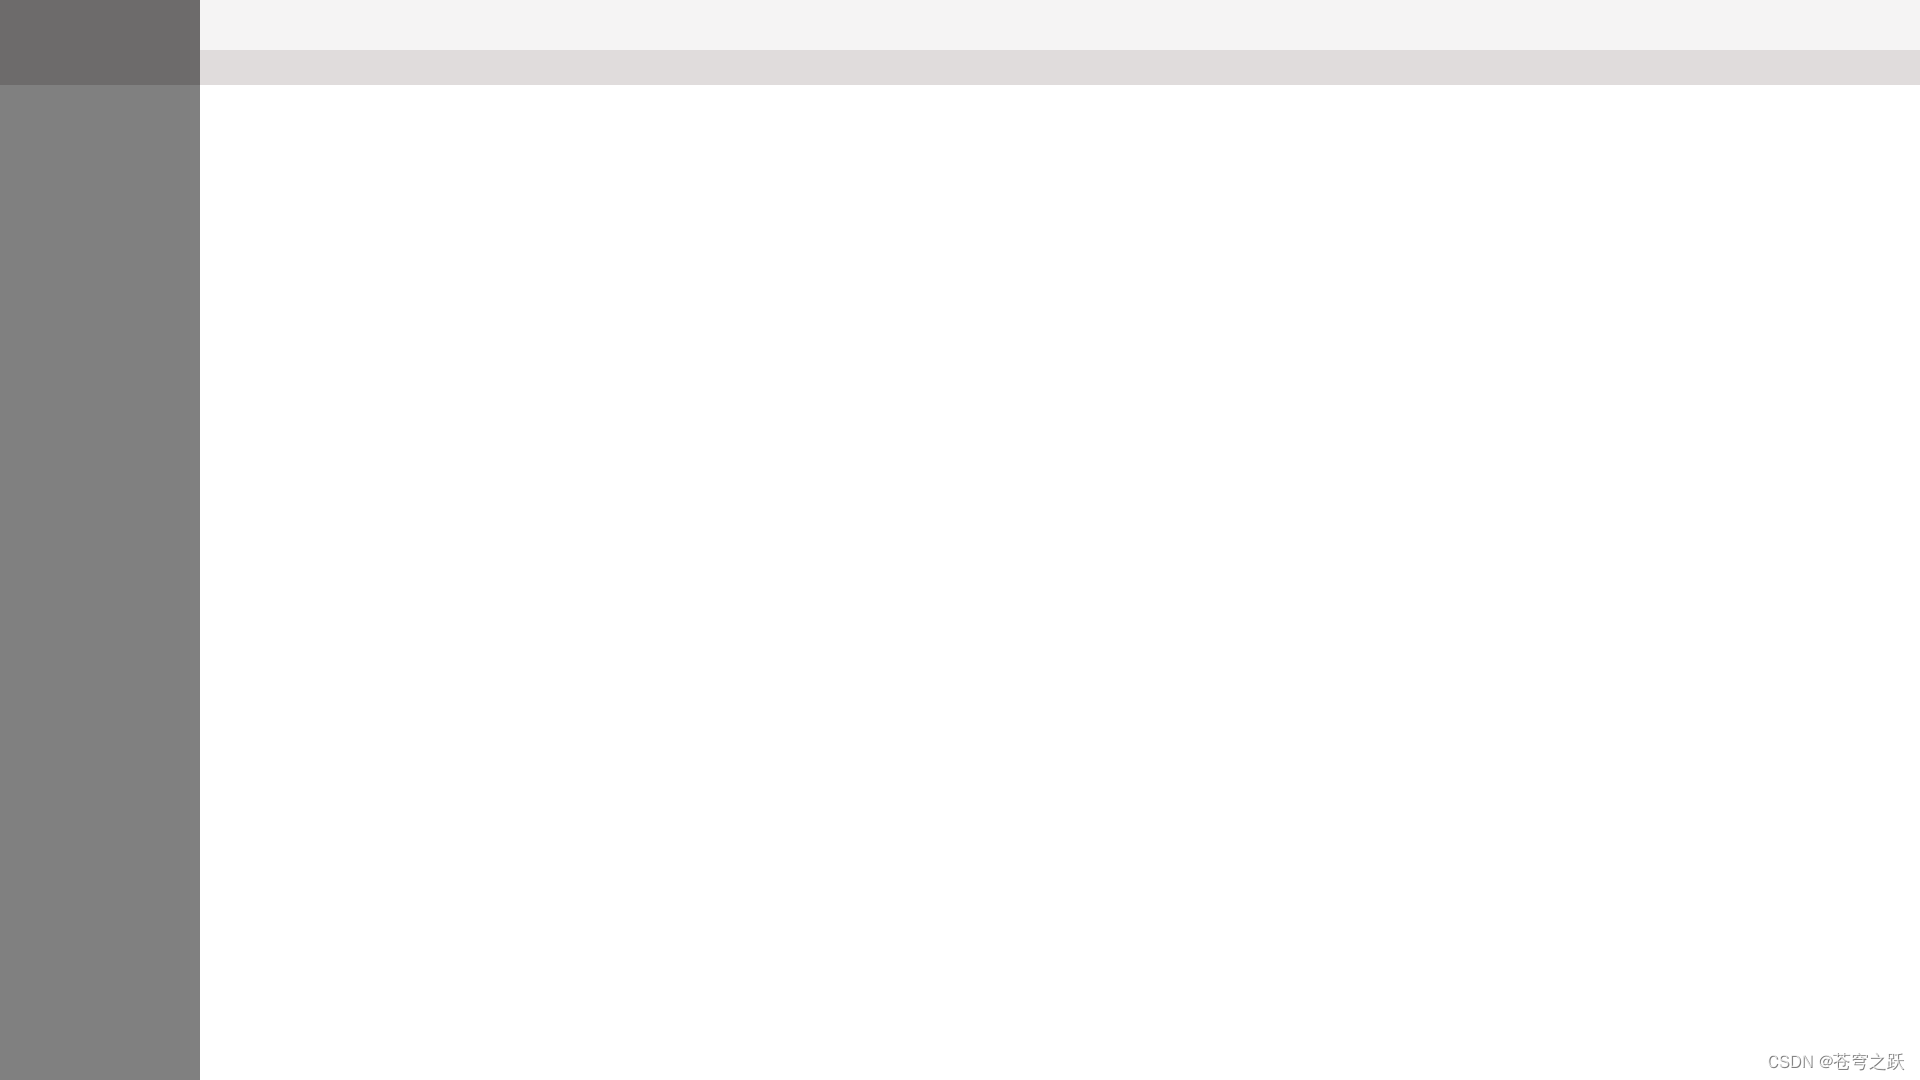
</style>3.在components文件夹下新建layout文件夹,新建一个布局主组件LayoutMain.vue,全部使用弹性盒子模型构建,内容如下
<script setup>

</script>

<template>
    <!-- 容器 -->
    <div class="root-container">
        <!-- 左半边 -->
        <div class="left">
            <!-- LOGO区 -->
            <div class="left-logo"></div>
            <!-- 菜单区 -->
            <div class="left-menu"></div>
        </div>
        <!-- 右半边 -->
        <div class="right">
            <!-- 页头区 -->
            <div class="right-header"></div>
            <!-- Tab区 -->
            <div class="right-tab"></div>
            <!-- 主显示区 -->
            <div class="right-main"></div>
        </div>
    </div>
</template>

<style lang="less" scoped>
/* 容器满屏 */
.root-container {
    background-color: white;
    height: 100%;
    width: 100%;
    // 弹性盒子模型
    display: flex;
    // 盒子左右排列
    flex-direction: row;
    // 水平对齐
    justify-content: start;
    // 垂直对齐
    align-items: center;
}

.left {
    background-color: gray;
    width: 200px;
    height: 100%;

    .left-logo {
        background-color: #6d6b6b;
        width: 100%;
        height: 85px;
    }

    .left-menu {
        width: 100%;
        height: calc(100% - 85px);
    }
}

.right {
    background-color: rgb(209, 205, 205);
    // 使用计算占满剩余宽度
    width: calc(100% - 200px);
    height: 100%;

    .right-header {
        background-color: #f5f4f4;
        width: 100%;
        height: 50px;
    }

    .right-tab {
        background-color: #e0dcdc;
        width: 100%;
        height: 35px;
    }

    .right-main {
        background-color: white;
        width: 100%;
        // 使用计算占满剩余高度
        height: calc(100% - 50px - 35px);
    }
}
</style>
4.为了开发方便,添加一下路由地址“/layout”,可以方便导航我们的布局主页面:
import { createRouter, createWebHistory } from 'vue-router'
const routerHistory = createWebHistory()
const router = createRouter({
    history: routerHistory,
    routes: [
        {
            path: '/',
            component: () => import('../components/HelloWorld.vue')
        }, {
            path: '/page1',
            component: () => import('../views/page1.vue')
        }, {
            path: '/page2',
            component: () => import('../views/page2.vue')
        },
        {
            path: '/layout',
            component: () => import('@/components/layout/LayoutMain.vue')
        }
    ]
})
export default router
5.效果如下
6.接下来,就要把相关的功能组件开发出来,一个个放到对应的盒子中。
版权声明:本文为wenxingchen原创文章,遵循CC 4.0 BY-SA版权协议,转载请附上原文出处链接和本声明。