一、下载安装Erlang
这里以最新的OTP 23.0 Windows 64-bit Binary File为例,下载后安装到C:\Program Files\erl-23.0,在PATH中添加路径:C:\Program Files\erl-23.0\bin
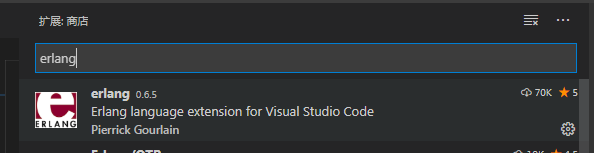
二、安装VSCode Erlang插件
三、安装rebar3
在https://www.rebar3.org/下载最新的rebar3,放在Erlang的可执行文件目录中(C:\Program Files\erl-23.0\bin),然后在此目录添加一个rebar3.bat,内容如下:
@echo off
escript.exe "%~dpn0" %*
四、测试开发环境
由于VSCode的Erlang插件默认是使用rebar3编译生成的目录结构来进行调试的,所以需要使用rebar3来进行编译。也强烈建议使用rebar3来创建工程。
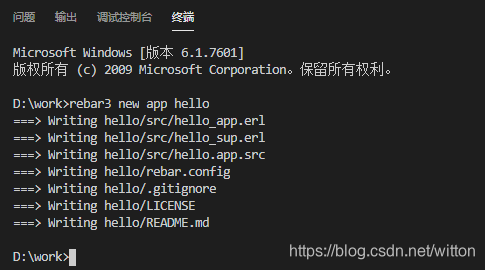
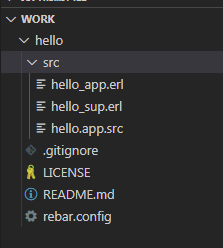
1. 创建工程
在VSCode终端使用rebar3创建一个hello工程
rebar3 new app hello
2. 配置生成任务
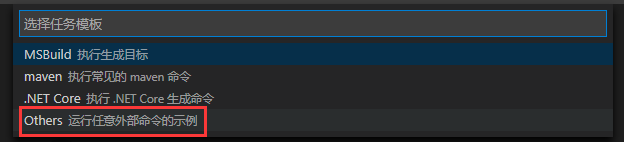
在“终端”菜单中执行“配置默认生成任务”,选择使用模板创建tasks.json,再选择Others。

此时生成的tasks.json文件:
{
	// See https://go.microsoft.com/fwlink/?LinkId=733558
	// for the documentation about the tasks.json format
	"version": "2.0.0",
	"tasks": [
		{
			"label": "echo",
			"type": "shell",
			"command": "echo Hello"
		}
	]
}
将之改为:
{
	// See https://go.microsoft.com/fwlink/?LinkId=733558
	// for the documentation about the tasks.json format
	"version": "2.0.0",
	"tasks": [
		{
			"label": "rebar3 compile",
			"type": "shell",
			"command": "cd hello && rebar3 compile"
		}
	]
}
由于VSCode的工作区为hello的上层目录work,所以如果要编译hello需要进入到hello目录再编译。
此时再在“终端”菜单中执行“配置默认生成任务”,会出现我们刚才配置的任务rebar3 compile,执行它。
并在problemMatcher中设置为"$erlang":
{
	// See https://go.microsoft.com/fwlink/?LinkId=733558
	// for the documentation about the tasks.json format
	"version": "2.0.0",
	"tasks": [
		{
			"label": "rebar3 compile",
			"type": "shell",
			"command": "cd hello && rebar3 compile",
			"problemMatcher": [
				"$erlang"
			],
			"group": {
				"kind": "build",
				"isDefault": true
			}
		}
	]
}
3. 编译
按F7编译,rebar3会创建一个_build目录来存放编译结果,默认情况下,项目结果会放在_build\default\lib目录对应项目名文件夹中,所有源文件编译到项目的ebin目录中,并创建src、include和priv的快捷方式。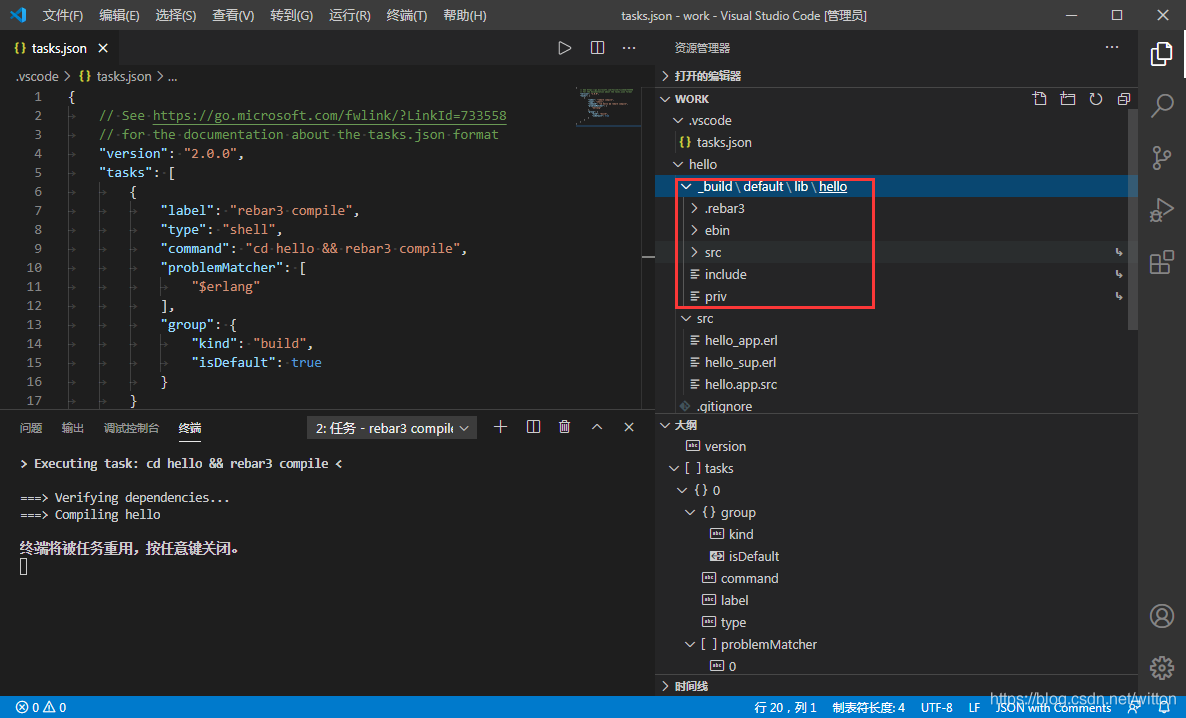
4. 运行、调试
要运行调试,需要先进行配置,如下图所示创建launch.json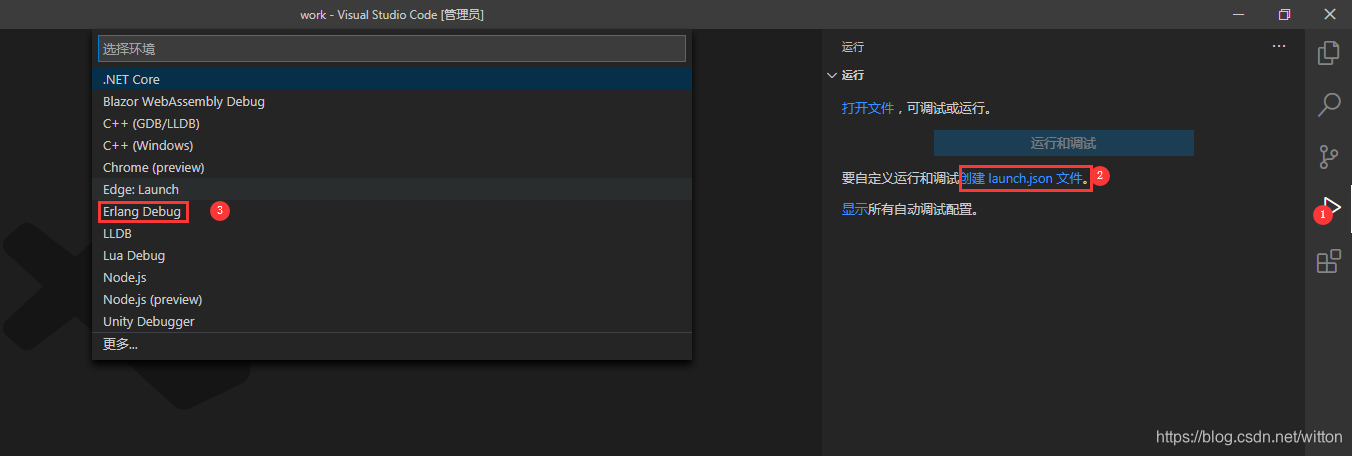
修改launch.json,在cwd中添加hello的路径和arguments参数。为了让运行前自动编译,可以添加preLaunchTask参数,指定任务名称为编译任务。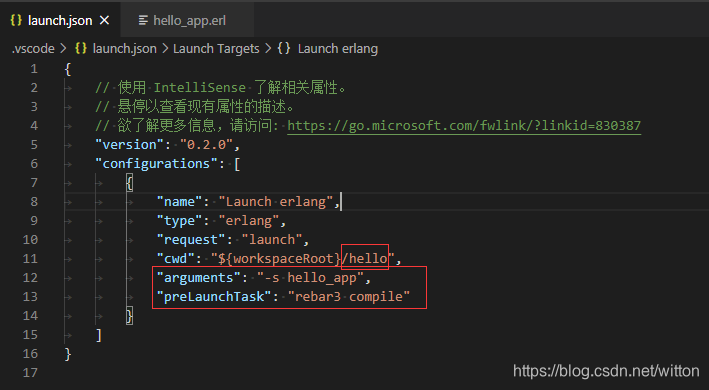
{
	// 使用 IntelliSense 了解相关属性。
	// 悬停以查看现有属性的描述。
	// 欲了解更多信息,请访问: https://go.microsoft.com/fwlink/?linkid=830387
	"version": "0.2.0",
	"configurations": [
		{
			"name": "Launch erlang",
			"type": "erlang",
			"request": "launch",
			"cwd": "${workspaceRoot}/hello",
			"arguments": "-s hello_app",
			"preLaunchTask": "rebar3 compile"
		}
	]
}
配置好后如果此时按F5调试会报错: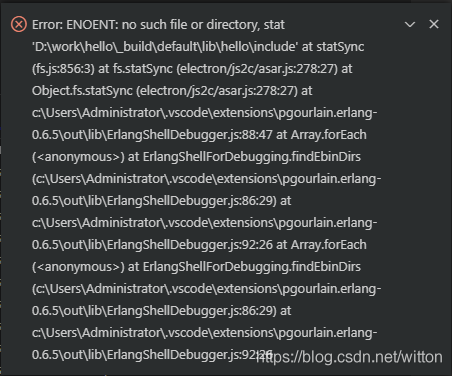
说是include不存在,这是因为rebar3会创建src、include和priv的快捷方式,但是hello项目中并不存在include和priv目录,所以创建的快捷方式无效。从命令行中dir,可以看到include、priv、src都是hello工作目录的快捷方式。
知道原因就好解决了,先删除_build目录,然后在hello工作目录添加目录include、priv,再次编译即可。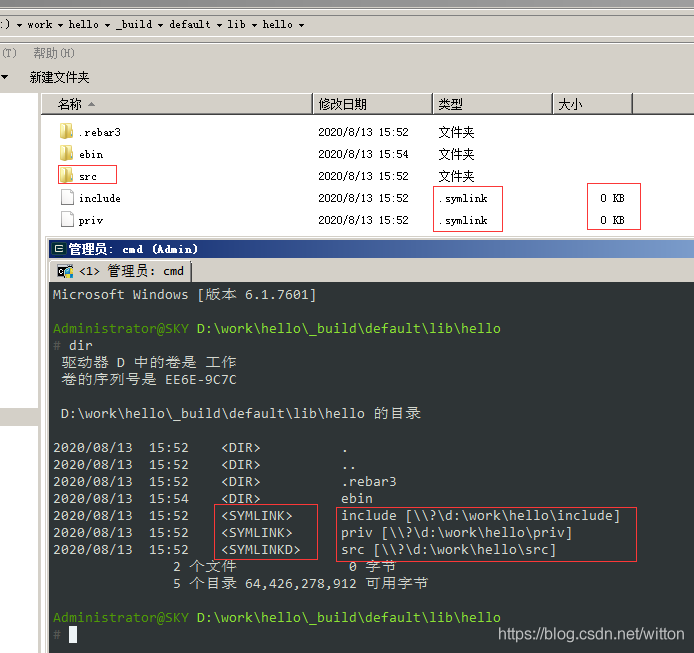
此时还不能打断点调试,因为rebar3在创建工程时hello_app.erl中的start函数是一个有2个参数的函数,而启动配置中只支持0个或者1个参数。所以还需要修改一下源文件,添加一个start函数: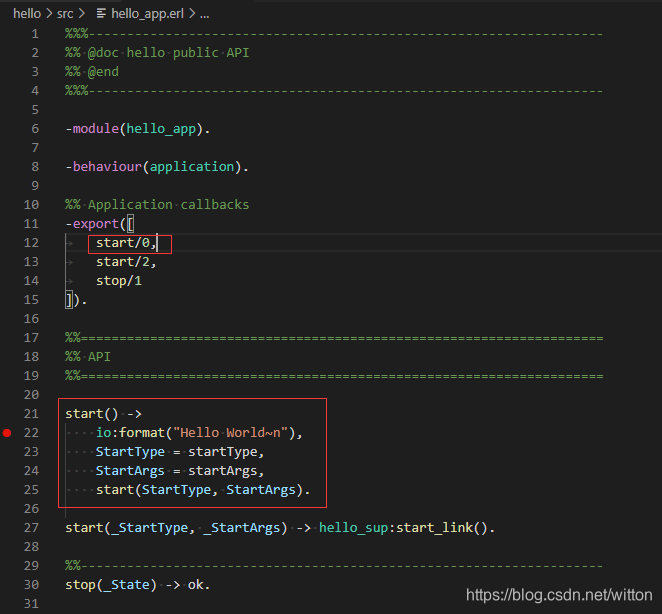
此时运行调试即可断点查看变量、堆栈等信息。
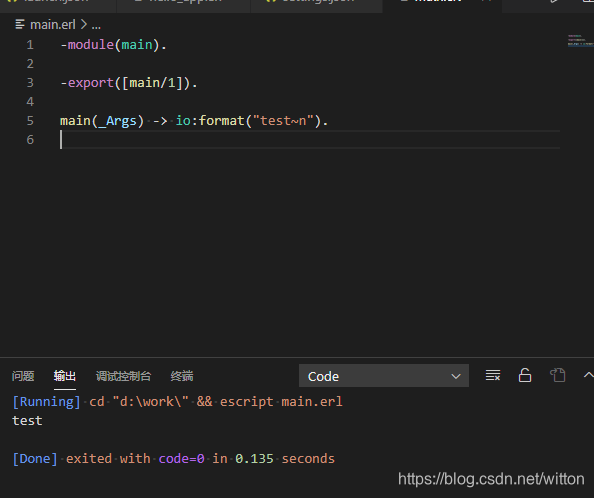
五、使用CodeRunner运行
截止目前CoderRunner插件还不支持Erlang,不过可以自行添加,在settings.json中找到"code-runner.executorMap",添加erlang的命令即可,这里是使用escript的方式执行的,所以需要添加main/1入口函数。
"erlang": "cd $dir && escript $fileName",
如有一个main.erl:
-module(main).

-export([main/1]).

main(_Args) -> io:format("test~n").
使用CodeRunner执行Erlang: