实现过程:
要想图形化展示日志,我们可以利用rsyslog的前端展示工具loganalyzer来展示。用这个工具它是基于LAMP架构来实现的,在这之前我们先把apache的访问日志交给rsyslog,rsyslog再把对应的日志写到数据库里,然后通过日志展示工具loganalyzer去数据库把日志对出来,然后展示出来。
环境:
Centos7.6 192.168.6.129 (httpd 、php、wordpress)
目录在/app 下 httpd24 php
Centos7.6 192.168.6.130 (mariadb)
目录在/data/mysql/下
参考链接:
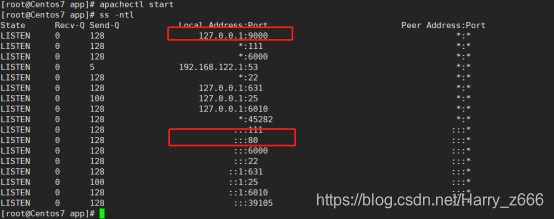
1.在192.168.6.129主机上开启httpd 服务
[root@Centos7 app]# apachectl start
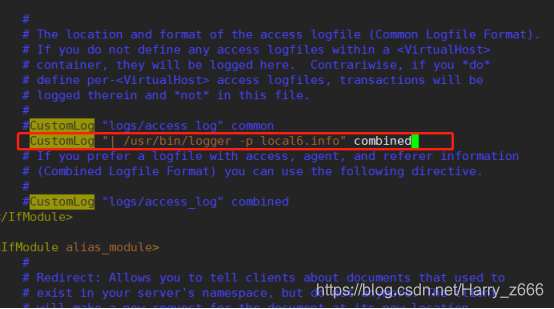
2.修改192.168.6.129主机上 /app/httpd24/conf/httpd.conf 文件中的访问日志的配置,使其重定向至 rsyslog
[root@Centos7 conf]# vim httpd.conf

CustomLog "| /usr/bin/logger -p local6.info" combined
修改/etc/rsyslog.conf配置文件
[root@Centos7 conf]# vim /etc/rsyslog.conf

重启httpd 、rsyslog服务
[root@Centos7 conf]# apachectl restart
[root@Centos7 conf]# systemctl restart rsyslog

3.在192.168.6.129主机上安装rsyslog-mysql数据包
[root@Centos7 conf]# yum install -y rsyslog-mysql
两个文件
模块:ommysql.so
创建数据库脚本:Mysql-createDB.sql

传送/usr/share/doc/rsyslog-8.24.0/mysql-createDB.sql文件给192.168.6.130主机,此主机装有mariadb数据库

[root@Centos7 conf]# scp /usr/share/doc/rsyslog-8.24.0/mysql-createDB.sql 192.168.6.130:/data/

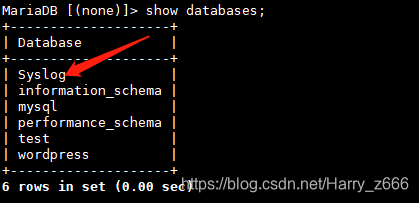
4.在192.168.130主机上导入/usr/share/doc/rsyslog-8.24.0/mysql-createDB.sql
[root@Centos7 data]# mysql -uroot -p123456 < mysql-createDB.sql
5.授权数据库
MariaDB [(none)]> grant all on Syslog.* to syslog@'192.168.6.%' identified by 'centos';
MariaDB [(none)]> flush privileges;
6.修改/etc/rsyslog.conf配置文件
1.添加ommysql模块

2.添加数据库连接信息
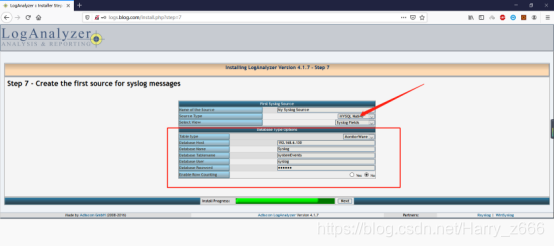
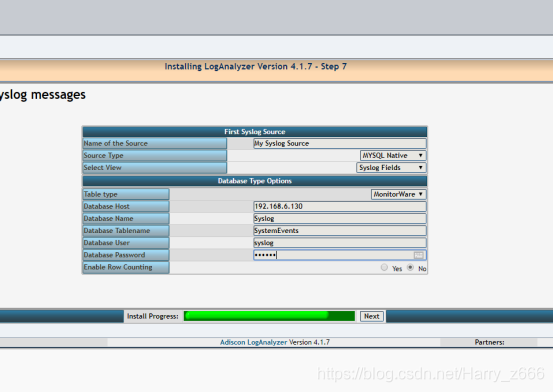
local6.* :ommysql:192.168.6.130,Syslog,syslog,centos

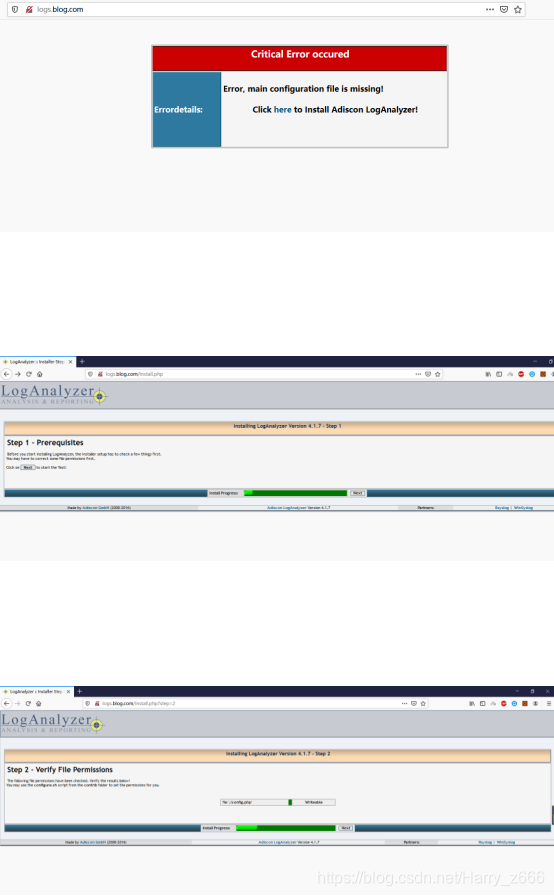
7.安装LogAnalyzer

[root@Centos7 data]# tar -xvf loganalyzer-4.1.7.tar.gz
[root@Centos7data]#cp -a loganalyzer-4.1.7/src/ /app/httpd24/htdocs/logs
[root@Centos7 logs]# touch config.php
[root@Centos7 logs]# chmod 666 config.php

8.在httpd.conf文件中添加虚拟主机设置
[root@Centos7 conf]# vim httpd.conf
<VirtualHost *:80>
ServerName logs.blog.com
DocumentRoot /app/httpd24/htdocs/logs
<Directory /app/httpd24/htdocs/logs>
Options none
Require all granted
</Directory>
ProxyPassMatch ^/(.*\.php)$ fcgi://127.0.0.1:9000/app/httpd24/htdocs/logs/$1
</VirtualHost>

在windows上修改hosts文件,重启相关服务
[root@Centos7 conf]# vim httpd.conf
[root@Centos7 conf]# apachectl restart
[root@Centos7 conf]# systemctl restart php-fpm
[root@Centos7 conf]# systemctl restart rsyslog.service
9.在浏览器上进行安装


版权声明:本文为Harry_z666原创文章,遵循 CC 4.0 BY-SA 版权协议,转载请附上原文出处链接和本声明。