· Spring Boot简介及快速搭建
· Spring Boot的配置和自动配置原理
· Spring Boot热部署与日志
· Spring Boot与Web开发
· Spring Boot集成MyBatis
· Spring Boot启动原理源码剖析
· Spring Boot自定义starters
Spring boot简介及快速搭建
1. 简介
官网:https://spring.io/projects/spring-boot
SpringBoot基于Sping4.0设计,是由Pivotal公司提供的框架。
SpringBoot基于Spring开发,不仅继承了Spring框架原有的优秀特性,而且还通过简化配置来进一步简化了Spring应用的整个搭建和开发过程,其设计目的是用来简化Spring应用的初始搭建以及开发过程。怎么简化的呢?就是通过提供默认配置等方式让我们更容易使用。
SpringBoot本身并不提供Spring框架的核心特性以及拓展功能,也就是说,它并不是用来替代Spring的解决方案,而是和Spring框架紧密结合用于提升Spring开发者体验的工具。
关于SpringBoot有一句很出名的话就是约定大约配置。采用SpringBoot可以大大的简化开发模式,它集成了大量常用的第三方库配置,所有你想集成的常用框架,它都有对应的组件支持,例如Redis、MongoDB、Dubbo、kafka、ES等。SpringBoot应用中这些第三方库几乎可以零配置地开箱即用,大部分的SpringBoot应用都只需要非常少量的配置代码,开发者能更加专注于业务逻辑。另外SpringBoot通过集成大量的框架使得依赖包的版本冲突,以及引用的不稳定性等问题得到了很好的解决。

优点
快速构建一个独立的Spring应用程序;
嵌入的Tomcat、Jetty或者Undertow,无需部署WAR文件;
提供starter POMs来简化Maven配置和减少版本冲突所带来的问题;
对Sping和第三方库提供默认配置,也可以修改默认值,简化框架配置;
提供生产就绪型功能,如指标、健康检查和外部配置;
无需配置XML,无代码生成,开箱即用;
2. Why SpringBoot?
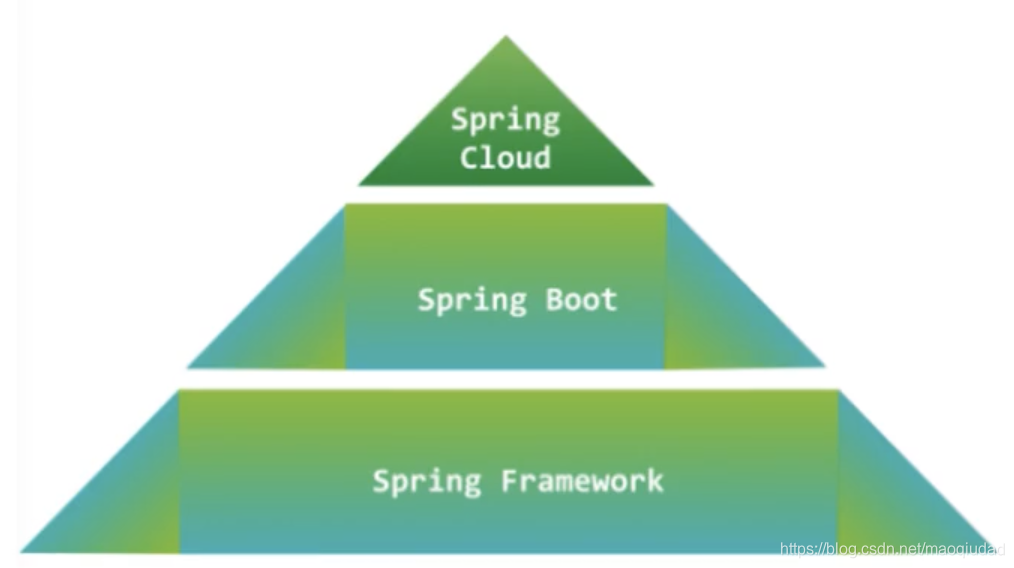
SpringBoot简化了基于Spring开发这只是最直观的一方面;还有另一个方面:也更得力于各微服务组件的支持(起初是Netflix移植到Spring),Spring,这也是谈SpringBoot必谈微服务的原因。可以说是Spring Cloud带动了SpringBoot,SpringBoot成就了SpringCloud。
微服务

快速开始SpringBoot Hello World
前置知识要求
SSM框架使用经验
熟练使用Maven进行项目构建和依赖管理
熟练使用Idea或者Eclipse
环境要求
Spring Boot RELEASE 需要Java8,并且与Java15兼容。还需要Spring Framework 5.2.10.RELEASE或者更高版本。
构建工具的支持
Maven 3.3+
开发工具
eclpise
Idea 2018+(别忘了配置Maven,Jdk)
创建一个Maven工程
项目中引入依赖
 		<!--继承springboot父项目-->
    <parent>
        <groupId>org.springframework.boot</groupId>
        <artifactId>spring-boot-starter-parent</artifactId>
        <version>2.5.2</version>
        <relativePath/> <!-- lookup parent from repository -->
    </parent>

	<dependencies>
		<!--引入springboot的web支持-->
        <dependency>
            <groupId>org.springframework.boot</groupId>
            <artifactId>spring-boot-starter-web</artifactId>
        </dependency>
    </dependencies>
建包并创建控制器
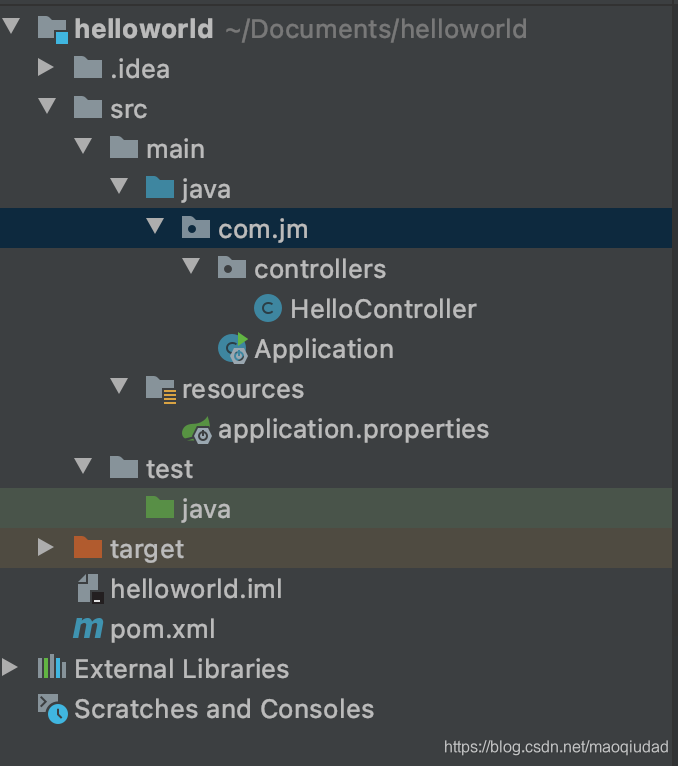
HelloController.java如下:
package com.jm.controllers;

import org.springframework.web.bind.annotation.RequestMapping;
import org.springframework.web.bind.annotation.RestController;

@RestController
@RequestMapping("/hello")
public class HelloController {

    @RequestMapping("/world")
    public String sayHi(){
        return "hello world";
    }
}
标记SpringBoot启动类
Application如下:
package com.jm;

import org.springframework.boot.SpringApplication;
import org.springframework.boot.autoconfigure.SpringBootApplication;

@SpringBootApplication //标记成SpringBoot启动类
public class Application {
    public static void main(String[] args) {
        SpringApplication.run(Application.class, args);
    }
}
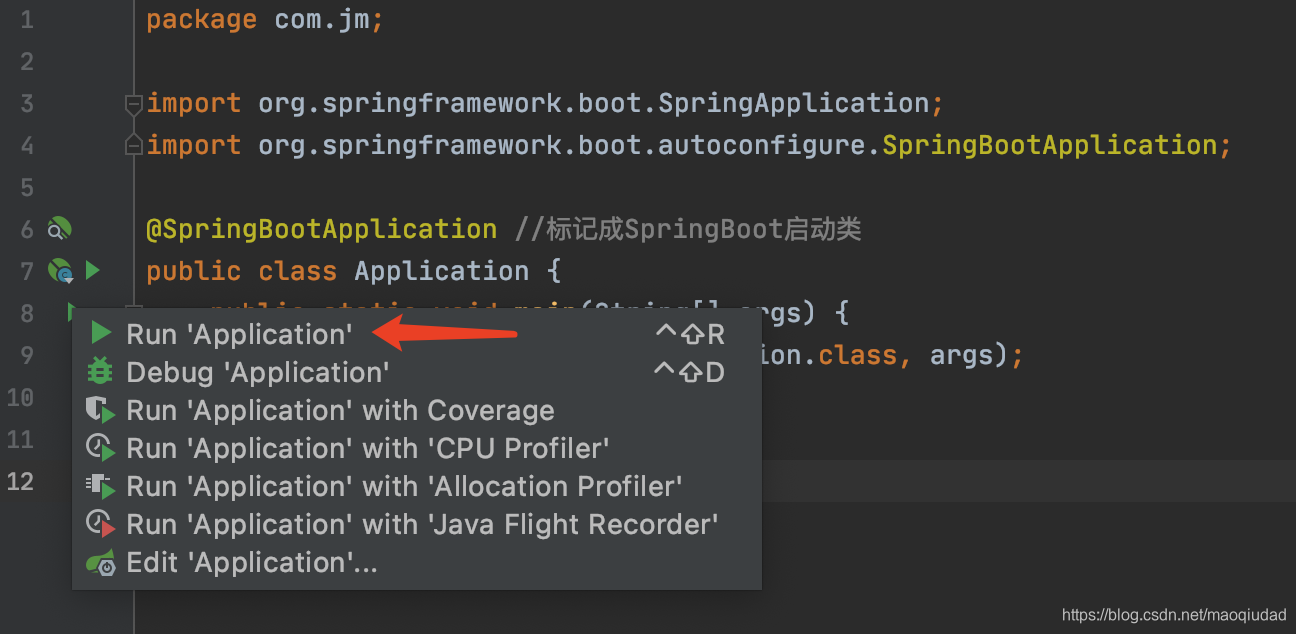
启动启动类
启动类有且仅有一个;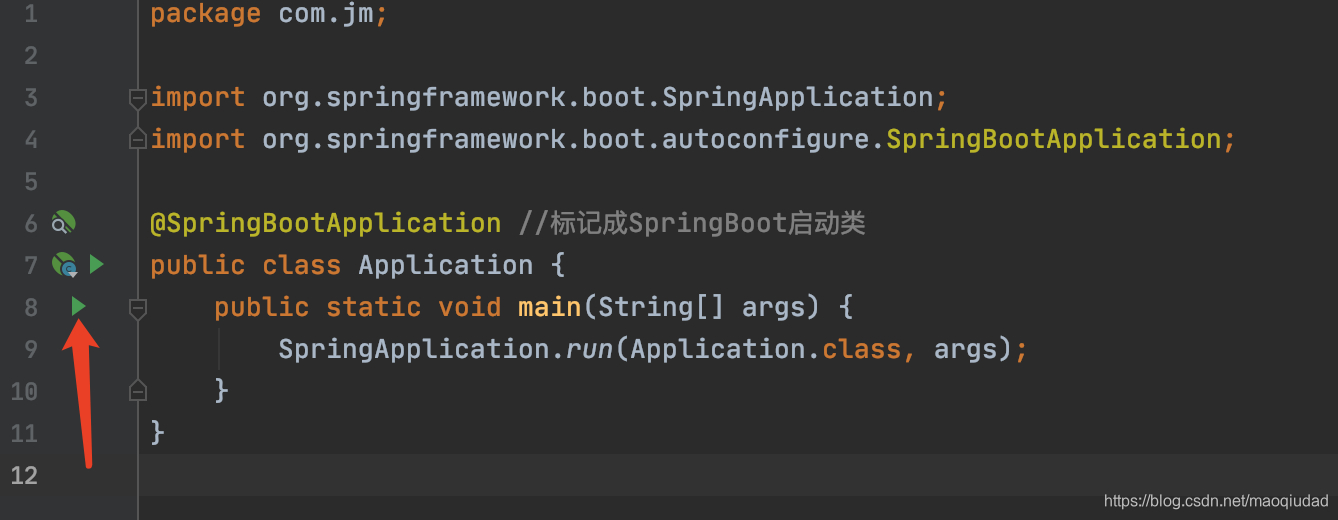
查看效果
浏览器输入:http://localhost:8080/hello/world 回车
Tips:
在resources/application.properties中添加如下代码,可更改指定的端口号和项目虚拟路径
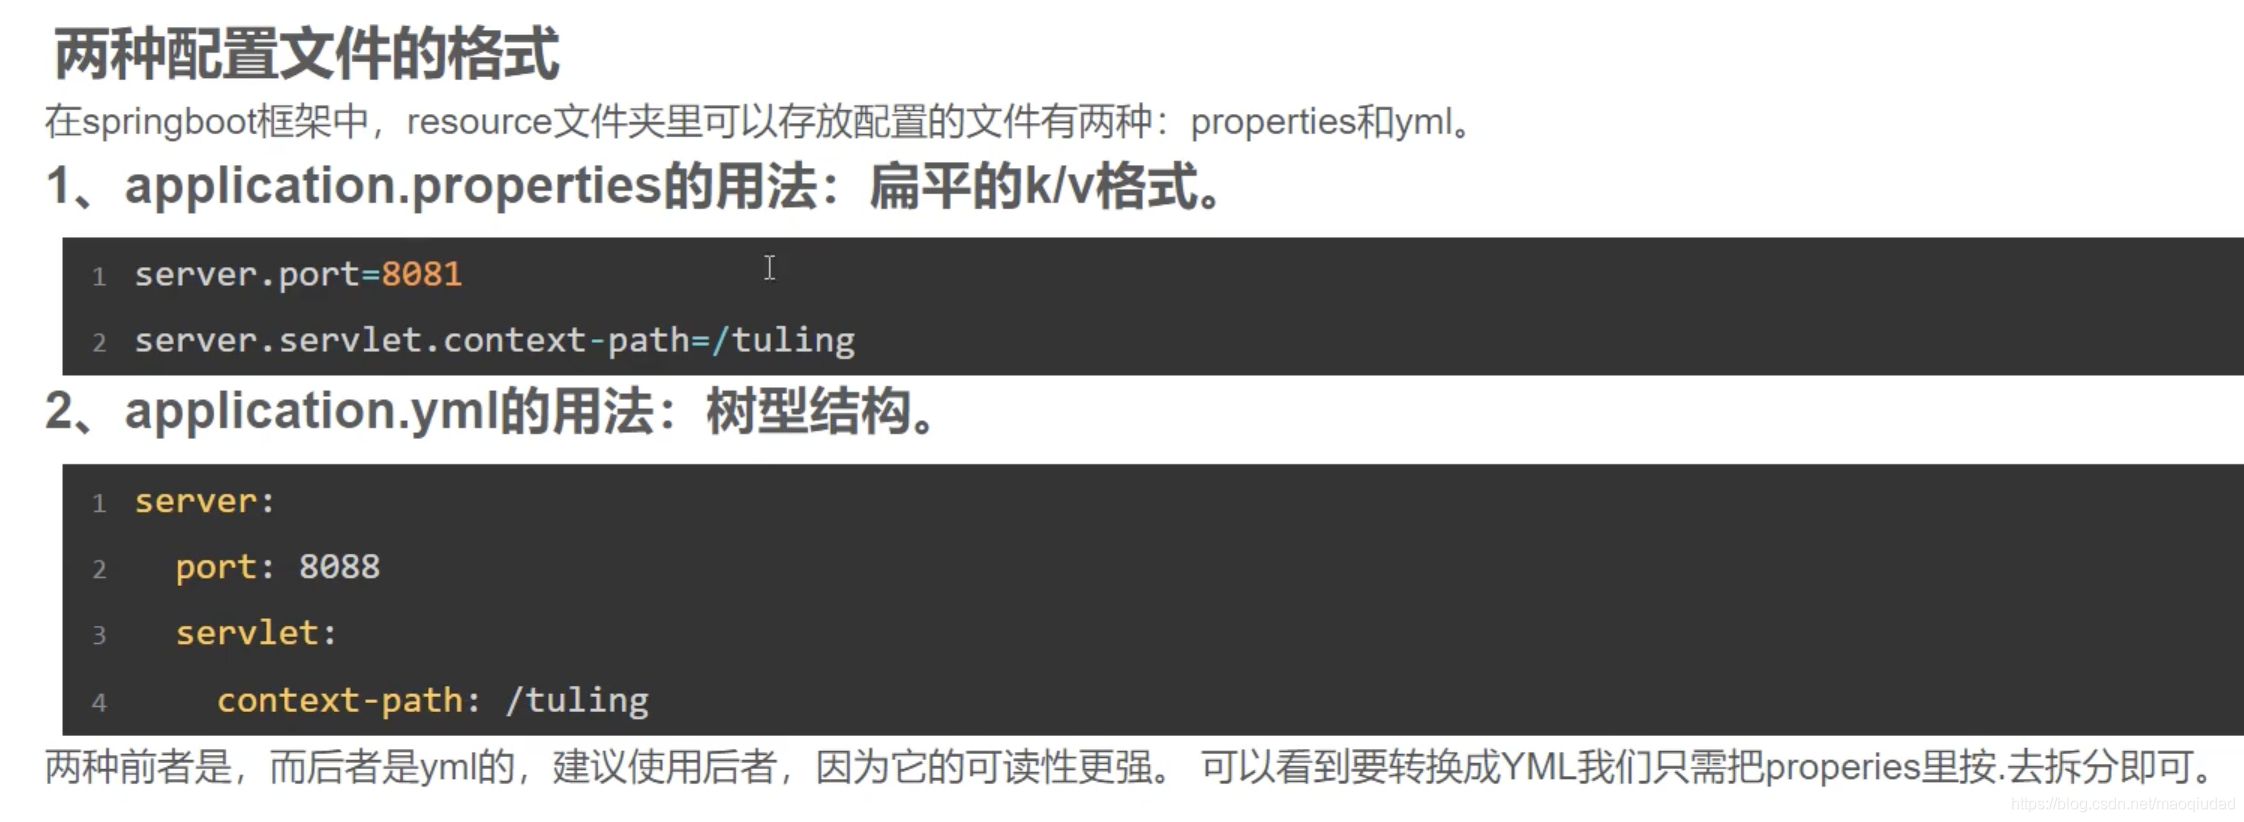
#端口
server.port=8088
#项目虚拟路径
server.servlet.context-path= /jm
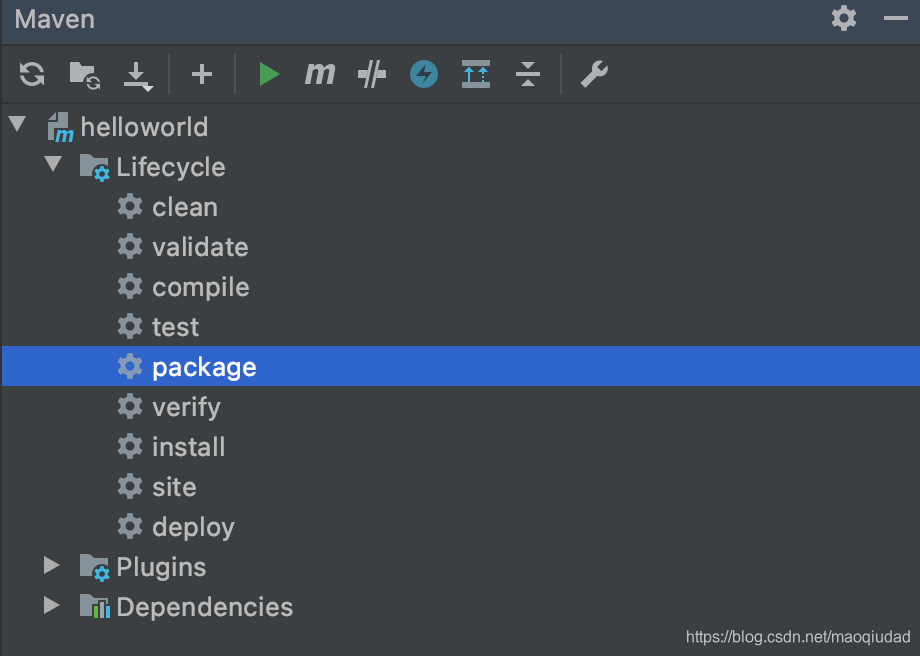
在Maven选项卡中,双击package会在target文件下生成项目的jar,可直接在jar文件路径下,使用java -jar 文件名.jar运行。注意,要先在项目pom.xml文件下添加:
    <build>
        <plugins>
            <plugin>
                <groupId>org.springframework.boot</groupId>
                <artifactId>spring-boot-maven-plugin</artifactId>
            </plugin>
        </plugins>
    </build>
否则,运行jar会提示需要有主清单属性。

是jar包里META-INF/MANIFEST.MF文件。
代码说明
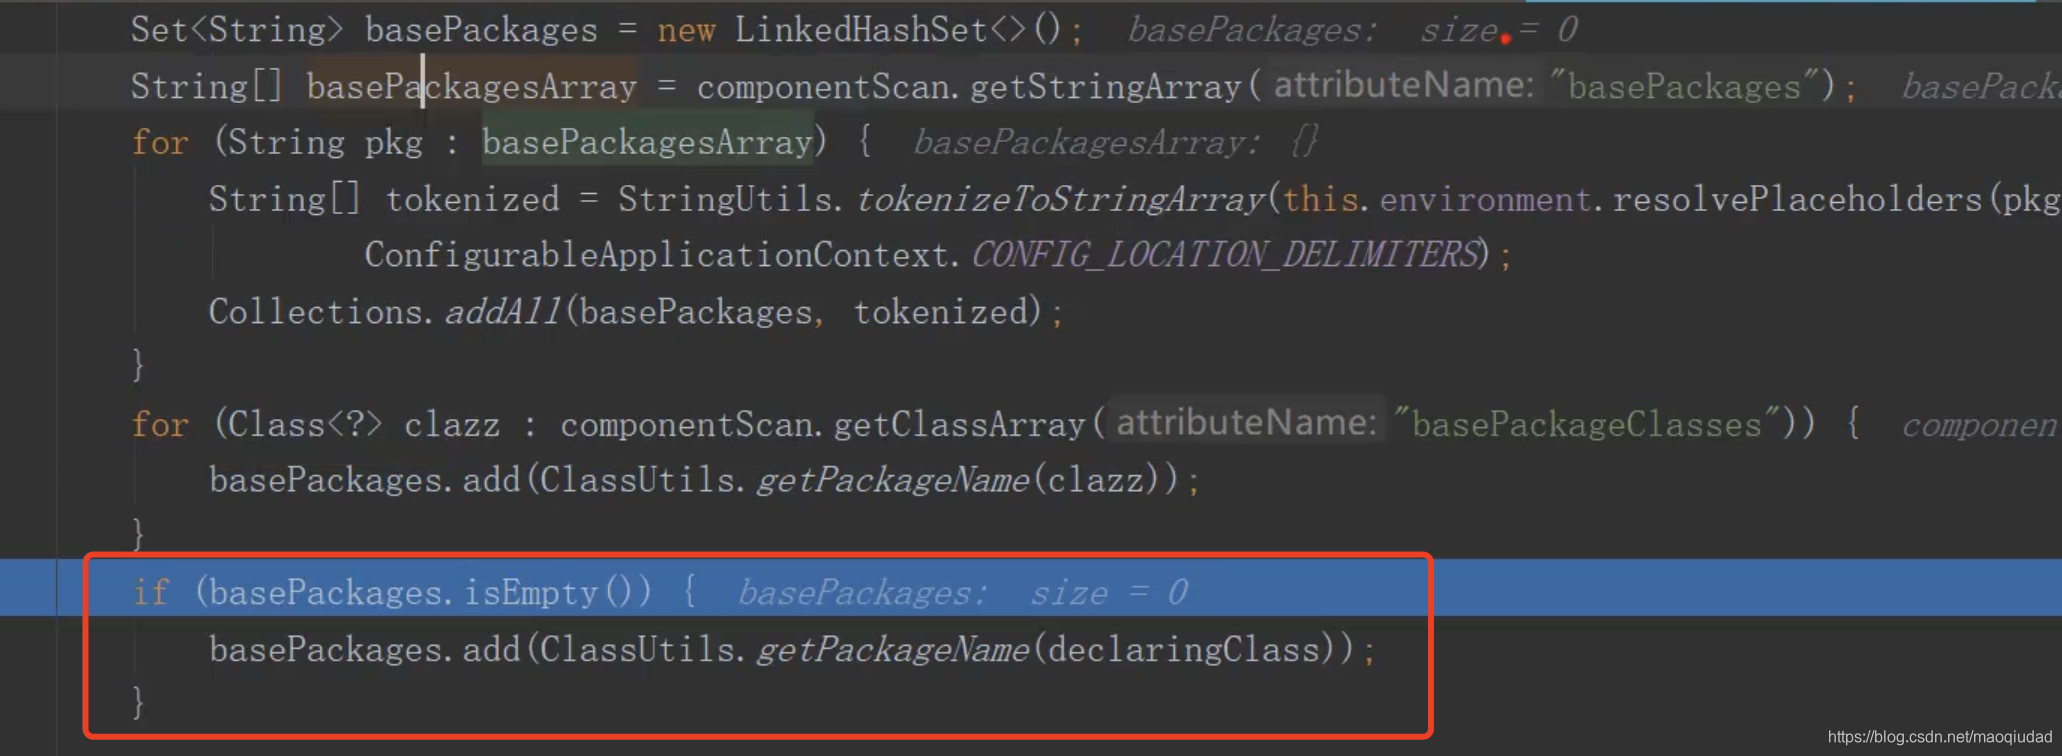
启动类@SpringBootApplication会解析配置类Configuration的时候,会解析ComponentScan包路径,如果没有读取到,会将当前配置类所在的包当作是basePackages。解析ComponentScanAnnotationParser.java拿到basePackages属性的值,如果没有拿到就会设置当前配置类所在的包的路径给basePackages。
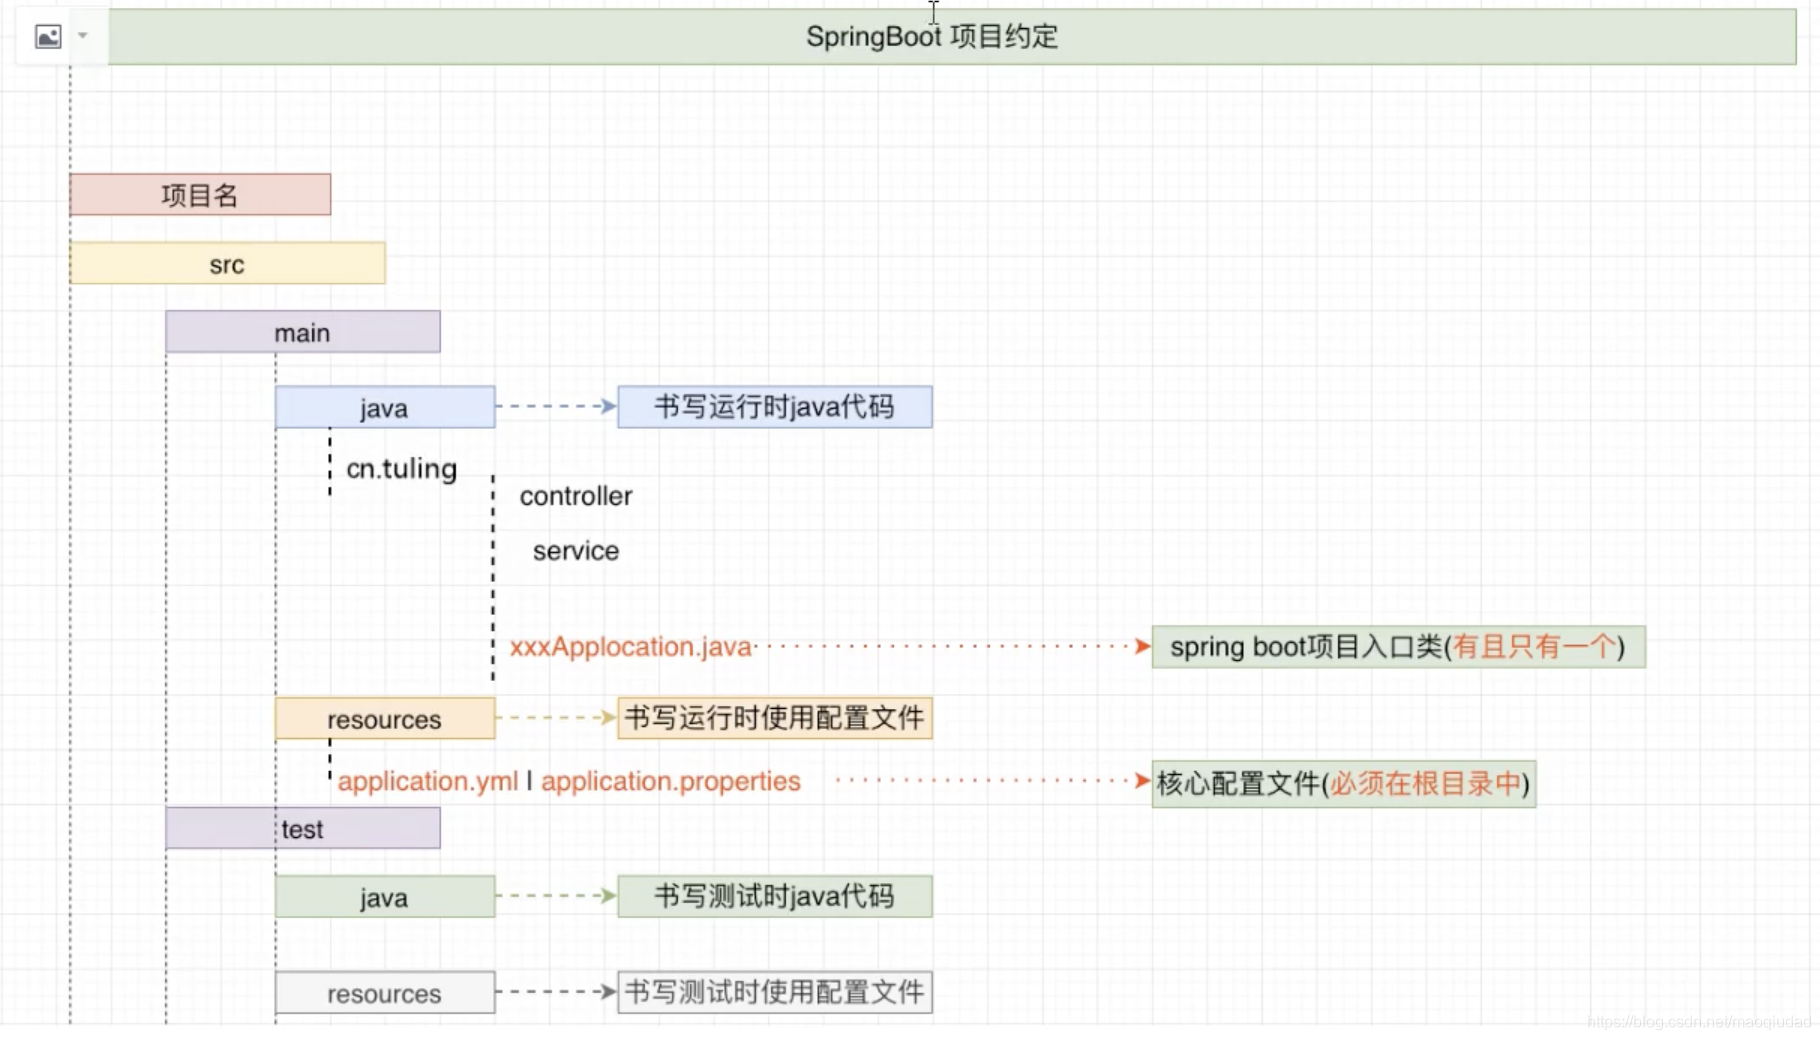
所以,SpringBootApplication启动类最好放在需要扫描包的根目录下,或者说放在所有Bean的顶层目录中。
配置文件采用约定大于配置的方式。 一定要放在resources根目录下,一定要叫application.properties或application.yml。
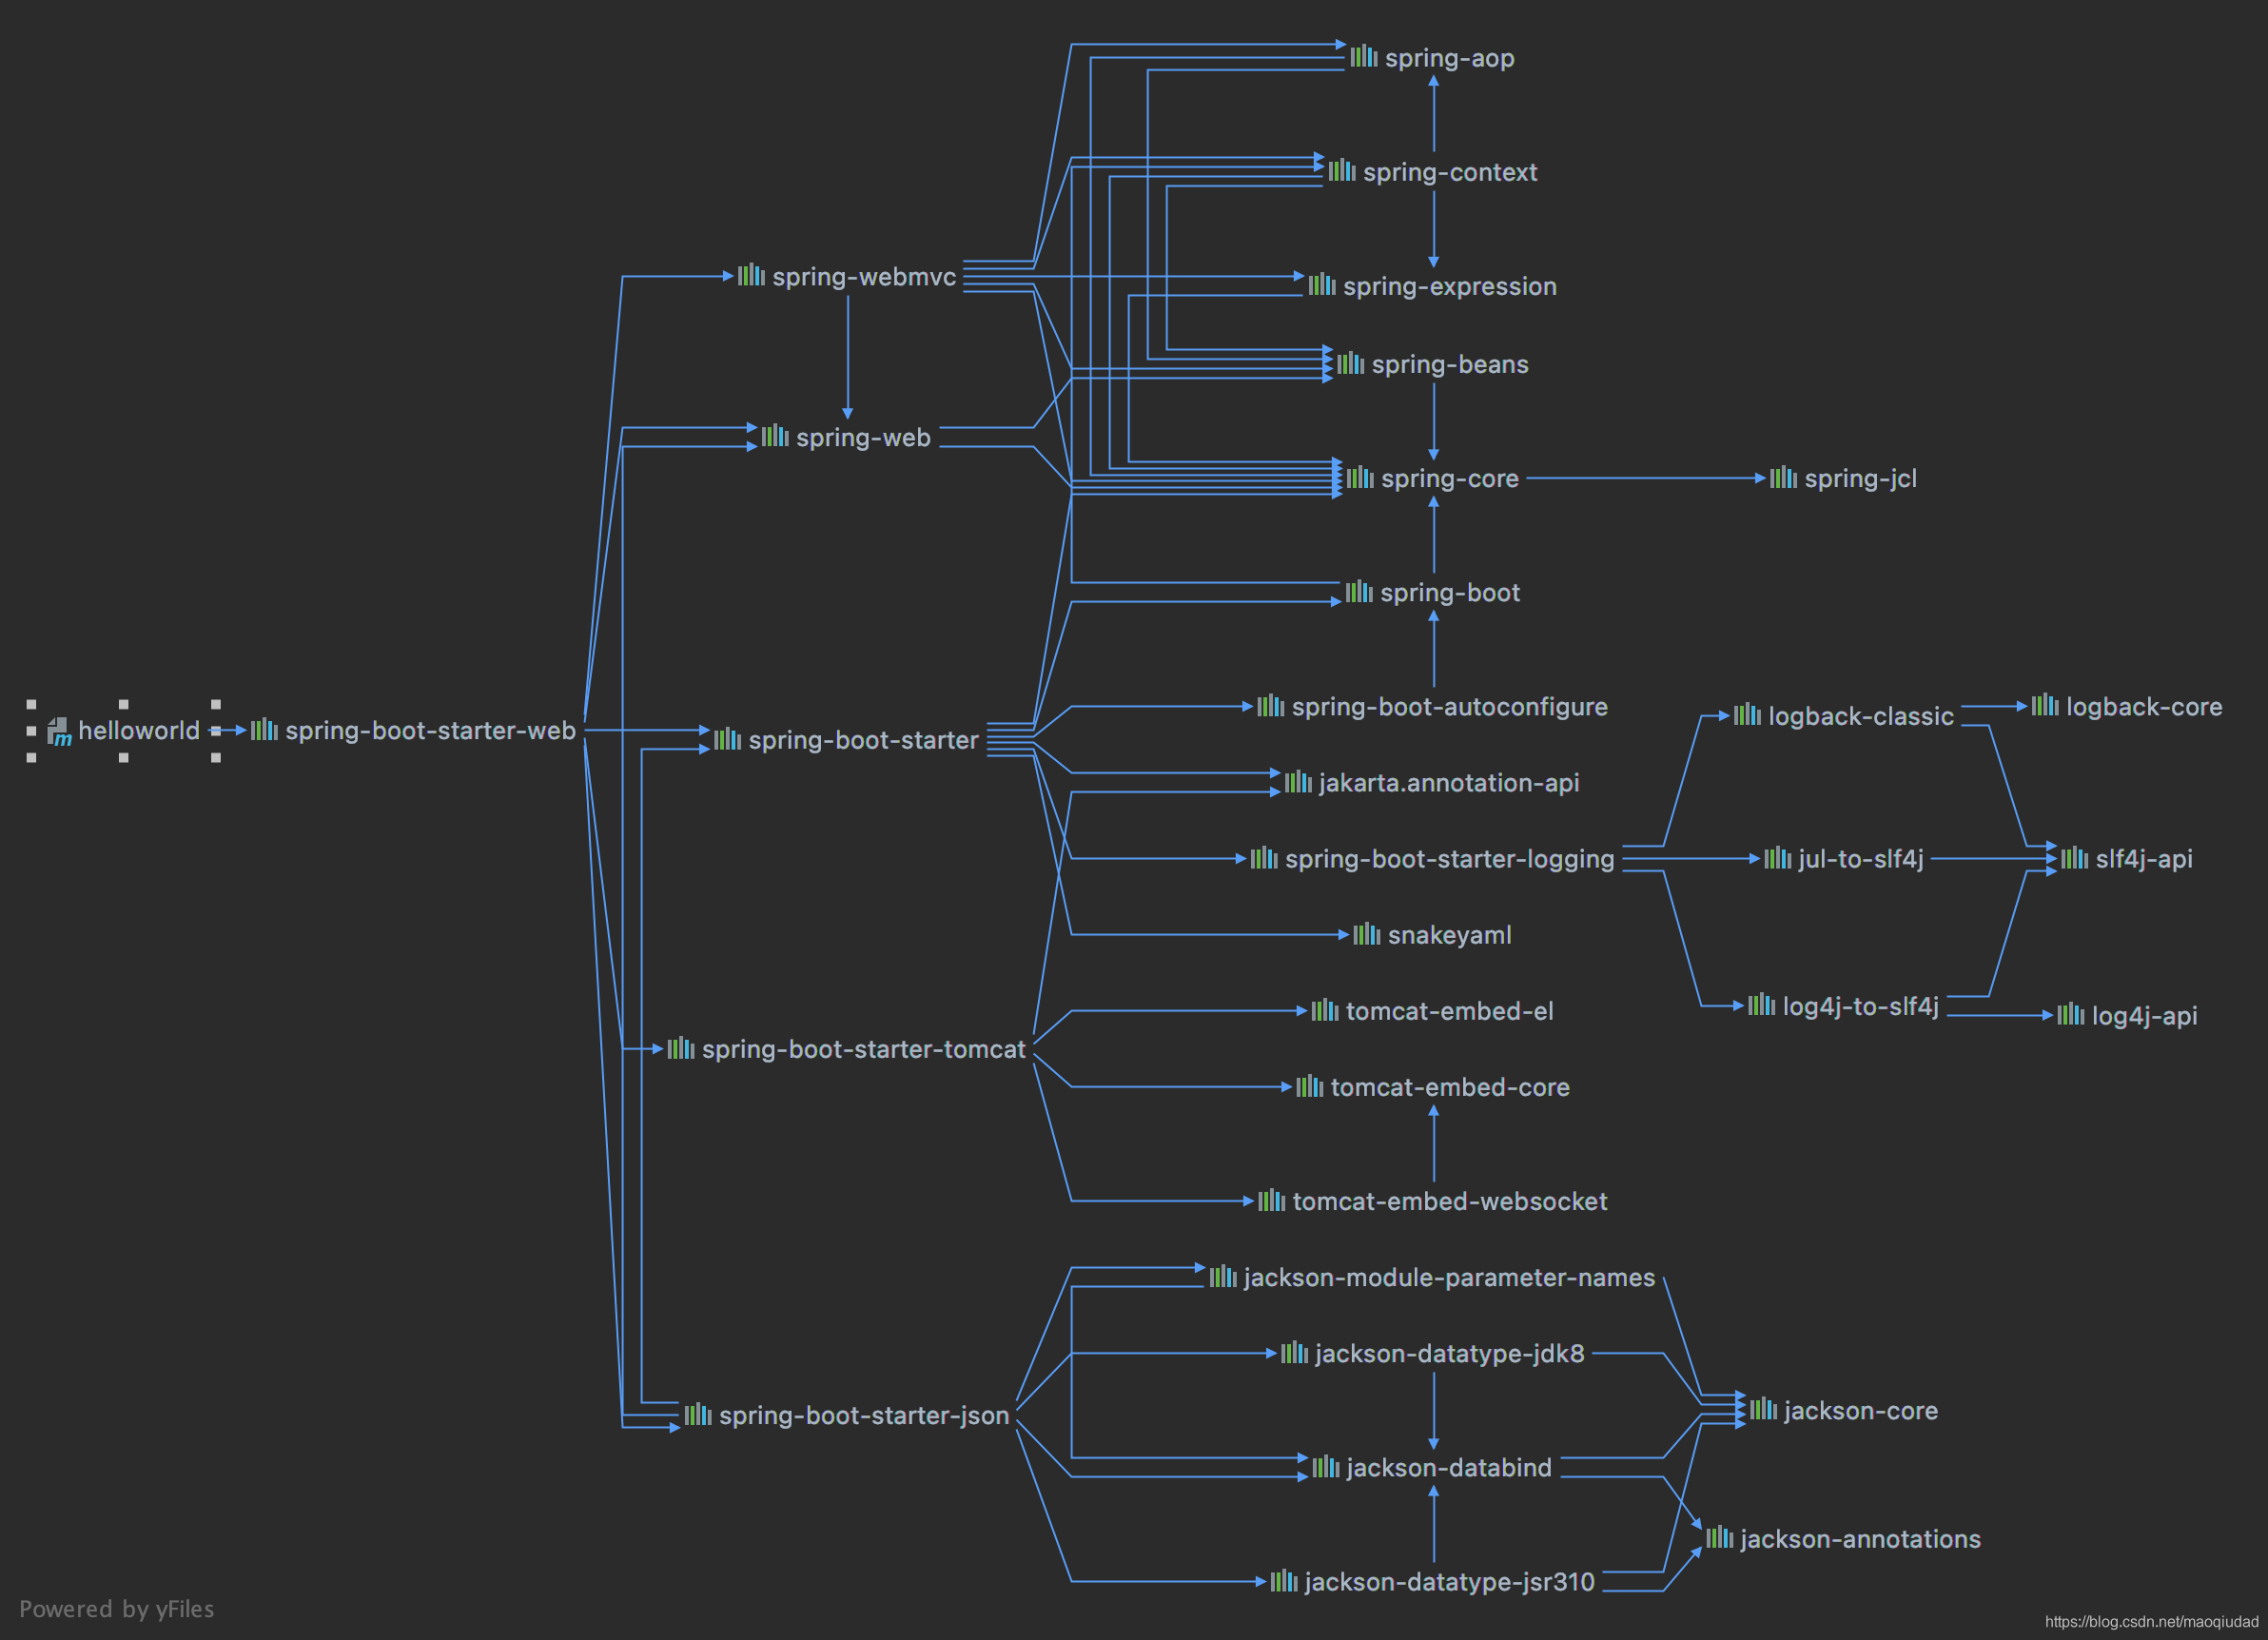
    <!-- 引入了父Maven项目,继承父Maven项目所有的配置信息
       spring-boot-starter-parent又引入了一个父Maven项目
       <parent>
        <groupId>org.springframework.boot</groupId>
        <artifactId>spring-boot-dependencies</artifactId>
        <version>2.5.2</version>
      </parent>
      spring-boot-dependencies  帮我们管理了SpringBoot应用中所有的依赖的版本。所有的版本号都在这里维护
      以后我们导入已有依赖就不需要写版本号了,它帮我们解决第三方库直接的版本冲突问题
      SpringBoot的版本仲裁中心
     -->
    <parent>
        <groupId>org.springframework.boot</groupId>
        <artifactId>spring-boot-starter-parent</artifactId>
        <version>2.5.2</version>
    </parent>

    <!--
         starter 场景启动器:不同的场景启动器维护了对应的所有的依赖,从而简化Maven文件的书写
         spring-boot-starter-web: 使用 Spring MVC 构建 Web(包括 RESTful)应用程序
         使用 Tomcat 作为默认的嵌入式容器
    -->
    <dependencies>
        <dependency>
            <groupId>org.springframework.boot</groupId>
            <artifactId>spring-boot-starter-web</artifactId>
        </dependency>
    </dependencies>

    <!-- 部署springboot的插件,只有加了这个插件,当运行 java -jar xxxx.jar 才能正常启动-->
    <build>
        <plugins>
            <plugin>
                <groupId>org.springframework.boot</groupId>
                <artifactId>spring-boot-maven-plugin</artifactId>
            </plugin>
        </plugins>
    </build>
Spring Boot的配置文件和自动配置原理
1.使用Spring Initializer快速创建spring项目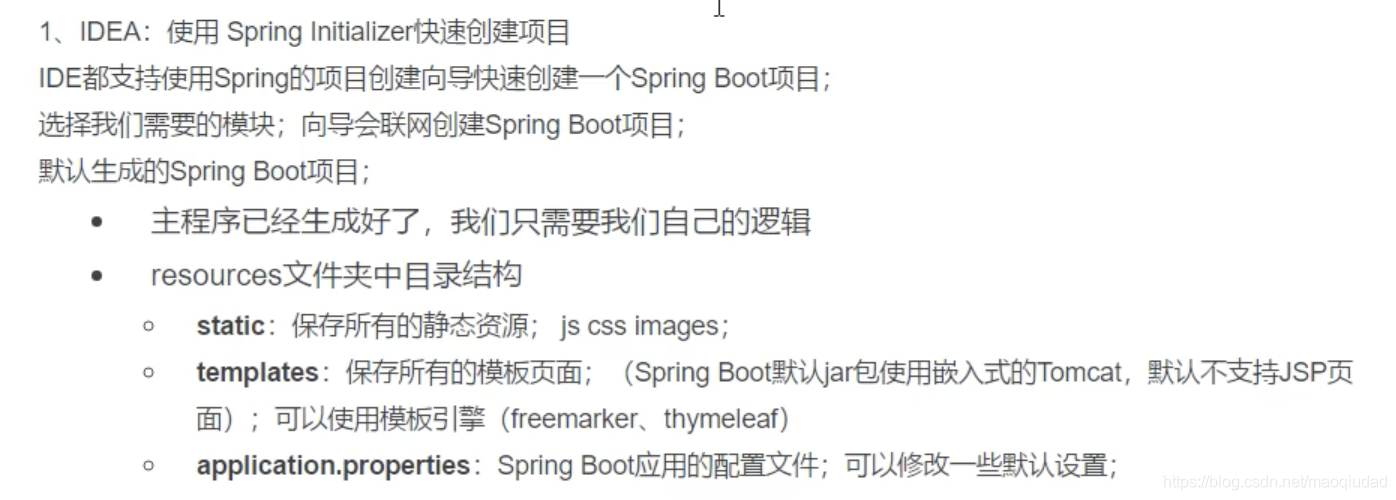
1、继承关系 SpringBoot的Maven项目
创建父项目:
一个都不需要勾选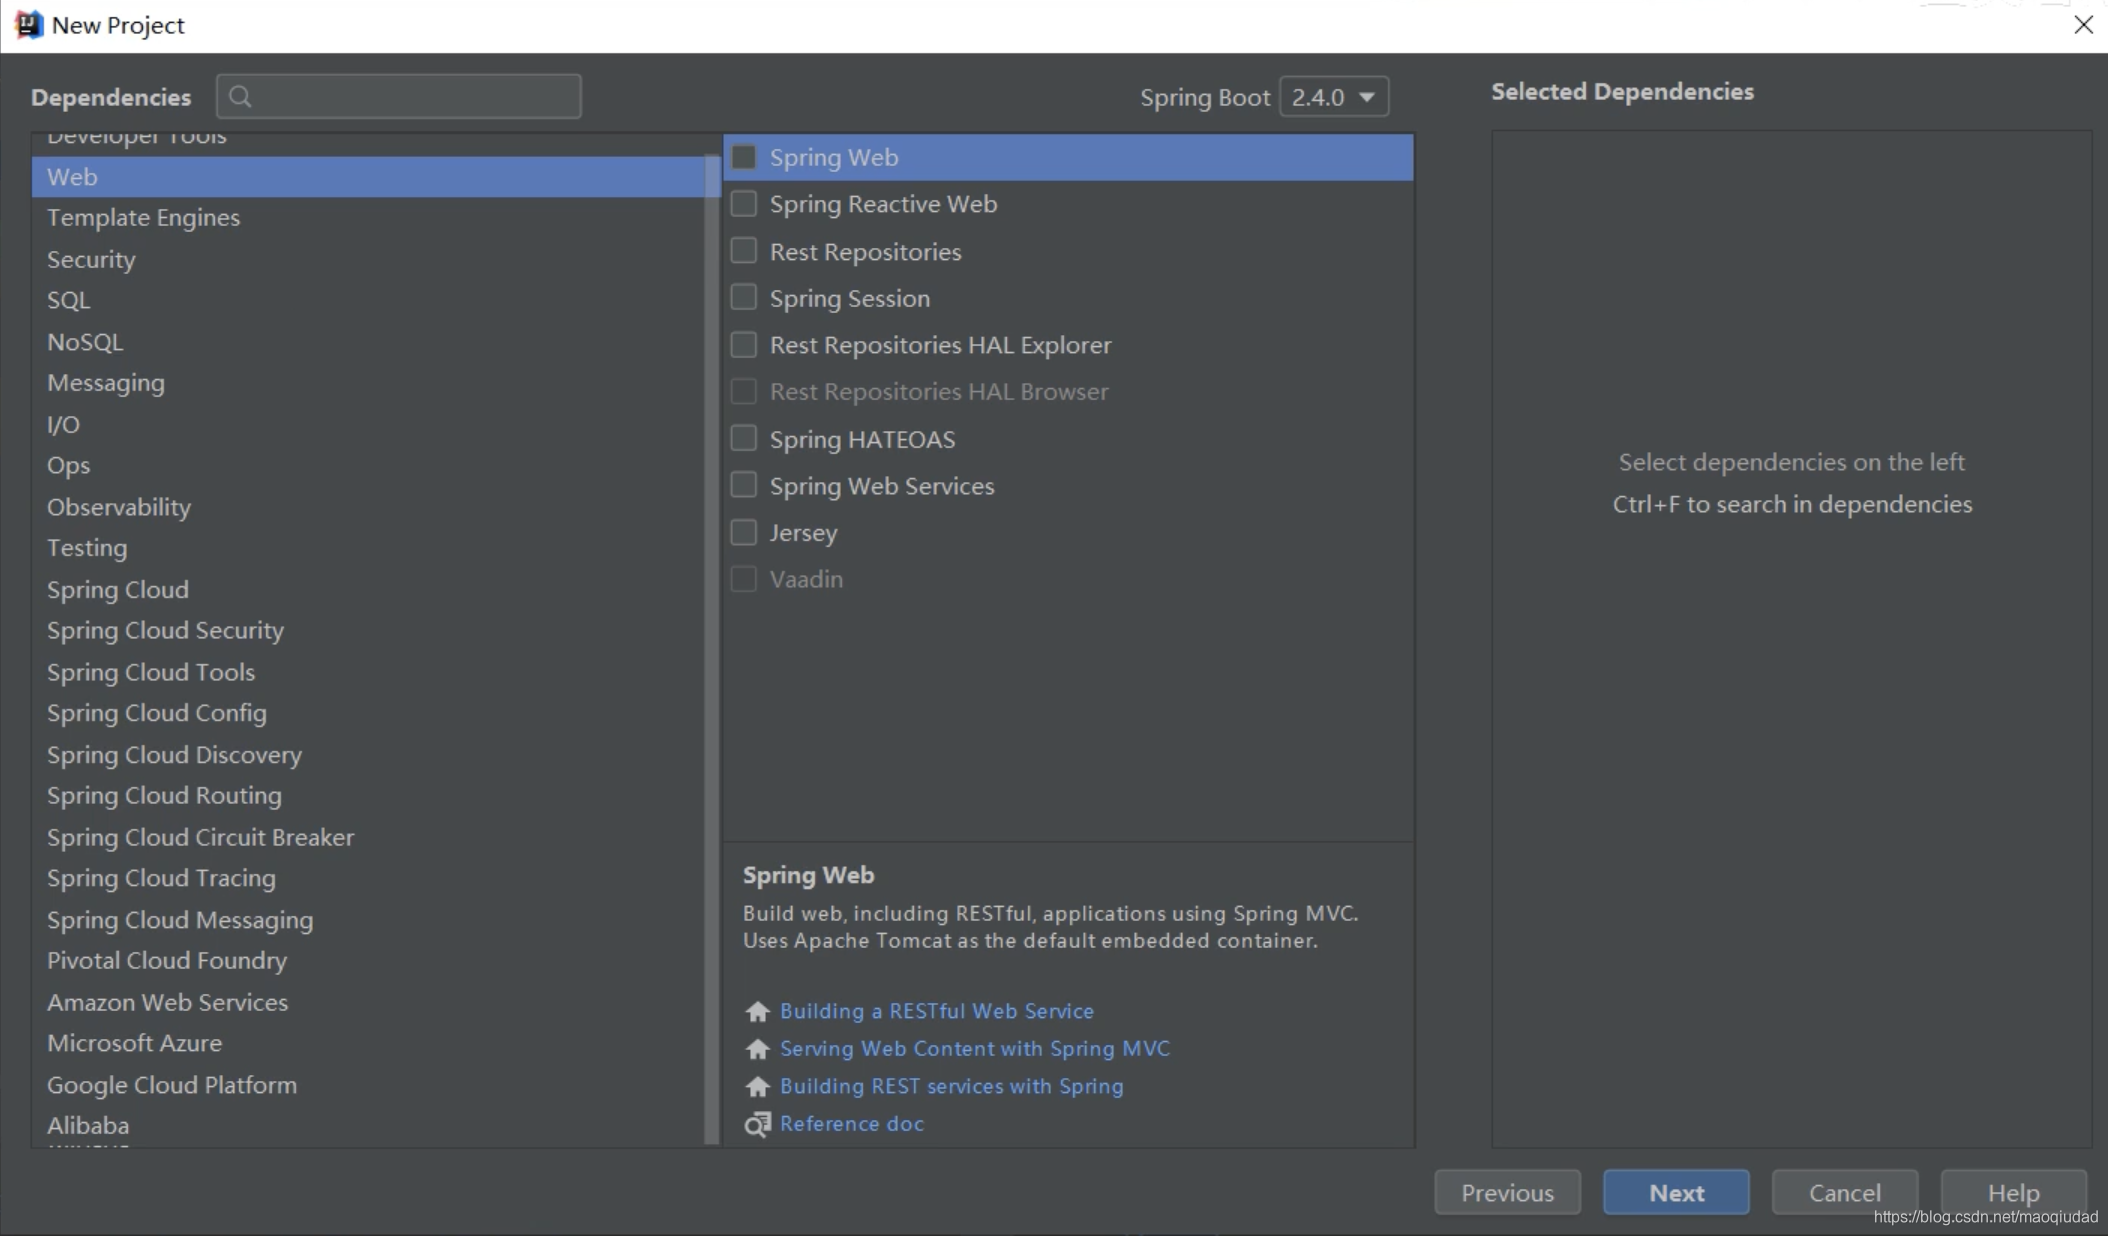
新建的父项目如下: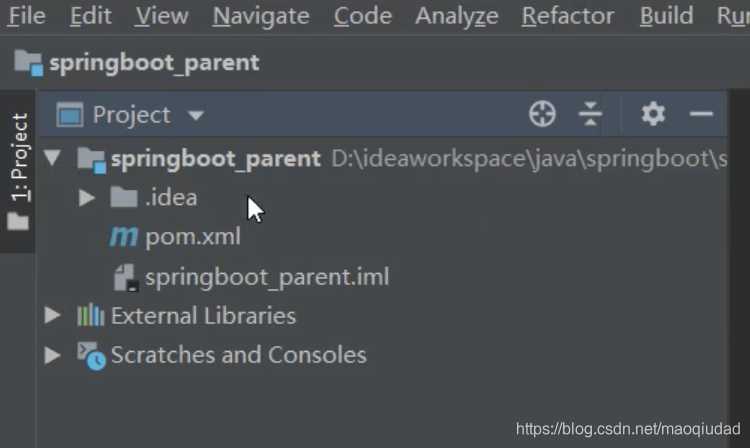
没有src之类的文件夹,只有pom.xml文件提供给子模块去继承的。
子项目创建:

举例选Spring Web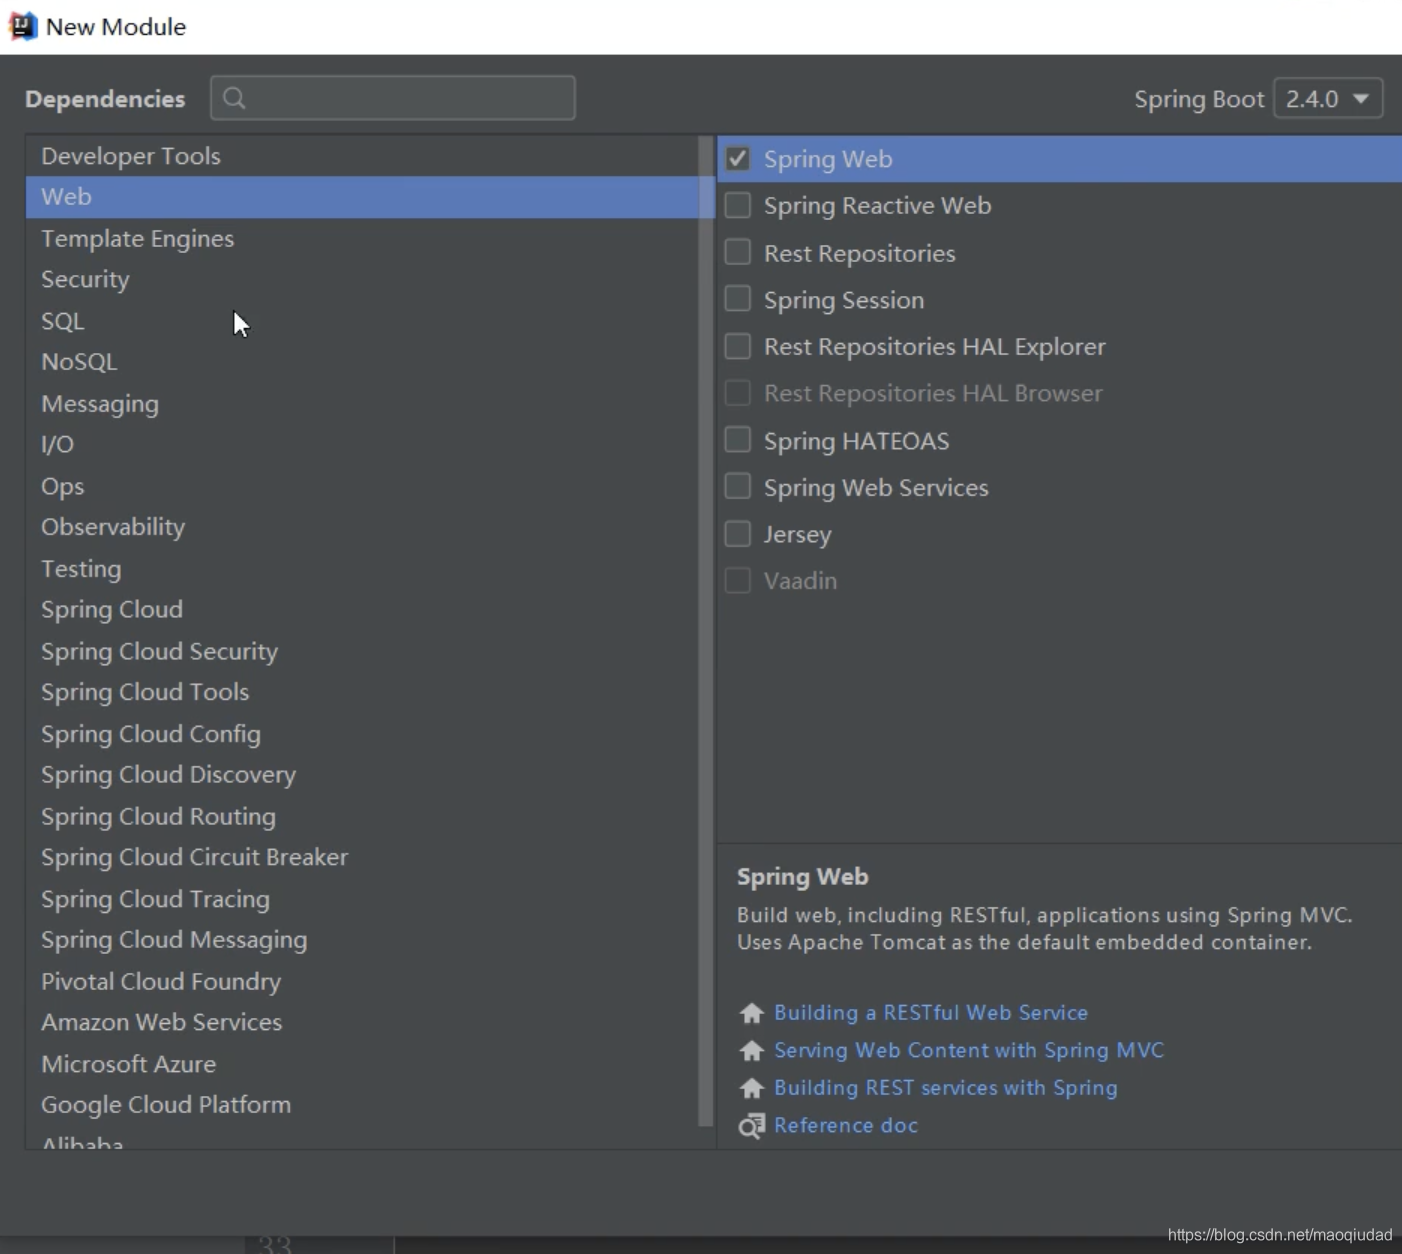
复制父项目pom.xml里的:
    <groupId>com.jm.springboot</groupId>
    <artifactId>springboot_parent</artifactId>
    <version>0.0.1-SNAPSHOT</version>
把子项目pom.xml 里的内容替换掉,如下:
    <parent>
        <groupId>com.jm.springboot</groupId>
        <artifactId>springboot_parent</artifactId>
        <version>0.0.1-SNAPSHOT</version>
    </parent>
这样才是一个正常的继承关系。
spring_initializr --> springboot_parent --> spring-boot-starter-parent
2.自定义SpringApplication
如果SpringApplication默认设置不符合您的喜好,则可以创建一个本地实例并对其进行自定义。例如,关闭横幅可以编写:
@SpringBootApplication
public class SpringInitializrApplication {

    public static void main(String[] args) {

        SpringApplication app = new SpringApplication(SpringInitializrApplication.class);
        app.setBannerMode(Banner.Mode.OFF);//关闭springboot启动横幅
        app.run(args);
    }

}
懒加载初始化
在resource/application.properties中配置:
spring.main.lazy-initialization=true
将SpringBoot容易设置为初始化懒加载:所有的Bean在Spring初始化时将不会创建Bean,而是在使用的时候才会去创建,和Bean的懒加载类似。
3.配置文件的使用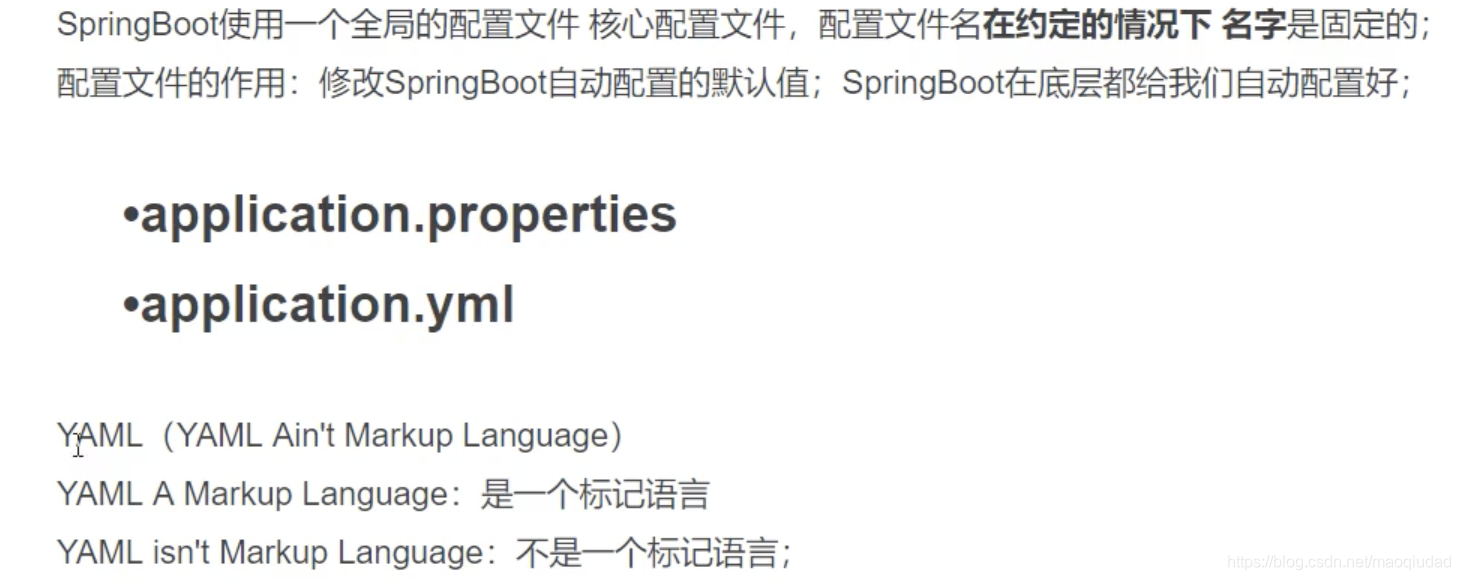
配置文件加载顺序
spring-boot-starter-parent中有:
        <includes>
          <include>**/application*.yml</include>
          <include>**/application*.yaml</include>
          <include>**/application*.properties</include>
        </includes>
加载优先级自上而下
配置有的以主优先,没有的就互补配置
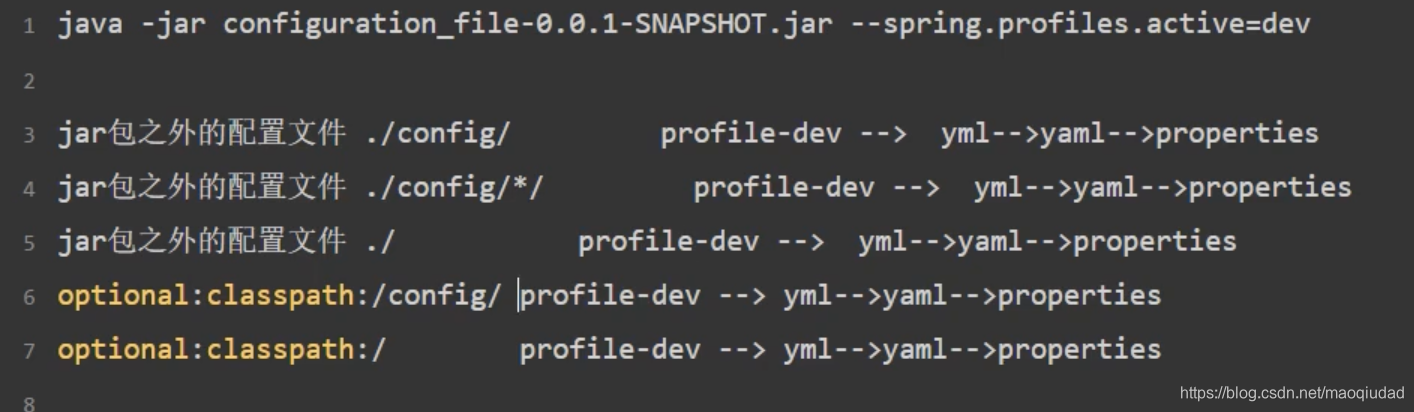
外部约定配置文件加载顺序
springboot启动还会扫描以下位置的application.properties或者application.yml文件作为SpringBoot默认配置文件
低⬇️
1.classpath根目录下的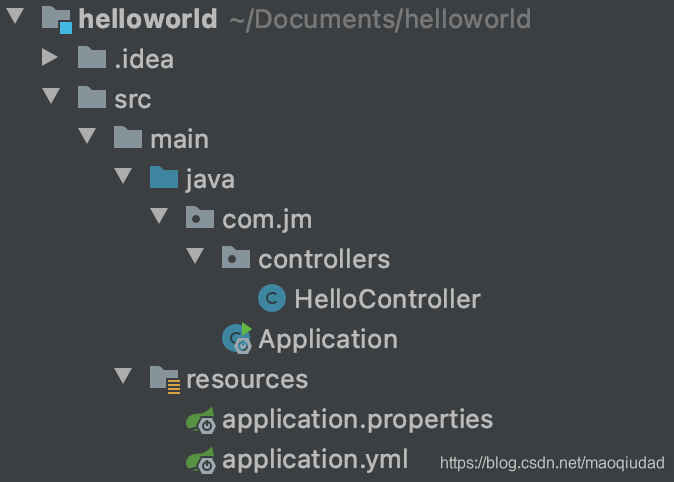
2.classpath根config/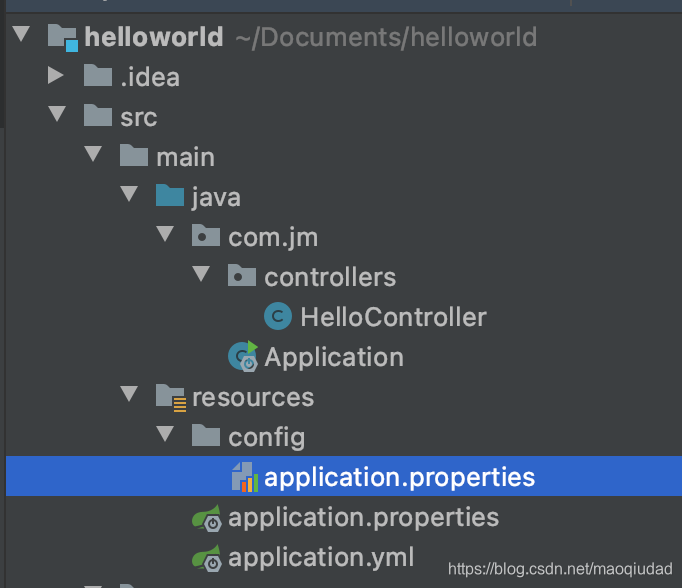
3.项目根目录(实际开发不会去用)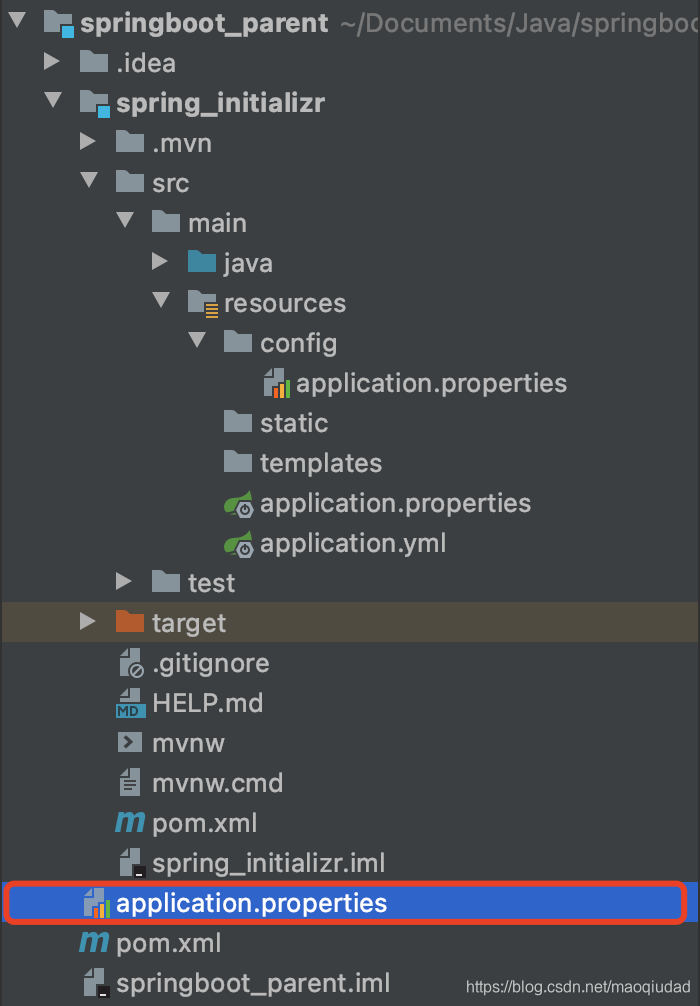
如果当前项目是继承/耦合关系maven项目的话,项目根目录=父maven项目的根目录。
4.项目根/config(实际开发不会去用)
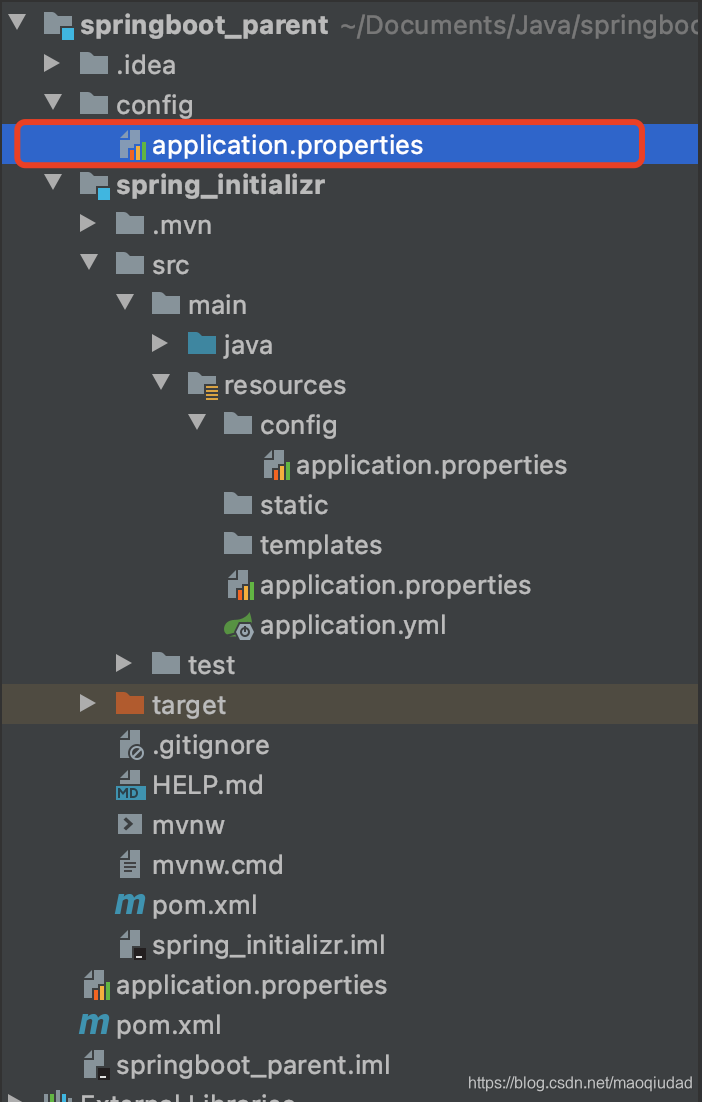
5.直接子目录/config
或者
java -jar helloworld-1.0-SNAPSHOT.jar --server.port=8087
java -jar helloworld-1.0-SNAPSHOT.jar --spring.config.location=D:\config/
注意结尾用“\“。
高⬇️
优先级由低到高,高优先级的配置会覆盖低优先级的配置;互补配置。
官网: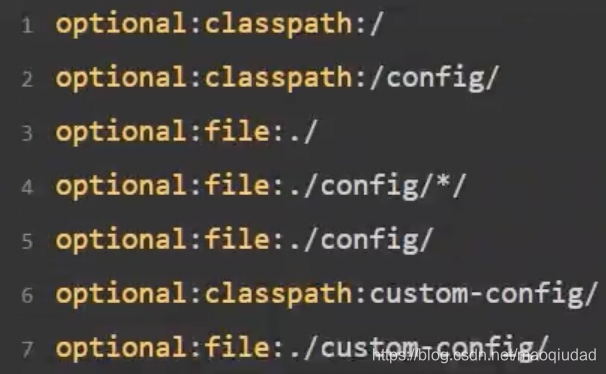
Profile文件的加载
Profile的意思是配置,对于应用程序来说,不同的环境需要不同的配置。
SpringBoot框架提供了多profile的管理功能,我们可以使用profile功能来区分不同环境的配置。
1.多profile文件
1.Spring官方给出的语法规则是application-{profile}. properties(.yaml/yml)。
2.如果需要创建自定义的properties文件时,可以用application-xxx.properties的命名方式。
2.激活指定profile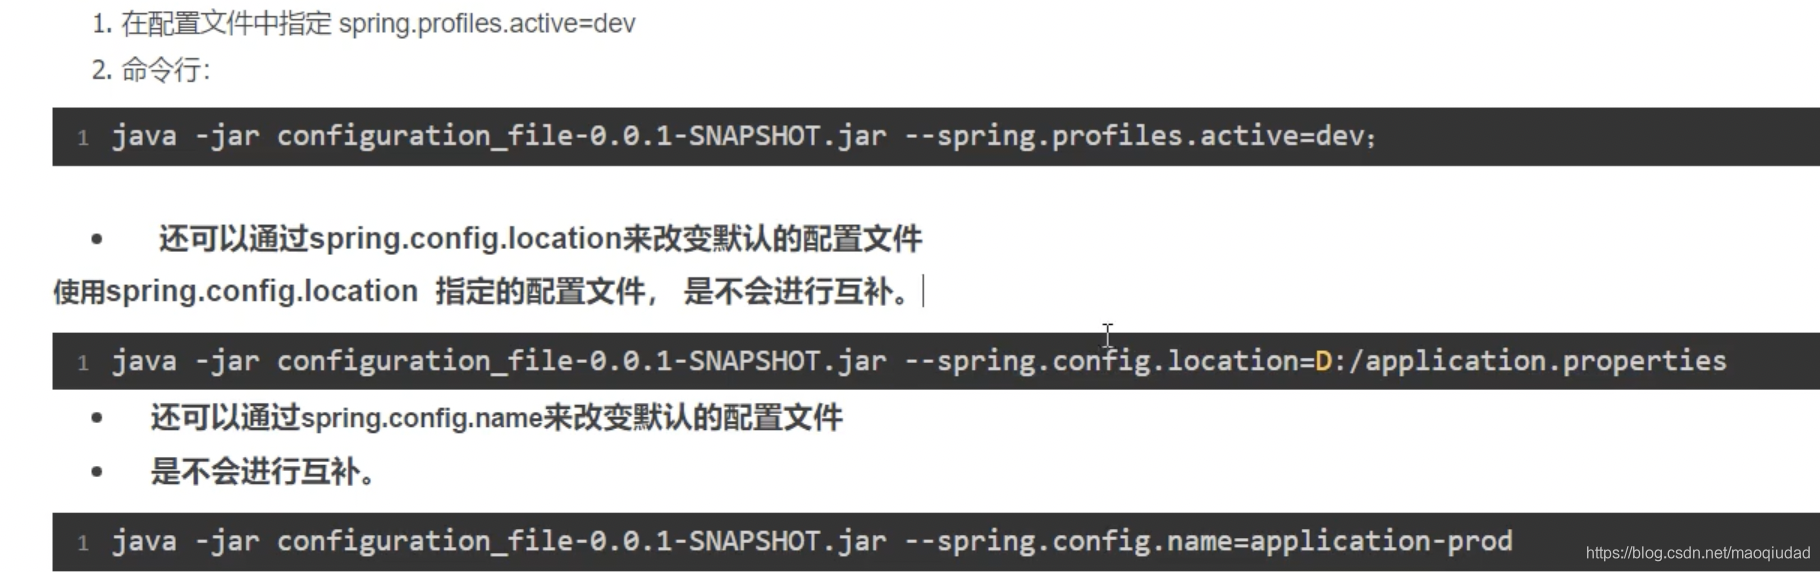

**所有配置文件按以下顺序考虑:**优先级从低到高
1.打包在jar中配置文件
2.打包在jar中profile
3.打包的jar之外的配置文件
4.打包的jar之外的profile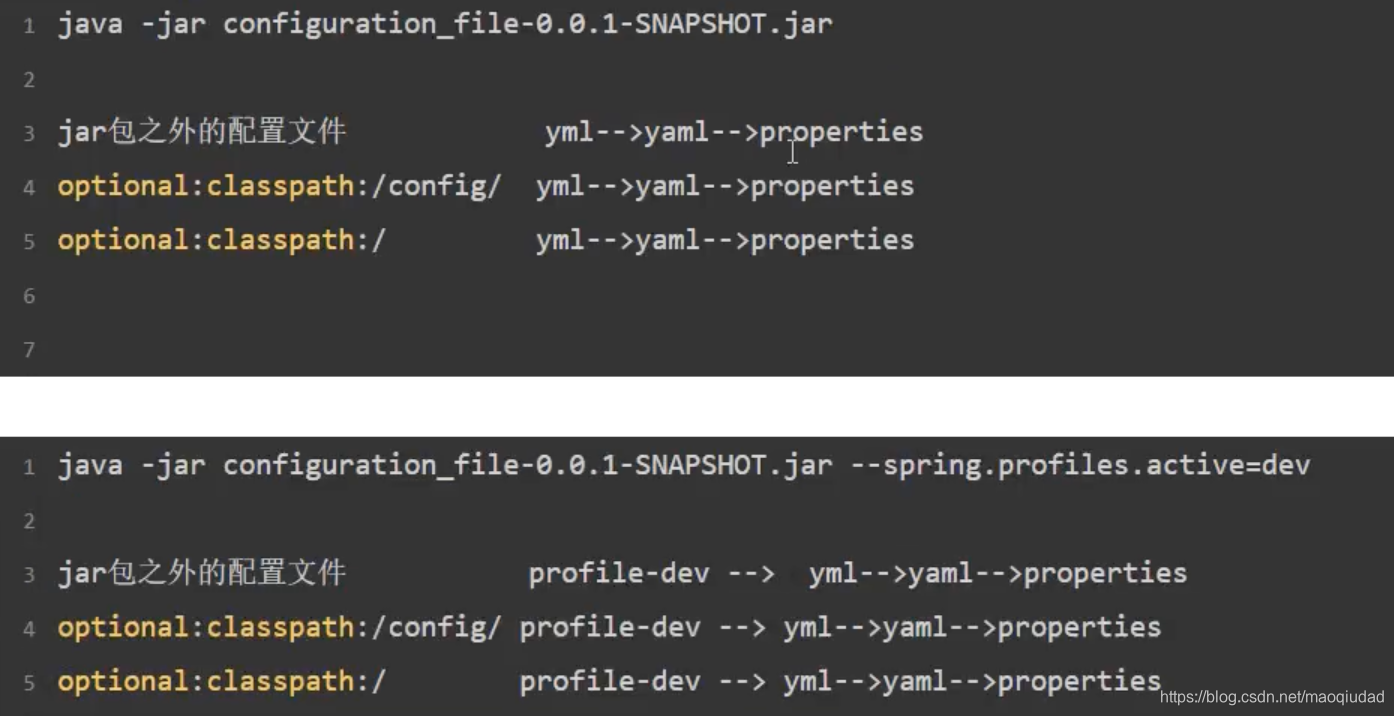

配置文件读取方式 低–>高
- @PropertySource@Configuration类上的注释。请注意,Environment在刷新应用程序上下文之前,不会将此 类属性源添加到中。现在配置某些属性(如logging.*和spring.main.*在刷新开始之前先读取)为时已晚。
a. 会和约定的配置文件形成互补
b. 一定要指定.properties配置
@PropertySource("classpath:appSource.properties")
- 默认属性(通过设置指定SpringApplication.setDefaultProperties)。
a. 会和约定的配置文件形成互补
 public static void main(String[] args) throws IOException {
  SpringApplication springApplication = new SpringApplication(ExternConfigurationApplication.class);

// 创建Properties
Properties properties = new Properties();
// 通过当前类的ClassLoader
 InputStream is= ExternConfigurationApplication.class.getClassLoader()
 .getResourceAsStream("app.properties");
 // 将输入流读取成properties
 properties.load(is);

springApplication.setDefaultProperties(properties);
springApplication.run(args);
}
- 配置数据(例如application.properties文件)
a. 约定配置文件 - 操作系统环境变量。
a. 会使约定配置文件失效
b. 1.idea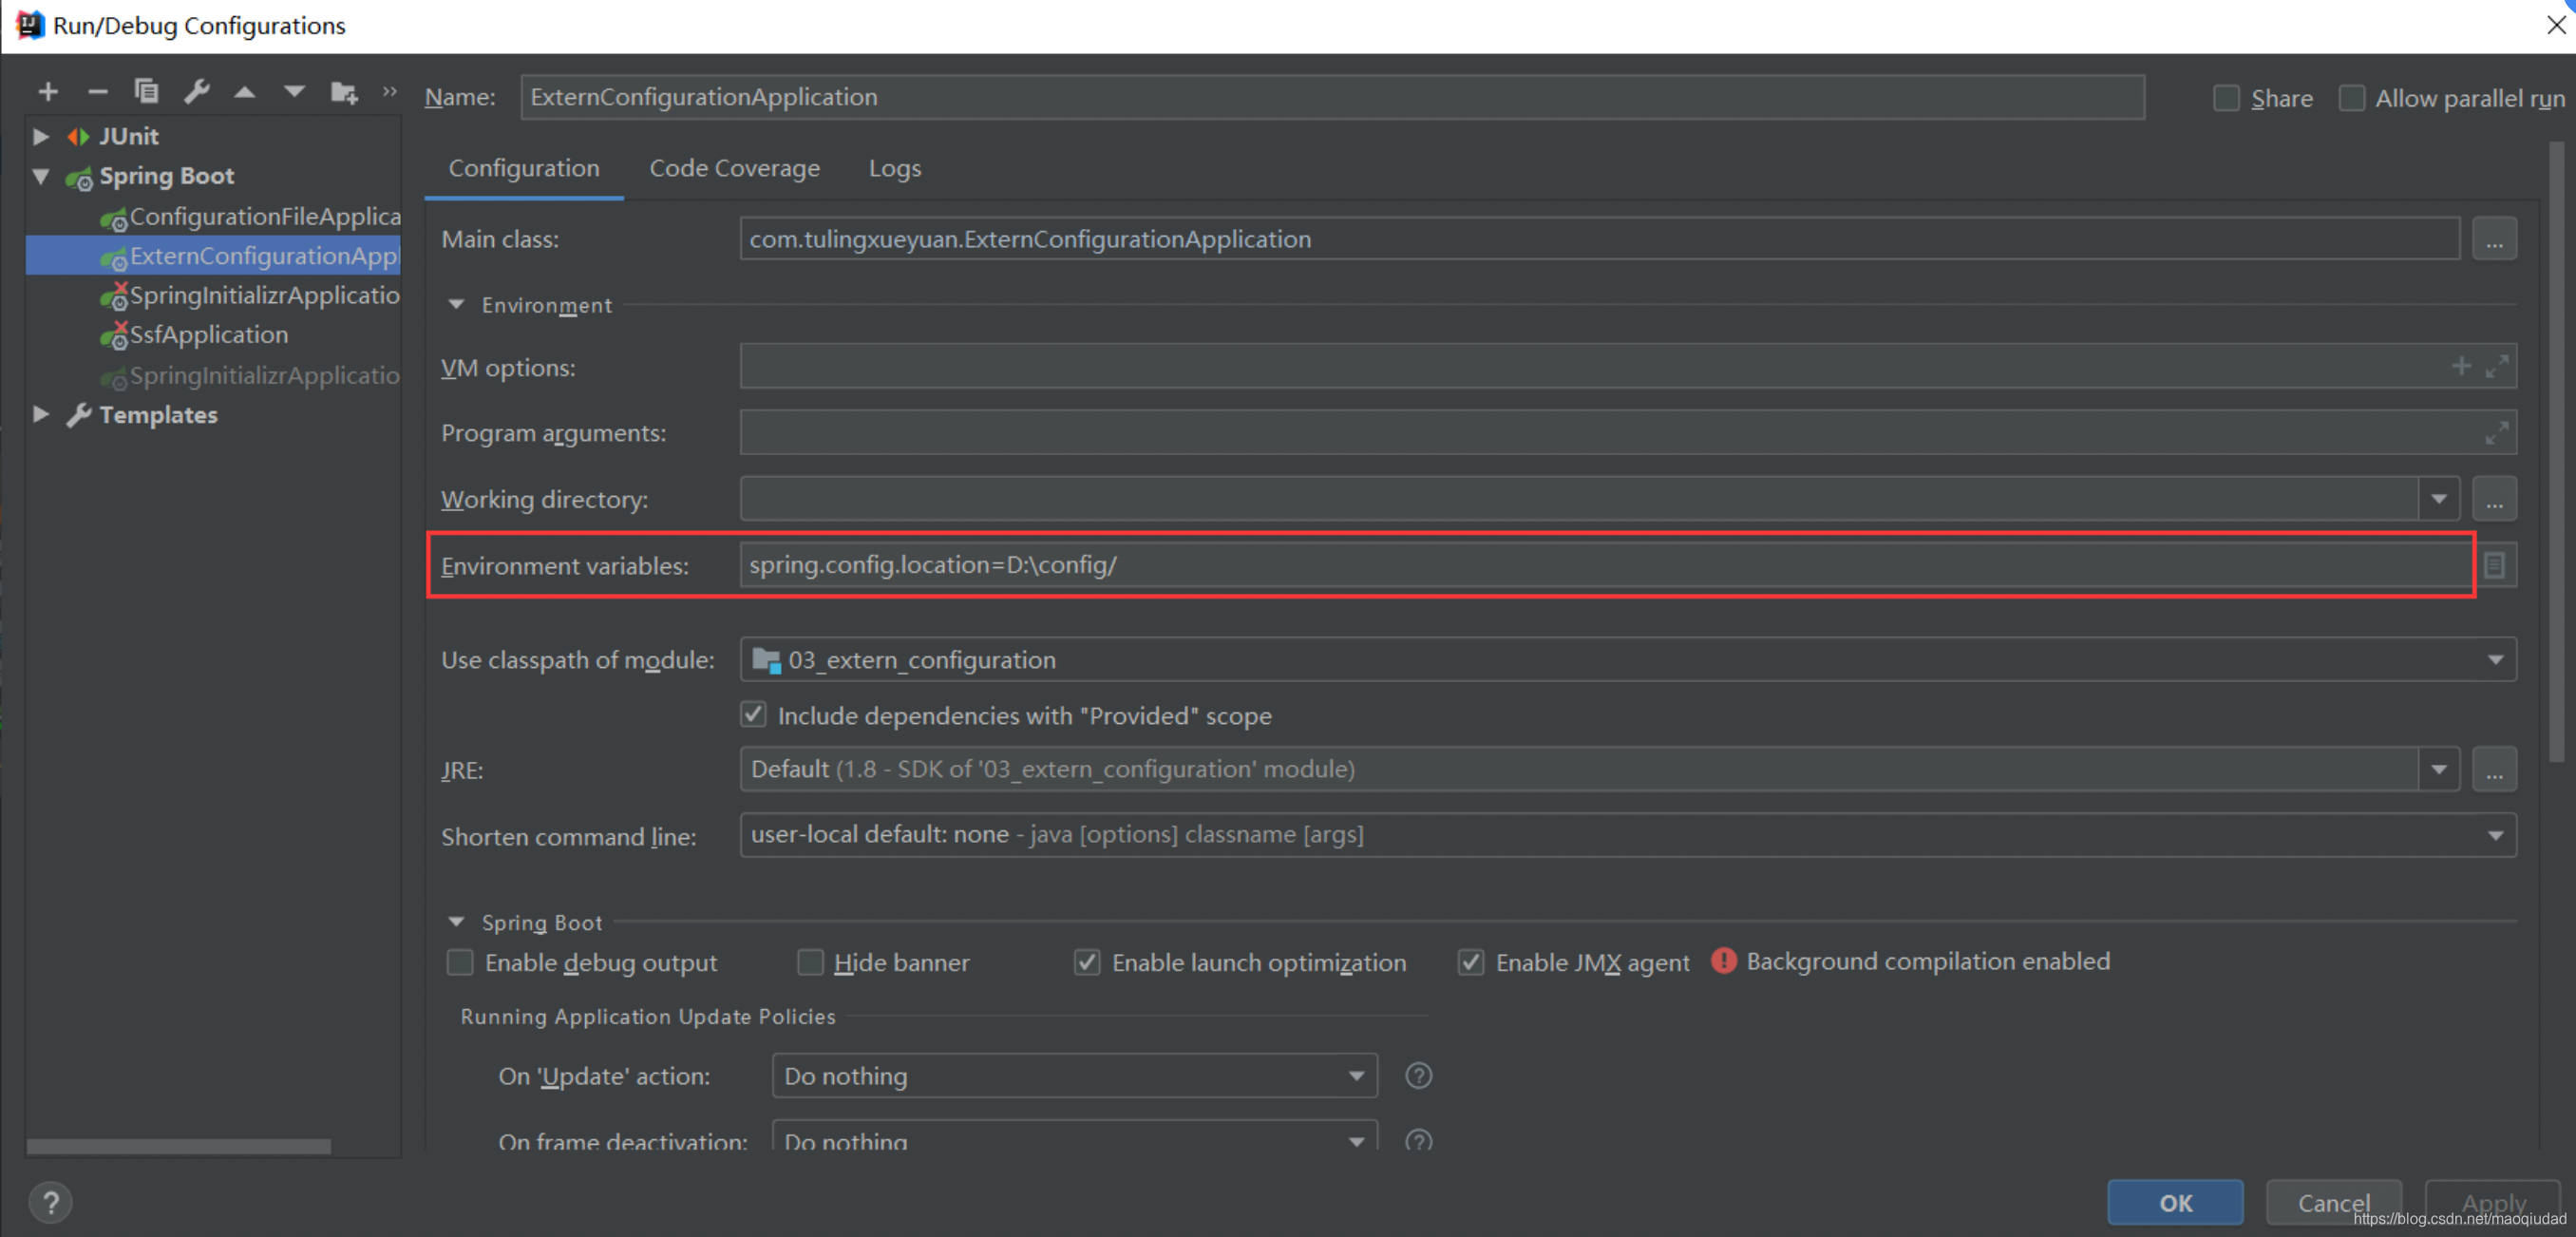
c. 2.windows
set spring.config.location=D:\config/
java ‐jar 03_extern_configuration‐0.0.1‐SNAPSHOT.jar
- Java系统属性(System.getProperties())。
a. 会使约定配置文件失效
b. idea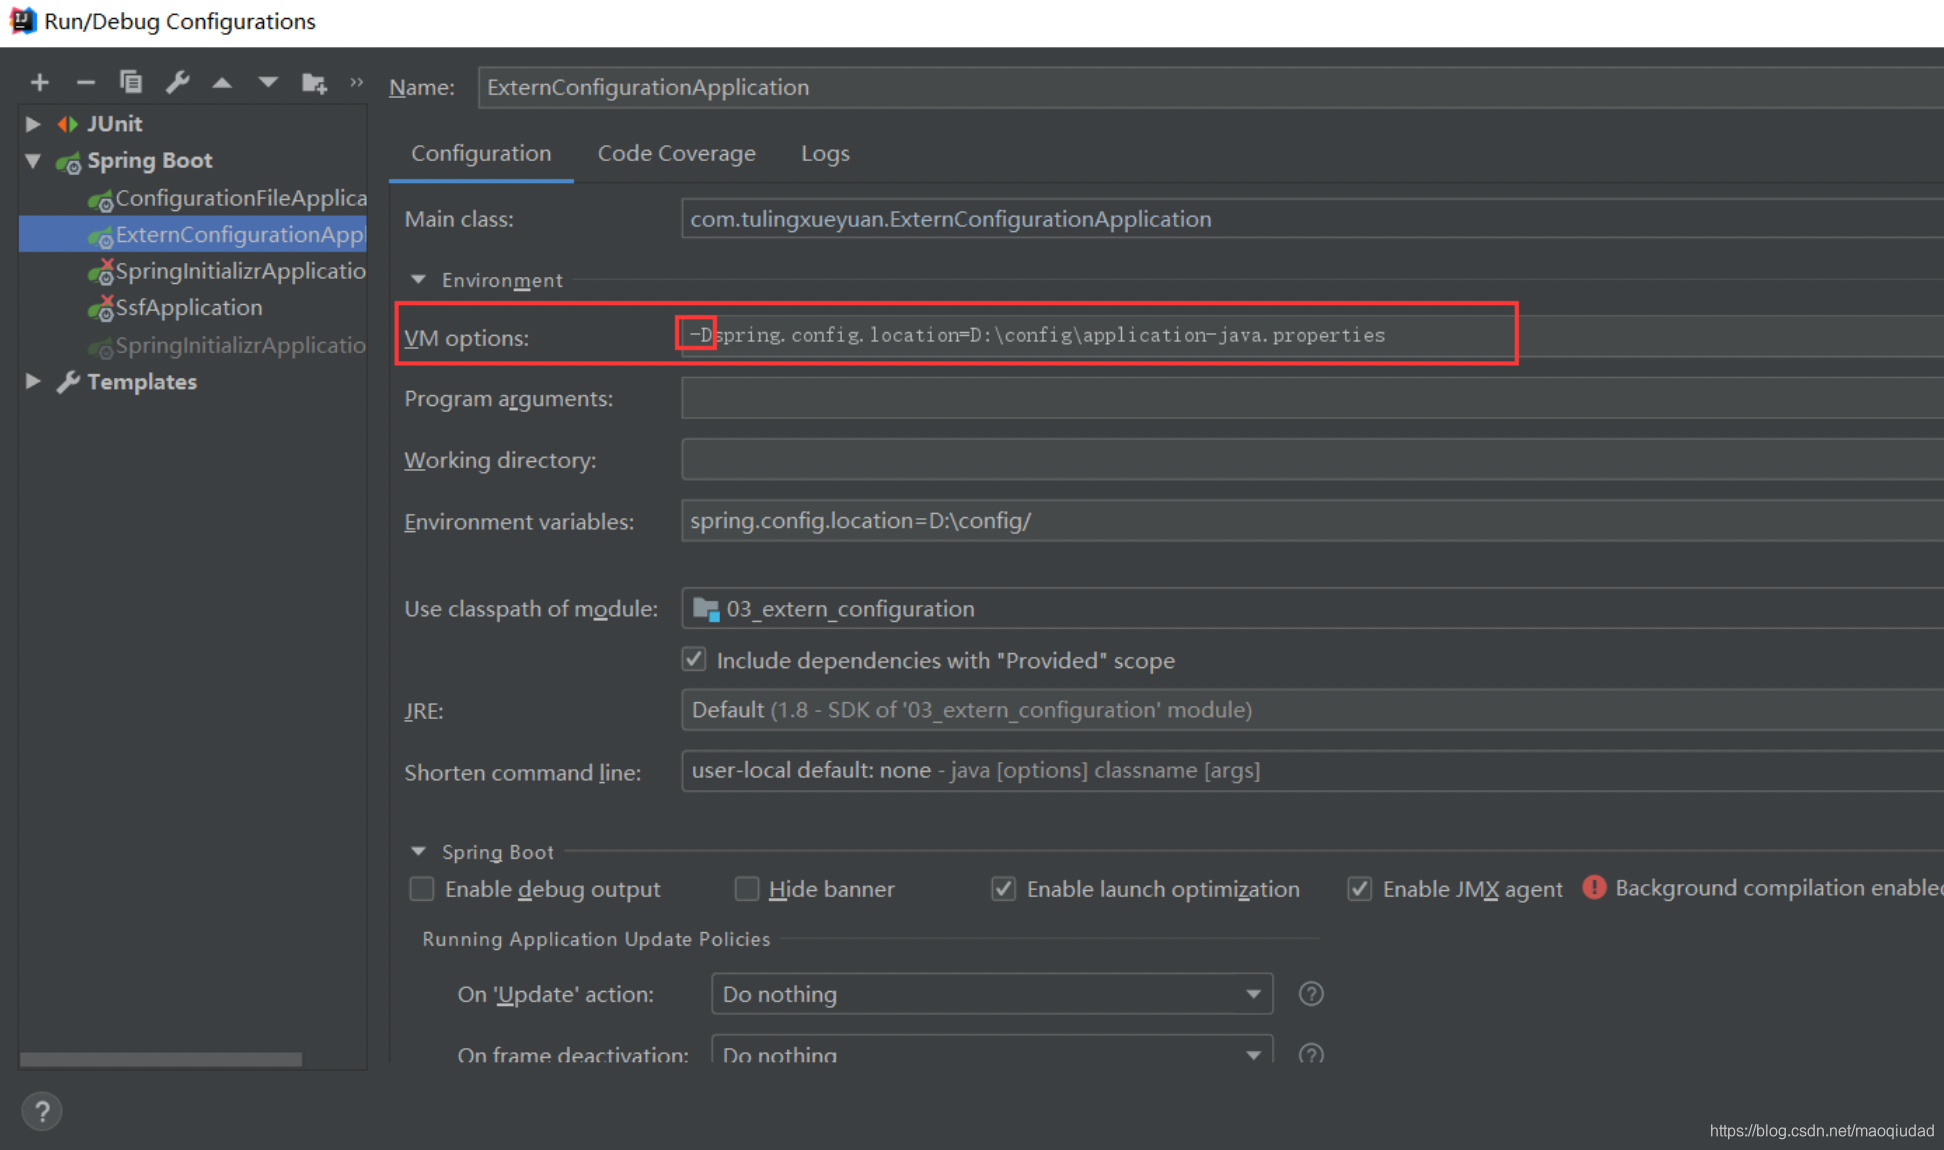
c. 命令行java属性
java ‐Dspring.config.location=D:\config\application‐java.properties ‐jar 03_extern_configuration‐0.0.1‐SNAPSHOT.jar
- 的JNDI属性java:comp/env。
- ServletContext 初始化参数。
ServletContext 的配置标签需要写到 web‐app (根标签)中 ,具体如下:
 <context‐param>
  <param‐name>spring.config.location</param‐name>
   <param‐value>xxx.properties</param‐value>
 </context‐param>
- ServletConfig 初始化参数。
ServletConfig 的配置标签需要写到 Servlet 标签中,标签如下:
 <init‐param>
  <param‐name>spring.config.location</param‐name>
   <param‐value>xxx.properties</param‐value>
 </init‐param>
- 来自的属性SPRING_APPLICATION_JSON(嵌入在环境变量或系统属性中的嵌入式JSON)。
- 命令行参数。
a. 会使约定配置文件失效
java ‐jar configuration_file‐0.0.1‐SNAPSHOT.jar ‐‐spring.config.location=D:/application.properties
- properties测试中的属性。可用于测试应用程序的特定部分@SpringBootTest的测试注释和注释。
- @TestPropertySource 测试中的注释。
a. 用在单元测试上的
@TestPropertySource("classpath:appSource.properties")
- $HOME/.config/springboot当devtools处于活动状态时,目录中的Devtools全局设置属性。
配置文件值注入
将YAML映射到属性
字面量:普通的值(数字,字符串,布尔)
k: v:字面直接来写;
字符串默认不用加上单引号或者双引号;
“”:双引号;不会转义字符串里面的特殊字符;特殊字符会作为本身想表示的意思
name: “zhangsan \n lisi”:输出;zhangsan 换行 lisi
‘’:单引号;会转义特殊字符,特殊字符最终只是一个普通的字符串数据
name: ‘zhangsan \n lisi’:输出;zhangsan \n lisi对象、Map(属性和值)(键值对):
k: v:在下一行来写对象的属性和值的关系;注意缩进
对象还是k: v的方式
friends:
 lastName: zhangsan
 age: 20
行内写法:
friends: {lastName: zhangsan,age: 18}
- 数组(List、Set):
用- 值表示数组中的一个元素
pets:
 ‐ cat
 ‐ dog
 ‐ pig
行内写法
pets: [cat,dog,pig]
配置文件
person:
 lastName: hello
 age: 18
 boss: false
 birth: 2017/12/12
 maps: {k1: v1,k2: 12}
 lists:
  ‐ lisi
  ‐ zhaoliu
   dog:
   name: 小狗
   age: 12
javaBean:
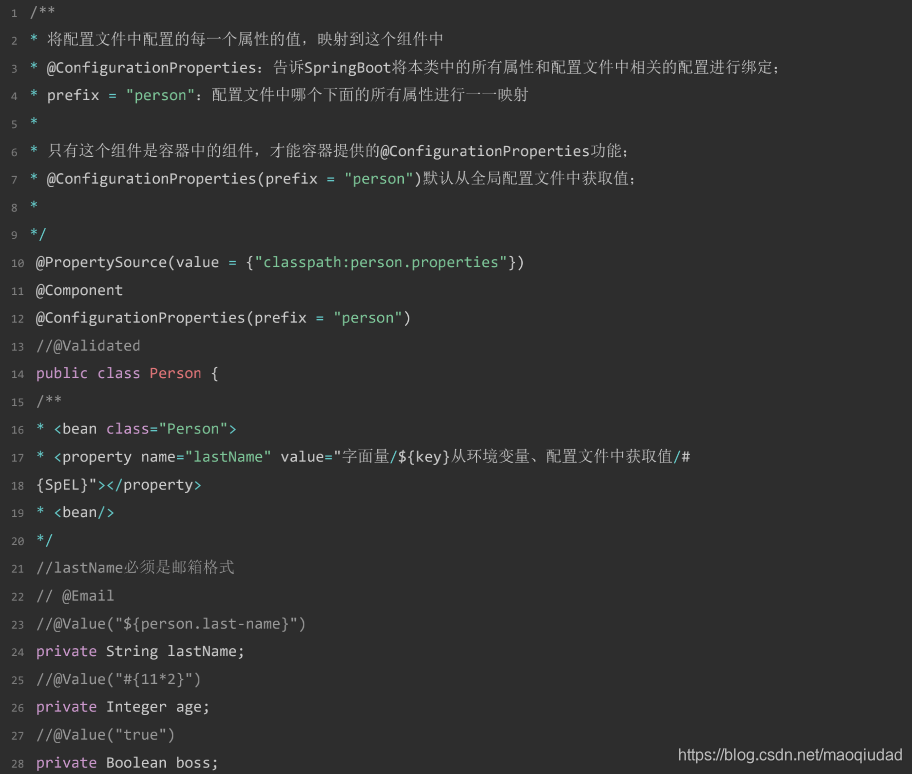
 /**
  * 将配置文件中配置的每一个属性的值,映射到这个组件中
  * @ConfigurationProperties:告诉SpringBoot将本类中的所有属性和配置文件中相关的配置进行绑定;
   * prefix = "person":配置文件中哪个下面的所有属性进行一一映射
   *
   *  只有这个组件是容器中的组件,才能容器提供的@ConfigurationProperties功能;
   *
   * /
   @Component
    @ConfigurationProperties(prefix = "person")
    public class Person {
    private String lastName;
    private Integer age;
    private Boolean boss;
    private Date birth;
    private Map<String,Object> maps;
    private List<Object> lists;
    private Dog dog;
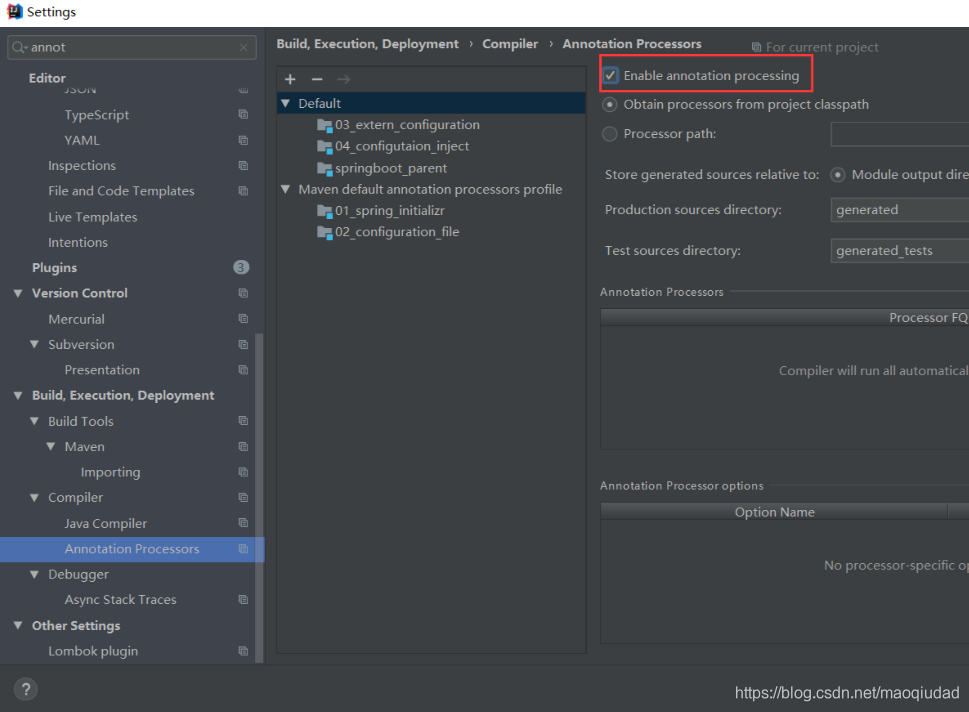
我们可以导入配置文件处理器,以后编写配置就有提示了
<!‐‐导入配置文件处理器,配置文件进行绑定就会有提示‐‐>
<dependency>
<groupId>org.springframework.boot</groupId>
<artifactId>spring‐boot‐configuration‐processor</artifactId>
<optional>true</optional>
</dependency>
properties配置文件在idea中默认utf-8可能会乱码
调整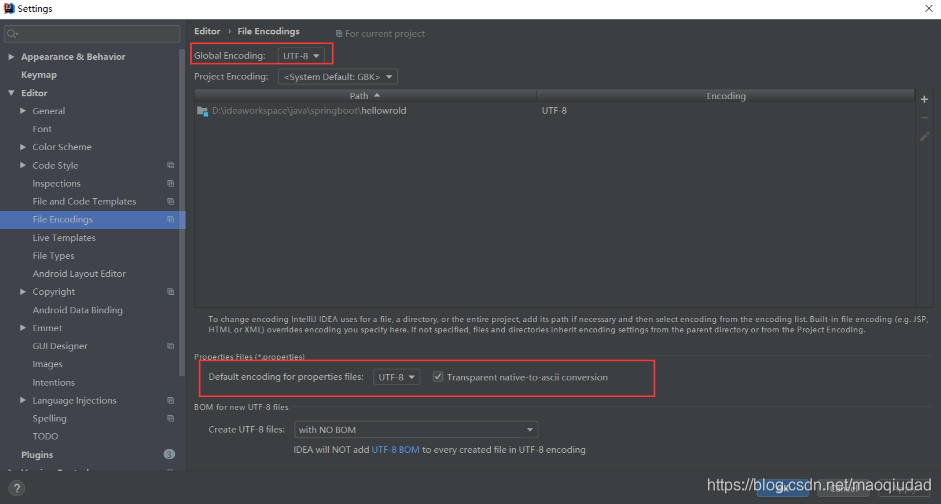
松散绑定:
user:
 USERNAME: 徐庶
user:
 userName: 徐庶
user:
 user_name: 徐庶
user:
 user‐name: 徐庶
 以上4种命名是可以自动绑定bean属性 User.username
@Value获取值和@ConfigurationProperties获取值比较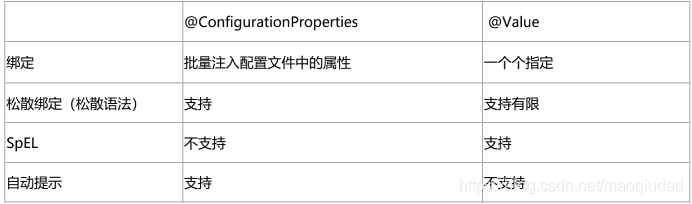
配置文件yml还是properties他们都能获取到值;
使用场景
如果说,我们只是在某个业务逻辑中需要获取一下配置文件中的某项值,使用@Value;
如果说,我们专门编写了一个javaBean来和配置文件进行映射,我们就直接使用@ConfigurationProperties;
3、配置文件注入值数据校验
@Component
@ConfigurationProperties(prefix = "person")
@Validated
public class Person {
        /**
        * <bean class="Person">
         * <property name="lastName" value="字面量/${key}从环境变量、配置文件中获取值/#
         {SpEL}"></property>
         * <bean/>
         */
        //lastName必须是邮箱格式
        @Email
        //@Value("${person.last‐name}")
        private String lastName;
        //@Value("#{11*2}")
        private Integer age;
        //@Value("true")
        private Boolean boss;
        private Date birth;
        private Map<String,Object> maps;
        private List<Object> lists;
        private Dog dog;
- @PropertySource:加载指定的配置文件;
- @ImportResource:导入Spring的配置文件,让配置文件里面的内容生效;
Spring Boot里面没有Spring的配置文件,我们自己编写的配置文件,也不能自动识别;
想让Spring的配置文件生效,加载进来;@ImportResource标注在一个配置类上
@ImportResource(locations = {"classpath:beans.xml"})
导入Spring的配置文件让其生效
配置文件占位符
1、随机数
${random.value}、${random.int}、${random.long}
${random.int(10)}、${random.int[1024,65536]}
2、占位符获取之前配置的值,如果没有可以是用:指定默认值
person.last‐name=张三${random.uuid}
person.age=${random.int}
person.birth=2017/12/15
person.boss=false
person.maps.k1=v1
person.maps.k2=14
person.lists=a,b,c
person.dog.name=${person.hello:hello}_dog
person.dog.age=15