前言:
由于本人在工作中也一直在坚持做技术分享,但始终未做webpack相关的技术分享,直到有一天,一个前端小伙伴找到我,说他自己想学习webpack相关的知识,但找到的资料都很片面,所以想让我做有关webpack的技术分享。
这篇文章主要还是学习至官网,基于我自己的理解而编写。如果有理解得不对的地方,请各位不吝赐教。
概念:
entry: 要打包的入口文件
output: 打包后输出的配置
loader: webpack默认只能识别js文件和json文件,loader的作用相当于翻译,将其他格式的文件翻译为webpack能够识别的JS格式
plugins: 增强webpack的功能,比如压缩,分隔,提取css等
mode: 环境模式,一般有production生成环境和development开发环境
1. 创建项目
在G盘创建项目目录webpack01
PS G:\webpack01> npm init
This utility will walk you through creating a package.json file.
It only covers the most common items, and tries to guess sensible defaults.

See `npm help init` for definitive documentation on these fields
and exactly what they do.

Use `npm install <pkg>` afterwards to install a package and
save it as a dependency in the package.json file.

Press ^C at any time to quit.
package name: (webpack01)
version: (1.0.0)
description:
entry point: (index.js)
test command:
git repository:
keywords:
author:
license: (ISC)
About to write to G:\webpack01\package.json:

{
  "name": "webpack01",
  "version": "1.0.0",
  "description": "",
  "main": "index.js",
  "scripts": {
    "test": "echo \"Error: no test specified\" && exit 1"
  },
  "author": "",
  "license": "ISC"
}


Is this OK? (yes)
得到package.json文件
{
  "name": "webpack01",
  "version": "1.0.0",
  "description": "",
  "main": "index.js",
  "scripts": {
    "test": "echo \"Error: no test specified\" && exit 1"
  },
  "author": "",
  "license": "ISC"
}
然后再安装webpack 和 webpack-cli
npm install -D webpack webpack-cli然后再向package.json文件中的scripts添加 "build": "webpack":
{
  "name": "webpack01",
  "version": "1.0.0",
  "description": "",
  "main": "index.js",
  "scripts": {
    "test": "echo \"Error: no test specified\" && exit 1",
    "build":"webpack"
  },
  "author": "",
  "license": "ISC",
  "devDependencies": {
    "webpack": "^5.37.1",
    "webpack-cli": "^4.7.0"
  }
}
在项目根目录创建源码目录src,然后在src目录下创建index.js文件,index.js内容如下
console.log('hello webpack')在根目录创建webpack的配置文件webpack.config.js:
const { resolve } = require('path')
module.exports = {
    //入口文件
    entry: './src/index.js',
    //打包后的文件配置
    output: {
        //指定输出的目录,一般采用绝对路径
        path: resolve(__dirname,'build'),
        filename: 'built.js'
    },
    module: {
        //loader配置
        rules: []
    },
    //插件配置
    plugins:[],
    //环境配置
    mode: 'development'
}
在根目录下创建index.html
<!DOCTYPE html>
<html lang="en">
<head>
    <meta charset="UTF-8">
    <meta http-equiv="X-UA-Compatible" content="IE=edge">
    <meta name="viewport" content="width=device-width, initial-scale=1.0">
    <title>Document</title>
</head>
<body>
    <h1>hello webpack</h1>
</body>
<script src="./build/built.js"></script>
</html>
执行webpack命令或者npm run build
PS G:\webpack01> npm run build

> webpack01@1.0.0 build G:\webpack01
> webpack

asset built.js 1.21 KiB [compared for emit] (name: main)
./src/index.js 28 bytes [built] [code generated]
webpack 5.37.1 compiled successfully in 84 ms
这个时候编译成功,查看编译成功后的built.js,内容为:
/*
* ATTENTION: The "eval" devtool has been used (maybe by default in mode: "development").
* This devtool is neither made for production nor for readable output files.
* It uses "eval()" calls to create a separate source file in the browser devtools.
* If you are trying to read the output file, select a different devtool (https://webpack.js.org/configuration/devtool/)
* or disable the default devtool with "devtool: false".
* If you are looking for production-ready output files, see mode: "production" (https://webpack.js.org/configuration/mode/).
*/
/******/ (() => { // webpackBootstrap
/******/ var __webpack_modules__ = ({
/***/ "./src/index.js":
/*!**********************!*\
!*** ./src/index.js ***!
\**********************/
/***/ (() => {
eval("console.log('hello webpack')\n\n//# sourceURL=webpack://webpack01/./src/index.js?");
/***/ })
/******/ });
/************************************************************************/
/******/
/******/ // startup
/******/ // Load entry module and return exports
/******/ // This entry module can't be inlined because the eval devtool is used.
/******/ var __webpack_exports__ = {};
/******/ __webpack_modules__["./src/index.js"]();
/******/
/******/ })()
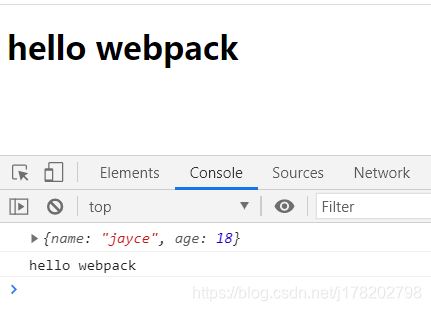
;在浏览器中打开index.html文件,并打开控制台,发现已经有 hello webpack输出
在src目录下创建data.json文件
{
    "name": "jayce",
    "age": 18
}
修改src/index.js文件,引入data.json,并进行打印,index.js内容如下:
import data from './data.json'

console.log(data)
console.log('hello webpack')
然后再进行编译
PS G:\webpack01> npm run build

> webpack01@1.0.0 build G:\webpack01
> webpack

asset built.js 3.21 KiB [emitted] (name: main)
runtime modules 274 bytes 1 module
./src/index.js 81 bytes [built] [code generated]
./src/data.json 35 bytes [built] [code generated]
webpack 5.37.1 compiled successfully in 105 ms
这个时候打开浏览器,查看控制台输出
再查看build/built.js,内容如下
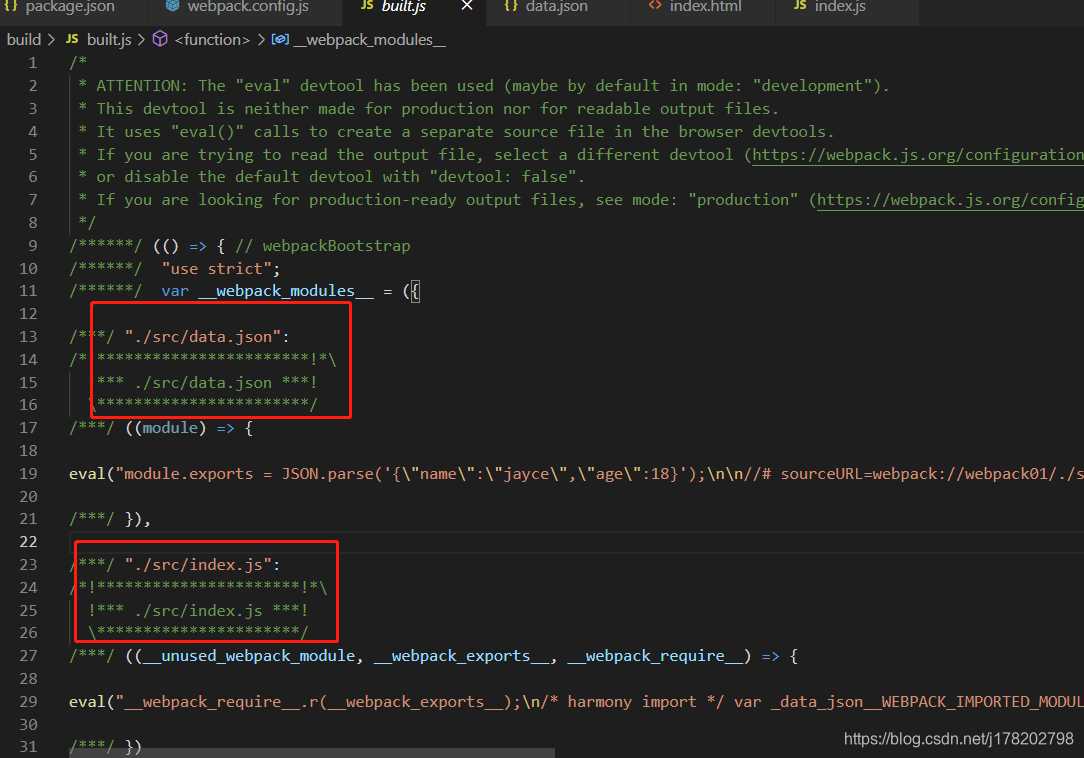
我们发现js文件和json文件都被打包到我们的出口文件中了
所以得出结论: webpack能够天然的识别js文件和json文件
接下来为html中的h1添加css样式文件和less样式文件
src/index.css内容:
h1 {
    color: pink;
}
src/index.less
h1 {
    font-size: 48px;
}
修改src/index.js,引入刚刚创建的样式文件,先引入css文件:
import data from './data.json'
import 'index.css' //引入样式文件
console.log(data)
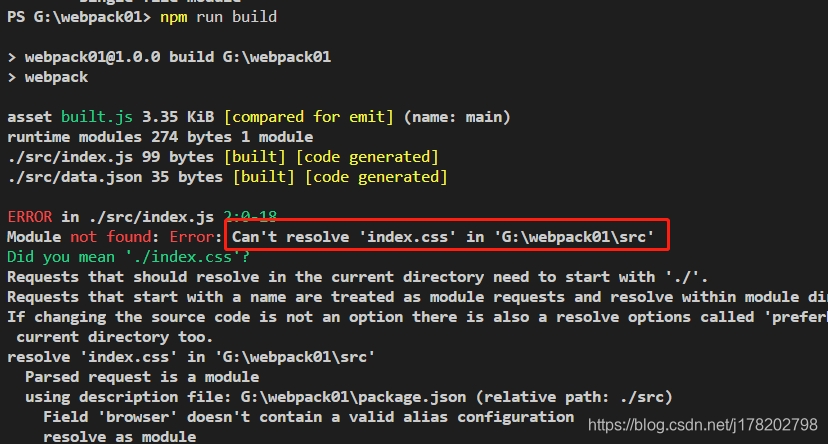
console.log('hello webpack')然后再进行编译:
npm run build这个时候会编译不通过,因为webpack根本不识别css文件
为了webpack能够识别css文件,我们需要配置css-loader,修改webpack.config.js文件
const { resolve } = require('path')
module.exports = {
    //入口文件
    entry: './src/index.js',
    //打包后的文件配置
    output: {
        //指定输出的目录,一般采用绝对路径
        path: resolve(__dirname,'build'),
        filename: 'built.js'
    },
    module: {
        //loader配置
        rules: [
            {
                //匹配以css结尾的文件
                test: /\.css$/,
                //采用css-loader进行处理,让webpack能够识别
                loader: 'css-loader'
            }
        ]
    },
    //插件配置
    plugins:[],
    //环境配置
    mode: 'development'
}
修改完毕,别忘记要引入css-loader的包
npm install -D css-loader这个时候再执行webpack编译,就发现编译成功了
PS G:\webpack01> npm run build

> webpack01@1.0.0 build G:\webpack01
> webpack

asset built.js 7.69 KiB [compared for emit] (name: main)
runtime modules 937 bytes 4 modules
cacheable modules 2.02 KiB
  ./src/index.js 101 bytes [built] [code generated]
  ./src/data.json 35 bytes [built] [code generated]
  ./src/index.css 327 bytes [built] [code generated]
  ./node_modules/css-loader/dist/runtime/api.js 1.57 KiB [built] [code generated]
webpack 5.37.1 compiled successfully in 343 ms
我们查看build/built.js文件发现,src/index.css已经被打包进去了
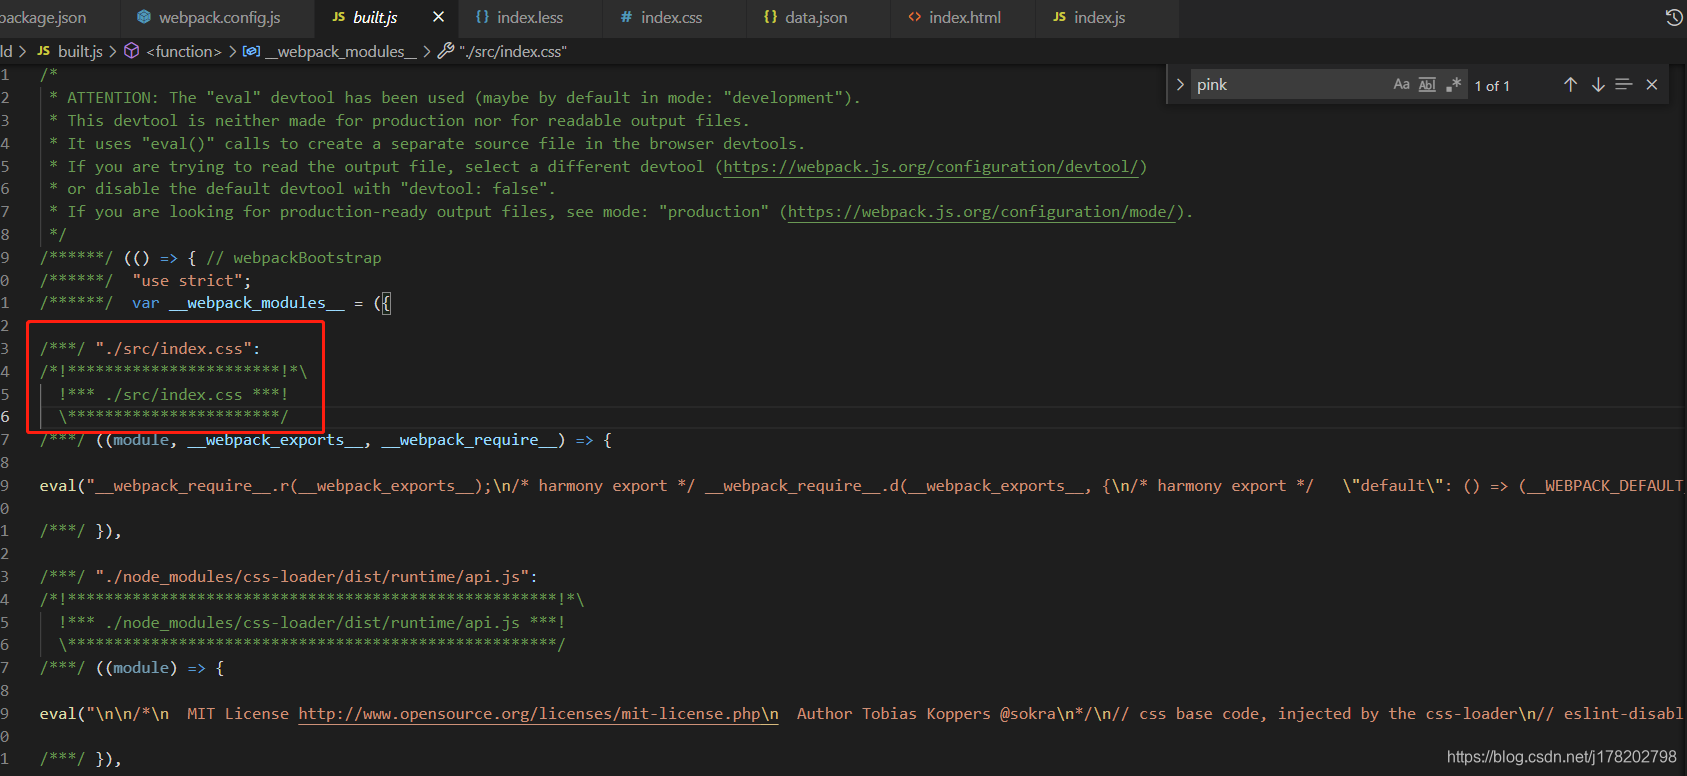

pink这个字体颜色能在编译后的built.js文件中搜到,那么index.html中的字体颜色会生效吗

如您所见,颜色并未生效,这个是为什么呢?
原来css-loader只负责把css处理为webpack能够识别的字符串,要想样式生效,就要借助于style-loader
style-loader的作用为: 在js文件运行的时候,会动态插入js的css字符串到html文件中的head内部,并添加style标签
和css-loader一样,使用style-loader需要进行安装包
npm install -D style-loader修改webpack.config.js
const { resolve } = require('path')
module.exports = {
    //入口文件
    entry: './src/index.js',
    //打包后的文件配置
    output: {
        //指定输出的目录,一般采用绝对路径
        path: resolve(__dirname,'build'),
        filename: 'built.js'
    },
    module: {
        //loader配置
        rules: [
            {
                //匹配以css结尾的文件
                test: /\.css$/,
                //单个loader使用loader属性
                //loader: 'css-loader'

                //多个loader处理一个文件,需要使用use
                //use属性的执行顺序为逆序,也就是数组尾->数组首的顺序
                use: ['style-loader','css-loader']
            }
        ]
    },
    //插件配置
    plugins:[],
    //环境配置
    mode: 'development'
}
loader配置中,use数组中loader执行顺序切记为从尾到首的方式执行,也就是css-loader和style-loader的顺序是不能换的
配置完毕后,再进行编译,编译成功后再查看index.html,在浏览器中运行index.html,我们发现确实在head里动态插入了style标签
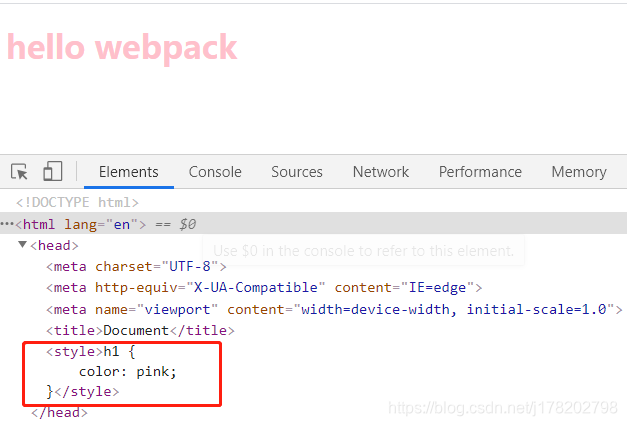
为了验证style-loader的样式是js运行的时候动态插入的,这个时候我们查看根目录下的index.html发现其内部仍然是没有style标签的
<!DOCTYPE html>
<html lang="en">
<head>
    <meta charset="UTF-8">
    <meta http-equiv="X-UA-Compatible" content="IE=edge">
    <meta name="viewport" content="width=device-width, initial-scale=1.0">
    <title>Document</title>
</head>
<body>
    <h1>hello webpack</h1>
</body>
<script src="./build/built.js"></script>
</html>
接下来我们尝试在src/index.js中引入index.less文件,修改index.js文件
import data from './data.json'
import './index.css'
import './index.less'

console.log(data)
console.log('hello webpack')
修改完毕,再进行编译,会报错:

webpack果然还是不识别less文件的,为了解决这个问题,需要引入less-loader,进行处理,less-loader又依赖less进行编译,所以我们需要同时安装less和less-loader两个包
npm install -D less less-loader包安装完毕后,我们需要修改webpack.config.js,为less文件配置loader
less-loader的运行机制为: 借助less包进行编译,将less文件转为css文件,但css文件仍然是webpack不识别的,所以还要将css进行css-loader和style-loader处理,文件的loader如下:
const { resolve } = require('path')
module.exports = {
    //入口文件
    entry: './src/index.js',
    //打包后的文件配置
    output: {
        //指定输出的目录,一般采用绝对路径
        path: resolve(__dirname,'build'),
        filename: 'built.js'
    },
    module: {
        //loader配置
        rules: [
            {
                //匹配以.css结尾的文件
                test: /\.css$/,
                //单个loader使用loader属性
                //loader: 'css-loader'

                //多个loader处理一个文件,需要使用use
                //use属性的执行顺序为逆序,也就是数组尾->数组首的顺序
                use: ['style-loader','css-loader']
            },
            {
                //匹配以.less结尾的文件
                test: /\.less$/,
                use: ['style-loader','css-loader','less-loader']
            }
        ]
    },
    //插件配置
    plugins:[],
    //环境配置
    mode: 'development'
}
这个时候再进行编译,就发现能编译成功了。之后我们打开浏览器查看index.html,发现那个骚气的粉色字体变大了

由于时间关系,这篇先写到这里