import os  # 文件处理模块,用于处理文件和目录
import torch  # pytorch的深度学习框架
import pandas as pd  #人脸识别库
from skimage import io, transform  # skimage为数字图像处理包,io用于读取、保存和显示图片或视频,transform用于几何变换和其他变换
import numpy as np  # 用于矩阵运算
imporrt matplotlib,pyplot as plt # matplotlib为一个2D绘图库,pyplot模块提供了类似于MATLAB的界面,特别是与IPython结合使用时
from torch.utils.data import Dataset, DataLoader # 该接口主要用来将自定义的数据读取接口的输出或者PyTorch已有的数据读取接口的输入按照batch size封装成Tensor
from torchvision import transforms, utils

# Ignore warnings
import warnings
warnings.filterwarnings("ignore")

plt.ion() # interactive mode
数据集的下载链接为:https://download.pytorch.org/tutorial/faces.zip
格式如下:
image_name,part_0_x,part_0_y,part_1_x,part_1_y,part_2_x, ... ,part_67_x,part_67_y
0805personali01.jpg,27,83,27,98, ... 84,134
1084239450_e76e00b7e7.jpg,70,236,71,257, ... ,128,312
CSV文件的读取如下:
landmarks_frame = pd.read_csv('data/faces/face_landmarks.csv')

n = 65
img_name = landmarks_frame.iloc[n, 0]
landmarks = landmarks_frame.iloc[n, 1:].as_matrix()
landmarks = landmarks.astype('float').reshape(-1, 2)

print('Image name: {}'.format(img_name))
print('Landmarks shape: {}'.format(landmarks.shape))
print('First 4 Landmarks: {}'.format(landmarks[:4]))
定义一个显示函数:
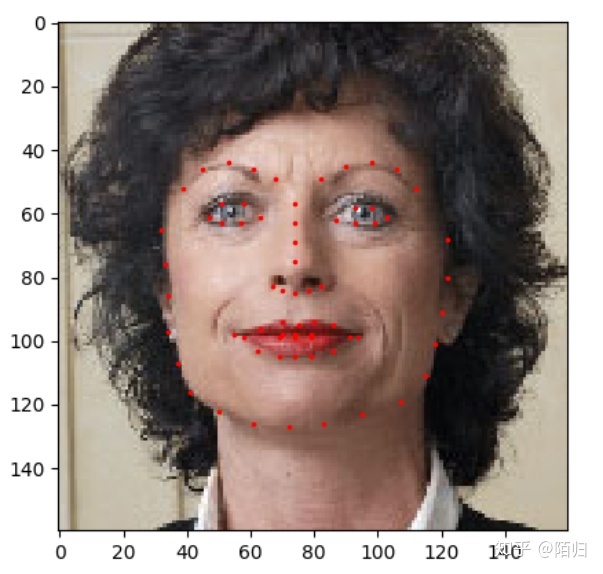
def show_landmarks(image, landmarks):
    """Show image with landmarks"""
    plt.imshow(image) # 显示图像
    plt.scatter(landmarks[:, 0], lamdmarks[:, 1], s = 10, marker = '.', c = 'r') # 显示特征点
    plt.pause(0.001)

plt.figure()
show_landmarks(io.imread(os.path.join('data/faces/', img_name)), landmarks)
plt.show()
显示结果如图所示: