开发中的问题
开发的过程当中使用了大量的xml等配置文件,以及在开发过程中使用MAVEN的构建工具来进行构建项目,但是往往有时也会出现依赖的一些冲突,而且开发的时候测试还需要下载和使用tomcat等等这些servlet容器,所以开发的效率不高。
springboot:
1.直接嵌入tomcat
2.自动的解决jar包冲突
3.不需要xml的配置,自动的配置
springboot的介绍
Spring Boot makes it easy to create stand-alone, production-grade Spring based Applications that you can “just run”.
We take an opinionated view of the Spring platform and third-party libraries so you can get started with minimum fuss. Most Spring Boot applications need very little Spring configuration.
特性:
创建独立的Spring应用程序
直接嵌入Tomcat,Jetty或Undertow(无需部署WAR文件)
提供“入门”依赖项(起步依赖),以简化构建配置
尽可能自动配置Spring和第三方库
提供可用于生产的功能,例如指标,运行状况检查和外部化配置
完全没有代码生成,也不需要XML配置
一、创建springboot工程
1、手动创建
1)创建空工程
2)创建maven Module
配置pom.xml
添加parent
<parent>
    <groupId>org.springframework.boot</groupId>
    <artifactId>spring-boot-starter-parent</artifactId>
    <version>2.1.4.RELEASE</version>
</parent>
添加起步依赖
    <dependencies>
        <!--加入springboot的starter 核心starter,包括自动配置支持、
        日志记录和YAML-->
        <dependency>
            <groupId>org.springframework.boot</groupId>
            <artifactId>spring-boot-starter</artifactId>
        </dependency>

        <dependency>
            <groupId>org.springframework.boot</groupId>
            <artifactId>spring-boot-starter-web</artifactId>
        </dependency>

    </dependencies>

    <build>
        <plugins>
            <plugin>
                <groupId>org.springframework.boot</groupId>
                <artifactId>spring-boot-maven-plugin</artifactId>
            </plugin>
        </plugins>
    </build>
创建启动类(或者 叫引导类)
@SpringBootApplication
public class SpringbootApplication {

    public static void main(String[] args) {
        SpringApplication.run(SpringbootApplication.class,args);
    }
}
创建controller 实现展示hello world
@RestController
public class TestController {
    @RequestMapping("/hello")
    public String showHello(){
        return "hello world";
    }
}
2、SpringBoot 项目目录结构(工程结构)
1)代码层结构
根目录:com.it (包名)
启动类
数据实体类 domain:
jpa项目:com.it.domain
mybatis项目:com.it.entity
数据接口访问层 Dao
数据服务接口层 Service:com.it.service
数据服务接口实现层 Service Implements:com.it.service.impl
前端控制器层 Controller:com.it.controller
工具类库 utils:com.it.utils
配置类 config:com.it.config
数据传输对象 dto:com.it.dto
数据传输对象Data Transfer Object用于封装多个实体类domain之间的关系,不破坏原有的实体类结构
视图包装对象 vo:com.it.vo
视图包装对象View Object用于封装客户端请求的数据,防止部分数据泄露如:管理员ID,保证数据安全,不破坏 原有的实体类结构
常量类 constant:com.it.constant
2)资源目录结构
根目录:resources
–static 目录用于存储静态资源,如html、css、js、图片等资源
–templates 目录用于存储模板文件,如jsp、thymeleaf等模板文件
–application.properties 用于配置相关的使用到的属性,所有的配置基本上都需要在这里配置,需要注意的是名字不能修改。
mybatis映射文件:resources/mappers/
mybatis配置文件:resources/spring-mybatis.xml
二、Springboot的配置文件
SpringBoot是约定大于配置的,所以很多配置都有默认值。如果想修改默认配置,可以用application.properties或application.yml(application.yaml)自定义配置。SpringBoot默认从Resource目录加载自定义配置文件。
1、properties文件
properties文件的配置多以key.key.key:value的形式组成
比如:修改端口配置
server.port=8081
2、 yaml或者yml文件
yaml文件等价于properties文件,在使用过程中都是一样的效果。
我们可以根据需要选择性的使用properties和yml文件。如果同时存在两个文件,那么优先级properties要高于yml。
语法特点如下:
大小写敏感
数据值前必须有空格,作为分隔符
使用缩进表示层级关系
缩进时不允许使用Tab键,只允许使用空格。
缩进的空格数目不重要,只要相同层级的元素左侧对齐即可#表示注释 只支持单行注释
书写格式如下要求如下:
- key和key之间需要 冒号加换行 以及 空格两次。
- 简单key value之间需要冒号加空格。
key1:
  key2:
    key3: value
key4: value4
如:
#key为: server.port
server:
  port: 8081
YAML支持的数据结构
对象:键值对的集合,又称为映射(mapping)/ 哈希(hashes) / 字典(dictionary)
数组:一组按次序排列的值,又称为序列(sequence) / 列表(list)
纯量(scalars):单个的、不可再分的值
YAML教程(快速入门版)
相关资料
YAML 官方网站
YAML 1.2 官方文档
https://yaml.org/spec/1.2/spec.html
YAML - 维基百科
https://zh.wikipedia.org/wiki/YAML
YAML to JSON (格式在线转换)
https://www.json2yaml.com/convert-yaml-to-json
#以下为自定义配置

# 基本格式 key: value
name: zhangsan

# 数组  元素为简单类型
# - 用于区分不同的元素
city:
  - beijing
  - tianjin
  - shanghai
  - chongqing

# POJO(对象)
student:
  name: zhangsan
  age: 19
  score: 100

#集合(也是数组)中的元素是对象形式
students:
  - name: zhangsan
    age: 18
    score: 100
  - name: lisi
    age: 28
    score: 88
  - name: wangwu
    age: 38
    score: 90

#map集合形式
maps: {"name":"zhangsan", "age": "15"}

#参数引用
person:
  name: ${name} # 该值可以获取到上边的name定义的值
3、 获取配置文件中值
获取配置文件中的值我们一般有几种方式:
- @value注解的方式 只能获取简单值
- Environment的方式
- @ConfigurationProperties pojo方式
controller实现:
@RestController
public class Test2Controller {
    @Value("${name}")
    private String name;

    @Value("${city[0]}")
    private String city0;

    @Value("${students[0].name}")
    private String studentname;

    @Value("${person.name}")
    private String personName;


    @Value("${maps.name}")//value注解只能获简单的值对象
    private String name1;

    @Autowired
    private Student student;

    @RequestMapping("/show")
    public String showHello() {
        System.out.println(name);
        System.out.println(city0);
        System.out.println(studentname);
        System.out.println(personName);

        System.out.println(">>>>"+student.getAge());

        return "hello world";
    }
}
Environment的方式
@RestController
@RequestMapping("/user")
public class UserController {
    @Value("${maps.name}")
    private String city;

    @Autowired
    private Environment environment;

    @Autowired
    private Student student;

    @RequestMapping("/hello")
    public String showHello(){
        System.out.println(city);
        System.out.println(environment.getProperty("maps.name"));
        System.out.println(student);
        return "hello world...";
    }

}
Environment 接口
org.springframework.core.env
public interface Environment extends PropertyResolver
表示当前应用程序运行的环境。建模应用程序环境的两个关键方面:
profiles and properties。与属性访问相关的方法是通过PropertyResolver超接口公开的。
Environment 常用方法
PropertyResolver
解析针对任何基础源的属性的接口
PropertyResolver 常用方法
//返回与给定键关联的属性值,如果键不能解析,则返回null
String getProperty(String key)
String getProperty(String key, String defaultValue)
//targetType 属性值的预期类型
<T> T getProperty(String key, Class<T> targetType)
<T> T getProperty(String key, Class<T> targetType, T defaultValue)
pojo方式:
@Component
@ConfigurationProperties(prefix = "student")
public class Student {
    private String name;
    private Integer age;
}
        <!--自定义的配置提示-->
        <dependency>
            <groupId>org.springframework.boot</groupId>
            <artifactId>spring-boot-configuration-processor</artifactId>
            <optional>true</optional>
        </dependency>
@EnableConfigurationProperties 注解
启用对ConfigurationProperties 注解的bean的支持。ConfigurationProperties bean可以以标准的方式注册(例如使用@Bean方法),或者,为了方便,可以直接在这个注释上指定。
@EnableConfigurationProperties 常用属性
Class<?>[] value() default {}
4、环境切换 profiles
properties配置方式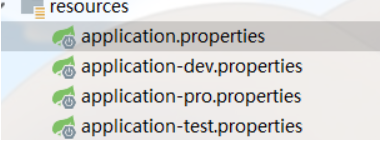
application.properties:
#通过active指定选用配置环境
spring.profiles.active=test
application-dev.properties:
#开发环境
server.port=8081
application-test.properties
server.port=8082
application-pro.properties
server.port=8083
yml配置方式同理
还有一种是分隔符的方式(了解)
spring:
  profiles:
    active: dev

---
#开发环境
server:
  port: 8081
spring:
  profiles: dev

---
#测试环境
server:
  port: 8082
spring:
  profiles: test

---
#生产环境
server:
  port: 8083
spring:
  profiles: pro
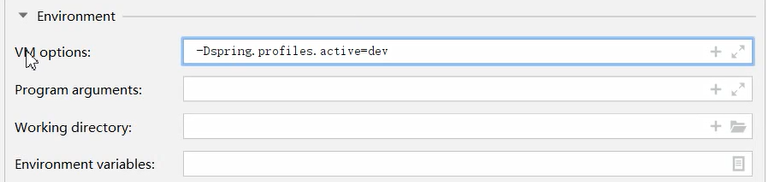
激活profile的方式(了解)
- 配置文件的方式(上边已经说过)
- 运行是指定参数
java -jar xxx.jar --spring.profiles.active=test - jvm虚拟机参数配置 -Dspring.profiles.active=dev
Run/Debug configuration
三、Springboot集成第三方框架
springboot 中打包jar
- 添加依赖:
    <build>
        <plugins>
            <plugin>
                <groupId>org.springframework.boot</groupId>
                <artifactId>spring-boot-maven-plugin</artifactId>
            </plugin>
        </plugins>
    </build>
- 在要打包的项目的根目录:
mvn clean package
或 mvn clean install
1、 springboot整合junit
测试类和 启动类 在同一个包中
1) 添加依赖
<dependency>
    <groupId>org.springframework.boot</groupId>
    <artifactId>spring-boot-starter-test</artifactId>
    <scope>test</scope>
</dependency>
2) 在/main/java/service下创建UserService
@Service
public class UserService {

    public String getUser() {
        System.out.println("获取用户的信息");
        return "zhangsan";
    }
}
3) 测试
//如果 测试类不和启动类包路径一致 以及子包下 需要指定classes 指定的启动类的字节码对象
//@SpringBootTest(classes = SpringBootApplication.class)
@RunWith(SpringRunner.class)
@SpringBootTest
public class SpringBootApplicationTests {

    @Autowired
    private UserService userService;

    @Test
    public void getUser() {
        String userinfo = userService.getUser();
        System.out.println(userinfo);
    }
}
@RunWith(SpringRunner.class) 使用springrunner运行器
@SpringBootTest 启用springboot测试
使用的方式和之前的spring的使用方式差不多。
SpringRunner
SpringRunner是SpringJUnit4ClassRunner的别名
要使用这个类,只需用@RunWith(SpringRunner.class)注释一个基于JUnit 4的测试类。
如果你想使用Spring TestContext框架的运行器,可以使用 org.springframework.test.context.junit4.rules.SpringClassRule和org.springframework.test.context.junit4.rules.SpringMethodRule。
2、springboot整合mybatis
http://mybatis.org/spring-boot-starter/mybatis-spring-boot-autoconfigure/
插件:
对比:
使用 spring集成mybatis 步骤:
1.依赖 mybatis mybatis-spring mysql,spring依赖
2.spring-dao.xml
+ 数据源配置
+ sqlsessionfactorybean
+ mapper扫描
3.开发mapper/dao接口
使用springboot集成mybatis 步骤:
1.parent 起步依赖 启动类
2.起步依赖(需要:mybatis的起步依赖 web的起步依赖,mysql驱动)
3.mapper扫描,数据源的配置
4.开发mapper/dao接口
1、添加依赖:
 <!--驱动-->
        <dependency>
            <groupId>mysql</groupId>
            <artifactId>mysql-connector-java</artifactId>
            <scope>runtime</scope>
        </dependency>
        <!--mybatis的 起步依赖-->
        <dependency>
            <groupId>org.mybatis.spring.boot</groupId>
            <artifactId>mybatis-spring-boot-starter</artifactId>
            <version>2.0.1</version>
        </dependency>
        <!--spring web起步依赖-->
        <dependency>
            <groupId>org.springframework.boot</groupId>
            <artifactId>spring-boot-starter-web</artifactId>
        </dependency>
2、创建pojo
public class User implements Serializable{
    private Integer id;
    private String username;//用户名
    private String password;//密码
    private String name;//姓名
    //getter setter...
    //toString
}
3、创建mapper接口
public interface UserDao {
    public User findById(Integer id);
}
4、创建UserDao映射文件
<?xml version="1.0" encoding="UTF-8" ?>
<!DOCTYPE mapper PUBLIC "-//mybatis.org//DTD Mapper 3.0//EN" "http://mybatis.org/dtd/mybatis-3-mapper.dtd">
<mapper namespace="com.it.dao.UserDao">
    <select id="findById" parameterType="int" resultType="com.it.pojo.User">
        select * from t_user where id = #{id}
    </select>
</mapper>
5、在application.yml文件中配置数据源:
spring:
  datasource:
    driver-class-name: com.mysql.jdbc.Driver
    url: jdbc:mysql://localhost/springboot_user?useUnicode=true&characterEncoding=UTF-8&serverTimezone=UTC
    username: root
    password: 123456
#配置mapper的映射文件的位置
mybatis:
  mapper-locations: classpath:mappers/*mapper.xml
6、包扫描 @MapperScan
@SpringBootApplication
//MapperScan 用于扫描指定包下的所有的接口,将接口产生代理对象交给spriing容器
@MapperScan(basePackages = "com.it.dao")
public class MybatisApplication {
    public static void main(String[] args) {
        SpringApplication.run(MybatisApplication.class,args);
    }
}
数据库连接池之Hikari源码解析
Hikari连接池目前公认是性能最高的数据库连接池,同时也是SpringBoot2.0以后默认使用的数据库连接池。
3、springboot整合redis
spring data redis 封装了jedis, 提供了一个核心的模板类RedisTemplate 提供了很多方法。
1.添加springboot data redis 的起步依赖
2.配置连接服务器的ip和端口
3.注入一个核心的模板类 RedisTemplate 提供了很多操作redis服务端的方法
添加起步依赖
<dependency>
    <groupId>org.springframework.boot</groupId>
    <artifactId>spring-boot-starter-data-redis</artifactId>
</dependency>
配置redis链接信息
spring:
  datasource:
    driver-class-name: com.mysql.jdbc.Driver
    url: jdbc:mysql://localhost/springboot_user?useUnicode=true&characterEncoding=UTF-8&serverTimezone=UTC
    username: root
    password: 123456
  redis:
    host: localhost
    port: 6379
#配置mapper的映射文件的位置
mybatis:
  mapper-locations: classpath:mappers/*Mapper.xml
service中进行调用
@Service
public class UserServiceImpl implements UserService {
    @Autowired
    private UserDao userDao;

    @Autowired
    private RedisTemplate redisTemplate;

    @Override
    public User findById(Integer id) {
        User user = (User) redisTemplate.boundValueOps(id).get();

        if(user != null){
            System.out.println("哈哈。。。redis里有");
            return user;
        }
        user = userDao.findById(id);
        redisTemplate.boundValueOps(id).set(user);
        return user;
    }
}
RedisTemplate
简化Redis数据访问代码的助手类
执行给定对象和Redis存储中的底层二进制数据之间的自动序列化/反序列化。默认情况下,它为对象使用Java序列化(通过JdkSerializationRedisSerializer)。对于字符串密集型操作,请考虑专用的StringRedisTemplate。
RedisTemplate 常用方法
//设置此模板要使用的 key 的序列化器。默认为getDefaultSerializer()。
public void setKeySerializer(RedisSerializer<?> serializer)

public void setValueSerializer(RedisSerializer<?> serializer)

public BoundValueOperations<K, V> boundValueOps(K key)
StringRedisTemplate
RedisSerializer 接口
对象到字节数组(二进制数据)的序列化和反序列化的基本接口。建议实现在序列化和反序列化端能处理空对象/空数组。注意,Redis不接受null 键或值,但可以返回null(对于不存在的键)。
RedisSerializer 常用方法
//用给定的ClassLoader 使用java序列化来获取RedisSerializer。
static RedisSerializer<Object> java(@Nullable ClassLoader classLoader)

//获取一个可以使用Jackson读写JSON的RedisSerializer。
static RedisSerializer<Object> json()
//使用UTF-8作为默认java.nio.charset 获取一个简单的字符串到 byte[](和byte[]到字符串)的序列化器
static RedisSerializer<String> string()
StringRedisSerializer
简单字符串到byte[]序列化器。使用指定的字符集(默认为UTF-8)将字符串转换为字节,反之亦然。
当与Redis的交互主要通过字符串发生时很有用。
不执行任何空转换,因为空字符串是有效的键/值。
BoundKeyOperations 接口
Redis 键的操作。执行通用键“绑定”操作。
与其他api一样,如果底层连接是流水线的或用多模式或以多模式排队的,那么所有方法都将返回null。
BoundKeyOperations 常用方法
//返回与此实体相关联的键
K getKey()

//返回相关的Redis类型
DataType getType()

//返回此键的过期时间 以秒为单位
// 在管道/事务中使用时为空
Long getExpire()

//设置键的生存/过期时间
Boolean expire(long timeout, TimeUnit unit)

Boolean expireAt(Date date)

//删除键的过期时间 (如果有的话)
Boolean persist();

//重命名键
void rename(K newKey)
BoundValueOperations 接口
public interface BoundValueOperations<K, V> extends BoundKeyOperations<K>
绑定到某个键的Value(或Redis术语中的String)操作
BoundValueOperations 常用方法
https://redis.io/commands/setex
//设置绑定键的值
1、void set(V value)

//设置绑定键的值和过期时间
2、void set(V value, long timeout, TimeUnit unit)

default void set(V value, Duration timeout)

//如果绑定键不存在,则设置绑定键的值
3、Boolean setIfAbsent(V value)
   Boolean setIfAbsent(V value, long timeout, TimeUnit unit)
   default Boolean setIfAbsent(V value, Duration timeout)

//如果key存在,设置绑定的key的值。
4、Boolean setIfPresent(V value)
  Boolean setIfPresent(V value, long timeout, TimeUnit unit)
  default Boolean setIfPresent(V value, Duration timeout)

//获取绑定键的值
5、V get()

//设置绑定键的值并返回其旧值
6、V getAndSet(V value)

//将绑定键下存储为字符串值的整数值递增1
7、Long increment()

//将绑定键下存储为字符串值的整数值递增delta
Long increment(long delta)
//将绑定键下存储为字符串值的浮点数值增加delta
Double increment(double delta)

8、Long decrement()
Long decrement(long delta)

//向绑定键追加一个值
9、Integer append(String value)

//获取绑定键的值的 begin和end之间子字符串。
10、String get(long start, long end)

//用给定值从指定的偏移量开始重写绑定键的部分。
11、void set(V value, long offset)

//获取绑定键的值的长度
12、Long size()
BoundListOperations 接口
public interface BoundListOperations<K, V> extends BoundKeyOperations<K>
绑定到某个键的 List 操作
BoundListOperations 的常用方法
BoundHashOperations 接口
public <HK, HV> BoundHashOperations<K, HK, HV> boundHashOps(K key)
绑定到某个键的 Hash 操作
BoundHashOperations 常用方法
redis的序列化机制
1,默认的情况下redisTemplate操作key vlaue的时候 必须要求 key一定实现序列化 value 也需要实现序列化
2,默认的情况下redisTemplate使用JDK自带的序列化机制:JdkSerializationRedisSerializer
3,JDK自带的序列化机制中要求需要key 和value 都需要实现Serializable接口
4. RedisTemplate支持默认以下几种序列化机制:机制都实现了RedisSerializer接口
+ OxmSerializer
+ GenericJackson2JsonRedisSerializer
+ GenericToStringSerializer
+ StringRedisSerializer
+ JdkSerializationRedisSerializer
+ Jackson2JsonRedisSerializer springboot @ConditionalOnMissingBean注解的作用
它是修饰bean的一个注解,主要实现的是,当你的bean被注册之后,如果再注册相同类型的bean,就不会成功,它会保证你的bean只有一个,即你的实例只有一个,当你注册多个相同的bean时,会出现异常,以此来告诉开发人员。
我们可以进行自定义序列化机制:例如:我们定义key 为字符串序列化机制,value:为JDK自带的方式则,应当处理如下:
@SpringBootApplication
@MapperScan(basePackages = "com.it.dao")
//MapperScan 用于扫描指定包下的所有的接口,将接口产生代理对象交给spriing容器
public class MybatisApplication {
    public static void main(String[] args) {
        SpringApplication.run(MybatisApplication.class,args);
    }

    @Bean
    public RedisTemplate<Object, Object> redisTemplate(
        RedisConnectionFactory redisConnectionFactory) throws UnknownHostException {
        RedisTemplate<Object, Object> template = new RedisTemplate<>();
        template.setConnectionFactory(redisConnectionFactory);
        //设置key的值为字符串序列化方式 那么在使用过程中key 一定只能是字符串
        template.setKeySerializer(new StringRedisSerializer());
        //设置value的序列化机制为JDK自带的方式
        template.setValueSerializer(new JdkSerializationRedisSerializer());
        //一般我们如下设置:
        //key  设置为字符串
        //value 设置为JSON

        //设置自定义的默认的序列化机制
        //template.setDefaultSerializer(new GenericJackson2JsonRedisSerializer());
        return template;
    }
}
在工作中,根据我们业务的需要进行设置和选择,如果没有合适的还可以自己定义。只要实现RedisSerializer接口即可。
springboot不需要添加版本
版本统一进行管理
4、 SpringBoot2 整合log4j2日志配置
需要注意的是
Spring Boot 只有1.3.x和1.3.x以下版本才支持log4j的日志配置,1.3.x以上版本只支持log4j2。
1)依赖
<dependencies>
        <!--加入springboot的starter 核心starter,包括自动配置支持、
        日志记录和YAML-->
        <dependency>
            <groupId>org.springframework.boot</groupId>
            <artifactId>spring-boot-starter</artifactId>
            <exclusions>
                <exclusion>
                    <groupId>org.springframework.boot</groupId>
                    <artifactId>spring-boot-starter-logging</artifactId>
                </exclusion>
            </exclusions>
        </dependency>

        <dependency>
            <groupId>org.springframework.boot</groupId>
            <artifactId>spring-boot-starter-log4j2</artifactId>
        </dependency>
</dependencies>
Spring Boot配置log4j记录日志
SpringBoot+MyBatis如何配置log4j日志输出
2)log4j2.xml配置
将日志信息分为info、error、sql三个文件夹打印出来
<?xml version="1.0" encoding="utf-8"?>

<!--logger leves trace<debug<info<warn<error<fatal -->
<configuration status="off">
    <appenders>
        <Console name="console" target="SYSTEM_OUT">
            <PatternLayout pattern="%d{yyyy-MM-dd HH:mm:ss.SSS} [%t] %-5level %l - %m%n"/>
        </Console>
        <RollingFile name="info_appender" fileName="logs/log.log" filePattern="logs/%d{yyyy-MM-dd}/log_%i.log.gz">
            <Filters>
                <ThresholdFilter level="info"/>
                <ThresholdFilter level="error" onMatch="DENY" onMismatch="NEUTRAL"/>
            </Filters>
            <PatternLayout pattern="%d{yyyy-MM-dd HH:mm:ss.SSS} [%t] %-5level %l - %m%n"/>
            <Policies>
                <TimeBasedTriggeringPolicy interval="1" modulate="true"/>
                <SizeBasedTriggeringPolicy size="200 MB"/>
            </Policies>
        </RollingFile>
        <RollingFile name="error_appender" fileName="logs/log-error.log" filePattern="logs/%d{yyyy-MM-dd}/log_error_%i.log.gz">
            <Filters>
                <ThresholdFilter level="error" onMatch="ACCEPT" onMismatch="DENY"/>
            </Filters>
            <PatternLayout pattern="%d{yyyy-MM-dd HH:mm:ss.SSS} [%t] %-5level %l - %m%n"/>
            <Policies>
                <TimeBasedTriggeringPolicy interval="1" modulate="true"/>
                <SizeBasedTriggeringPolicy size="200 MB"/>
            </Policies>
            <DefaultRolloverStrategy max="3"/>
        </RollingFile>
        <RollingFile name="sql_appender" fileName="logs/log-sql.log" filePattern="logs/%d{yyyy-MM-dd}/log_sql_%i.log.gz">
            <Filters>
                <ThresholdFilter level="debug"/>
            </Filters>
            <PatternLayout pattern="%d{yyyy-MM-dd HH:mm:ss.SSS} [%t] %-5level %l - %m%n"/>
            <Policies>
                <TimeBasedTriggeringPolicy interval="1" modulate="true"/>
                <SizeBasedTriggeringPolicy size="200 MB"/>
            </Policies>
            <DefaultRolloverStrategy max="3"/>
        </RollingFile>
    </appenders>
    <loggers>
        <Root level="info">
            <AppenderRef ref="console"/>
            <AppenderRef ref="info_appender"/>
            <AppenderRef ref="error_appender"/>
        </Root>
        <Logger name="errorLog" level="info" additivity="false">
            <appender-ref ref="error_appender" level="info"/>
        </Logger>
        <Logger name="com.example.log4jtest.dao" level="DEBUG" additivity="false">
            <appender-ref ref="sql_appender" level="DEBUG"/>
        </Logger>
        <!--  <logger name="jdbc.connection" level="OFF"/>
          <logger name="jdbc.audit" level="OFF"/>
          <logger name="jdbc.resultset" level="OFF"/>
          <Logger name="jdbc.sqlonly" level="DEBUG" additivity="false">
            <appender-ref ref="sql_appender" level="DEBUG"/>
          </Logger>-->
    </loggers>
</configuration>
整合MyBatis
在application.yml中
mybatis:
  mapper-locations: classpath:mappers/*dao.xml
  configuration:
    log-impl: org.apache.ibatis.logging.stdout.StdOutImpl
org.apache.ibatis.logging.stdout.StdOutImpl:这个是可以打印sql、参数、查询结果的
org.apache.ibatis.logging.log4j.Log4jImpl:这个不打印查询结果