mybatis
1.mybatis快速入门
1.1. 复习jdbc
1.1.1jdbc连接数据库查询
package com.lhb;
import java.sql.*;
/**
*@Auther:xs
*@Date:2020/11/29
*@Description:com.lhb
*@Version:1.0
*/
public class TestJdbc {
public static void main(String[] args) throws ClassNotFoundException, SQLException {
findArticle();
}
private static void findArticle() {
Connection conn = null;
Statement stmt = null;
ResultSet rs = null;
try {
Class.forName("com.mysql.jdbc.Driver");
String url = "jdbc:mysql://localhost:3306/biblog";
String userName = "root";
String password = "root";
conn = DriverManager.getConnection(url, userName, password);
stmt = conn.createStatement();
rs = stmt.executeQuery("select * from article");
while (rs.next()) {
System.out.println(rs.getInt(1));
}
} catch (ClassNotFoundException | SQLException e) {
e.printStackTrace();
} finally {
if (rs == null) {
try {
rs.close();
} catch (SQLException e) {
e.printStackTrace();
}
}
if (stmt == null) {
try {
stmt.close();
} catch (SQLException e) {
e.printStackTrace();
}
}
if (conn == null) {
try {
conn.close();
} catch (SQLException e) {
e.printStackTrace();
}
}
}
}
}
1.1.2.jdbc事物提交
package com.lhb;
import java.sql.Connection;
import java.sql.DriverManager;
import java.sql.PreparedStatement;
import java.sql.SQLException;
/**
*@Auther:xs
*@Date:2020/11/29
*@Description:com.lhb
*@Version:1.0
*/
public class TestTransaction {
public static void main(String[] args) {
insertArticle();
}
private static void insertArticle() {
String url = "jdbc:mysql://localhost:3306/biblog";
String userName = "root";
String password = "root";
Connection conn = null;
PreparedStatement ps = null;
try {
Class.forName("com.mysql.jdbc.Driver");
conn = DriverManager.getConnection(url, userName, password);
conn.setAutoCommit(false);
String sql = "insert into article (atl_title, atl_desc, content) values(?, ?, ?)";
ps = conn.prepareStatement(sql);
ps.setString(1, "title");
ps.setString(2, "desc");
ps.setString(3, "content");
int i = ps.executeUpdate();
System.out.println(i);
conn.commit();
} catch (ClassNotFoundException e) {
try {
conn.rollback();
} catch (SQLException ex) {
ex.printStackTrace();
}
} catch (SQLException e) {
e.printStackTrace();
} finally {
if (ps == null) {
try {
ps.close();
} catch (SQLException e) {
e.printStackTrace();
}
}
if (conn == null) {
try {
conn.close();
} catch (SQLException e) {
e.printStackTrace();
}
}
}
}
}
这里只单单一个查询(插入),写起来过于冗长,及其不利于扩展和编写业务。这就是我们需要学习框架的原因。
1.2 mybatis 搭建运行
搭建步骤:
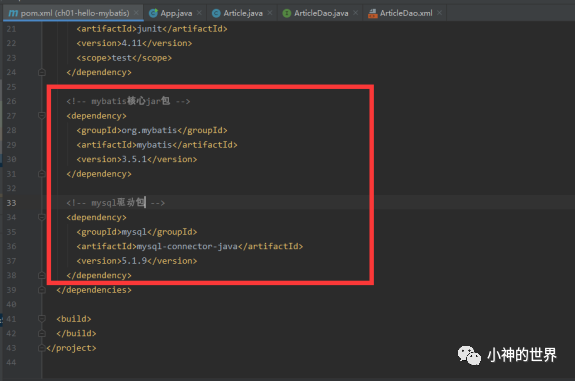
1. 引入jar包
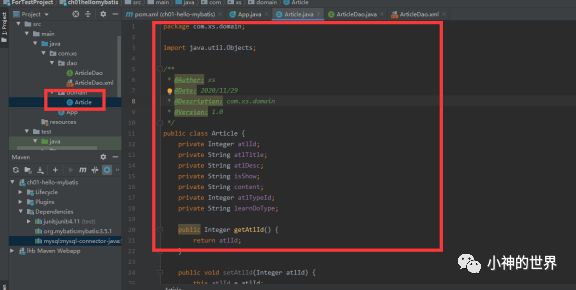
2.创建实体类
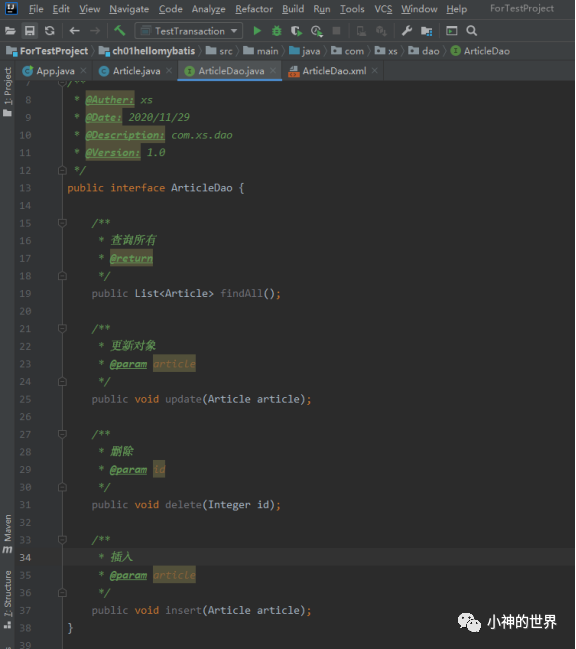
3.创建dao(mapper)
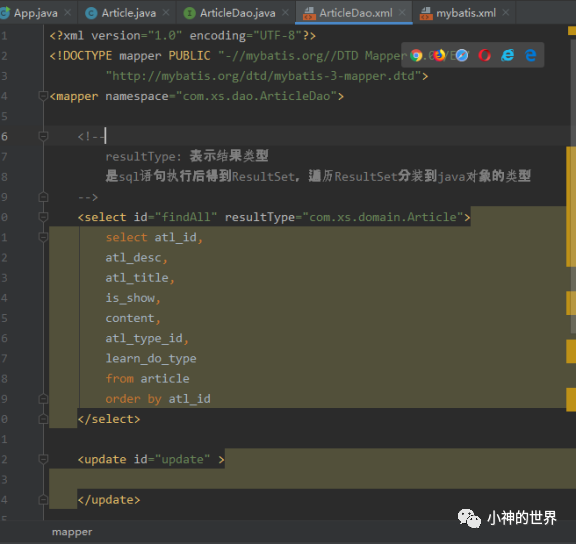
4. 创建sql映射文件
5. 创建mybatis主配置文件
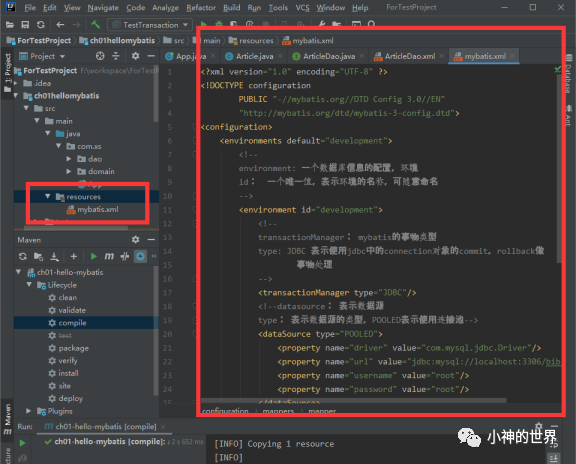
6. 执行程序
package com.xs;
import com.xs.domain.Article;
import org.apache.ibatis.io.Resources;
import org.apache.ibatis.session.SqlSession;
import org.apache.ibatis.session.SqlSessionFactory;
import org.apache.ibatis.session.SqlSessionFactoryBuilder;
import java.io.IOException;
import java.io.InputStream;
import java.util.List;
/**
* Hello world!
*
*/
public class App
{
public static void main( String[] args ) throws IOException {
// 1. 配置文件
String config = "mybatis.xml";
// 2. 读取配置文件
InputStream in = Resources.getResourceAsStream(config);
// 3. 创建builder
SqlSessionFactoryBuilder builder = new SqlSessionFactoryBuilder();
// 4. 使用builder读取配置文件创建factory
SqlSessionFactory factory = builder.build(in);
// 5. factory获取session对象
SqlSession ss = factory.openSession();
// 6. 指定要执行的sql语句的标识 sql映射文件中的namespace + "." + 标签的id值
String sqlId = "com.xs.dao.ArticleDao.findAll";
// 7.执行sql语句,通过sqlId找到sql语句
List<Article> list = ss.selectList(sqlId);
for (int i = 0; i < list.size(); i++) {
System.out.println(list.get(i));
}
ss.close();
}
}
注意: 这里我数据库表中带有驼峰字段名称,导致刚开始带像atl_id、atl_xxx这些字段,没有分装到对象的属性中。
这个问题可以在mybatis主配置中得到解决。
<configuration>
<!-- 开启驼峰映射 ,为自定义的SQL语句服务-->
<!--设置启用数据库字段下划线映射到java对象的驼峰式命名属性,默认为false-->
<settings>
<setting name="mapUnderscoreToCamelCase" value="true"/>
</settings>
</configuration>
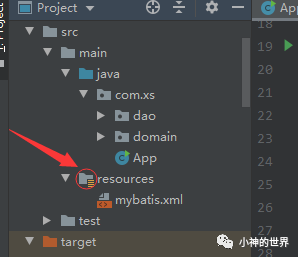
注意:
如果编译后的文件中没有.xml文件,需要去确认下idea resources文件夹是不是没有标识为资源文件夹
第二,是否pom.xml文件中存在插件
<build>
<resources>
<resource>
<directory>src/main/java</directory>
<includes>
<include>**/*.properties</include>
<include>**/*.xml</include>
</includes>
<filtering>false</filtering>
</resource>
</resources>
</build>
7. insert、update、delete 操作
insert
<insert id="insert" >
insert into article
<trim prefix="(" suffix=")" suffixOverrides=",">
<if test="atlId != null">atl_id,</if>
<if test="atlDesc != null">atl_desc,</if>
<if test="atlTitle != null">atl_title,</if>
<if test="isShow != null">is_show,</if>
<if test="content != null">content,</if>
<if test="atlTypeId != null">atl_type_id,</if>
<if test="learnDoType != null">learn_do_type,</if>
</trim>
values
<trim prefix="(" suffix=")" suffixOverrides=",">
<if test="atlId != null">#{atlId},</if>
<if test="atlDesc != null">#{atlDesc},</if>
<if test="atlTitle != null">#{atlTitle},</if>
<if test="isShow != null">#{isShow},</if>
<if test="content != null">#{content},</if>
<if test="atlTypeId != null">#{atlTypeId},</if>
<if test="learnDoType != null">#{learnDoType},</if>
</trim>
</insert>
@Test
public void testInsert() throws IOException {
String config = "mybatis.xml";
InputStream in = Resources.getResourceAsStream(config);
SqlSessionFactoryBuilder builder = new SqlSessionFactoryBuilder();
SqlSessionFactory factory = builder.build(in);
SqlSession session = factory.openSession();
String sqlId = "com.xs.dao.ArticleDao.insert";
Article article = new Article();
article.setAtlDesc("insert");
article.setAtlTitle("insert");
article.setContent("insert");
int i = session.insert(sqlId, article);
session.commit();
// mybatis默认不是自动提交事务的,所以执行修改操作后,需要手工提交事务
System.out.println(i);
session.close();
}
8. 配置日志功能
<settings>
<!-- 开启驼峰映射 ,为自定义的SQL语句服务-->
<!--设置启用数据库字段下划线映射到java对象的驼峰式命名属性,默认为false-->
<setting name="mapUnderscoreToCamelCase" value="true"/>
<!--控制台中输出执行的sql语句和参数
logImpl 表示要输出日志
STDOUT_LOGGING 把日志输入到控制台上
-->
<setting name="logImpl" value="STDOUT_LOGGING"/>
</settings>
2.mybatis dao代理
原理即是动态代理。
mybatis dao代理简述
我们前面的查询如下:
String sqlId = "com.xs.dao.ArticleDao.findAll";
List<Article> list = ss.selectList(sqlId);
通过SqlSession执行各种增、删、改、查。
这里的sqlId指的是mapper.xml文件中的namespace + “.” + 文件中sql的id。也就是说,我们需要一个mybatis.xml主配置,需要domain、mapper.xml(dao.xml)文件,唯独没有用到dao接口类,还没有写dao实现类。这是为什么?
那是因为,mybatis通过反射,通过dao接口类,得到dao接口的全限定名称com.xs.dao.ArticleDao,以及该接口中的方法findAll。这样,相当于通过dao接口类以及方法,就可以得到我们前面的sqlId,我们得到了sqlId,其实也就知道SqlSession执行的是增还是删,还是改,还是查了。也就是通过接口和接口中的方法,我们就可以拿到sqlId了。
有兴趣的朋友可以看看某位网友的这篇文章,是跟踪mybatis源码过程dao代理的实现。
https://blog.csdn.net/qq_23830637/article/details/103743697
package com.xs;
import org.apache.ibatis.io.Resources;
import org.apache.ibatis.session.SqlSession;
import org.apache.ibatis.session.SqlSessionFactory;
import org.apache.ibatis.session.SqlSessionFactoryBuilder;
import java.io.IOException;
import java.io.InputStream;
/**
*@Auther:xs
*@Date:2020/12/3
*@Description:com.xs
*@Version:1.0
*/
public class Main {
public static void main(String[] args) throws IOException {
String config = "mybatis.xml";
InputStream in = Resources.getResourceAsStream(config);
SqlSessionFactoryBuilder builder = new SqlSessionFactoryBuilder();
SqlSessionFactory factory = builder.build(in);
SqlSession sqlSession = factory.openSession();
ArticleDao dao = sqlSession.getMapper(ArticleDao.class);
dao.findAll();
}
}
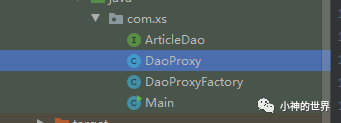
myProxyDao
我自己也模仿mybatis,改写了个超级简单的例子。看完动手写,你就知道mybatis的dao代理了。
package com.xs;
import com.xs.domain.Article;
/**
*@Auther:xs
*@Date:2020/12/3
*@Description:com.xs
*@Version:1.0
*/
public class Main {
public static void main(String[] args) {
ArticleDao dao = DaoProxyFactory.newInstance(ArticleDao.class);
dao.findAll();
System.out.println(dao);
dao.insertArticle(new Article());
System.out.println(dao);
dao.getArticle();
}
}
package com.xs;
import java.lang.reflect.InvocationHandler;
import java.lang.reflect.Proxy;
/**
*@Auther:xs
*@Date:2020/12/3
*@Description:com.xs
*@Version:1.0
*/
public class DaoProxyFactory {
public static <T> T newInstance(Class<T> type) {
System.out.println(type.getName());
T t = (T)Proxy.newProxyInstance(DaoProxyFactory.class.getClassLoader(), new Class[]{type}, (InvocationHandler) new DaoProxy(type));
System.out.println(t + "........");
return t;
}
}
package com.xs;
import org.apache.ibatis.reflection.ExceptionUtil;
import java.lang.invoke.MethodHandles;
import java.lang.reflect.Constructor;
import java.lang.reflect.InvocationHandler;
import java.lang.reflect.Method;
import java.lang.reflect.Modifier;
/**
*@Auther:xs
*@Date:2020/12/5
*@Description:com.xs
*@Version:1.0
*/
public class DaoProxy implements InvocationHandler {
private Class type;
public DaoProxy(Class type) {
this.type = type;
}
@Override
public Object invoke(Object proxy, Method method, Object[] args) throws Throwable {
try {
// 如果是 Object 定义的方法,直接调用
if (Object.class.equals(method.getDeclaringClass())) {
return method.invoke(this, args);
} else if (isDefaultMethod(method)) {
return invokeDefaultMethod(proxy, method, args);
}
} catch (Throwable t) {
throw ExceptionUtil.unwrapThrowable(t);
}
// final MapperMethod mapperMethod = cachedMapperMethod(method);
// return mapperMethod.execute(sqlSession, args);
return myMethod(method, args);
}
private Object myMethod(Method method, Object[] args) {
System.out.println("参数: " + args);
System.out.println("类全限定名称: " + type.getName());
System.out.println("方法名称: " + method.getName());
return null;
}
private Object invokeDefaultMethod(Object proxy, Method method, Object[] args)
throws Throwable {
final Constructor<MethodHandles.Lookup> constructor = MethodHandles.Lookup.class
.getDeclaredConstructor(Class.class, int.class);
if (!constructor.isAccessible()) {
constructor.setAccessible(true);
}
final Class<?> declaringClass = method.getDeclaringClass();
return constructor
.newInstance(declaringClass,
MethodHandles.Lookup.PRIVATE| MethodHandles.Lookup.PROTECTED
| MethodHandles.Lookup.PACKAGE| MethodHandles.Lookup.PUBLIC)
.unreflectSpecial(method, declaringClass).bindTo(proxy).invokeWithArguments(args);
}
private boolean isDefaultMethod(Method method) {// 判断不是abstract,也不是static的public方法
return (method.getModifiers()
& (Modifier.ABSTRACT| Modifier.PUBLIC| Modifier.STATIC)) == Modifier.PUBLIC
&& method.getDeclaringClass().isInterface();
}
}
package com.xs;
import com.xs.domain.Article;
import java.util.List;
/**
*@Auther:xs
*@Date:2020/12/5
*@Description:com.xs
*@Version:1.0
*/
public interface ArticleDao {
public List<Article> findAll();
public Integer insertArticle(Article article);
default void getArticle() {
System.out.println("空数据");
}
}
3.传入参数
1.parameterType
mapper文件中sql元素的一个属性,表示dao接口中方法参数的数据类型
<select id="getById" parameterType="Integer" resultType="com.xs.domain.ArticleType">
select atl_type_id,
atl_type_code,
atl_type_name,
parent_id,
sort
from article_type
where atl_type_id = #{id}
</select>
public interface ArticleTypeDao {
public List<ArticleType> findAll();
public ArticleType getById(Integer id);
public int add(ArticleType articleType);
}
parameterType不是强制的,可以不写
2.一个简单类型的参数
什么是mybatis所说的【一个简单类型的参数】,即一个参数,这参数可以是java基本类型以及基本类型自动装箱的对象类型或String类型,那么在mapper中可以是#{任意字符}
3.多个参数-使用@Param
public ArticleType getByParams(@Param("id") Integer id, @Param("code")String code);
<select id="getByParams" resultType="com.xs.domain.ArticleType">
select atl_type_id, atl_type_code, atl_type_name, parent_id, sort
from article_type
where atl_type_id = #{id} and atl_type_code = #{code}
</select>
4.多个参数-使用java对象作为参数值
使用对象的语法 #{属性名, javaType=类型名称,jdbcType=数据类型}
#{atlTypeCode, javaType=java.lang.String, jdbcType=VARCHAR}
public ArticleType getByObj(ArticleType articleType);
<select id="getByObj" resultType="com.xs.domain.ArticleType">
select atl_type_id, atl_type_code, atl_type_name, parent_id, sort
from article_type
where atl_type_id = #{atlTypeId} and atl_type_code = #{atlTypeCode}
</select>
5.多个参数-按位置传值(不重要、不推荐)
#{arg0} #{arg1}...
按照位置传值
public ArticleType getByLocate(Integer id, String code);
<select id="getByLocate" resultType="com.xs.domain.ArticleType">
select atl_type_id, atl_type_code, atl_type_name, parent_id, sort
from article_type
where atl_type_id = #{arg0} and atl_type_code = #{arg1}
</select>
6.多个参数-使用map(不重要、不推荐)
public ArticleType getByMap(Map map);
<select id="getByMap" resultType="com.xs.domain.ArticleType">
select atl_type_id, atl_type_code, atl_type_name, parent_id, sort
from article_type
where atl_type_id = #{atlTypeId} and atl_type_code = #{atlTypeCode}
</select>
7.#和$的区别
#: 占位符,告诉mybatis使用实际的参数值代替。并使用PprepareStatement对象执行sql语句
$: 字符串替换,告诉mybatis使用Statement把sql语句和参数进行字符串拼接。${xxx}表示参数替换的位置。
#的执行语句:
Preparing: select atl_type_id, atl_type_code, atl_type_name, parent_id, sort from article_type whereatl_type_id = ?
$的执行语句:
Preparing: select atl_type_id, atl_type_code, atl_type_name, parent_id, sort from article_type whereatl_type_id = 1
8. like
用法1
public List<ArticleType> likeWithCode(String code);
<select id="likeWithCode" resultType="com.xs.domain.ArticleType">
select * from article_type where atl_type_code like #{code}
</select>
用法2
public List<ArticleType> likeWithCodeInMapper(String code);
<select id="likeWithCodeInMapper" resultType="com.xs.domain.ArticleType">
select * from article_type where atl_type_code like "%" #{code} "%"
</select>
4.封装mybatis输出结果
1.resultType
值sql语句执行完毕后,数据转为java对象。
处理方式:
1.mybatis执行sql语句,然后mybatis调用类的无参数构造方法,创建对象。
2.mybatis把ResultSet指定列值赋予同名属性。
resultType结果类型的值,可以是类型的全限定名称、类型的别名。
自定义类型别名步骤:
1. 在mybatis主配置文件中定义,使用<typeAlias>定义别名
2.在resultType中就可以使用自定义别名了
自定义别名的两种用法
1. 给每个类起别名
<typeAliases>
<typeAlias type="com.xs.domain.ArticleType" alias="articleType"></typeAlias>
</typeAliases>
<select id="findAll" resultType="articleType">
select atl_type_id,
atl_type_code,
atl_type_name,
parent_id,
sort
from article_type
order by atl_type_id
</select>
2.给包起别名
<typeAliases>
<!-- <typeAlias type="com.xs.domain.ArticleType" alias="articleType"></typeAlias>-->
<package name="com.xs.domain"/>
</typeAliases>
<select id="findAll" resultType="ArticleType">
select atl_type_id,
atl_type_code,
atl_type_name,
parent_id,
sort
from article_type
order by atl_type_id
</select>
1.简单类型
public int selectCount();
<select id="selectCount" resultType="int">
select count(1) from article_type
</select>
2.对象类型
public ArticleType getById(Integer id);
<select id="getById" parameterType="Integer" resultType="com.xs.domain.ArticleType">
select atl_type_id,
atl_type_code,
atl_type_name,
parent_id,
sort
from article_type
where atl_type_id = #{id}
</select>
3.Map
public Map findOneToMap();
<select id="findOneToMap" resultType="map">
select * from article_type where atl_type_id = 1 order by atl_type_id
</select>
2.resultMap
结果映射,指定列名和java对象的属性对应关系
1.自定义列值赋值给某个属性
2.当你的列名和属性名不一样时使用。
public ArticleType getForResultMap(Integer id);
<resultMap id="articleMap" type="com.xs.domain.ArticleType">
<!--主键列使用id标签,其他列使用result-->
<!--
column: 列名
property: java类型的属性名
-->
<id column="atl_type_id" property="atlTypeId"/>
<result column="atl_type_code" property="atlTypeCode"/>
<result column="atl_type_name" property="atlTypeName"/>
<result column="parent_id" property="parentId"/>
<result column="sort" property="sort"/>
</resultMap>
<select id="getForResultMap" resultMap="articleMap">
select atl_type_id, atl_type_code, atl_type_name, parent_id, sort
from article_type
where atl_type_id = #{id}
</select>
5.mybatis 动态sql
动态sql使用的是mybatis提供的标签,<if><where><foreach>
<if test=””>
</if>
1. if标签
List<ArticleType> selectWithIf(@Param("atlTypeCode") String atlTypeCode);
<select id="selectWithIf" resultType="com.xs.domain.ArticleType">
select * from article_type
where 2 > 1
<if test="atlTypeCode != null and atlTypeCode != ''">
and atl_type_code = #{atlTypeCode}
</if>
</select>
2.where 标签
List<ArticleType> selectWithWhere(@Param("atlTypeCode") String atlTypeCode);
<select id="selectWithWhere" resultType="com.xs.domain.ArticleType">
select * from article_type
<where>
<if test="atlTypeCode != null and atlTypeCode != ''">
and atl_type_code = #{atlTypeCode}
</if>
</where>
</select>
3.foreach标签
循环java中的数组, list集合的。主要是用在sql的in语句中。
<foreach collection="" item="" open="" close="" separator="">
</foreach>
collection: 表示接口中的方法参数的类型,如果是数组使用array,list则使用list
item: 自定义的遍历
open: 循环开始时的字符
close: 循环结束时的字符
separator: 集合成员之间的分隔符
1. 集合存放简单对象
List<ArticleType> selectWithForeach(@Param("ids") List<Integer> ids);
<select id="selectWithForeach" resultType="com.xs.domain.ArticleType">
select * from article_type
<where>
<if test="ids != null and ids.size > 0">
atl_type_id in
<foreach collection="ids" item="i" open="(" close=")" separator=",">
#{i}
</foreach>
</if>
</where>
</select>
2. 集合存放复杂对象
List<ArticleType> selectWithForeachComplicated(@Param("params") List<ArticleType> params);
<select id="selectWithForeachComplicated" resultType="com.xs.domain.ArticleType">
select * from article_type
<where>
<if test="params != null and params.size > 0">
(atl_type_id, atl_type_code) in
<foreach collection="params" item="article" open="(" close=")" separator=",">
(#{article.atlTypeId}, #{article.atlTypeCode})
</foreach>
</if>
</where>
</select>
4. 代码片段
<sql id="selectTable">
select * from article_type
</sql>
<select id="selectWithForeachComplicated" resultType="com.xs.domain.ArticleType">
<include refid="selectTable"></include>
<where>
<if test="params != null and params.size > 0">
(atl_type_id, atl_type_code) in
<foreach collection="params" item="article" open="(" close=")" separator=",">
(#{article.atlTypeId}, #{article.atlTypeCode})
</foreach>
</if>
</where>
</select>
6.mybatis配置
mybatis配置都可以去官网查看,有中文的文档。这里列几个看看。
1. 配置文件读取
<properties resource="jdbc.properties"/>
<environment id="development">
<transactionManager type="JDBC"></transactionManager>
<dataSource type="POOLED">
<property name="driver" value="${jdbc.driver}"/>
<property name="url" value="${jdbc.url}"/>
<property name="username" value="${jdbc.user}"/>
<property name="password" value="${jdbc.pwd}"/>
</dataSource>
</environment>
2. mappers文件读取
读取有两种方式
1. 直接读取文件
<mappers>
<mapper resource="com/xs/dao/ArticleTypeDao.xml"/>
</mappers>
2.读取包
使用package有要求:
1. mapper文件名称需要跟接口名称一样,区分大小写
2.mapper文件和dao接口需要在同一目录
<mappers>
<!-- <mapper resource="com/xs/dao/ArticleTypeDao.xml"/>-->
<package name="com.xs.dao"/>
</mappers>
7.扩展pagehelp
1. 引入jar包
<dependency>
<groupId>com.github.pagehelper</groupId>
<artifactId>pagehelper</artifactId>
<version>5.1.10</version>
</dependency>
2.加入plugin配置
在主配置文件中,environments前加入plugin
<plugins>
<plugin interceptor="com.github.pagehelper.PageInterceptor"></plugin>
</plugins>
3. 使用查询页
这里表示从第一页开始取,取5条数据。第一个参数是页数,第二个是页大小,页数0跟1都是第一页。只需要在查询之前,使用PageHelper.startPage方法即可。
SqlSession sqlSession = MyBatisUtils.getSqlSession();
ArticleTypeDao dao = sqlSession.getMapper(ArticleTypeDao.class);
PageHelper.startPage(1,5);
dao.selectPage();
List<ArticleType> selectPage();
<select id="selectPage" resultType="com.xs.domain.ArticleType">
<include refid="selectTable"></include> order by atl_type_id
</select>