目录

配置环境
Ubuntu18.04

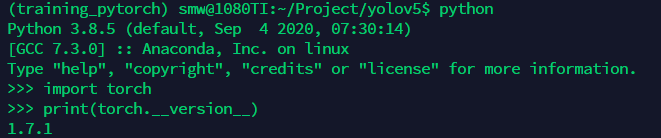
本篇创建虚拟环境training_pytorch,并安装python3.8.5,torch1.7.1进行yolov5环境的配置。
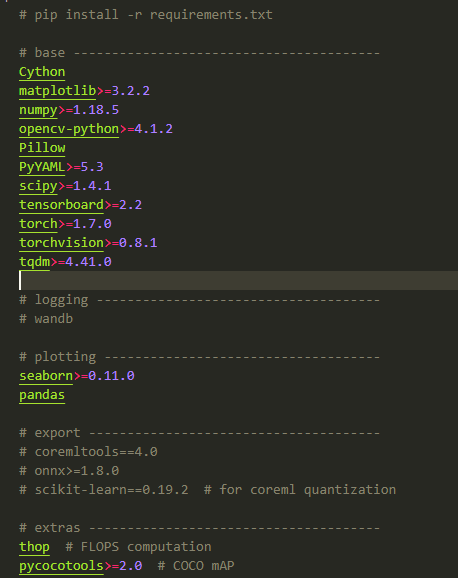
所需依赖的安装,并没有遇到别的博客中所描述的,记忆中一切都很顺利,也许缺啥补啥吧。直接按照源码地址中描述的安装即可。
pip install -r requirements.txt

requiremets.txt包含的依赖包如下图所示(202101010)。
下载预训练模型
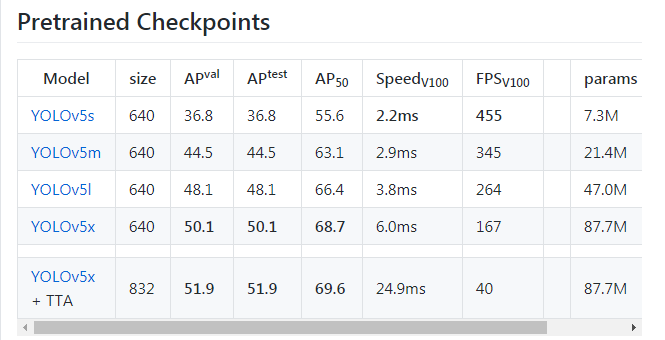
目前,在YOLOv5中一共包含5种与训练模型,网络输入分辨率、精度、参数量、实时性如下图所示。预训练模型链接。建议刚开始配置时选择最轻量级的YOLOv5s模型,下载起来相对快一些。
试用模型Inference
基础环境搭好以后,便可以使用试用模型进行检测,预训练模型支持80个类别的识别。所以可以先用来检验环境搭建是否成功。
为了简化试用模型时,调用detect.py所需要的配置参数,可以对默认参数进行修改。如下图所示。
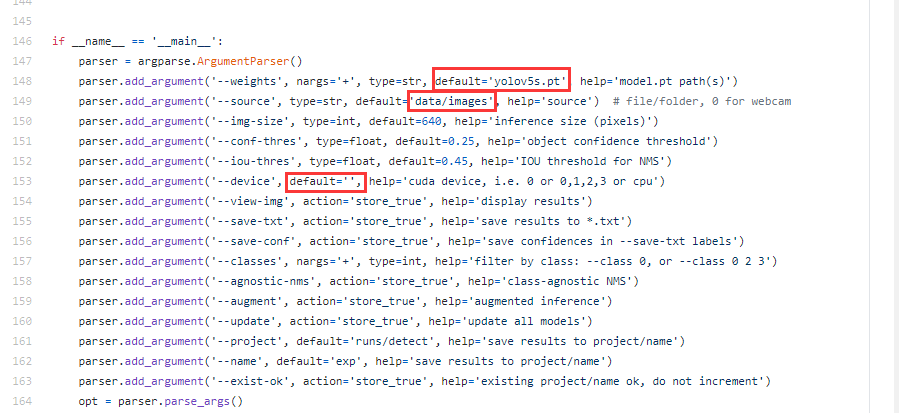
修改后,执行detect.py后,便可以在runs/detect/exp中看到相应的检测结果。
python detect.py

当然,如果不想修改detect.py的默认配置,可以通过调用detect.py传参的方式进行。
python detect.py --weights yolov5s.pt --img 640 --conf 0.25 --source data/images/
Image(filename='runs/detect/exp/zidane.jpg', width=600)
Namespace(agnostic_nms=False, augment=False, classes=None, conf_thres=0.25, device='', exist_ok=False, img_size=640, iou_thres=0.45, name='exp', project='runs/detect', save_conf=False, save_txt=False, source='data/images/', update=False, view_img=False, weights=['yolov5s.pt'])
YOLOv5 v4.0-21-gb26a2f6 torch 1.7.0+cu101 CUDA:0 (Tesla V100-SXM2-16GB, 16130.5MB)
Fusing layers...
Model Summary: 224 layers, 7266973 parameters, 0 gradients, 17.0 GFLOPS
image 1/2 /content/yolov5/data/images/bus.jpg: 640x480 4 persons, 1 buss, 1 skateboards, Done. (0.011s)
image 2/2 /content/yolov5/data/images/zidane.jpg: 384x640 2 persons, 2 ties, Done. (0.011s)
Results saved to runs/detect/exp
Done. (0.110s)
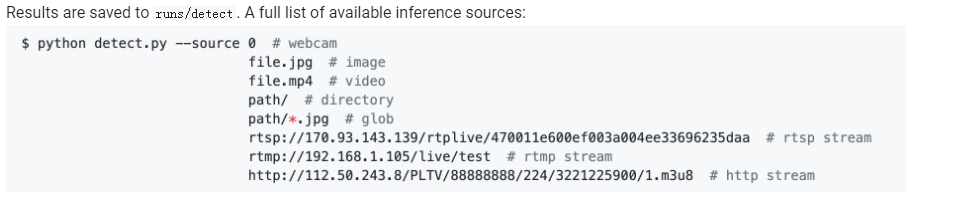
下面是github上给出的参数配置示例:
对于有行人、汽车检测背景需要的同学,可以先用预训练模型试试自己场景的图像。
标签:实战,YOLOv5,detect,False,模型,py,yolov5,images,安装
来源: https://www.cnblogs.com/monologuesmw/p/14465238.html