1.Consul是什么
Consul 是 HashiCorp 公司推出的开源工具,用于实现分布式系统的服务发现与配置。与其他分布式服务注册与发现的方案,Consul的方案更“一站式”,内置了服务注册与发现框 架、具有以下性质:
- 分布一致性协议实现
- 健康检查
- Key/Value存储
- 多数据中心方案
- 不再需要依赖其他工具(比如ZooKeeper等)
使用起来也较为简单。Consul使用Go语言编写,因此具有天然可移植性(支持Linux、windows和Mac OS X);安装包仅包含一个可执行文件,方便部署,与Docker等轻量级容器可无缝配合 。
基于 Mozilla Public License 2.0 的协议进行开源. Consul 支持健康检查,并允许 HTTP 和 DNS 协议调用 API 存储键值对.
一致性协议采用 Raft 算法,用来保证服务的高可用. 使用 GOSSIP 协议管理成员和广播消息, 并且支持 ACL 访问控制.
2.Consul安装
Consul下载路径
下载后无需安装,直接可用
启动
cmd命令在文件所在目录直接运行consul.exe文件
consul.exe agent --dev ( --dev表示开发模式运行,另外还有-server表示服务模式运行 )
Linux 和mac 运行命令
./consul agent -dev
启动后进入管理界面
http://127.0.0.1:8500/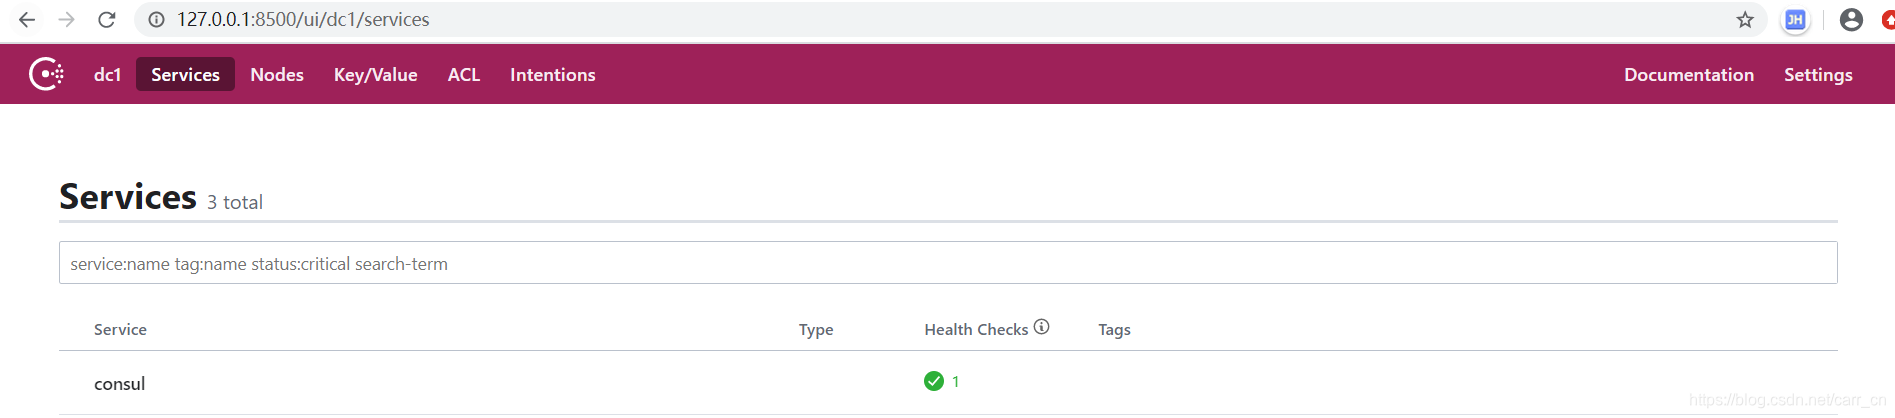
3.Consul入门案例
还是在昨天的项目的基础上继续添加子工程
3.1创建maven项目加入对应的依赖
注:对应的父项目依赖见上上篇传送门
<dependencies>
        <!-- consul依赖 -->
        <dependency>
            <groupId>org.springframework.cloud</groupId>
            <artifactId>spring-cloud-starter-consul-discovery</artifactId>
        </dependency>
        <!-- 监控依赖 -->
        <dependency>
            <groupId>org.springframework.boot</groupId>
            <artifactId>spring-boot-starter-actuator</artifactId>
        </dependency>
        <!-- web依赖 -->
        <dependency>
            <groupId>org.springframework.boot</groupId>
            <artifactId>spring-boot-starter-web</artifactId>
        </dependency>
        <!-- fastjson -->
        <dependency>
            <groupId>com.alibaba</groupId>
            <artifactId>fastjson</artifactId>
            <version>1.2.54</version>
        </dependency>
    </dependencies>
3.2 配置文件
server:
  port: 97
spring:
  application:
    name: consul-client
  cloud:
    consul:
      host: localhost
      port: 8500
      discovery:
        service-name: consul-client
3.3 启动类及注解
@SpringBootApplication
@EnableDiscoveryClient
public class ConsulClientApplication {
    public static void main(String[] args) {
        SpringApplication.run(ConsulClientApplication.class,args);
    }
}
3.4 查看是否注册成功
http://localhost:8500/
4.Consul配置中心Value取值
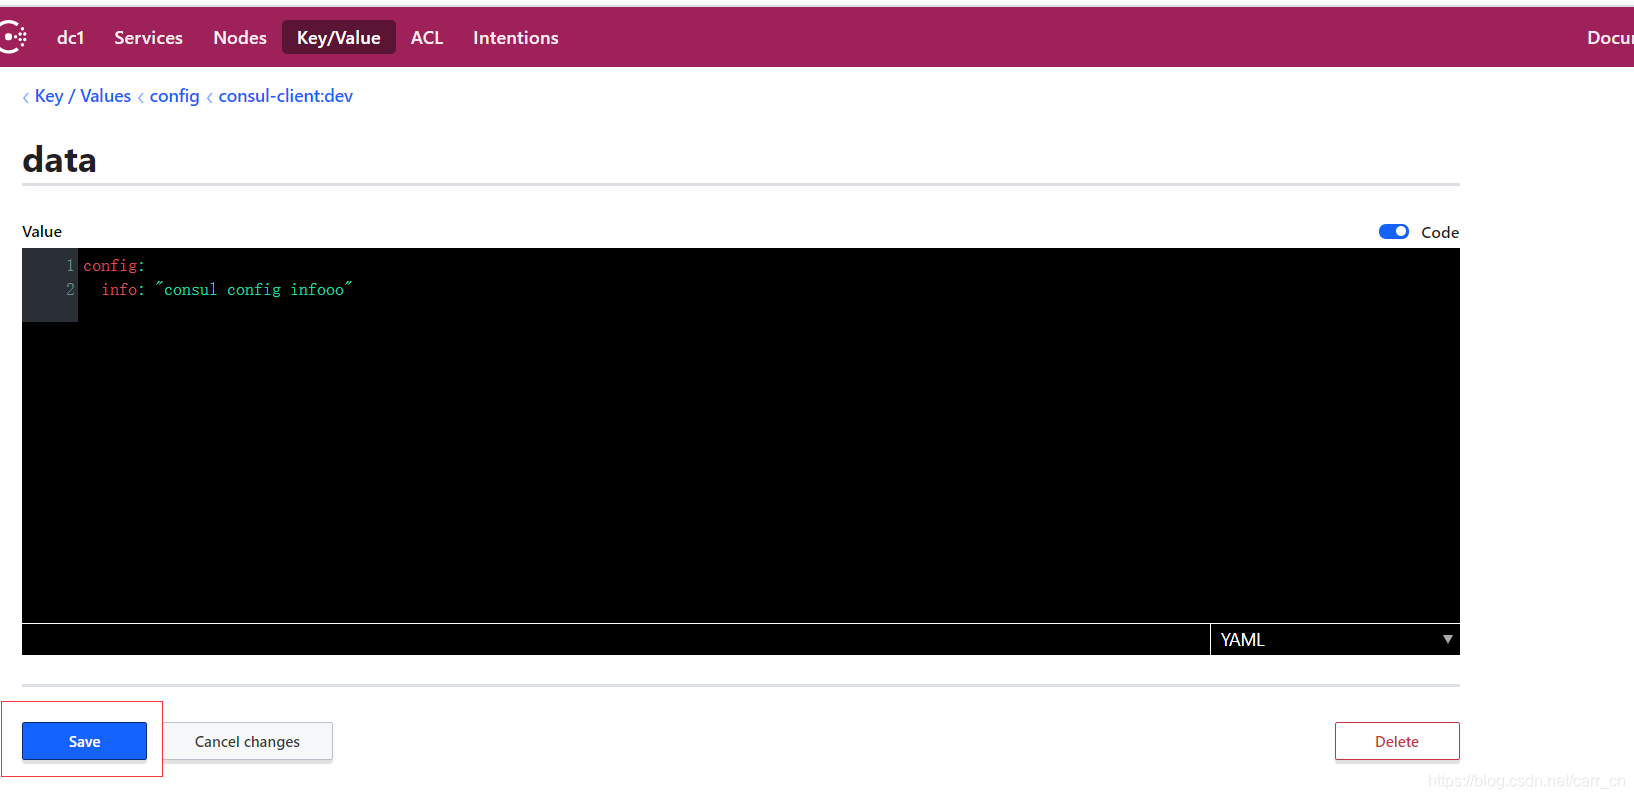
4.1 在consul控制台,Key/Value中添加配置
点击右上角Create创建新的Key/Value
key可以是字符也可以是目录
value有三种格式 JSON YAML HCL (下面使用的是YAML格式)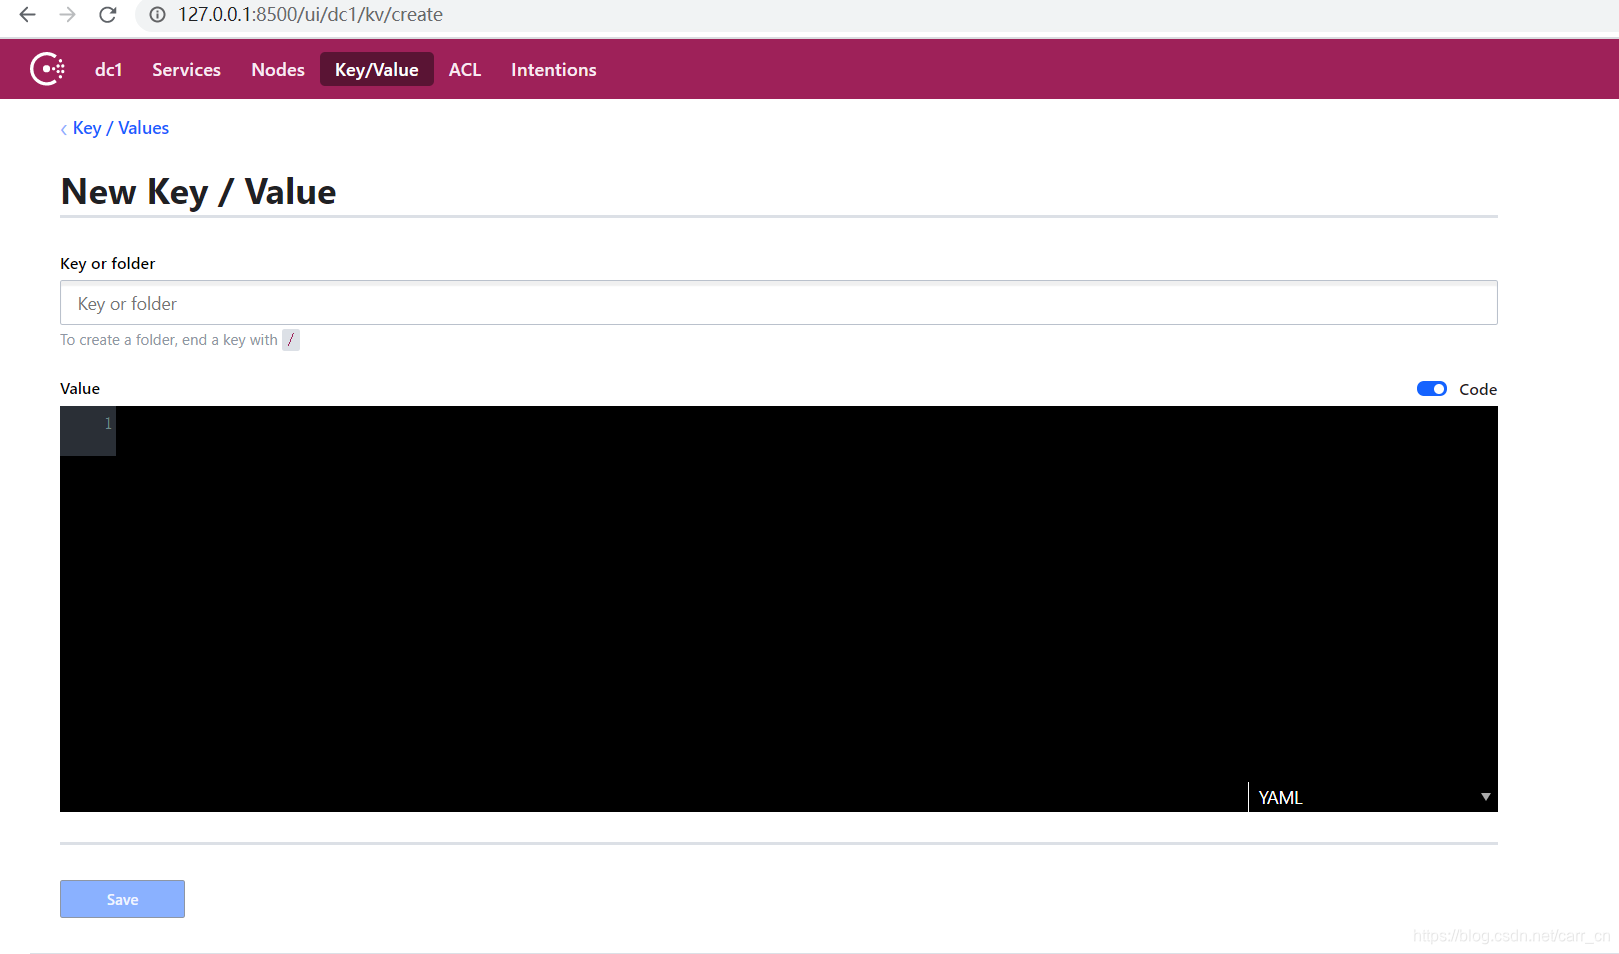
4.2 加入consul配置中心依赖
<!-- consul配置中心依赖 -->
<dependency>
    <groupId>org.springframework.cloud</groupId>
    <artifactId>spring-cloud-starter-consul-config</artifactId>
</dependency>
4.3 编写配置文件
server:
  port: 97
spring:
  application:
    name: consul-client
  profiles:
    active: dev
  cloud:
    consul:
      host: localhost
      port: 8500
      discovery:
        service-name: ${spring.application.name}

management:
  server:
    port: 9001
  endpoints:
    web:
      exposure:
        include: '*'
  endpoint:
    health:
      show-details: always

---
spring:
  profiles: dev
  cloud:
    consul:
      config:
        #是否启用配置中心
        enabled: true
        #配置格式
        format: yaml
        #设置所在目录
        prefix: config
        #分隔符
        profile-separator: ':'
        data-key: data
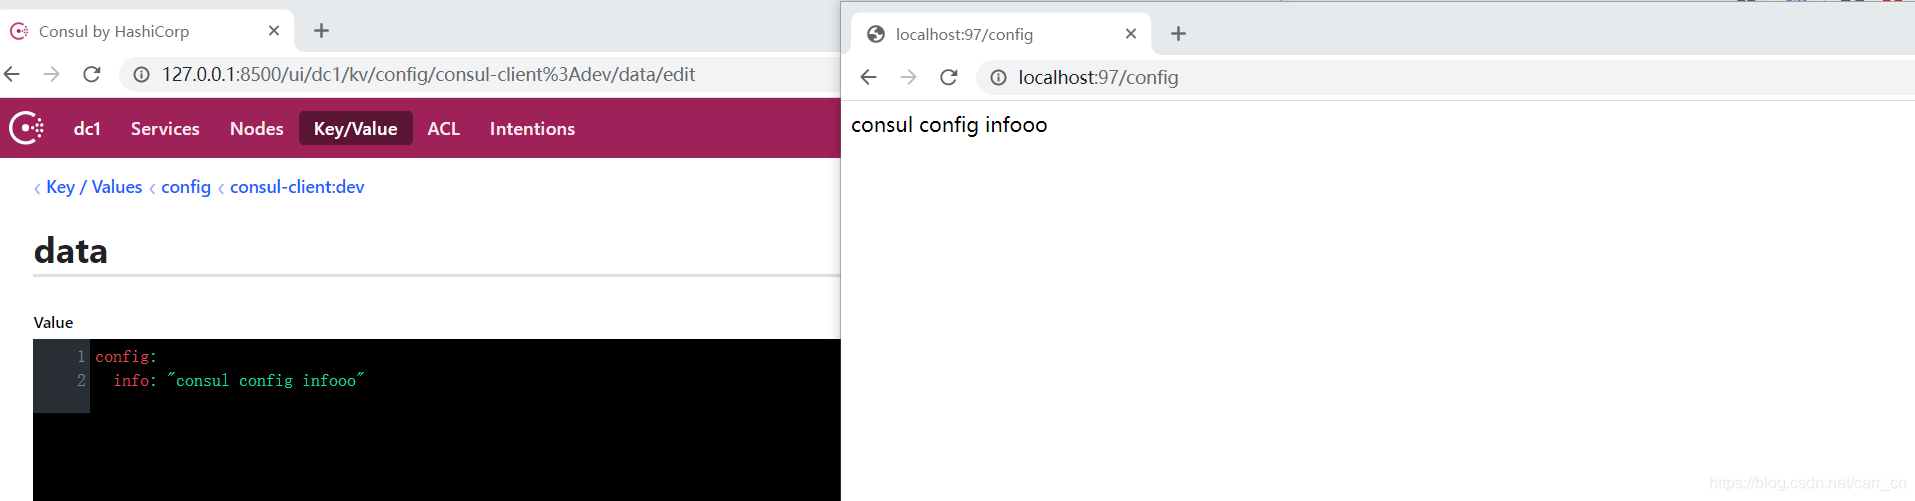
4.4 创建一个controller通过页面的方式显示配置用的值
@RestController
@RefreshScope
public class ConsulController {
    @Value("${config.info}")
    private String configInfo;

    @RequestMapping("/config")
    public Object getConfig(){
        return  configInfo;
    }
}
4.5 启动服务访问页面
5. 配置中心配置类取值
5.1 编写配置文件
server:
  port: 97
spring:
  application:
    name: consul-client
  profiles:
    active: test
  cloud:
    consul:
      host: localhost
      port: 8500
      discovery:
        service-name: ${spring.application.name}

management:
  server:
    port: 9001
  endpoints:
    web:
      exposure:
        include: '*'
  endpoint:
    health:
      show-details: always

---
spring:
  profiles: test
  cloud:
    consul:
      config:
        #是否启用配置中心
        enabled: true
        #配置格式
        format: yaml
        #设置所在目录
        prefix: config
        #分隔符
        profile-separator: ':'
        data-key: data
5.2 编写配置类
@JsonIgnoreProperties("$$beanFactory")
@Configuration
@ConfigurationProperties(prefix = "config")
public class ConsulConfigInfo {
    private String name;
    private String info;

    public String getName() {
        return name;
    }

    public void setName(String name) {
        this.name = name;
    }

    public String getInfo() {
        return info;
    }

    public void setInfo(String info) {
        this.info = info;
    }
}
5.3 创建controller
@RestController
@RefreshScope
public class ConsulController {
    @Autowired
    private ConsulConfigInfo consulConfigInfo;

    @RequestMapping("/getconfig")
    public Object Config(){
        return  consulConfigInfo;
    }
}
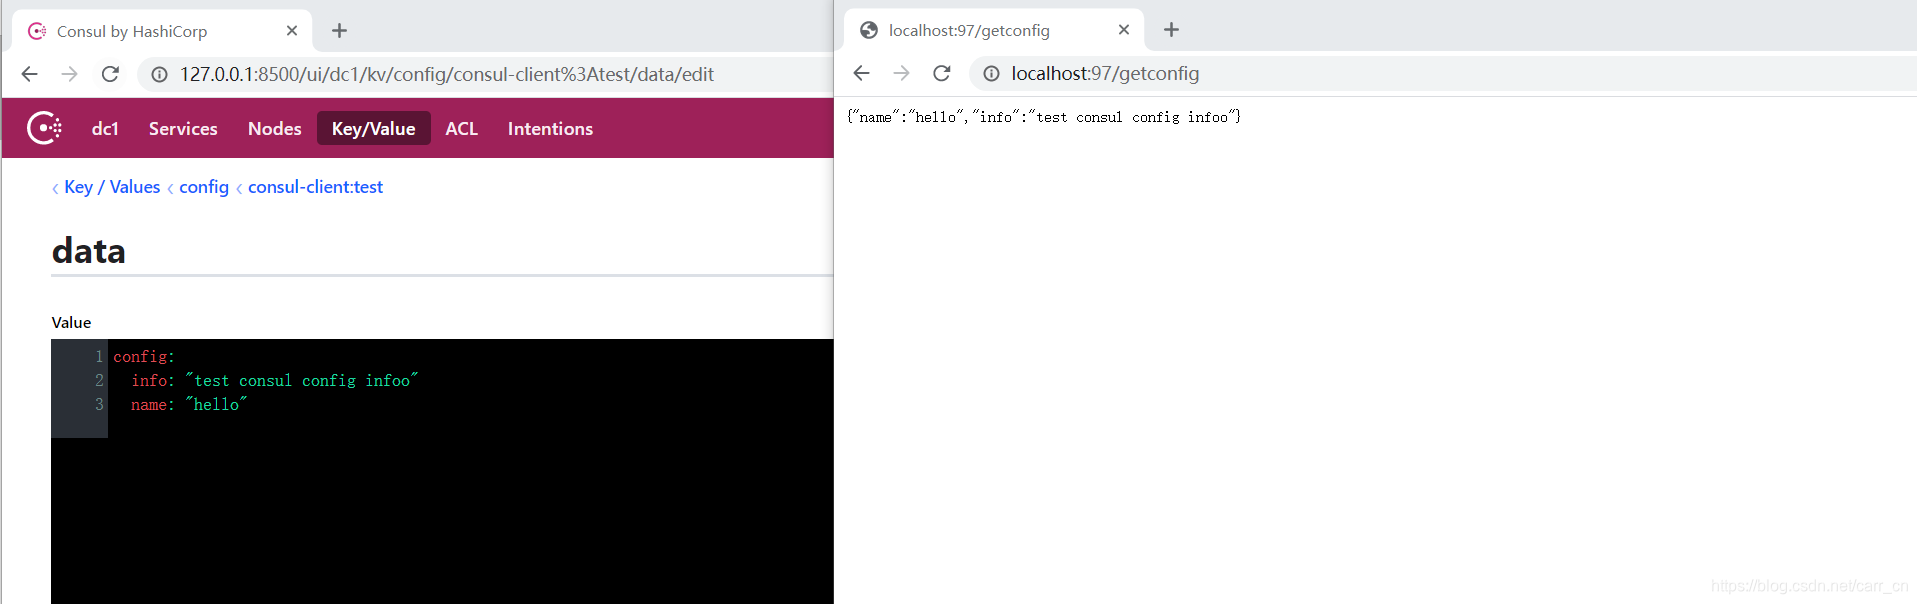
5.4 启动服务访问页面
版权声明:本文为carr_cn原创文章,遵循CC 4.0 BY-SA版权协议,转载请附上原文出处链接和本声明。