前面文章我详细介绍了Spring的生命周期,本文章就乘热打铁,继续介绍Spring的生态圈里最让人兴奋、回头率最高、最能改变游戏规则的东西,那就是Spring Boot。Spring Boot提供了一种新的编程范式,能在最小的阻力下开发Spring应用程序。有了它,你可以更加敏捷地开发Spring应用程序,专注于应用程序的功能,不用在Spring的配置上多花功夫,甚至完全不用配置。
我们先来看下Spring Boot可以为我们做什么。假设你受命用Spring开发一个简单的Hello World Web应用程序。你该做什么?我能想到一些基本的需要。
- 一个项目结构,其中有一个包含必要依赖的Maven或者Gradle构建文件,最起码要有Spring MVC和Servlet API这些依赖。
- 一个web.xml文件(或者一个WebApplicationInitializer实现),其中声明了Spring的DispatcherServlet。
- 一个启用了Spring MVC的Spring配置。
- 一个控制器类,以“Hello World”响应HTTP请求。
- 一个用于部署应用程序的Web应用服务器,比如Tomcat。
最让人难以接受的是,这份清单里只有一个东西是和Hello World功能相关的,即控制器,剩下的都是Spring开发的Web应用程序必需的通用样板。既然所有Spring Web应用程序都要用到它们,那为什么还要你来提供这些东西呢?
当使用Spring Boot来做时,我们只需简单引入starter起步依赖,并编写一个主启动类以及控制器,一个完整的Web应用就搭建起来了!
这里没有配置,没有web.xml,没有构建说明,甚至没有应用服务器,但这就是整个应用程序了。Spring Boot会搞定执行应用程序所需的各种后勤工作,你只要搞定应用程序的代码就好。
这里我们不但没配置DispatcherServlet,还有其他相关的bean也没有配置,那么他们是怎么跑到我们应用了的呢?
这就是Spring Boot自动配置的魔力在起作用了,我们只需简单在pom文件引入此起步依赖:
        <dependency>
            <groupId>org.springframework.boot</groupId>
            <artifactId>spring-boot-starter-web</artifactId>
        </dependency>
当我们启动main方法,Spring Boot的自动配置就会把一系列相关的bean创建初始化加入到我们应用,当这些工作做完后,内置Servlet容器就会启动(Tomcat),我们的应用就可以接受Web请求了!
那么Spring Boot的自动配置是如何实现的呢?
接下来我通过剖析Spring Boot的生命周期,最后给出答案。
当我们运行主启动类的main方法,Spring Boot其妙旅程就从SpringApplication类开始了:
@SpringBootApplication // 开启组件扫描和自动配置
public class SpringbootLifecycleApplication {

    public static void main(String[] args) {
        // 负责启动引导应用程序
        SpringApplication.run(SpringbootLifecycleApplication.class, args);
        System.out.println("http://localhost:8080/portal/index");
    }

}
深入静态run方法,会首先实例化一个SpringApplication类对象然后调用其run方法(省略无关代码):
public class SpringApplication {
	public static ConfigurableApplicationContext run(Class<?>[] primarySources, String[] args) {
		return new SpringApplication(primarySources).run(args);
	}
}
在SpringApplication的构造方法里做了个重要的工作(省略无关代码):
public class SpringApplication {

	public SpringApplication(ResourceLoader resourceLoader, Class<?>... primarySources) {
		this.resourceLoader = resourceLoader;
		Assert.notNull(primarySources, "PrimarySources must not be null");
		this.primarySources = new LinkedHashSet<>(Arrays.asList(primarySources));
		this.webApplicationType = WebApplicationType.deduceFromClasspath();
                // 读取META-INF/spring.factories里定义的ApplicationContextInitializer接口的实现类并初始化
		setInitializers((Collection) getSpringFactoriesInstances(ApplicationContextInitializer.class));
                // 读取META-INF/spring.factories里定义的ApplicationListener接口的实现类并初始化
		setListeners((Collection) getSpringFactoriesInstances(ApplicationListener.class));
		this.mainApplicationClass = deduceMainApplicationClass();
	}

	private <T> Collection<T> getSpringFactoriesInstances(Class<T> type, Class<?>[] parameterTypes, Object... args) {
		ClassLoader classLoader = getClassLoader();
		// Use names and ensure unique to protect against duplicates
		Set<String> names = new LinkedHashSet<>(SpringFactoriesLoader.loadFactoryNames(type, classLoader));
		List<T> instances = createSpringFactoriesInstances(type, parameterTypes, classLoader, args, names);
		AnnotationAwareOrderComparator.sort(instances);
		return instances;
	}

}
其中SpringFactoriesLoader类的loadFactoryNames会读取类路径下所有的META-INF/spring.factories文件里定义的所有接口实现类并缓存起来:
public final class SpringFactoriesLoader {
	private static Map<String, List<String>> loadSpringFactories(@Nullable ClassLoader classLoader) {
		// ......
		Enumeration<URL> urls = (classLoader != null ?
				classLoader.getResources(FACTORIES_RESOURCE_LOCATION) :
				ClassLoader.getSystemResources(FACTORIES_RESOURCE_LOCATION));
		result = new LinkedMultiValueMap<>();
		while (urls.hasMoreElements()) {
			URL url = urls.nextElement();
			UrlResource resource = new UrlResource(url);
			Properties properties = PropertiesLoaderUtils.loadProperties(resource);
			for (Map.Entry<?, ?> entry : properties.entrySet()) {
				String factoryTypeName = ((String) entry.getKey()).trim();
				for (String factoryImplementationName : StringUtils.commaDelimitedListToStringArray((String) entry.getValue())) {
					result.add(factoryTypeName, factoryImplementationName.trim());
				}
			}
		}
		cache.put(classLoader, result);
		return result;
		// ......
	}
}
随便找个大致看下其内容:
可以看到里面定义了很多spring接口的实现类,典型的如ApplicationContextInitializer接口,对于旧的spring项目,如果我们写了ApplicationContextInitializer的实现类,是需要配置在web.xml文件中的,不过Spring Boot是把这些配置放到了META-INF/spring.factories文件,这样就可以被搜索到。
上述接口的排序按照下列规则(spring接口实现类的排序基本都适用此规则),这个规则就决定了同一spring接口的多个实现类的执行顺序:
- PriorityOrdered是一等公民,首先被执行,PriorityOrdered公民之间通过接口返回值排序
- Ordered是二等公民,然后执行,Ordered公民之间通过接口返回值排序
- 都没有实现是三等公民,最后执行
接着看SpringApplication的run方法,找到一个扩展点,实现SpringApplicationRunListener接口的类的starting方法会被调用(省略无关代码):
class SpringApplicationRunListeners {
	void starting() {
		for (SpringApplicationRunListener listener : this.listeners) {
			listener.starting();
		}
	}
}
注意接下来的扩展点ApplicationListener<ApplicationStartingEvent>接口的实现类的onApplicationEvent会被执行是由SpringApplicationRunListener接口的实现类EventPublishingRunListener(由spring提供)来完成的(省略无关代码):
public class EventPublishingRunListener implements SpringApplicationRunListener, Ordered {
	@Override
	public void starting() {
		this.initialMulticaster.multicastEvent(new ApplicationStartingEvent(this.application, this.args));
	}
}

public class SimpleApplicationEventMulticaster extends AbstractApplicationEventMulticaster {
	// ......
        @Override
	public void multicastEvent(final ApplicationEvent event, @Nullable ResolvableType eventType) {
		ResolvableType type = (eventType != null ? eventType : resolveDefaultEventType(event));
		Executor executor = getTaskExecutor();
		for (ApplicationListener<?> listener : getApplicationListeners(event, type)) {
			if (executor != null) {
				executor.execute(() -> invokeListener(listener, event));
			}
			else {
				invokeListener(listener, event);
			}
		}
	}
        // ......
	private void doInvokeListener(ApplicationListener listener, ApplicationEvent event) {
		try {
			listener.onApplicationEvent(event);
		}
		// ......
	}
}
接着往下走,下个扩展点,实现SpringApplicationRunListener接口的类的environmentPrepared方法会被执行(省略无关代码):
class SpringApplicationRunListeners {
	void environmentPrepared(ConfigurableEnvironment environment) {
		for (SpringApplicationRunListener listener : this.listeners) {
			listener.environmentPrepared(environment);
		}
	}
}
继续,实现了ApplicationContextInitializer接口的类的initialize方法会被执行(省略无关代码):
public class SpringApplication {
	protected void applyInitializers(ConfigurableApplicationContext context) {
		for (ApplicationContextInitializer initializer : getInitializers()) {
			Class<?> requiredType = GenericTypeResolver.resolveTypeArgument(initializer.getClass(),
					ApplicationContextInitializer.class);
			Assert.isInstanceOf(requiredType, context, "Unable to call initializer.");
			initializer.initialize(context);
		}
	}
}
接着往下,实现SpringApplicationRunListener接口的类的contextPrepared方法会被执行(省略无关代码):
class SpringApplicationRunListeners {
	void contextPrepared(ConfigurableApplicationContext context) {
		for (SpringApplicationRunListener listener : this.listeners) {
			listener.contextPrepared(context);
		}
	}
}
继续往下,当sources加载进reader时,下一个扩展点暴露出来了,实现SpringApplicationRunListener接口的类的contextLoaded方法被执行(省略无关代码):
class SpringApplicationRunListeners {
	void contextLoaded(ConfigurableApplicationContext context) {
		for (SpringApplicationRunListener listener : this.listeners) {
			listener.contextLoaded(context);
		}
	}
}
上面就是Spring Boot的特殊逻辑,接下来的逻辑就同普通spring项目基本一样(我前面一篇文章《Spring详细生命周期介绍》谈到的),都是调用了AbstractApplicationContext类的refresh方法:
public abstract class AbstractApplicationContext extends DefaultResourceLoader
		implements ConfigurableApplicationContext {
	@Override
	public void refresh() throws BeansException, IllegalStateException {
		synchronized (this.startupShutdownMonitor) {
			// Prepare this context for refreshing.
			prepareRefresh();

			// Tell the subclass to refresh the internal bean factory.
			ConfigurableListableBeanFactory beanFactory = obtainFreshBeanFactory();

			// Prepare the bean factory for use in this context.
			prepareBeanFactory(beanFactory);

			try {
				// Allows post-processing of the bean factory in context subclasses.
				postProcessBeanFactory(beanFactory);

				// Invoke factory processors registered as beans in the context.
				invokeBeanFactoryPostProcessors(beanFactory);

				// Register bean processors that intercept bean creation.
				registerBeanPostProcessors(beanFactory);

				// Initialize message source for this context.
				initMessageSource();

				// Initialize event multicaster for this context.
				initApplicationEventMulticaster();

				// Initialize other special beans in specific context subclasses.
				onRefresh();

				// Check for listener beans and register them.
				registerListeners();

				// Instantiate all remaining (non-lazy-init) singletons.
				finishBeanFactoryInitialization(beanFactory);

				// Last step: publish corresponding event.
				finishRefresh();
			}

			catch (BeansException ex) {
				if (logger.isWarnEnabled()) {
					logger.warn("Exception encountered during context initialization - " +
							"cancelling refresh attempt: " + ex);
				}

				// Destroy already created singletons to avoid dangling resources.
				destroyBeans();

				// Reset 'active' flag.
				cancelRefresh(ex);

				// Propagate exception to caller.
				throw ex;
			}

			finally {
				// Reset common introspection caches in Spring's core, since we
				// might not ever need metadata for singleton beans anymore...
				resetCommonCaches();
			}
		}
	}
}
那么这里有人可能会奇怪了,既然和旧的spring一样都是调用的AbstractApplicationContext的refresh方法,那么Spring Boot是如何实现大量的新功能的?很简单,之前我们谈到过在refresh方法的整个执行过程中,会暴露出大量的扩展点,Spring Boot也是通过这些扩展点实现新功能的。
所以接下来关于这个refresh方法的讨论我只关注Spring Boot部分,跳过其他。
继续往下执行,深入invokeBeanFactoryPostProcessors方法可以找到一个特殊的类ConfigurationClassPostProcessor,它实现了BeanDefinitionRegistryPostProcessor接口,所以其执行时机是非常早的,这也很好理解,它完成的工作是后面其他工作的基础。该类的作用是读取所有的自动配置类(带有@Configuration注解的类),并将它们解析加载到BeanDefinitionRegistry对象里(省略无关代码):
public class ConfigurationClassPostProcessor implements BeanDefinitionRegistryPostProcessor,
		PriorityOrdered, ResourceLoaderAware, BeanClassLoaderAware, EnvironmentAware {
	public void processConfigBeanDefinitions(BeanDefinitionRegistry registry) {
                // ......
                // Parse each @Configuration class
		ConfigurationClassParser parser = new ConfigurationClassParser(
				this.metadataReaderFactory, this.problemReporter, this.environment,
				this.resourceLoader, this.componentScanBeanNameGenerator, registry);

		Set<BeanDefinitionHolder> candidates = new LinkedHashSet<>(configCandidates);
		Set<ConfigurationClass> alreadyParsed = new HashSet<>(configCandidates.size());
		do {
			parser.parse(candidates);
			parser.validate();

			Set<ConfigurationClass> configClasses = new LinkedHashSet<>(parser.getConfigurationClasses());
			configClasses.removeAll(alreadyParsed);

			// Read the model and create bean definitions based on its content
			if (this.reader == null) {
				this.reader = new ConfigurationClassBeanDefinitionReader(
						registry, this.sourceExtractor, this.resourceLoader, this.environment,
						this.importBeanNameGenerator, parser.getImportRegistry());
			}
			this.reader.loadBeanDefinitions(configClasses);
			alreadyParsed.addAll(configClasses);

			candidates.clear();
			// ......
		}
		while (!candidates.isEmpty());
        }
}
接着往下,可以发现onRefresh方法被覆盖了,方法里最终会创建Servlet容器对象(Tomcat):
public class ServletWebServerApplicationContext extends GenericWebApplicationContext
		implements ConfigurableWebServerApplicationContext {
	private void createWebServer() {
		WebServer webServer = this.webServer;
		ServletContext servletContext = getServletContext();
		if (webServer == null && servletContext == null) {
			ServletWebServerFactory factory = getWebServerFactory();
			this.webServer = factory.getWebServer(getSelfInitializer());
		}
		else if (servletContext != null) {
			try {
				getSelfInitializer().onStartup(servletContext);
			}
			catch (ServletException ex) {
				throw new ApplicationContextException("Cannot initialize servlet context", ex);
			}
		}
		initPropertySources();
	}
}
注意ServletWebServerFactory接口,这个是创建Servlet容器对象的工厂。真正创建Servlet容器对象是在这里(省略无关代码):
public class TomcatServletWebServerFactory extends AbstractServletWebServerFactory
		implements ConfigurableTomcatWebServerFactory, ResourceLoaderAware {

	@Override
	public WebServer getWebServer(ServletContextInitializer... initializers) {
		if (this.disableMBeanRegistry) {
			Registry.disableRegistry();
		}
		Tomcat tomcat = new Tomcat();
		File baseDir = (this.baseDirectory != null) ? this.baseDirectory : createTempDir("tomcat");
		tomcat.setBaseDir(baseDir.getAbsolutePath());
		Connector connector = new Connector(this.protocol);
		connector.setThrowOnFailure(true);
		tomcat.getService().addConnector(connector);
		customizeConnector(connector);
		tomcat.setConnector(connector);
		tomcat.getHost().setAutoDeploy(false);
		configureEngine(tomcat.getEngine());
		for (Connector additionalConnector : this.additionalTomcatConnectors) {
			tomcat.getService().addConnector(additionalConnector);
		}
		prepareContext(tomcat.getHost(), initializers);
		return getTomcatWebServer(tomcat);
	}
        // 这里创建了ServletContext对象
	protected void prepareContext(Host host, ServletContextInitializer[] initializers) {
		File documentRoot = getValidDocumentRoot();
		TomcatEmbeddedContext context = new TomcatEmbeddedContext();
		// ......
		if (isRegisterDefaultServlet()) {
			addDefaultServlet(context);
		}
		if (shouldRegisterJspServlet()) {
			addJspServlet(context);
			addJasperInitializer(context);
		}
		context.addLifecycleListener(new StaticResourceConfigurer(context));
		ServletContextInitializer[] initializersToUse = mergeInitializers(initializers);
		host.addChild(context);
		configureContext(context, initializersToUse);
		postProcessContext(context);
	}

}
那么DispatchServlet对象是在哪里创建并加入到ServletContext里的呢?调试执行,可以发现是在getSelfInitializer方法。这个方法作为lambda表达式被传递到Tomcat对象里面,当tomcat的start方法被调用时,此lambda表达式就会被执行,然后getSelfInitializer这里其实也提供了一个扩展点,找到所有实现了ServletContextInitializer接口的类然后执行其onStartup方法。DispatchServlet对象就是由这个接口的实现类DispatcherServletRegistrationBean创建并加入到ServletContext里的,还有相关的filter如characterEncodingFilter也是通过这样的方式加入到ServletContext里的(省略无关代码):
public class ServletWebServerApplicationContext extends GenericWebApplicationContext
		implements ConfigurableWebServerApplicationContext {

        private org.springframework.boot.web.servlet.ServletContextInitializer getSelfInitializer() {
		return this::selfInitialize;
	}

	private void selfInitialize(ServletContext servletContext) throws ServletException {
		prepareWebApplicationContext(servletContext);
		registerApplicationScope(servletContext);
		WebApplicationContextUtils.registerEnvironmentBeans(getBeanFactory(), servletContext);
		for (ServletContextInitializer beans : getServletContextInitializerBeans()) {
			beans.onStartup(servletContext);
		}
	}
}

public abstract class DynamicRegistrationBean<D extends Registration.Dynamic> extends RegistrationBean {
	@Override
	protected final void register(String description, ServletContext servletContext) {
                // dispatchServlet对象在此方法加入到servletContext里
		D registration = addRegistration(description, servletContext);
		if (registration == null) {
			logger.info(StringUtils.capitalize(description) + " was not registered (possibly already registered?)");
			return;
		}
		configure(registration);
	}
}
最后当ApplicationContext对象所有的bean都创建初始化完成时,finishRefresh方法就会启动Servlet容器(省略无关代码):
public class ServletWebServerApplicationContext extends GenericWebApplicationContext
		implements ConfigurableWebServerApplicationContext {
	@Override
	protected void finishRefresh() {
		super.finishRefresh();
		WebServer webServer = startWebServer();
		if (webServer != null) {
			publishEvent(new ServletWebServerInitializedEvent(webServer, this));
		}
	}
	private WebServer startWebServer() {
		WebServer webServer = this.webServer;
		if (webServer != null) {
			webServer.start();
		}
		return webServer;
	}
}
继续,下个扩展点SpringApplicationRunListener 的实现类的started方法会被调用(省略无关代码):
class SpringApplicationRunListeners {
	void started(ConfigurableApplicationContext context) {
		for (SpringApplicationRunListener listener : this.listeners) {
			listener.started(context);
		}
	}
}
接着到下个扩展点,ApplicationRunner接口或者CommandLineRunner接口的实现类会被调用(省略无关代码):
public class SpringApplication {
	private void callRunners(ApplicationContext context, ApplicationArguments args) {
		List<Object> runners = new ArrayList<>();
		runners.addAll(context.getBeansOfType(ApplicationRunner.class).values());
		runners.addAll(context.getBeansOfType(CommandLineRunner.class).values());
		AnnotationAwareOrderComparator.sort(runners);
		for (Object runner : new LinkedHashSet<>(runners)) {
			if (runner instanceof ApplicationRunner) {
				callRunner((ApplicationRunner) runner, args);
			}
			if (runner instanceof CommandLineRunner) {
				callRunner((CommandLineRunner) runner, args);
			}
		}
	}
}
最后一个扩展点,SpringApplicationRunListener接口的实现类的running方法会被执行:
class SpringApplicationRunListeners {
	void running(ConfigurableApplicationContext context) {
		for (SpringApplicationRunListener listener : this.listeners) {
			listener.running(context);
		}
	}
}
总结:
SpringApplicationRunListener.starting()
↓
ApplicationListener<ApplicationStartingEvent>
.onApplicationEvent(ApplicationStartingEvent)
↓
SpringApplicationRunListener.environmentPrepared(ConfigurableEnvironment)
↓
ApplicationContextInitializer.initialize(ApplicationContext)
↓
SpringApplicationRunListener.contextPrepared(ConfigurableApplicationContext)
↓
SpringApplicationRunListener.contextLoader(ConfigurableApplicationContext)
↓
接下来的生命周期和我前一篇文章《Spring详细生命周期介绍》一样
。。。。。。
↓
SpringApplicationRunListener.started(ConfigurableApplicationContext)
↓
CommandLineRunner.run(String...)和ApplicationRunner. run(ApplicationArguments)
↓
SpringApplicationRunListener.running(ConfigurableApplicationContext)
此时整个Spring Boot项目启动完成。值得注意的是SpringApplicationRunListener接口各个方法基本贯穿了Spring Boot的整个生命周期。那么当应用关闭时相关bean的destroy方法又是怎么被调用的呢?这里,在Spring Boot启动完成的时候,就注册了个关闭钩子,应用关闭时,此钩子被执行,进而doClose方法被调用,清理所有资源,发布应用关闭事件ContextClosedEvent(同旧Spring项目):
public class SpringApplication {
private void refreshContext(ConfigurableApplicationContext context) {
refresh(context);
if (this.registerShutdownHook) {
try {
context.registerShutdownHook();
}
catch (AccessControlException ex) {
// Not allowed in some environments.
}
}
}
}
public abstract class AbstractApplicationContext extends DefaultResourceLoader
implements ConfigurableApplicationContext {
@Override
public void registerShutdownHook() {
if (this.shutdownHook == null) {
// No shutdown hook registered yet.
this.shutdownHook = new Thread(SHUTDOWN_HOOK_THREAD_NAME) {
@Override
public void run() {
synchronized (startupShutdownMonitor) {
doClose();
}
}
};
Runtime.getRuntime().addShutdownHook(this.shutdownHook);
}
}
protected void doClose() {
// ......
// Check whether an actual close attempt is necessary...
// Publish shutdown event.
publishEvent(new ContextClosedEvent(this));
// Destroy all cached singletons in the context's BeanFactory.
destroyBeans();
// Close the state of this context itself.
closeBeanFactory();
// Let subclasses do some final clean-up if they wish...
onClose();
// ......
}
}
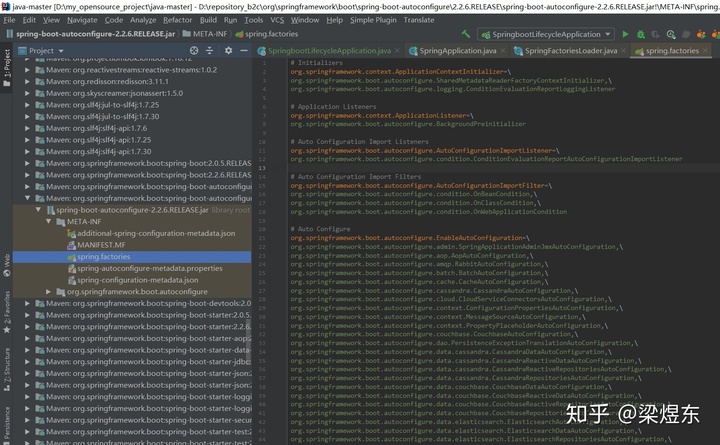
}好,我们已经搞明白了Spring Boot的整个生命周期,那么文章开头的问题Spring Boot的自动配置是如何实现的就可以回答了,以DispatcherServlet对象为例,Spring Boot自身的spring.factories定义了DispatcherServlet的自动配置类(省略无关代码):
// ......
# Auto Configure
org.springframework.boot.autoconfigure.EnableAutoConfiguration=
org.springframework.boot.autoconfigure.web.servlet.DispatcherServletAutoConfiguration,
// ......
DispatcherServletAutoConfiguration类(省略无关代码):
@AutoConfigureOrder(Ordered.HIGHEST_PRECEDENCE)
@Configuration(proxyBeanMethods = false)
@ConditionalOnWebApplication(type = Type.SERVLET)
@ConditionalOnClass(DispatcherServlet.class)
@AutoConfigureAfter(ServletWebServerFactoryAutoConfiguration.class)
public class DispatcherServletAutoConfiguration {
        // ......
	public static final String DEFAULT_DISPATCHER_SERVLET_BEAN_NAME = "dispatcherServlet";
        // ......
	@Configuration(proxyBeanMethods = false)
	@Conditional(DefaultDispatcherServletCondition.class)
	@ConditionalOnClass(ServletRegistration.class)
	@EnableConfigurationProperties({ HttpProperties.class, WebMvcProperties.class })
	protected static class DispatcherServletConfiguration {
                // ......
		@Bean(name = DEFAULT_DISPATCHER_SERVLET_BEAN_NAME)
		public DispatcherServlet dispatcherServlet(HttpProperties httpProperties, WebMvcProperties webMvcProperties) {
			DispatcherServlet dispatcherServlet = new DispatcherServlet();
			dispatcherServlet.setDispatchOptionsRequest(webMvcProperties.isDispatchOptionsRequest());
			dispatcherServlet.setDispatchTraceRequest(webMvcProperties.isDispatchTraceRequest());
			dispatcherServlet.setThrowExceptionIfNoHandlerFound(webMvcProperties.isThrowExceptionIfNoHandlerFound());
			dispatcherServlet.setPublishEvents(webMvcProperties.isPublishRequestHandledEvents());
			dispatcherServlet.setEnableLoggingRequestDetails(httpProperties.isLogRequestDetails());
			return dispatcherServlet;
		}
                // ......
        }
        // ......
}
@Conditional开头的注解就是条件化配置,判断在什么条件下该配置类会生效。例如DispatcherServletAutoConfiguration上的条件注解
@ConditionalOnWebApplication(type = Type.SERVLET)
@ConditionalOnClass(DispatcherServlet.class)
表示必须是Servlet环境且类路径下存在DispatcherServlet.class,则配置类生效。
所以如果我们需要创建自己的自动配置类,也按照这样的方式来做就可以了。
github源码:
https://github.com/jufeng98/java-mastergithub.com