官网地址https://ci.apache.org/projects/flink/flink-docs-release-1.7/tutorials/local_setup.html
1.下载flink从官网
https://flink.apache.org/downloads.html
2.选择自己的版本

3.进行下载

4.解压缩

5.启动

6.页面访问

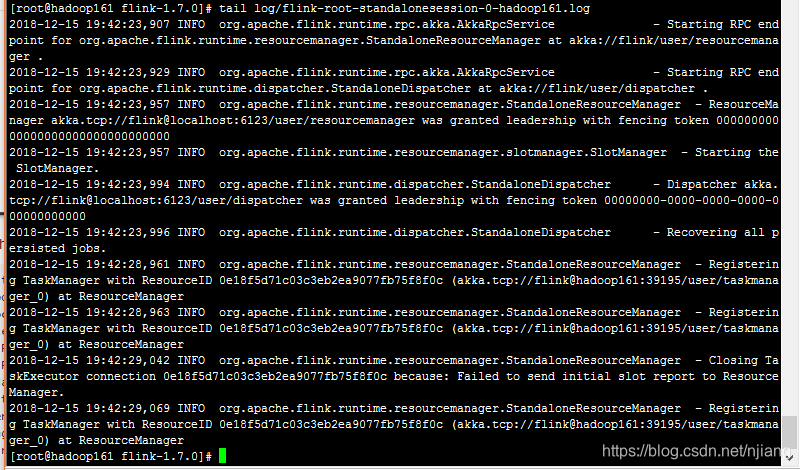
7.查看日志
8.执行一个例子代码
object SocketWindowWordCount {
def main(args: Array[String]) : Unit = {
// the port to connect to,获取端口
val port: Int = try {
ParameterTool.fromArgs(args).getInt("port")
} catch {
case e: Exception => {
System.err.println("No port specified. Please run 'SocketWindowWordCount --port <port>'")
return
}
}
// get the execution environment 获取上下文环境
val env: StreamExecutionEnvironment = StreamExecutionEnvironment.getExecutionEnvironment
// get input data by connecting to the socket 输入数据获取
val text = env.socketTextStream("localhost", port, '\n')
// parse the data, group it, window it, and aggregate the counts分组,根据word ,5秒一个窗口,按照1秒移动进行统计
val windowCounts = text
.flatMap { w => w.split("\\s") }
.map { w => WordWithCount(w, 1) }
.keyBy("word")
.timeWindow(Time.seconds(5), Time.seconds(1))
.sum("count")
// print the results with a single thread, rather than in parallel,打印出结果,按照单线程,
windowCounts.print().setParallelism(1)
env.execute("Socket Window WordCount")
}
// Data type for words with count,定义数据类型,
case class WordWithCount(word: String, count: Long)
}
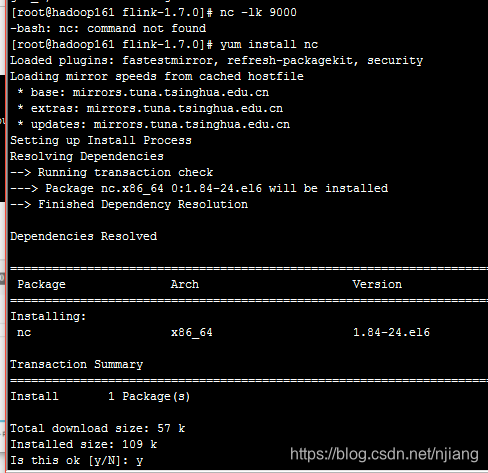
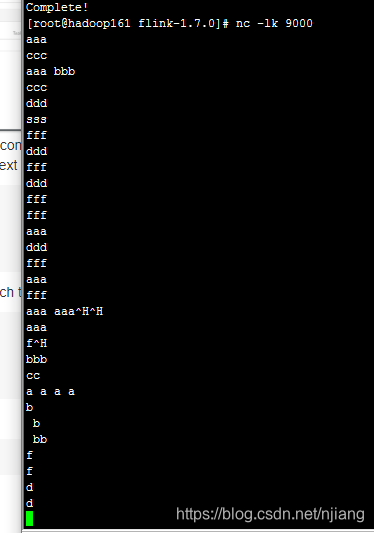
9.启动nc
如果没有按照下面步骤
(9.1)利用yum进行安装
yum install nc
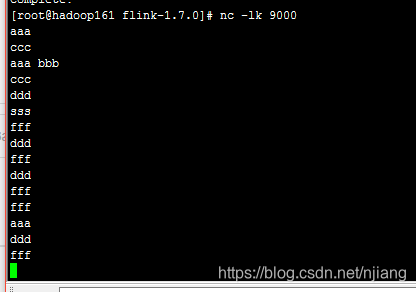
(9.2)使用进行指定端口
nc -lk 9000
10.启动计算服务
打开另一终端窗口

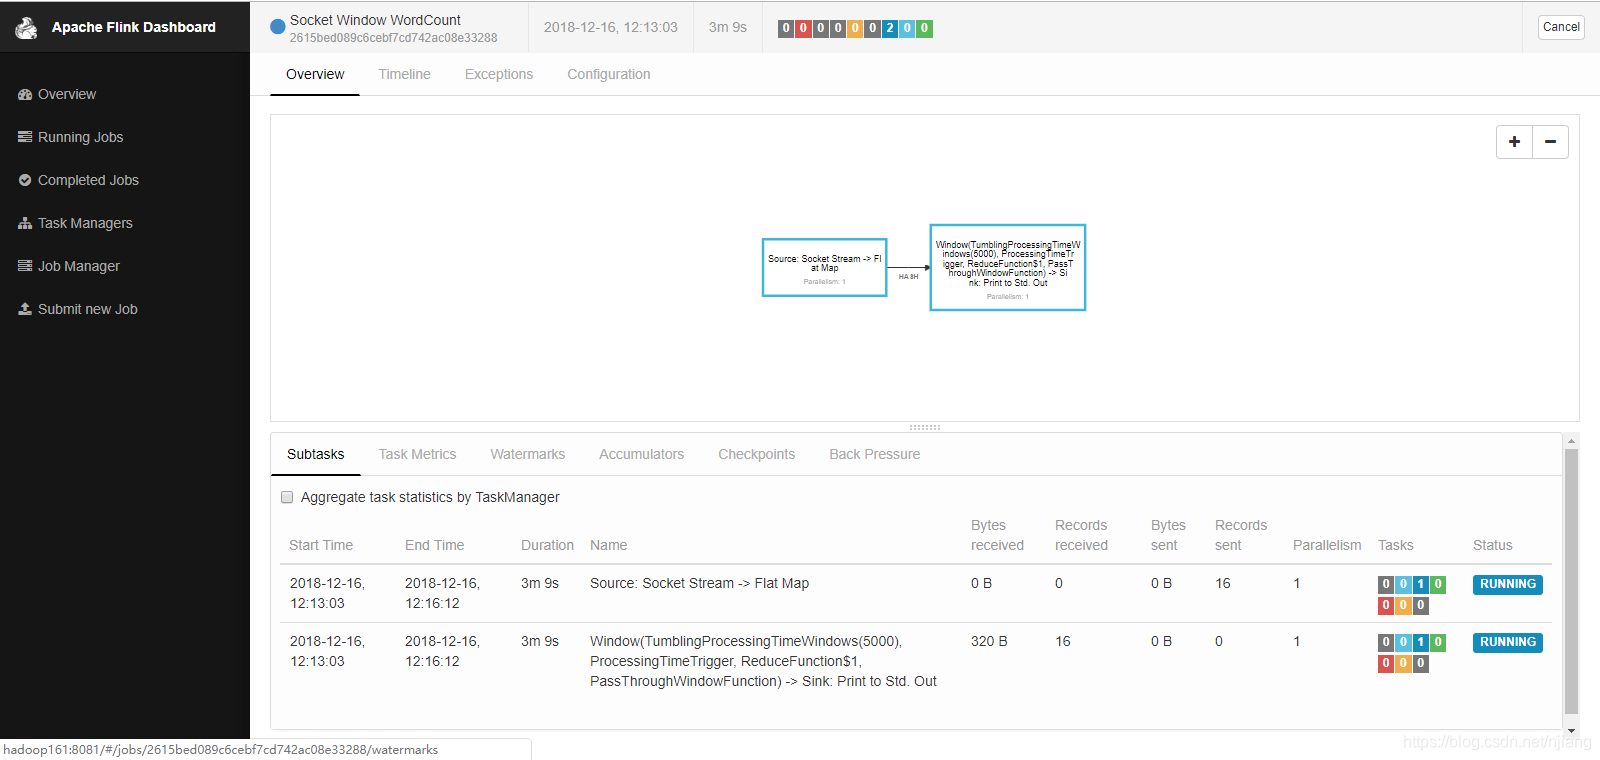
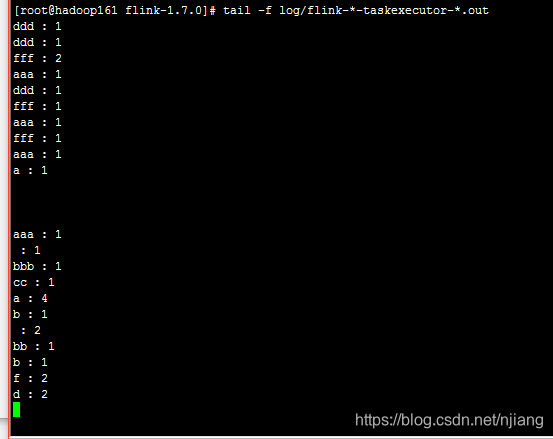
11.查看计算结果
(1)界面监控
(2)输入测试数据
(3)查看结果
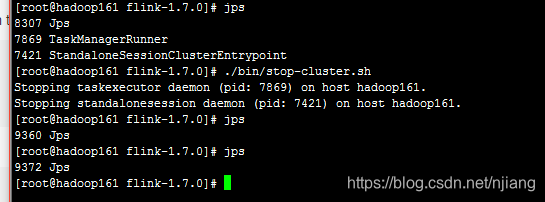
12.关闭集群
好了单机模式就先到这里!
奇迹的出现往往就在再坚持一下的时候!