1、实体类
User.java
/**
 * @Description: 实体类
 */
public class User {
	private String uId;
	private String userName;
	private int age;
	public String getuId() {
		return uId;
	}
	public void setuId(String uId) {
		this.uId = uId;
	}
	public String getUserName() {
		return userName;
	}
	public void setUserName(String userName) {
		this.userName = userName;
	}
	public int getAge() {
		return age;
	}
	public void setAge(int age) {
		this.age = age;
	}
}
2、mapper映射
UserMapper.java
@Mapper
public interface UserMapper {
	int addUser(User user);
}
UserMapper.xml
<?xml version="1.0" encoding="UTF-8"?>
<!DOCTYPE mapper PUBLIC "-//mybatis.org//DTD Mapper 3.0//EN" "http://mybatis.org/dtd/mybatis-3-mapper.dtd">
<mapper namespace="com.test.mapper.UserMapper">
	<resultMap id="userResultMap" type="com.test.model.User">
		<id column="u_id" property="uId" jdbcType="VARCHAR" />
		<result column="username" property="userName" jdbcType="VARCHAR" />
		<result column="age" property="age" jdbcType="BIGINT" />
	</resultMap>

	<insert id="addUser" parameterType="com.test.model.User">
		INSERT INTO user (u_id, username, age)
		VALUES (#{uId}, #{userName}, #{age})
	</insert>
</mapper>
3、Service层
UserService
public interface UserService {
	int addUser(User user);
}
UserServiceImpl
@Service
public class UserServiceImpl implements UserService {

	@Autowired
	private UserMapper userMapper;

	/**
	 * @Description: 添加用戶
	 */
	@Override
	public int addUser(User user) {
		return userMapper.addUser(user);
	}
}
4、Controller层
UserController
@RestController
@RequestMapping("/user")
public class UserController {

@Autowired
private UserService userService;

/**
 * @Description: 添加用户,RESTful风格接收参数
 */
@RequestMapping("/add/{userName}/{age}")
public Object saveUser(@PathVariable("userName") String userName,@PathVariable("age") String age){
	User user = new User();
	user.setuId(String.valueOf(System.currentTimeMillis()));
	user.setUserName(userName);
	user.setAge(Integer.valueOf(age));
	int addUser = userService.addUser(user);
	return "成功添加"+addUser+"條記錄";
}
}
5、application.properties文件
server.port=8999
#spring boot的jdbc模块会加载以下参数,并且根据url可以识别并自动加载mysql驱动,自动创建数据库实例,自动实现连接池(tomcat jdbc連接池(spring boot1),(註:Spring boot2默認連接池爲:hikari))
spring.datasource.url=jdbc:mysql://localhost:3306/test?characterEncoding=utf8
spring.datasource.username=xxx
spring.datasource.password=xxx
spring.datasource.driver-class-name=com.mysql.jdbc.Driver
6、pom.xml文件
<project xmlns="http://maven.apache.org/POM/4.0.0" xmlns:xsi="http://www.w3.org/2001/XMLSchema-instance"
xsi:schemaLocation="http://maven.apache.org/POM/4.0.0 http://maven.apache.org/xsd/maven-4.0.0.xsd">
	<modelVersion>4.0.0</modelVersion>
	<groupId>springboot2</groupId>
	<artifactId>springboot2</artifactId>
	<version>0.0.1-SNAPSHOT</version>

	<!-- Spring Boot父级依赖,提供相关的Maven默认依赖(常用的包依赖可以省去version标签) -->
	<parent>
		<groupId>org.springframework.boot</groupId>
		<artifactId>spring-boot-starter-parent</artifactId>
		<version>2.0.1.RELEASE</version>
	</parent>

	<!-- 覆蓋掉Spring Boot裏面對應的默認配置 -->
	<properties>
		<project.build.sourceEncoding>UTF-8</project.build.sourceEncoding>
		<project.reporting.outputEncoding>UTF-8</project.reporting.outputEncoding>
		<java.version>1.8</java.version>
	</properties>

	<dependencies>
		<!-- spring-boot-starter-xxx:代表一个spring boot模块 -->
		<dependency>
			<groupId>org.springframework.boot</groupId>
			<!-- spring-boot-starter-web:代表web模块,在这个模块中含了许多JAR包,有spring相关的jar,内置tomcat服务器,jackson等,这些web项目中常用的的功能都会自动引入 -->
			<artifactId>spring-boot-starter-web</artifactId>
		</dependency>

		<!-- 引入mybatis -->
		<dependency>
			<groupId>org.mybatis.spring.boot</groupId>
			<artifactId>mybatis-spring-boot-starter</artifactId>
			<version>1.3.0</version>
		</dependency>

		<!-- Hikari連接池(號稱最好的鏈接池(spring boot2默認)) -->
		<dependency>
			<groupId>com.zaxxer</groupId>
			<artifactId>HikariCP</artifactId>
		</dependency>

		<!-- 数据库驱动 -->
		<dependency>
			<groupId>mysql</groupId>
			<artifactId>mysql-connector-java</artifactId>
		</dependency>
	</dependencies>
</project>
7、启动类
InitApplication.java
//Spring Boot项目的核心注解,主要目的是开启自动配置
@SpringBootApplication
public class InitApplication {

	@Autowired
	private Environment env;

	public static void main(String[] args) {
		SpringApplication.run(InitApplication.class, args);
	}

	/*
	 * Spring Boot会智能地选择我们自己配置的这个DataSource实例
	 */
	//destroy-method="close"的作用是当数据库连接不使用的时候,就把该连接重新放到数据池中,方便下次使用调用.
	@Bean(destroyMethod = "close")
	public DataSource dataSource() {
		HikariDataSource dataSource = new HikariDataSource();
		dataSource.setJdbcUrl(env.getProperty("spring.datasource.url"));
		dataSource.setUsername(env.getProperty("spring.datasource.username"));// 用户名
		dataSource.setPassword(env.getProperty("spring.datasource.password"));// 密码
		dataSource.setDriverClassName(env.getProperty("spring.datasource.driver-class-name"));
		return dataSource;
	}
}
8、sql
CREATE TABLE `user` (
	`u_id` VARCHAR(32) NOT NULL COLLATE 'utf8_bin',
	`username` VARCHAR(64) NOT NULL COMMENT '用戶名' COLLATE 'utf8_bin',
	`age` BIGINT(3) NOT NULL COMMENT '年齡',
	PRIMARY KEY (`u_id`)
)
COMMENT='用戶表'
COLLATE='utf8_bin'
ENGINE=MyISAM;
9、项目结构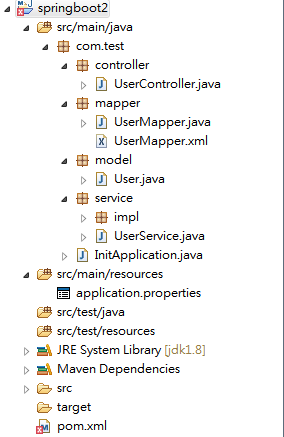
10、总结
springboot采用“约定优于配置”的做法,大大简化了开发中的繁琐的配置过程,无需程序员过多的关注配置,只需引入一些相关的jar依赖,便可满足平常的开发需求了。
版权声明:本文为zzr1107165829原创文章,遵循CC 4.0 BY-SA版权协议,转载请附上原文出处链接和本声明。