gitlab 安装使用
公司搬家,重新搭建代码库,决定使用gitlab。其实很简单,但是自己搞了好几天,于是把过程记录下来,大家一起交流学习,如有不足之处,欢迎指正。
GitLab 是一个用于仓库管理系统的开源项目。使用Git作为代码管理工具,并在此基础上搭建起来的web服务,它集成了Github的可视化功能,方便开发人员协同工作。
进入主题:
首先准备好Linux操作系统
下载gitlab 下载地址:https://bitnami.com/stack/gitlab/installer
下载过程较慢,可以做点其他的准备活动。
安装Git
软件版本:git-2.3.1.tar.gz
下载地址:https://www.kernel.org/pub/software/scm/git/
编译Git版本:
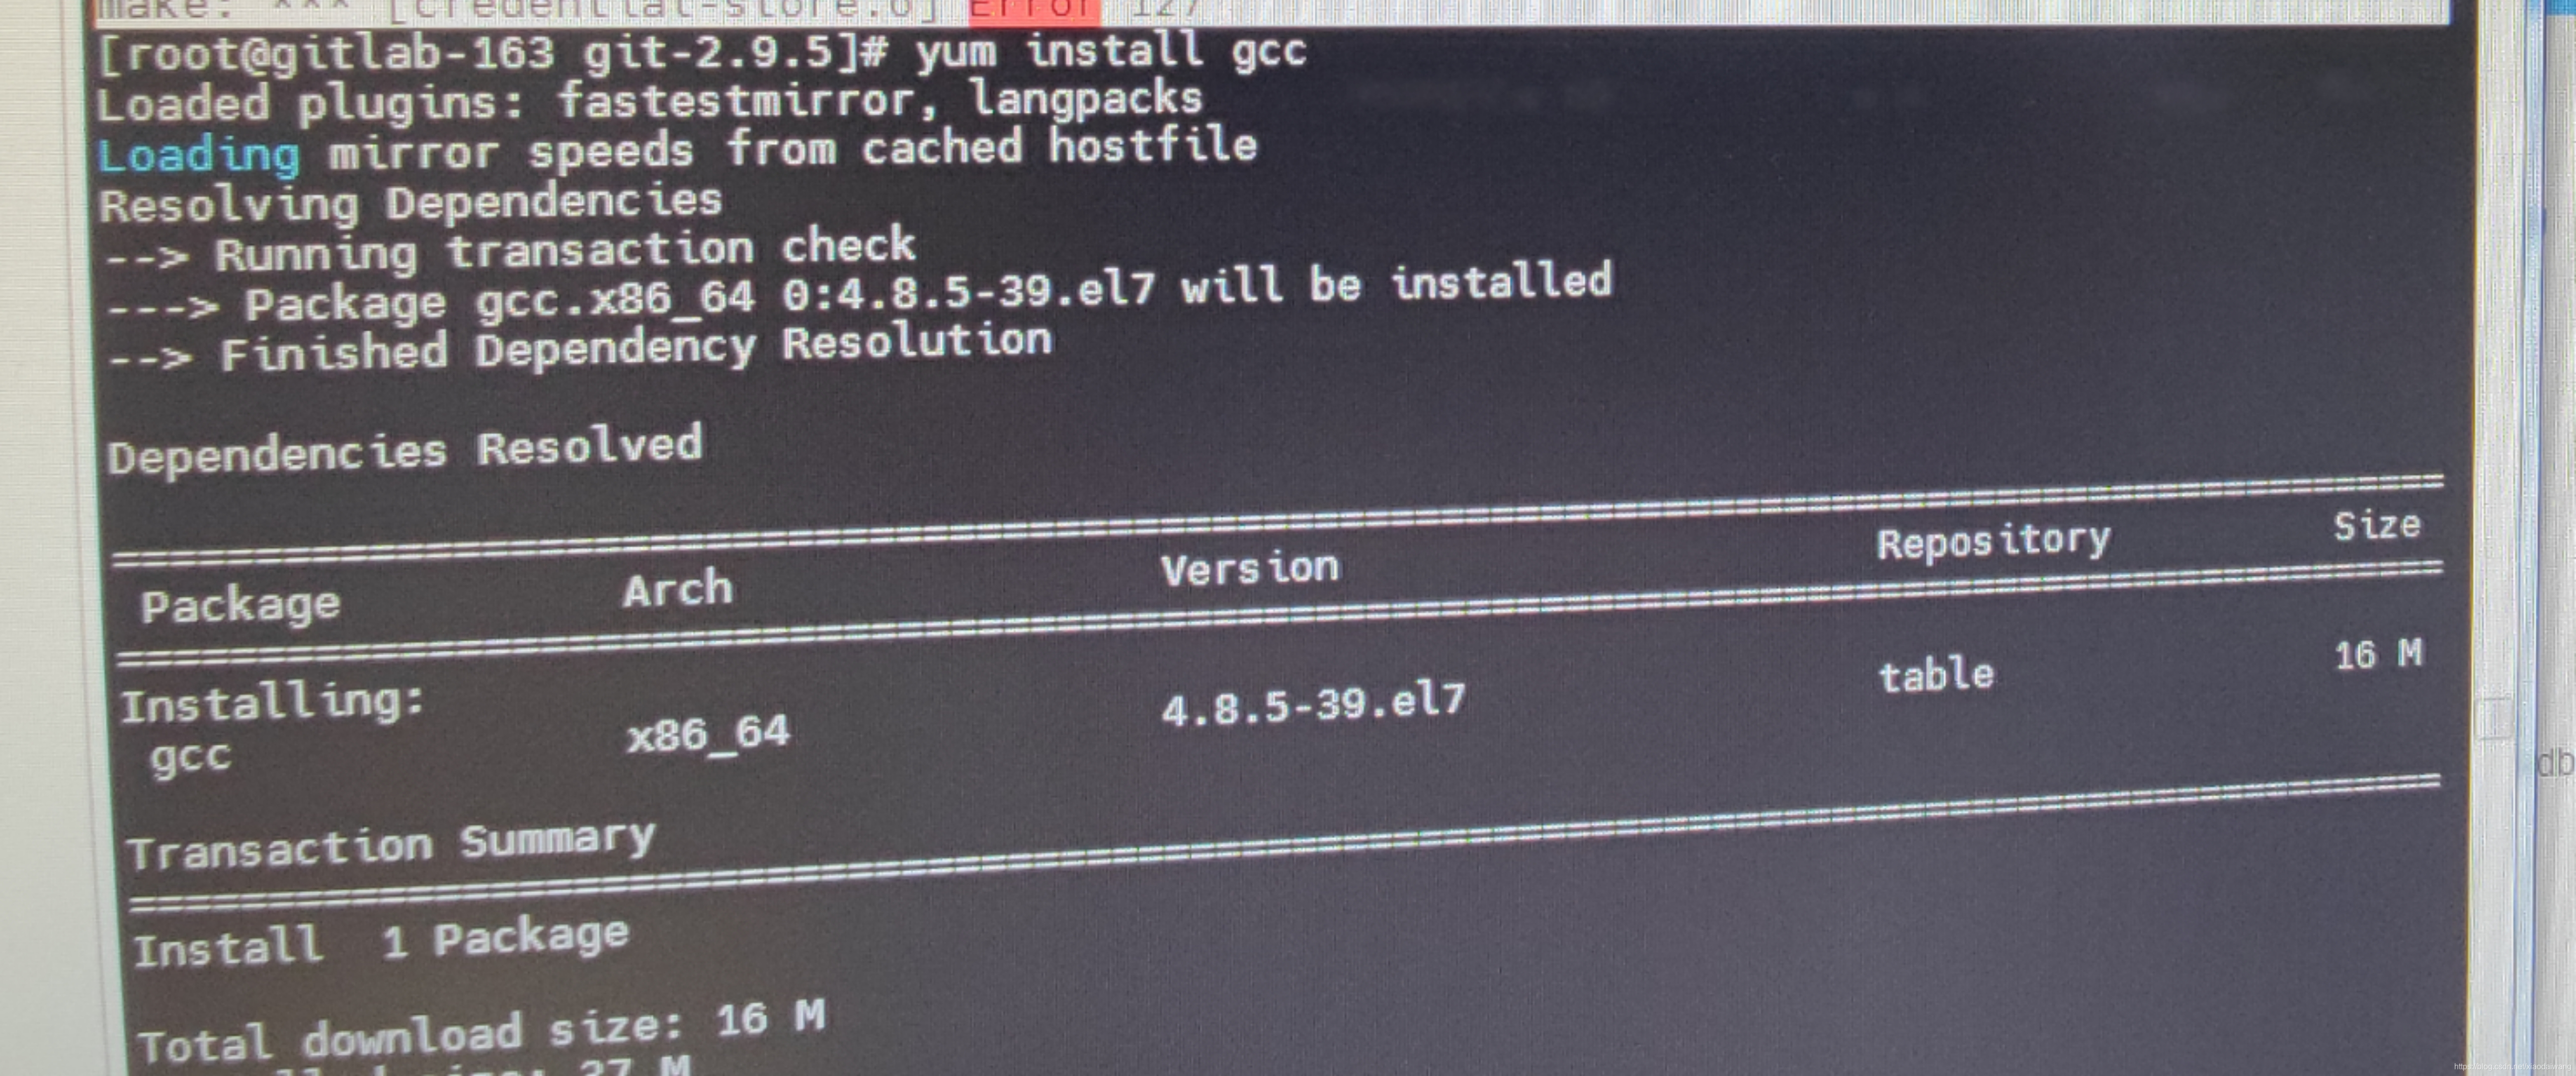
首先安装依赖(以下都是在root目录下完成): 编译时如果操作系统没有安装gcc,使用yum –y install gcc*
   yum -y install curl-devel expat-devel gettext-devel openssl-devel zlib-devel perl-devel
  tar -zxvf git-2.3.1.tar.gz
  cd git-2.3.1
  make prefix=/usr/local all
  make prefix=/usr/local install
如果遇到报错,比如

这是因为在CentOS中没有安装gcc,安装gcc即可。
yum -y install gcc
安装Gitlab
下载完成后,我们开始安装流程,命令如下:
chmod u+x bitnami-gitlab-8.7.5-0-linux-x64-installer.run
下面列出安装流程:
Welcome to the Bitnami Gitlab Stack Setup Wizard.
----------------------------------------------------------------------------
Select the components you want to install; clear the components you do not want
to install. Click Next when you are ready to continue.
PhpPgAdmin [Y/n] :
GitLab : Y (Cannot be edited)
Is the selection above correct? [Y/n]:
----------------------------------------------------------------------------
Installation folder
Please, choose a folder to install Bitnami Gitlab Stack
Select a folder [/opt/gitlab-8.7.5-0]:
----------------------------------------------------------------------------
Create Admin account
Bitnami Gitlab Stack admin user creation
Email Address [user@example.com]: wangxiaodai@**.com
Login [user]: xiaodai
Password :
Please confirm your password :
----------------------------------------------------------------------------
Web Server Port
Please enter the port that the bundled Apache Server will listen to by default.
Apache Web Server Port [80]:
Warning: Unable to bind to the given port number. This port is already in use by
the "httpd" process. You can stop the running process or select a different
port.
Press [Enter] to continue:81
----------------------------------------------------------------------------
Web Server Port
Please enter the port that the bundled Apache Server will listen to by default.
Apache Web Server Port [80]:
Warning: Unable to bind to the given port number. This port is already in use by
the "httpd" process. You can stop the running process or select a different
port.
Press [Enter] to continue:82
----------------------------------------------------------------------------
Web Server Port
Please enter the port that the bundled Apache Server will listen to by default.
Apache Web Server Port [80]: 82
----------------------------------------------------------------------------
Web Server Port
Please enter the port that the bundled Apache Server will use for SSL access.
SSL Port [443]: 999
----------------------------------------------------------------------------
Hostname that will be used to create internal URLs. If this value is incorrect,
you may be unable to access your Gitlab installation from other computers. It is
advisable to use a Domain instead of an IP address for compatibility with
different browsers.
Domain [0.0.4.18]: 10.10.10.42
Do you want to configure mail support? [y/N]: n
----------------------------------------------------------------------------
Setup is now ready to begin installing Bitnami Gitlab Stack on your computer.
Do you want to continue? [Y/n]: y
----------------------------------------------------------------------------
Please wait while Setup installs Bitnami Gitlab Stack on your computer.
Installing
0% ______________ 50% ______________ 100%
#########################################
----------------------------------------------------------------------------
Setup has finished installing Bitnami Gitlab Stack on your computer.
Info: To access the Bitnami Gitlab Stack, go to
http://10.10.10.42:82 from your browser.
Press [Enter] to continue:
安装完毕!
systemctl stop firewalld.service #停止firewall
访问浏览器地址即可打开gitlab.