Uniapp如何解决,绘制canvas海报二维码、绘制网络图片、canvas层级过高、用户拒绝授权后在授权?
# 前言
1.如果对你有帮助,麻烦点个赞,写稿不易
2.需求:
实现后台传来的海报和二维码图片,合成海报,并保存到本地。
3.问题:
如何绘制海报?
如何绘制网络图片海报?
如何解决canvas层级过高?
如何解决用户拒绝授权后再次授权?
一、uniapp如何绘制canvas海报二维码?
用两张本地图片代表背景图和二维码
展示效果:
代码如下(示例):
<template>
	<view class="box">
		<canvas style="width: 200px;height: 300px;margin: 0 auto" canvas-id="firstCanvas" id="sImg"></canvas>
		<button class="btn" @click="createCanvas">生成海报</button>
	</view>
</template>
<script>
	export default {
		methods: {
			createCanvas() {
				var _self = this;
				let ww, hh;
				const query = uni.createSelectorQuery().in(this);
				query.select('#sImg').boundingClientRect(data => {  //获取canvas-dom
					ww = data.width; //准确的canvas宽高
					hh = data.height
					var ctx = uni.createCanvasContext('firstCanvas') //绑定画布
					_self.ctx = ctx;
					// (图片路径、x坐标、y坐标、图片宽度、图片高度)
					_self.ctx.drawImage('../../static/logo.png',0,0,data.width,data.height);
					// 绘画的第二张图,会在第一张图上面
					_self.ctx.drawImage('../../static/logo.png',80,100,data.width / 4,data.height / 4);
					ctx.setFontSize(30);  //设置文字大小
					ctx.setTextAlign('center')  //设置对于坐标点的对齐方式
					ctx.fillText('测试测试',ww/2,hh/2+55) //计算距离,将文字定位于图片的某处
					ctx.setFillStyle('red')  //设置内容2的文字样式
					 _self.ctx.draw()
					 }).exec()
			}
		}
	}
</script>

<style lang="scss">
.box {
	width: 100%;
	height: 100vh;
	background: #007AFF;
}
.btn {
	width: calc(100% - 60px);
	margin: 10px auto;
}
</style>
注意事项:
当canvas绘画是当做组件引入时,需要在  var ctx = uni.createCanvasContext('firstCanvas')  后面加 this
否则,绘制无效
父组件
子组件
二、如何绘制网络图片海报?
问题:因为获取到的图片是后台传输的网络图片,不是本地图片,使用上面的方法canvas绘制后会显示空白
解决方法:使用uni.getImageInfo获取图片后在绘制
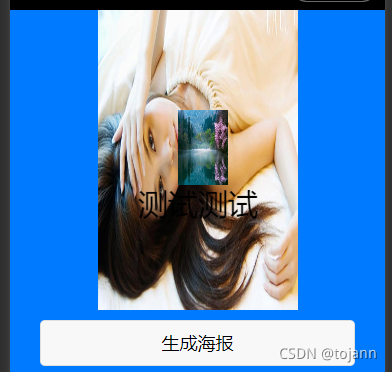
效果展示:
代码如下(示例):
			createCanvas() {
				var _self = this;
				let ww, hh;
				const query = uni.createSelectorQuery().in(this);
				query.select('#sImg').boundingClientRect(data => {  //获取canvas-dom
					ww = data.width; //准确的宽高
					hh = data.height
					var ctx = uni.createCanvasContext('firstCanvas',this) //绑定画布
					_self.ctx = ctx;
					uni.getImageInfo({
						src: 'https://img1.baidu.com/it/u=2881992720,703397733&fm=26&fmt=auto',
						success: function(res) {
							console.log(res,'res')
					// (图片路径、x坐标、y坐标、图片宽度、图片高度)
					_self.ctx.drawImage(res.path,0,0,data.width,data.height);
					// 绘画的第二张图,会在第一张图上面
					_self.ctx.drawImage(res.path,80,100,data.width / 4,data.height / 4);
					ctx.setFontSize(30);  //设置文字大小
					ctx.setTextAlign('center')  //设置对于坐标点的对齐方式
					ctx.fillText('测试测试',ww/2,hh/2+55) //计算距离,将文字定位于图片的某处
					ctx.setFillStyle('red')  //设置内容2的文字样式
					 _self.ctx.draw()
					 }})
				}).exec()
			}
注意事项:
如果绘画的是多张图片,第二张打后的图片可以在方法外面先uni.getImageInfo获取图片路径保存在data中,绘画是在调用就行,例如: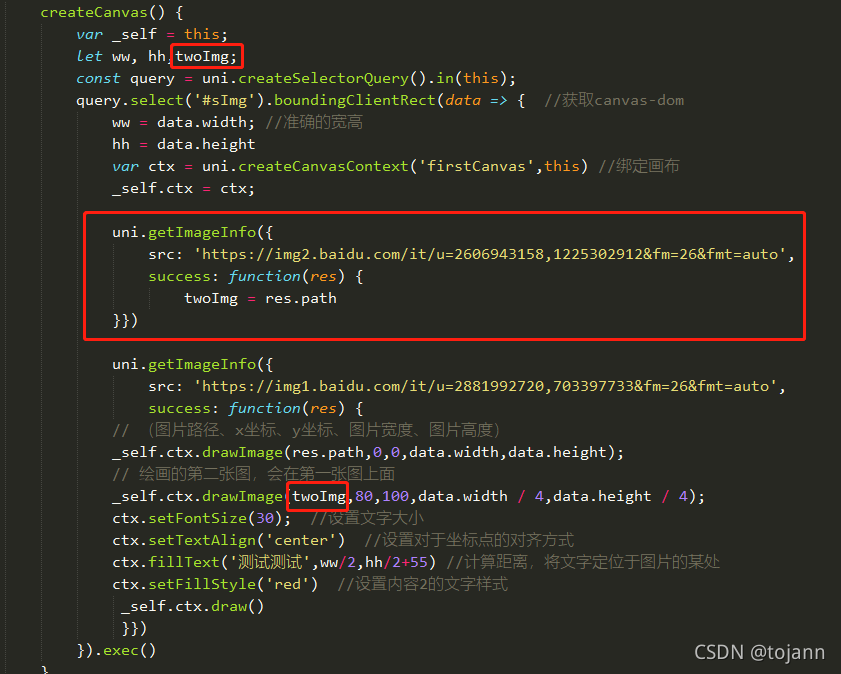
三、如何解决canvas层级过高?
- 例子使用了uView-ui组件,如果需要测试,需要自行引入
- 问题:生成海报后,如果海报的长度或宽度比盒子的多,就会超出父盒子。 层级过高,在本地测试显示没有问题,但是在真机上就会出现canvas层级过高
- 解决方法: 使用固定定位,将canvas移走,将绘制后的图片用image 显示
微信开发者工具显示没有问题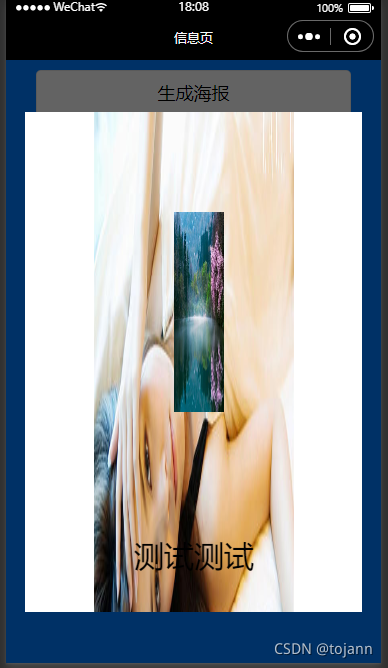
但是在真机显示时就出现问题了

因为方法比较简单,就不多说了。
代码如下(示例):
<template>
	<view class="box">
		<canvas style="width: 200px;height: 800px;margin: 0 auto" canvas-id="firstCanvas" class="sImg" id="sImg"></canvas>
		<u-popup  v-model="show" length="90%" height ="500px" mode="center">
			<image style="width: 200px;height: 800px;margin: 0 auto;display: block;" :src="tempImg" ></image>
		</u-popup>
		<button class="btn" @click="createCanvas" >生成海报</button>
	</view>
</template>
<script>
	export default {
		data() {
			return {
				show: false,
				tempImg: ''
			}
		},
		methods: {
			createCanvas() {
				this.show = true
				let ww, hh,twoImg;
				uni.getImageInfo({
					src: 'https://img2.baidu.com/it/u=2606943158,1225302912&fm=26&fmt=auto',
					success: function(res) {
						twoImg = res.path
				}})
				var _self = this;
				const query = uni.createSelectorQuery().in(this);
				query.select('#sImg').boundingClientRect(data => {  //获取canvas-dom
					ww = data.width; //准确的宽高
					hh = data.height
					var ctx = uni.createCanvasContext('firstCanvas',this) //绑定画布
					_self.ctx = ctx;
					uni.getImageInfo({
						src: 'https://img1.baidu.com/it/u=2881992720,703397733&fm=26&fmt=auto',
						success: function(res) {
						// (图片路径、x坐标、y坐标、图片宽度、图片高度)
						_self.ctx.drawImage(res.path,0,0,data.width,data.height);
						// 绘画的第二张图,会在第一张图上面
						_self.ctx.drawImage(twoImg,80,100,data.width / 4,data.height / 4);
						ctx.setFontSize(30);  //设置文字大小
						ctx.setTextAlign('center')  //设置对于坐标点的对齐方式
						ctx.fillText('测试测试',ww/2,hh/2+55) //计算距离,将文字定位于图片的某处
						ctx.setFillStyle('red')  //设置内容2的文字样式
						_self.ctx.draw(false,setTimeout( () => {   //获取canvas图片
							uni.canvasToTempFilePath({
								quality: 1,
								canvasId:'firstCanvas',
								success: function (res) {
									console.log(res,'ress')
									_self.tempImg=res.tempFilePath
								  },
								  fail: function (res) {
									console.log(res);
								}
							},_self)
						},500));  //输出到画布中
					 }})
				}).exec()
			}
		}
	}
</script>

<style lang="scss">
.box {
	position: relative;
	width: 100%;
	height: 100vh;
	background: #007AFF;
	overflow: hidden;
	.box2 {
		width: 80%;
		height: 400px;
		background: rgba(0,0,0,.5);
		margin: 0 auto;
		z-index: 10;
		overflow-y: auto;
	}
}
.sImg {
	position: fixed;
	top: 0;
	left: -999999px;
}
.btn {
	width: calc(100% - 60px);
	margin: 10px auto;
}
</style>
四、如何解决用户拒绝授权后再次授权?
解决: 每次保存图片,调用uni检测是否授权,是,保存,否,调用授权
// 检查是否授权
			authImg() {
				var _self = this
				   uni.authorize({
						scope: 'scope.writePhotosAlbum',
						success(){ //1.1 允许授权
							_self.saveImg()
						},
						fail(){    //1.2 拒绝授权
							uni.showModal({
								content:'检测到您还没打开存储功能权限,是否去设置打开?',
									confirmText: "确认",
									cancelText:'取消',
									success: (res) => {
										if(res.confirm){
											uni.openSetting({
												success: (res) => {
													_self.saveImg()
												}
											})
										}else{
											console.log('取消');
											return false;
										}
									}
							})
							return false;
						}
					})
				},
				// 保存图片
				saveImg() {
					uni.saveImageToPhotosAlbum({  //保存图片
						filePath:this.tempImg,
						success: (res) => {
							uni.showToast({
								title:'保存成功',
							})
							this.show = false
						}
					})
				}
版权声明:本文为silencejan原创文章,遵循CC 4.0 BY-SA版权协议,转载请附上原文出处链接和本声明。