浏览器发送请求 localhost:8080/home
通过thymeleaf (xmlns:th=“http://thymeleaf.org”>)和model.addAttribute实现 服务器和网页的连接
通过userDao里面的jdbcTemplate的方法实现服务器和数据库的操作
spring MVC 其实是通过服务器作为中介实现页面和数据库的数据交互
层级结构
首先配置pom(导入jar包)
<?xml version="1.0" encoding="UTF-8"?>
<project xmlns="http://maven.apache.org/POM/4.0.0" xmlns:xsi="http://www.w3.org/2001/XMLSchema-instance"
	xsi:schemaLocation="http://maven.apache.org/POM/4.0.0 http://maven.apache.org/xsd/maven-4.0.0.xsd">
	<modelVersion>4.0.0</modelVersion>
	<parent>
		<groupId>org.springframework.boot</groupId>
		<artifactId>spring-boot-starter-parent</artifactId>
		<version>1.5.9.RELEASE</version>    //spring boot 的父类
		<relativePath/> <!-- lookup parent from repository -->
	</parent>
	<groupId>com.tl</groupId>
	<artifactId>idea_demo</artifactId>
	<version>0.0.1-SNAPSHOT</version>
	<packaging>jar</packaging>
	<name>idea_demo</name>
	<description>Demo project for Spring Boot</description>
<properties>
	<java.version>1.8</java.version>
</properties>

<dependencies>
	<!-- https://mvnrepository.com/artifact/org.springframework.boot/spring-boot-devtools   rebushu-->
	<dependency>
		<groupId>org.springframework.boot</groupId>
		<artifactId>spring-boot-devtools</artifactId>
	</dependency>
	<!--兼容老版本-->
	<dependency>
		<groupId>net.sourceforge.nekohtml</groupId>
		<artifactId>nekohtml</artifactId>
		<version>1.9.22</version>
	</dependency>
	<dependency>
		<groupId>org.springframework.boot</groupId>
		<artifactId>spring-boot-starter-thymeleaf</artifactId>
	</dependency>
	<dependency>
		<groupId>org.springframework.boot</groupId>
		<artifactId>spring-boot-starter-web</artifactId>
	</dependency>

	<dependency>
		<groupId>org.springframework.boot</groupId>
		<artifactId>spring-boot-starter-test</artifactId>
		<scope>test</scope>
	</dependency>


	<!-- https://mvnrepository.com/artifact/mysql/mysql-connector-java   数据库-->
	<dependency>
		<groupId>mysql</groupId>
		<artifactId>mysql-connector-java</artifactId>
	</dependency>
	<!-- https://mvnrepository.com/artifact/com.alibaba/druid   阿里 连接池-->


	<!-- https://mvnrepository.com/artifact/com.alibaba/druid-spring-boot-starter -->
	<dependency>
		<groupId>com.alibaba</groupId>
		<artifactId>druid-spring-boot-starter</artifactId>
		<version>1.1.9</version>
	</dependency>


	<!-- https://mvnrepository.com/artifact/org.springframework.boot/spring-boot-starter-jdbc  JDBC-->
	<dependency>
		<groupId>org.springframework.boot</groupId>
		<artifactId>spring-boot-starter-jdbc</artifactId>
	</dependency>
</dependencies>

<build>
	<plugins>
		<plugin>
			<groupId>org.springframework.boot</groupId>
			<artifactId>spring-boot-maven-plugin</artifactId>
			<configuration>
				<fork>true</fork>
			</configuration>

		</plugin>
	</plugins>
</build>
配置properties
spring.datasource.driver-class-name=com.mysql.jdbc.Driver //配置驱动
spring.datasource.username=root
spring.datasource.password=******
spring.datasource.url=jdbc:mysql:///test  //数据库连接池

spring.thymeleaf.prefix=classpath:/templates/

#thymeleaf
spring.thymeleaf.encoding=UTF-8
spring.thymeleaf.suffix=.html
#spring.thymeleaf.mode=HTML5
spring.thymeleaf.mode=LEGACYHTML5
#hot deploy
spring.thymeleaf.cache=false
spring.resources.chain.strategy.content.enabled=true
spring.resources.chain.strategy.content.paths=/**

logging.level.com.tledu.sboot_thyme=debug
1.Controller部分
package com.tl.idea_demo.controller;

        import com.tl.idea_demo.dao.UserDao;
        import com.tl.idea_demo.entity.User;
        import org.springframework.beans.factory.annotation.Autowired;
        import org.springframework.stereotype.Controller;
        import org.springframework.ui.Model;
        import org.springframework.web.bind.annotation.RequestMapping;
        import org.springframework.web.bind.annotation.RequestParam;
        import org.springframework.web.bind.annotation.ResponseBody;
/@Controller注解
在SpringMVC 中,控制器Controller 将用户请求的数据封装为一个model,然后把该model返回给对应的网页展示
,只需使用@Controller 标记一个类是Controller ,@RequestMapping (映射路径如"/home")和@RequestParam (映射参数)
这样的Controller 就能被外界访问到。通过在return"/home "可以将各种操作的结果返回到浏览器/
public class MyConller{
	 @Autowired
   private UserDao userDao;/*通过实例化userDao来调用userDao的方法(userDao已经通过jdbcTemplate连接上了数据库)*/

   @RequestMapping("/home")/* 网页的localhost:8080/home跳转到这*/
    public  String home (Model model){

       model.addAttribute("users",userDao.findAll());

       return "home";

   }
   @ResponseBody/*这注解表明操作完直接在该页面显示删除成功或失败*/
   @RequestMapping("/delete") /*点删除按钮跳转到这*/
   public String delete(int id){
       int a=userDao.deletebyid(id);/*调用userDao的deletebyid方法根据id进行删除操作*/
       if(a>0){
           return "删除成功"+"<a href='/home'>返回主页</a>";
       }
       else{return "删除失败"+"<a href='/home'>返回主页</a>";
       }
   }
   @RequestMapping("/update")/*点修改跳转到这*/
    public String update(@RequestParam int id ,Model model){  /*映射前端的参数*/
       User user=userDao.finduserbyid(id); /*调用userDao的finduserbyid通过id找到该对象*/
       model.addAttribute("user",user);/*将得到的对象通过model的方法映射到"user"*/
       return "update";/*将该对象送到网页  跳转看update网页(只是回显  现在还没修改)*/
   }
   @ResponseBody
   @RequestMapping("/updateAction")  /*通过表单的action="/updateAction" 跳转到这*/
    public String updateAction (User user){
       int row=userDao.update(user); /*这里通过调用userDao的update进行对数据库的内容的修改*/
       if(row>0){
           return "修改成功"+"<a href='/home'>返回主页</a>";
       }
       else{
           return"修改失败"+"<a href='/home'>返回主页</a>";
       }
   }

}
2.userdao部分
userdao 通过private JdbcTemplate jdbcTemplate实例化对象 用jdbcTemplate的方法连接数据库进行增删改查;
package com.tl.idea_demo.dao;

import com.tl.idea_demo.entity.User;
import org.springframework.beans.factory.annotation.Autowired;
import org.springframework.jdbc.core.BeanPropertyRowMapper;
import org.springframework.jdbc.core.JdbcTemplate;
import org.springframework.stereotype.Repository;

import java.util.List;

@Repository
public class UserDao {

@Autowired
private JdbcTemplate jdbcTemplate;  /*通过jdbcTemplate的方法对数据库操作*/


public List<User> findAll(){ /*查询语句将表的很多个对象放入List集合*/
    return jdbcTemplate.query("select * from person",new Object[]{},new BeanPropertyRowMapper<User>(User.class));
}
public int update(User user){/*进行数据库的update操作*/
    String sql="update person set `name`=?,salary=?,address=? where id=?";
    return jdbcTemplate.update(sql,user.getName(),user.getSalary(),user.getAddress(),user.getId());
}


 public int   deletebyid(int id){/*通过id找到该对象实现删除操作*/
        BeanPropertyRowMapper<User> rowMapper = new BeanPropertyRowMapper<>(User.class);
        String sql="delete from person where id=? ";
        int a= jdbcTemplate.update(sql,id);
        return a;
    }
    public User finduserbyid(int id){/*在进行修改操作之前先通过id回显这个id对应对象的每个属性*/
            BeanPropertyRowMapper<User> rowMapper = new BeanPropertyRowMapper<>(User.class);
            String sql="select * from person where id=? ";
            return  jdbcTemplate.queryForObject(sql,rowMapper,id);
    }

}
3.实体类部分
package com.tl.idea_demo.entity;

/**
 * Created by dwz on 2018/12/11.
 */
public class User {
    private int id;
    private String name;
    private double salary;
    private String address;

    public String getName() {
        return name;
    }

    public void setName(String name) {
        this.name = name;
    }

    public int getId() {
        return id;
    }

    public void setId(int id) {
        this.id = id;
    }

    public double getSalary() {
        return salary;
    }

    public void setSalary(double salary) {
        this.salary = salary;
    }

    public String getAddress() {
        return address;
    }

    public void setAddress(String address) {
        this.address = address;
    }

    @Override
    public String toString() {
        return "user{" +
                "id=" + id +
                ", name='" + name + '\'' +
                ", salary=" + salary +
                ", address='" + address + '\'' +
                '}';
    }
}
3home网页部分
<!DOCTYPE html>
<html lang="en" xmlns:th="http://thymeleaf.org">
<head>
    <meta charset="UTF-8" />
    <title>Titlsssse</title>
</head>
<body>
<table cellspacing="0" cellpadding="0" width="70%" border="1px">
        <tr>
            <th>id</th>
            <th>name</th>
            <th>salary</th>
            <th>address</th>
            <th>modify</th>
            <th>delete</th>

        </tr>
        <tr th:each="user:${users}"> /*将select得到的很多对象的List集合遍历到网页的表格中*/
            <td th:text="${user.id}"></td>
            <td th:text="${user.name}"></td>
            <td th:text="${user.salary}"></td>
            <td th:text="${user.address}"></td>
            <td><a th:href="@{'/update?id=' + ${user.id}}">修改</a></td>
            <td><a th:href="@{'/delete?id='+${user.id}}">删除</a></td>
        </tr>
    </table>

</body>
</html>
4.update网页部分
<!DOCTYPE html>
<html lang="en" xmlns:th="http://thymeleaf.org">
<head>
    <meta charset="UTF-8">
    <title>update title</title>
</head>
<body>
<form action="/updateAction" method="post">
    <table cellpadding="0px" cellspacing="0px" border="1px" width="50%">
        <tr>
            <td>id</td>
            <td><input type="text" th:value="${user.id}" name="id"></td>
        </tr>
        <tr>
            <td>name</td>
            <td><input type="text" th:value="${user.name}" name="name"></td>
        </tr>
        <tr>
            <td>salary</td>
            <td><input type="text" th:value="${user.salary}" name="salary"></td>
        </tr>
        <tr>
            <td>address</td>
            <td><input type="text" th:value="${user.address}" name="address"></td>

        </tr>
        <tr>
            <td><input type="submit" value="提交"></td>
            <td><input type="reset" value="重置"></td>
        </tr>
    </table>
</form>

</body>
</html>
5.演示部分
首先登录网页localhost:8080/home
点击修改进入修改界面
将id为1的name修改为杜 点击提交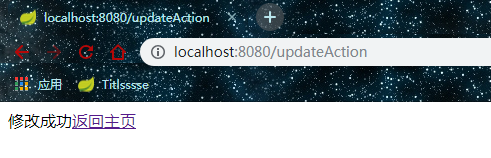
此时可以通过超链接返回主页
查看自己的数据库发现数据库的内容确实已经修改成功
6.剩下的网页部分的润色就很简单了
需要打包带走的可以留下邮箱
版权声明:本文为Teacher_du原创文章,遵循CC 4.0 BY-SA版权协议,转载请附上原文出处链接和本声明。