今天来写一下springboot的接口,也是初学者,有报错的自己调试哈
第一步,创建项目

点击下一步就是了
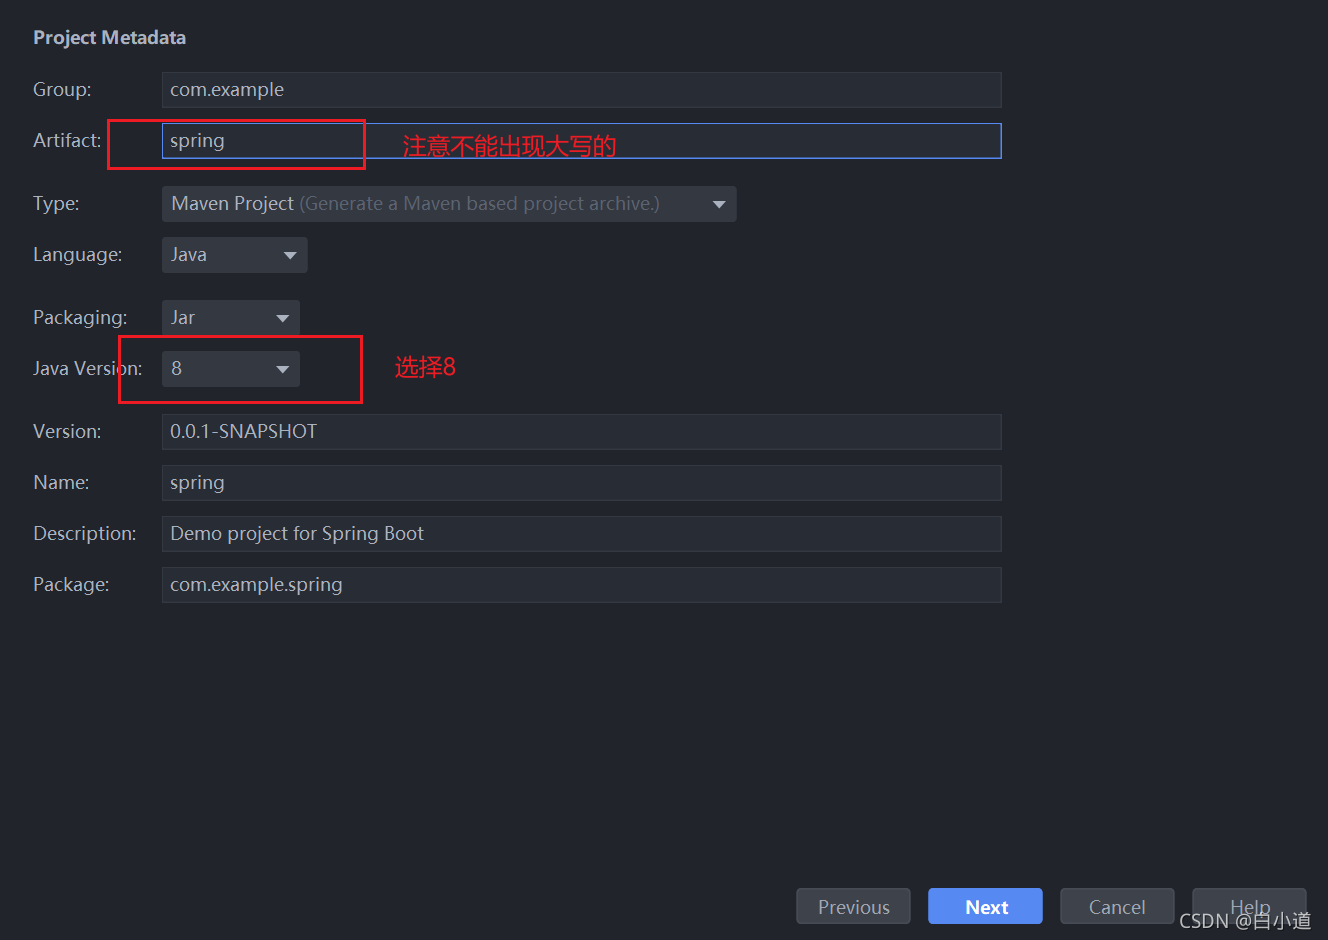
勾选这几项
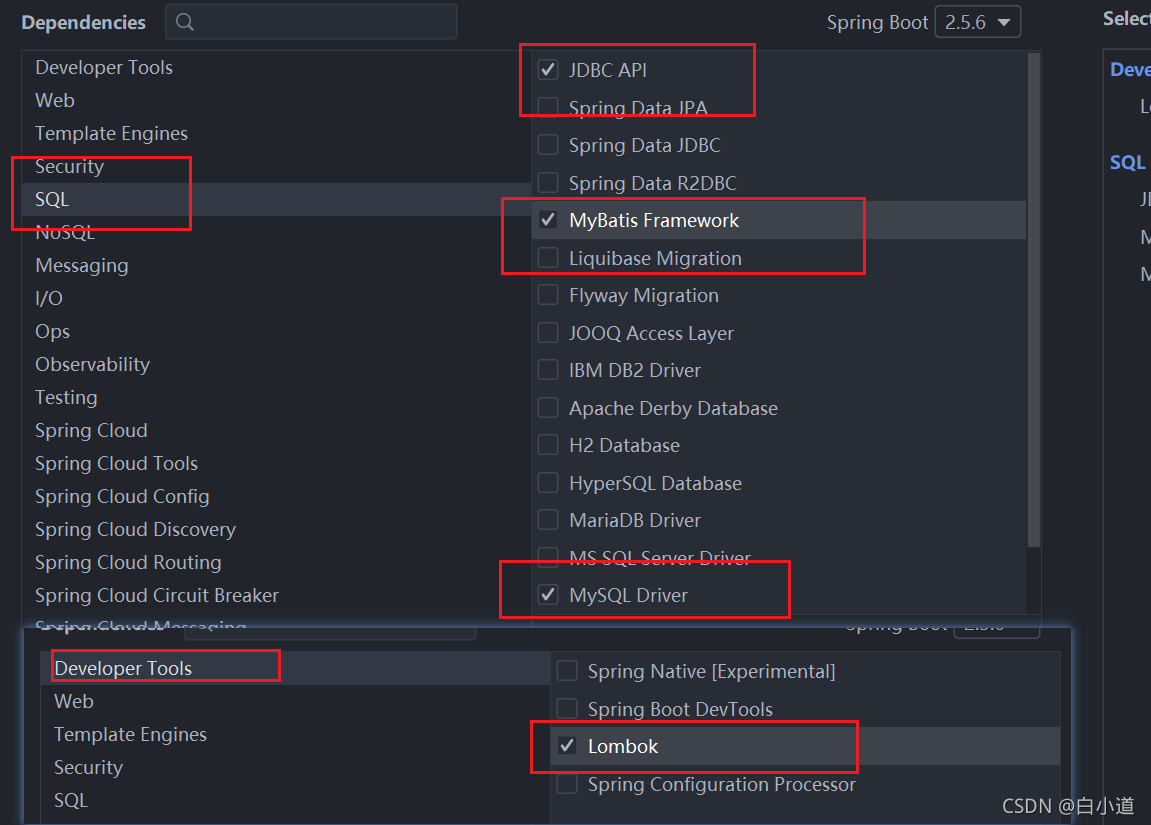
数据库选择mySQL,勾选mybatis,后续用mabatis写sql语句。
好,接下来就是。。。
等待项目的生成。
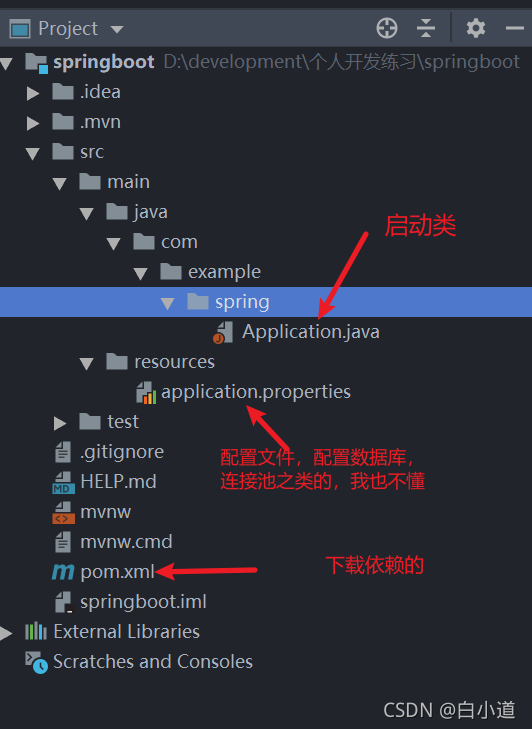
项目生成之后就是这鸟样了。。
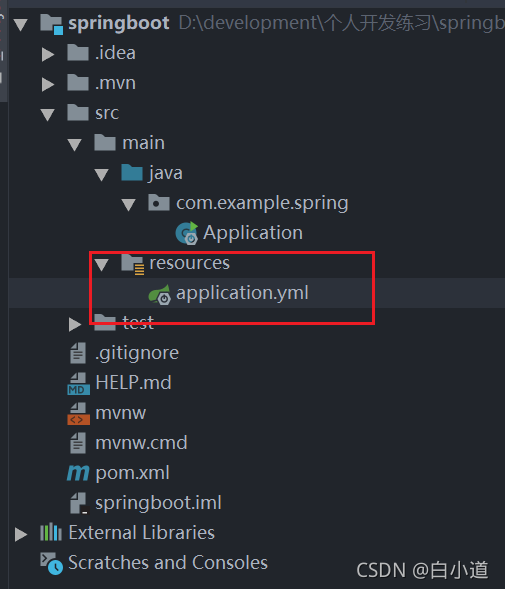
个人喜好用yml的写法,看起来舒服些
接下来我们来创建表
mysql数据库客户端个人建议用下面这玩意,看着挺舒服的

创建了一个名为练习的库,然后往这个库里添加表,添加数据就可以了
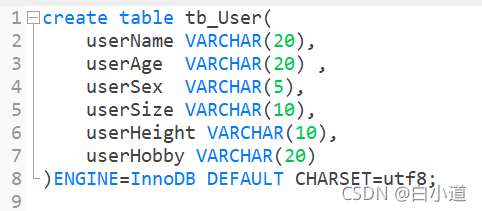
创建一个表,表名自定义好了,字段那些自己看着办吧,
create table tb_User(
userName VARCHAR(20),
userAge VARCHAR(20) ,
userSex VARCHAR(5),
userSize VARCHAR(10),
userHeight VARCHAR(10),
userHobby VARCHAR(20)
)ENGINE=InnoDB DEFAULT CHARSET=utf8;
然后往表里插入一些数据,

像这样子,INSERT INTO tb_user VALUES('李蛋儿','25','男','10cm','165cm','流哈喇子')
表里有了数据之后我们开始我们的接口。
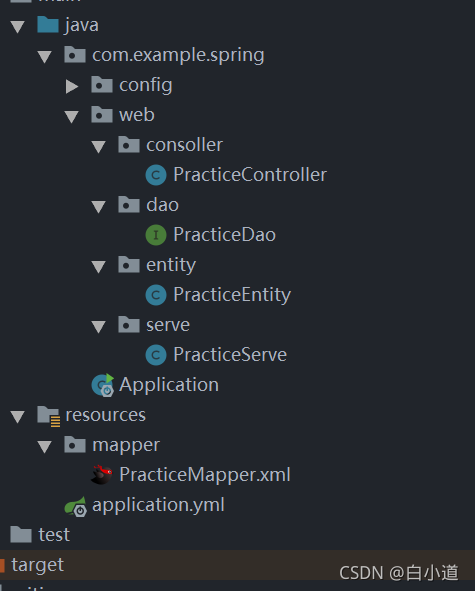
先创建好这些文件,consoller控制层,用来接收参数,返回查询结果用的(个人理解),还有dao层接口,实体类,业务层serve,mapper文件夹下面的.xml文件是写mybatis的。
接下来我们来配置数据库,用来连接mysql,设置端口之类的。
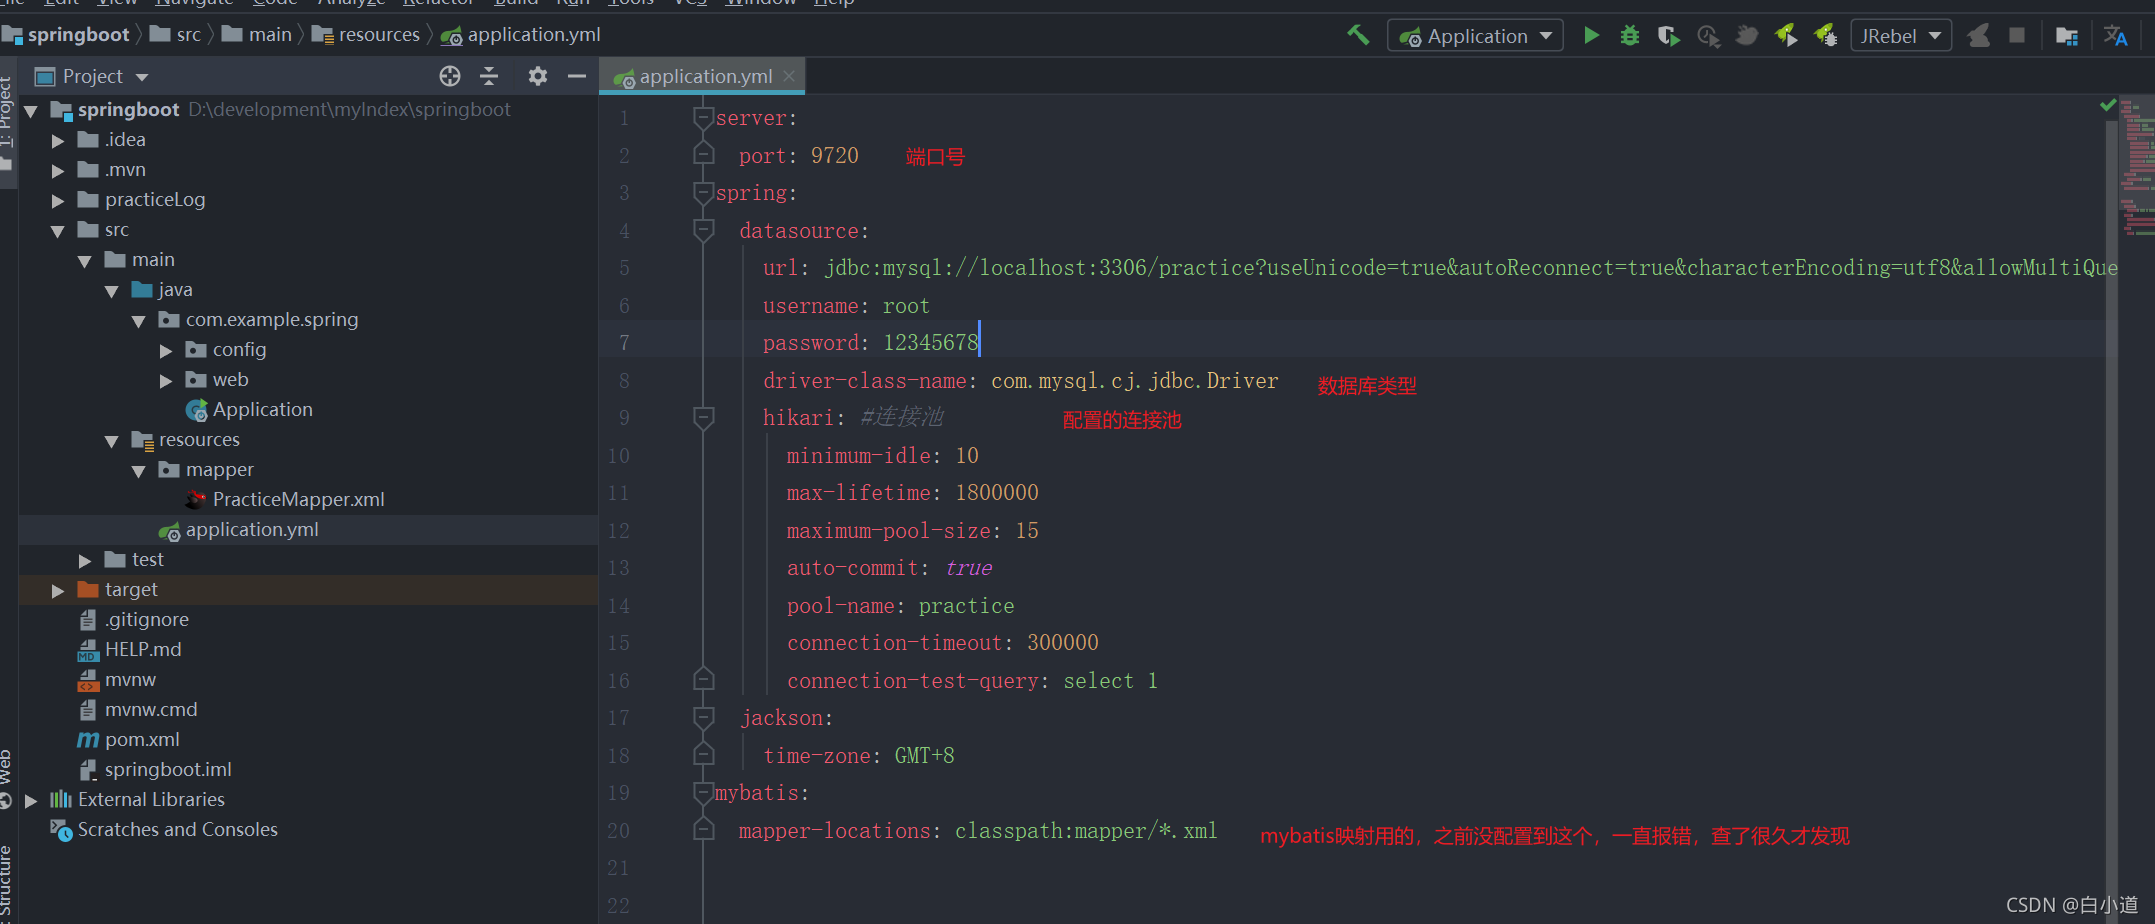
server:
  port: 9720
spring:
  datasource:
    url: jdbc:mysql://localhost:3306/practice?useUnicode=true&autoReconnect=true&characterEncoding=utf8&allowMultiQueries=true&useSSL=false&failOverReadOnly=false
    username: root
    password: 12345678
    driver-class-name: com.mysql.cj.jdbc.Driver
    hikari: #连接池
      minimum-idle: 10
      max-lifetime: 1800000
      maximum-pool-size: 15
      auto-commit: true
      pool-name: practice
      connection-timeout: 300000
      connection-test-query: select 1
  jackson:
    time-zone: GMT+8
mybatis:
  mapper-locations: classpath:mapper/*.xml
好的,我们配置好了数据库和连接池之后就是写接口了。。千万千万要睁大眼睛,一个都不要放过。
我们先从controller写起
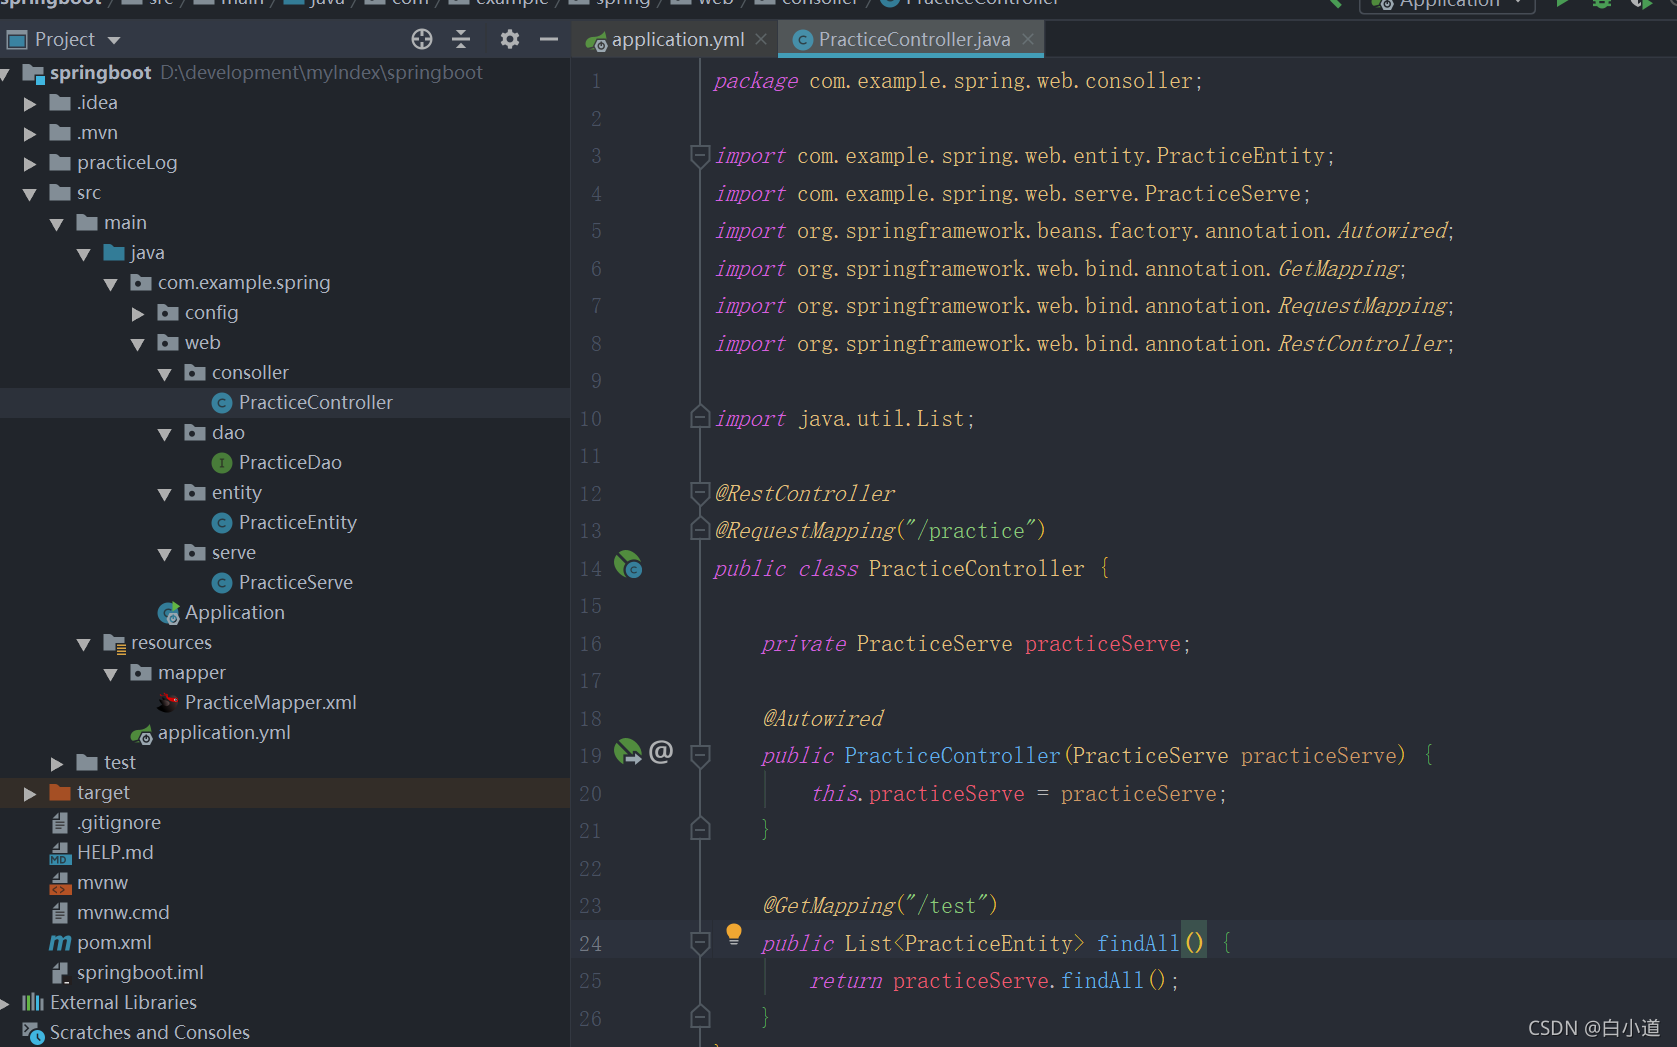
@RestController
@RequestMapping("/practice")
public class PracticeController {

    private PracticeServe practiceServe;

    @Autowired
    public PracticeController(PracticeServe practiceServe) {
        this.practiceServe = practiceServe;
    }

    @GetMapping("/test")
    public List<PracticeEntity> findAll() {
        return practiceServe.findAll();
    }
写完这个之后你会发现
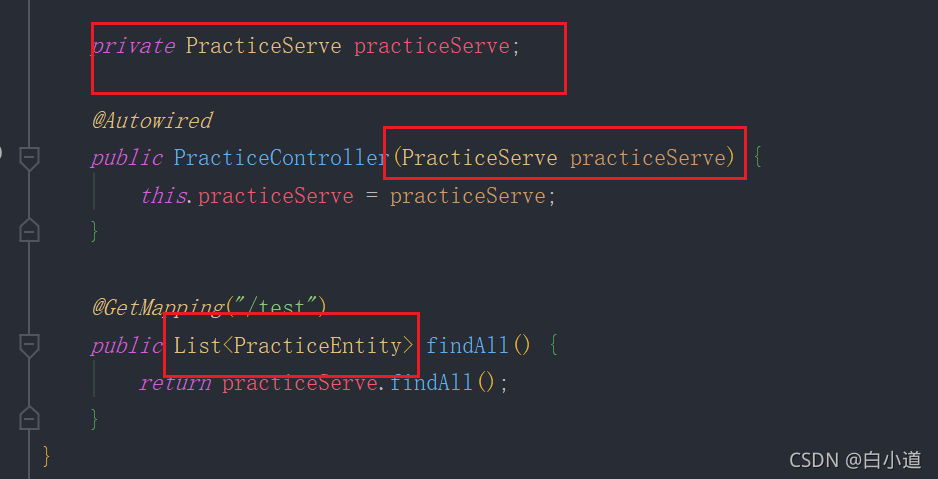
这几个地方报错,为什么呢,因为我们没写完。
好,不要管这个报错,我们接着写。。。
接下来是实体类和接口Dao
 这个是实体类,省去了getter和setter。写上去也不碍事的
@Data
public class PracticeEntity {
    private String userName;

    private String userAge;

    private String userSex;

    private String userSize;

    private String userHeight;

    private String userHobby;
}
记住,这里的类型要和数据库的字段类型是一样。

这是接口dao层,
@Mapper
@Repository
public interface PracticeDao {
    List<PracticeEntity> findData();
}
dao层写好了我们就来写mybatis,一定一定看好了。。

<?xml version="1.0" encoding="UTF-8"?>
<!DOCTYPE mapper PUBLIC "-//mybatis.org//DTD Mapper 3.0//EN" "http://mybatis.org/dtd/mybatis-3-mapper.dtd">
<mapper namespace="com.example.spring.web.dao.PracticeDao">
    <resultMap id="BaseResultMap" type="com.example.spring.web.entity.PracticeEntity">
        <result column="userName" jdbcType="VARCHAR" property="userName"/>
        <result column="userAge" jdbcType="VARCHAR" property="userAge"/>
        <result column="userSex" jdbcType="VARCHAR" property="userSex"/>
        <result column="userSize" jdbcType="VARCHAR" property="userSize"/>
        <result column="userHeight" jdbcType="VARCHAR" property="userHeight"/>
        <result column="userHobby" jdbcType="VARCHAR" property="userHobby"/>
    </resultMap>
    <select id="findData" resultType="com.example.spring.web.entity.PracticeEntity">
       SELECT * from tb_user

    </select>
</mapper>
好了,万事具备了,我们来写业务层了
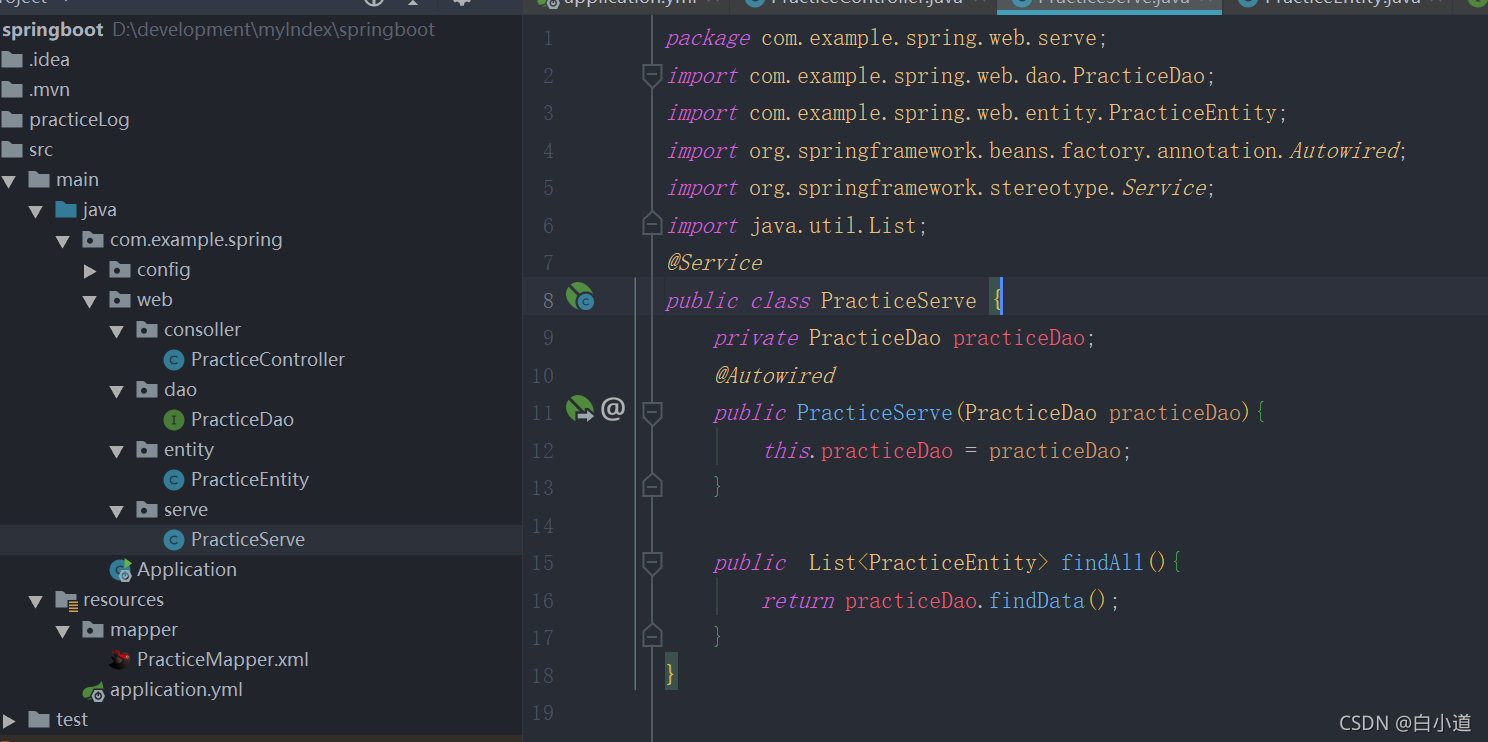
@Service
public class PracticeServe {
    private PracticeDao practiceDao;
    @Autowired
    public PracticeServe(PracticeDao practiceDao){
        this.practiceDao = practiceDao;
    }

    public  List<PracticeEntity> findAll(){
        return practiceDao.findData();
    }
}
findData()这个方法一定是跳到controller层的,什么,怎么跳转?好家伙,按住ctrl建,然后把鼠标指向在这个findData,点它,就可以跳到controller层了。。
好的,接口写完了,你会发现之前报错的controlller层也不报错了。。。
打开Apipost工具测试一下写的接口
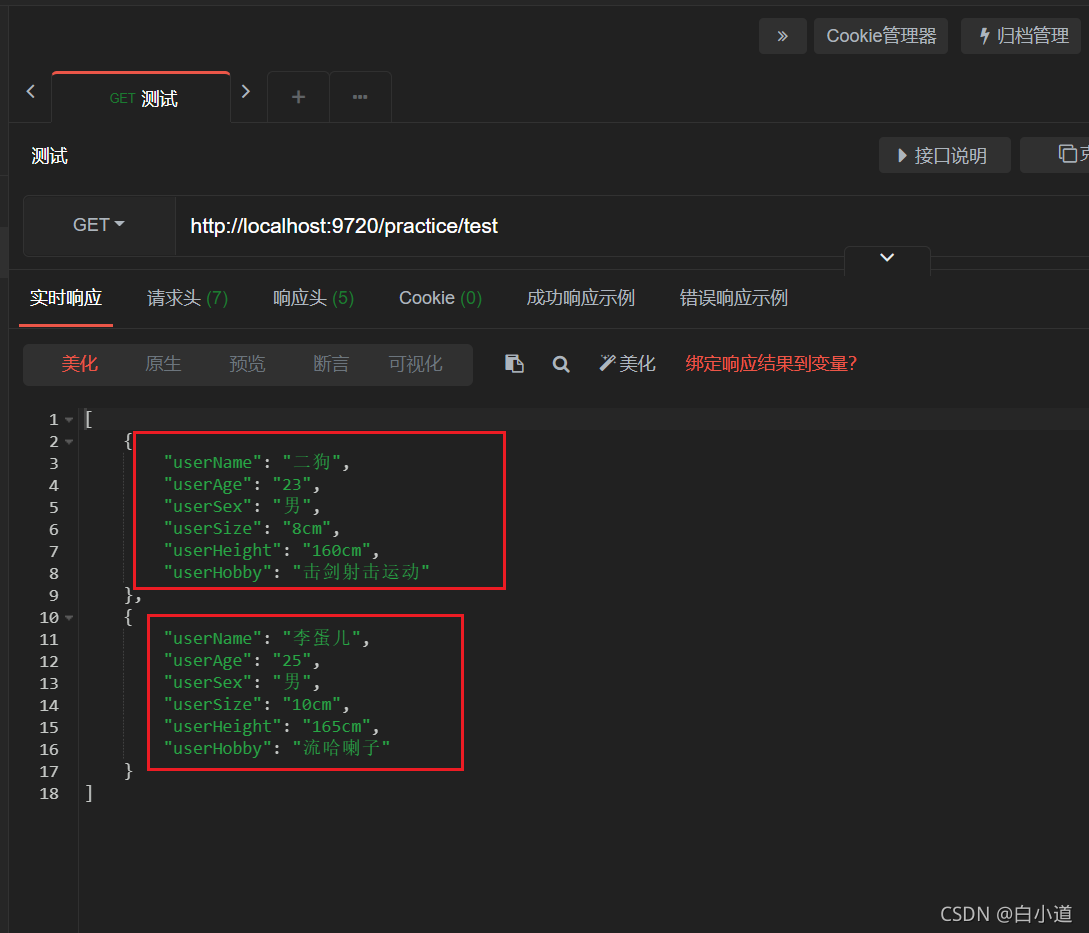
成功得到数据。。。接口完成