Bazel 基础
文章目录
参考
- BILIBILI Bazel 的下载与使用
- Bazel Ubuntu 官方文档安装
- Bazel Git Release
- Bazel-examlpe-cpp- tutorial
- Bazel-example-third_party
- Bazel C++ 项目官方文档
Bazel 安装(Ubuntu)
- 参照参考一种的方式,在Bazel Git Release中下载合适的Bazel版本,然后
- 给权限:
chmod -x bazel_binary_file - 移动到
/usr/local/bin,可以顺便改个名,用链接也是可以的 - 测试是否安装成功:
bazel version 
- 给权限:
Example
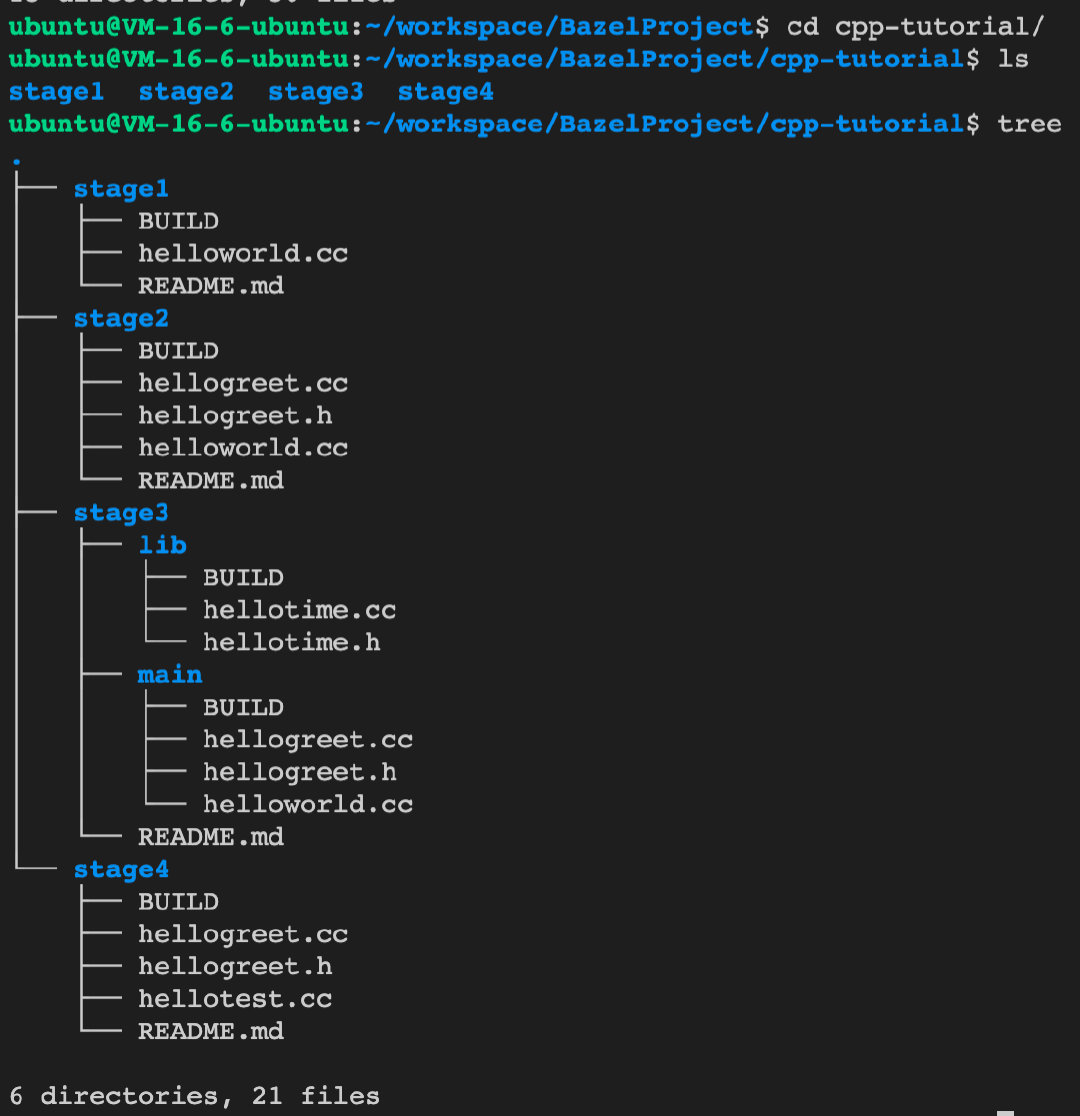
- 这是Bazel-examlpe-cpp- tutorial下的三个example,这里自己搭了一下,不同的是官方将每一个stage都当成一个bazel项目,因此你可能在Bazel C++ 项目官方文档中看到每个stage中都有一个WORKSPACE,而我在尝试的时候是以下图中BazelProject为根目录,每一个stage都是一个组件这样的形式,因此只需要在根目录中添加一个WORKSPACE即可
单文件编译——HelloWorld!
首先stage1演示了单文件的编译
写好helloworld.cc之后,新建BUILD文件,在这里配置文件之间的依赖关系
下面是BUILD中的配置,name指定了名称,srcs是一个数组,指定了源代码的位置
cc_binary(
    name = "helloworld",
    srcs = ["helloworld.cc"],
)
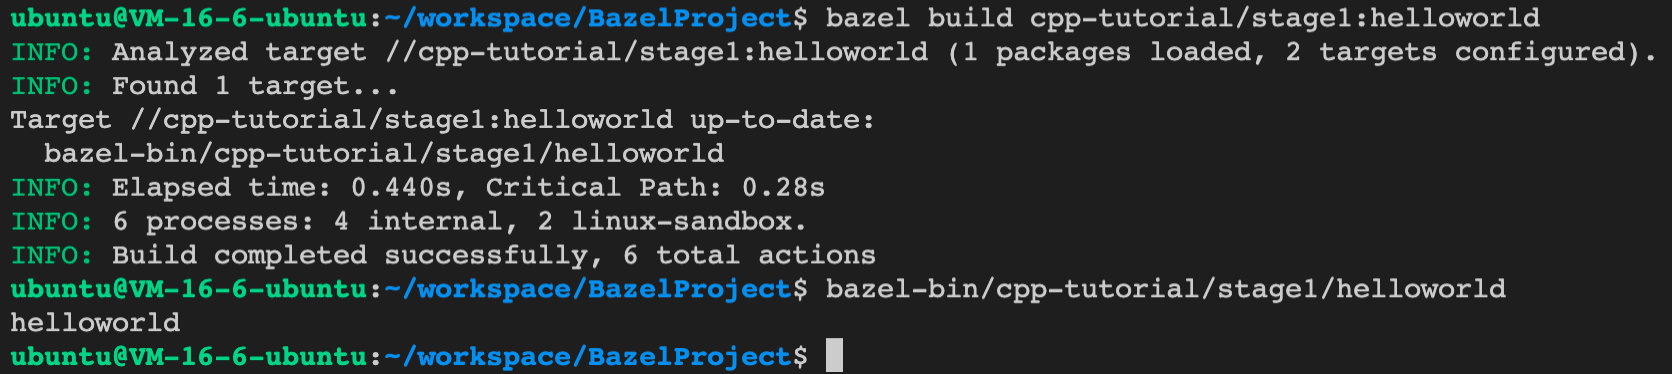
然后运行
bazel build cpp-tutorial/stage1:helloworld,表示编译该路径下name=helloworld的可执行文件(cc_binary),编译成功后运行即可出现helloworld
多文件编译——HelloGreet!
在stage2中我们又实现了另一个组件——get_greet(),返回"Hello " + who,其中who是参数,此时可以看到stage2下有三个愿文件,我们需要去编译它们
而对于多文件的编译成一个可执行文件,我们可以直接写在一个数组里,如下方代码的下半侧,当然最好是分开写,然后在主程序中的deps引用它,如下方代码的上半侧
# 分开来写,可读性好一点
cc_library(
    name = "hellogreet",
    srcs = ["hellogreet.cc"],
    hdrs = ["hellogreet.h"], )

cc_binary(
    name = "helloworld2",
    srcs = [
        "helloworld.cc",
    ],
    deps = [
        ":hellogreet",
    ], )


# 直接写到一个数组里
cc_binary(
    name = "helloworld3",
    srcs = [
        "helloworld.cc","hellogreet.cc","hellogreet.h"
    ],
    deps = [
        ":hellogreet",
    ], )
然后编译运行即可

不同组件之间的依赖——Hellotime!
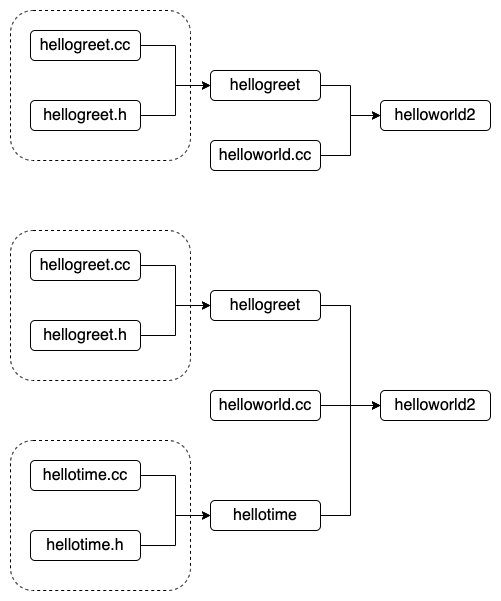
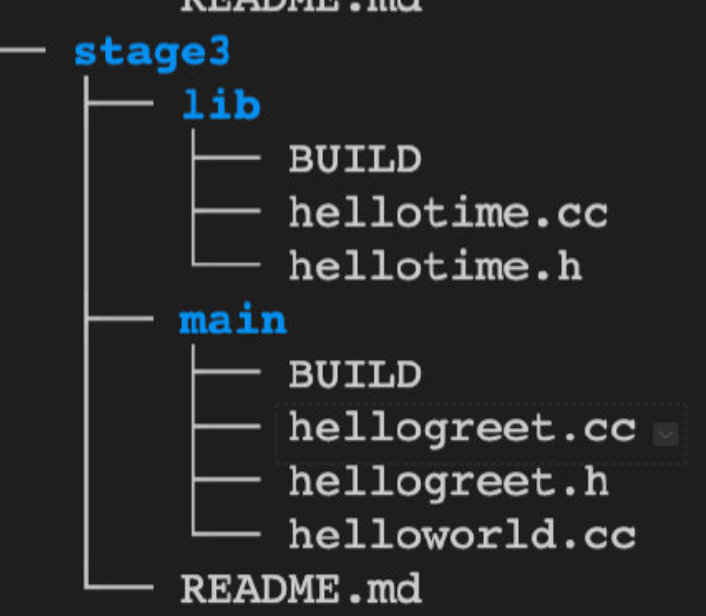
在stage2中会输出当前时间,这个函数是现在helloworld.cc文件中,而在stage3中,会讲这个部分抽取出来实现在不同文件中的组件中。
下面是与stage2的不同之处对比,stage2只是封装了hellogreet组件(同一目录下),而stage3还增加了hellotime组件,不同的是hellotime的实现位于和helloworld不同的路径下,这点在下方tree打印可以看出
于是BUILD文件中的依赖应当指明hellotime的地址:“//cpp-tutorial/stage3/lib:hellotime”
cc_library(
    name = "hellogreet",
    srcs = ["hellogreet.cc"],
    hdrs = ["hellogreet.h"], )

cc_binary(
    name = "helloworld3",
    srcs = [
        "helloworld.cc",
    ],
    deps = [
        ":hellogreet",
        "//cpp-tutorial/stage3/lib:hellotime",
    ], )
然后编译一下就可以运行了

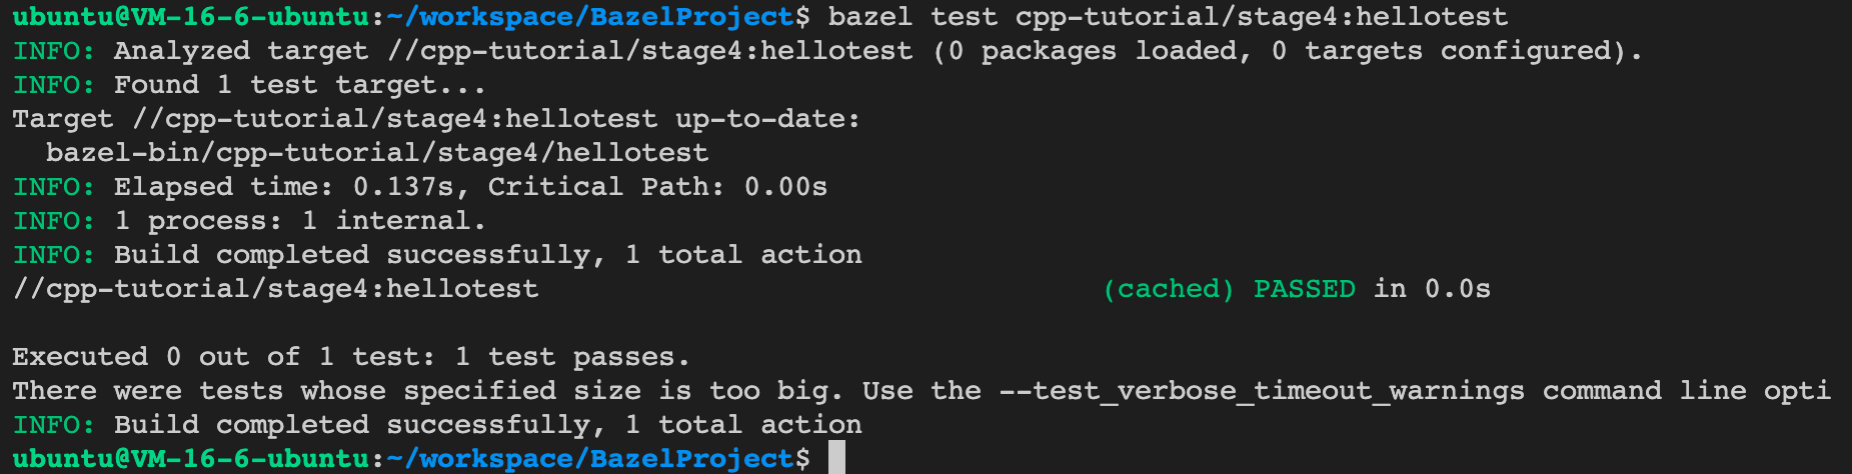
外部依赖——gtest
出了官方的三个example之外,我还试了一下引入外部依赖,参考官方项目,我们将外部依赖(以gtest为例)统一放在third_party文件夹下,然后gtest下有一堆bzl文件,定义了各种依赖加载规则,rule这块尚未看到,暂时先把官方的cp过来,参考Bazel-example-third_party。下图是third_party相关的目录截图:
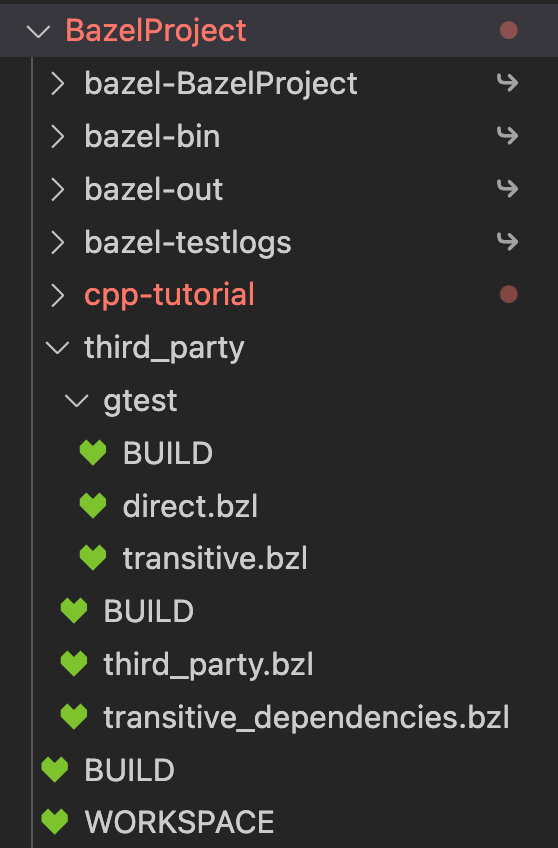
接下来是定义third_party的规则,分别有两个bzl,third_party.bzl中定义了加载第三方包本体的规则,transitive_dependencies.bzl定义了加载这个包第三方依赖的规则,实际上都只是调用方法,具体的加载规则分别写在direct.bzl(本体)和transitive.bzl(依赖)。下面以third_party.bzl为例(transitive_dependencies.bzl同理):
# 首先在third_party.bz中会加载gtest中的direct.bzl包下的load_gtest方法,这个有点类似于python中的import机制
load("//third_party/gtest:direct.bzl", "load_gtest")

def load_third_party_libraries():
    """Load all third party dependencies"""
    load_gtest()


# 然后在load_third_party_libraries方法中调用load_gtest,此时就会调用direct.bzl对应的方法
# direct.bzl中的load_gtest使用maybe来下包
"""
Dependency to gtest (google test), a unit test framework for C++
"""

load("@bazel_tools//tools/build_defs/repo:utils.bzl", "maybe")
load("@bazel_tools//tools/build_defs/repo:http.bzl", "http_archive")

def load_gtest():
    # It is not clear in Bazel what is the best practice for using http_archive.
    # If you call http_archive without any kind of check, you could call it two times
    # with the same name and different parameters and you would not get any warning/error.
    #
    # One option is to check if it is already available in the existing_rules and only
    # call http_archive if it is not present. In the else you could display a message in
    # case that was already present but in reality you would only want a warning/error if was
    # already called with different parameters (different library version for example).
    #
    # Another option is to wrap the http_archive in a maybe call but this will also not display
    # a warning. It behaves like the if check with the advantage that the name has not to be
    # repeated
    maybe(
        http_archive,
        name = "gtest",
        url = "https://github.com/google/googletest/archive/release-1.8.1.zip",
        sha256 = "927827c183d01734cc5cfef85e0ff3f5a92ffe6188e0d18e909c5efebf28a0c7",
        strip_prefix = "googletest-release-1.8.1",
    )
然后BUILD中我是设置了可见属性为全局
定义了这些规则之后要怎么运行?
我们已经在third_party中定义了规则,然后我们需要在bazel编译的时候加载/执行他们。而Bazel编译的时候会先运行WORKSPACE种的环境初始化代码,因此,我们可以在WORKSPACE声明执行third_party下的加载过程:
# 根目录下的WORKSPACE
# 就像之前一样,类似函数调用,语法相同

load("//third_party:third_party.bzl", "load_third_party_libraries")
load_third_party_libraries()

load("//third_party:transitive_dependencies.bzl", "load_transitive_dependencies")
load_transitive_dependencies()
这是我们就可以在BUILD中调用引入gtest了:
load("@rules_cc//cc:defs.bzl", "cc_binary", "cc_library", "cc_test")
package(default_visibility = ["//visibility:public"])


cc_library(
    name = "hellogreet",
    srcs = ["hellogreet.cc"],
    hdrs = ["hellogreet.h"], )

cc_test(
    name = "hellotest",
    srcs = ["hellotest.cc"],
    copts = ["-Iexternal/gtest/include"],
    deps = [
        "@gtest//:gtest_main",
        ":hellogreet",
    ], )
然后我们就可以进行gtest的测试了: