用户登录后,应该让用户跳转到个人中心。而个人中心是在主页当中。主页是由个人中心、推荐、分区、动态这些页面组成,每个页面具有各自的功能。首先我们要完成的是个人中心页面的具体功能。
实现主页导航栏的思维
因为个人中心、推荐、分区、动态这些页面是以导航栏的方式在页面的最上方,所以刚开始我是想把他们放在app.vue页面,但是发现这样会让所有页面都显示导航栏,所以我是创建一个nav组件来把导航栏跳转页面功能都放入其中,在让以上的页面都引入这个组件,这样就让主页完成了导航栏跳转功能。
1.导航栏
创造一个nav.vue组件,然后在创建centre、message、subarea等vue文件来对应个人中心、、推荐(home)、分区、动态页面。
nav.vue代码


2.个人中心的实现
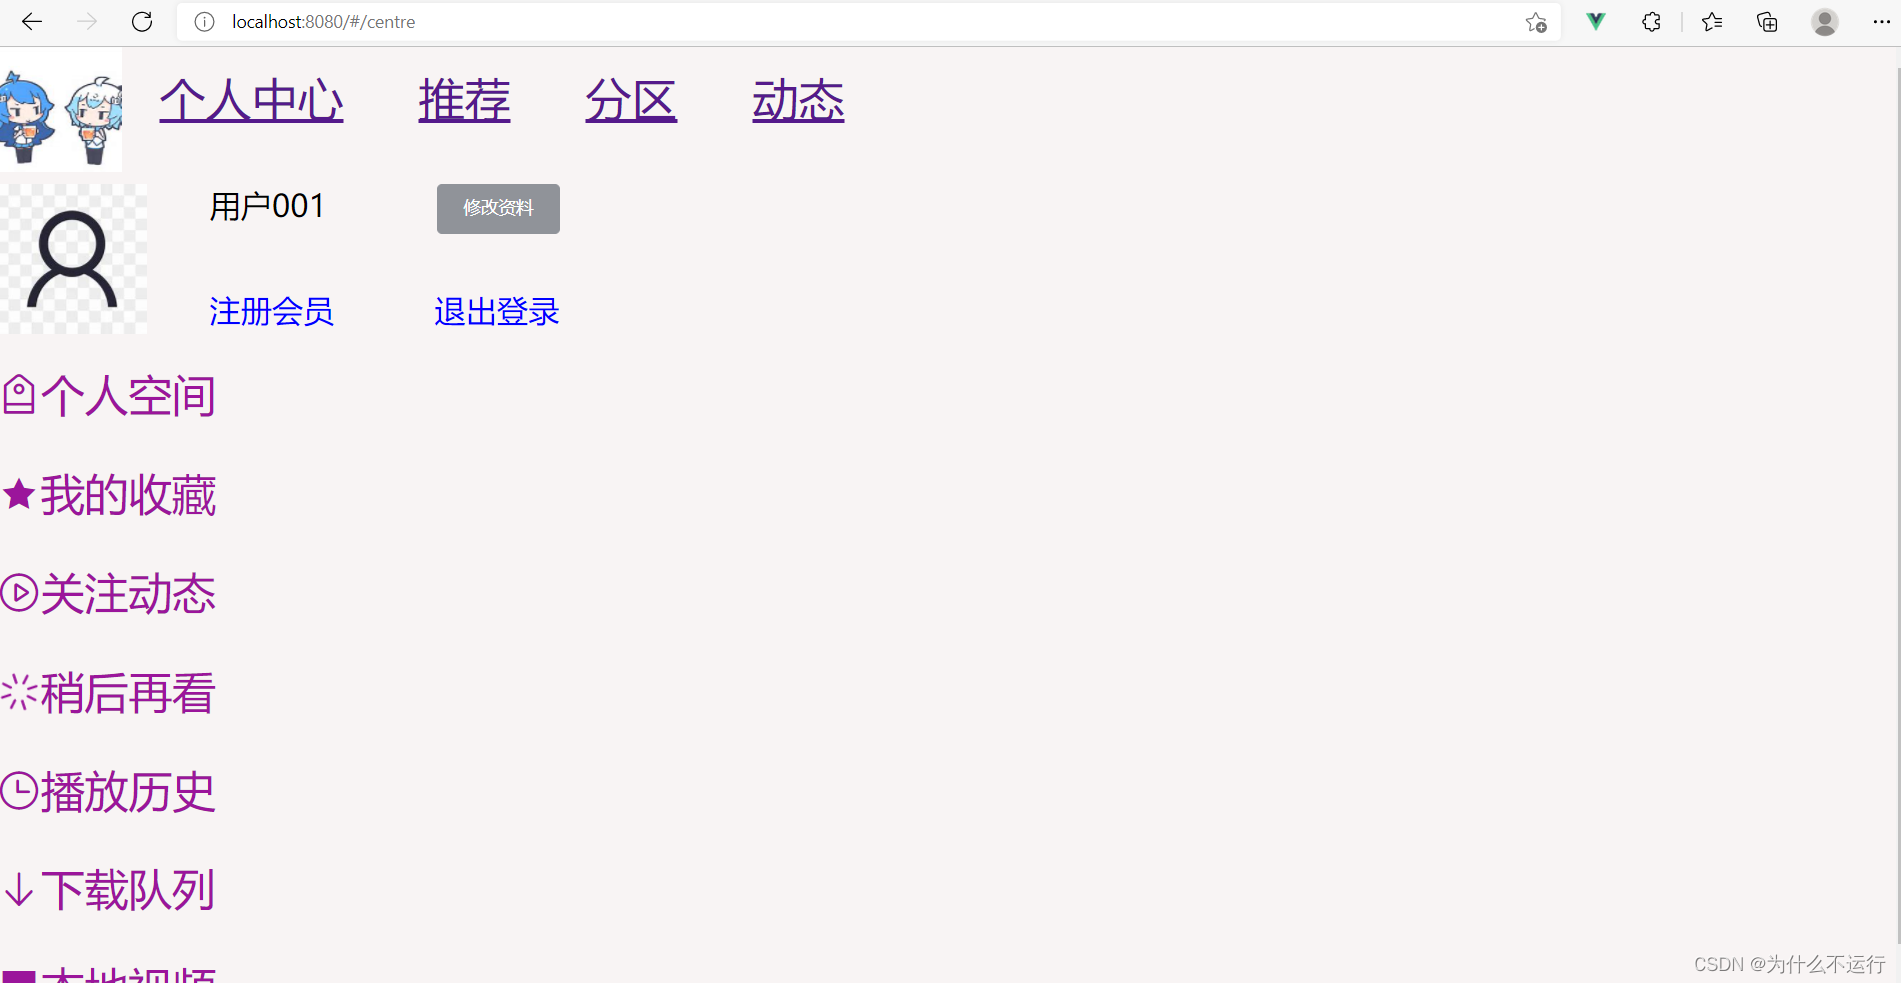
分为两个部分,第一部分为个人信息,具有头像、名字、修改资料、退出登录等内容。
第二部分为个人空间、我的收藏、关注动态、播放历史等功能。
第一部分实现
对于名字和头像的资料修改我们可以使用Vuex来完成。先创建一个页面来完成修改资料功能。其中我们需要使用到Element.ui里的Input 输入框、Form 表单和Upload 上传组件。
1.Vuex的配置 store下的index.js文件
import Vue from 'vue'
import Vuex from 'vuex'

Vue.use(Vuex)

export default new Vuex.Store({
  state: {
    //当前的状态
    name:'用户001',
    img:'https://tse3-mm.cn.bing.net/th/id/OIP-C.z_2bhbWhfLjM1Mpj8FzvdgAAAA?w=173&h=173&c=7&o=5&dpr=1.25&pid=1.7',
    item:{
      name:'',
      picture:'',
      video:'',
    },
  },
  mutations: {
    //声明同步的方法
    ctrlS(state,newData){
      state.name = newData[0];
      state.img = newData[1];
    },
  },
  actions: {
  },
  modules: {
  }
})
修改资料的实现
大部分内容是对Element.ui组件内容进行修改,关键性内容是判断修改的名字或者头像是否为空来决定是否提交给Vuex。
判断修改信息逻辑:1.判断名字和头像是否为空 2.判断名字和头像是否不为空 3.判断名字是否为空 4.判断头像是否为空。
2.edit.vue 修改资料页面
<template>
  <!-- 编辑资料 -->
  <div class="md">
    <p style="font-size: 180%">个人资料</p>
    <el-form
      :model="ruleForm"
      status-icon
      :rules="rules"
      ref="ruleForm"
      label-width="80px"
      class="demo-ruleForm"
    >
      <!-- 用户名 -->
      <el-form-item label="用户名" prop="user">
        <el-input
          type="text"
          class="input"
          v-model="ruleForm.user"
          autocomplete="off"
          placeholder="请输入用户名"
          @input="handleInput"
        >
        </el-input>
      </el-form-item>
      <!-- 填写个人主页 -->
      <el-form-item label="个人主页" prop="grzy">
        <el-input
          type="text"
          class="input"
          v-model="ruleForm.grzy"
          autocomplete="off"
          placeholder="填写你的个人主页"
        ></el-input>
      </el-form-item>
      <!-- 填写个人介绍 -->
      <el-form-item label="个人介绍" prop="grjs">
        <el-input
          :rows="6"
          type="textarea"
          v-model="ruleForm.grjs"
          autocomplete="off"
          placeholder="填写你的个人介绍"
          class="input"
        ></el-input>
      </el-form-item>
    </el-form>
    <!-- 上传头像 -->
    <div class="img">
      <el-upload
        class="avatar-uploader"
        action="https://jsonplaceholder.typicode.com/posts/"
        :show-file-list="false"
        :on-success="handleAvatarSuccess"
        :before-upload="beforeAvatarUpload"
      >
        <img v-if="imageUrl" :src="imageUrl" class="avatar" />
        <i v-else class="el-icon-plus avatar-uploader-icon"></i>
      </el-upload>
      <p style="color: darkgrey; text-align: center">点击修改头像</p>
      <p style="color: darkgrey; text-align: center">
        上传头像图片只能是 JPG 格式!
      </p>
      <p style="color: darkgrey; text-align: center">
        上传头像图片大小不能超过 2MB!
      </p>
    </div>
    <el-button type="primary" class="save" @click="ctrlS">保存修改</el-button>
    <el-button type="primary" class="rq" @click="handReturn">返回</el-button>
    <i v-show="active" class="el-icon-circle-close" @click="handrem"></i>
  </div>
</template>

<script>
import { mapState } from "vuex";
export default {
  data() {
    return {
      active: false,
      username: "",
      imageUrl: "",
      // 个人信息初始数据
      ruleForm: {
        user: "",
        grzy: "",
        grjs: "",
      },
      // 判断用户名格式是否正确
      rules: {
        user: [
          { required: true, message: "请输入用户名", trigger: "blur" },
          {
            min: 3,
            max: 10,
            message: "长度在3到10个字符之间",
            trigger: "blur",
          },
        ],
      },
    };
  },
  computed: {
    ...mapState(["name", "img"]),
  },
  methods: {
    // 获取用户名的值
    handleInput() {
      this.username = this.ruleForm.user;
      console.log(this.username);
      // this.$store.commit('handleInput',username)
    },
    // 获取头像地址
    handleAvatarSuccess(res, file) {
      this.active = true;
      this.imageUrl = URL.createObjectURL(file.raw);
    },
    // 判断上传头像文件的规则
    beforeAvatarUpload(file) {
      const isJPG = file.type === "image/jpeg";
      const isLt2M = file.size / 1024 / 1024 < 2;

      if (!isJPG) {
        this.$message.error("上传头像图片只能是 JPG 格式!");
      }
      if (!isLt2M) {
        this.$message.error("上传头像图片大小不能超过 2MB!");
      }
      return isJPG && isLt2M;
    },
    // 删除头像文件
    handrem() {
      this.imageUrl = "";
      this.active = !this.active;
    },
    // 返回个人主页
    handReturn() {
      this.$router.push("centre");
    },
    ctrlS() {
      // 点击保存后判断用户名和头像是否有值才把数据交给vuex
      // 判断名字和头像是否为空
      if (this.username === "" && this.imageUrl === "") {
        alert("您未做任何修改");
        this.$router.push("centre");
        // 判断名字和头像是否不为空
      } else if (this.username != "" && this.imageUrl != "") {
        this.$store.commit("ctrlS", [this.username, this.imageUrl]);
        this.$router.push("centre");
        // 判断名字是否为空
      } else if (this.username === "" && this.imageUrl != "") {
        this.$store.commit("ctrlS", [this.name, this.imageUrl]);
        this.$router.push("centre");
        // 判断头像是否为空
      } else if (this.username != "" && this.imageUrl === "") {
        this.$store.commit("ctrlS", [this.username, this.img]);
        this.$router.push("centre");
      }
    },
  },
};
3.centre.vue 个人中心的具体实现
因为第二部分的功能必须先完成其他的页面功能,所以留在最后实现。
<template>
    <div>
        <!-- 个人中心 -->
        <NavBar/>
        <div class="user-edit">
            <img :src="img" alt="" class="head">
            <div class="buju">
           <span class="name" style="color: black;">{{name}}</span>
           <el-button class="compile" @click="$router.push('/edit')" type="info">修改资料</el-button>
             <span class="member" @click="huiyuan">注册会员</span>
            <span class="quit"  @click="$router.push('/login')">退出登录</span>
            </div>
        </div>
        <div class="list">
            <span @click="$router.push('/empty')"><i class="el-icon-discount"></i>个人空间</span>
            <span @click="$router.push('/collect')"><i class="el-icon-star-on"></i>我的收藏</span>
            <span @click="$router.push('/message')"><i class="el-icon-video-play"></i>关注动态</span>
            <span @click="$router.push('/empty')"><i class="el-icon-loading"></i>稍后再看</span>
            <span @click="$router.push('/history')"><i class="el-icon-time"></i>播放历史</span>
            <span @click="$router.push('/empty')"><i class="el-icon-bottom"></i>下载队列</span>
            <span @click="$router.push('/empty')"><i class="el-icon-s-platform"></i>本地视频</span>
        </div>
    </div>
</template>

<script>
import {mapState} from 'vuex';
import NavBar from '@/components/nav.vue';
    export default {
        components: {
            NavBar,
        },
        methods: {
            huiyuan() {
                alert('目前还没开放这个功能哦')
            }
        },
         computed: {
         ...mapState(['name','img'])
      },
    }
</script>
个人中心页面完成
版权声明:本文为z2428478096原创文章,遵循CC 4.0 BY-SA版权协议,转载请附上原文出处链接和本声明。