一、编写启动器
1,在IDEA中新建一个空项目 spring-boot-starter-study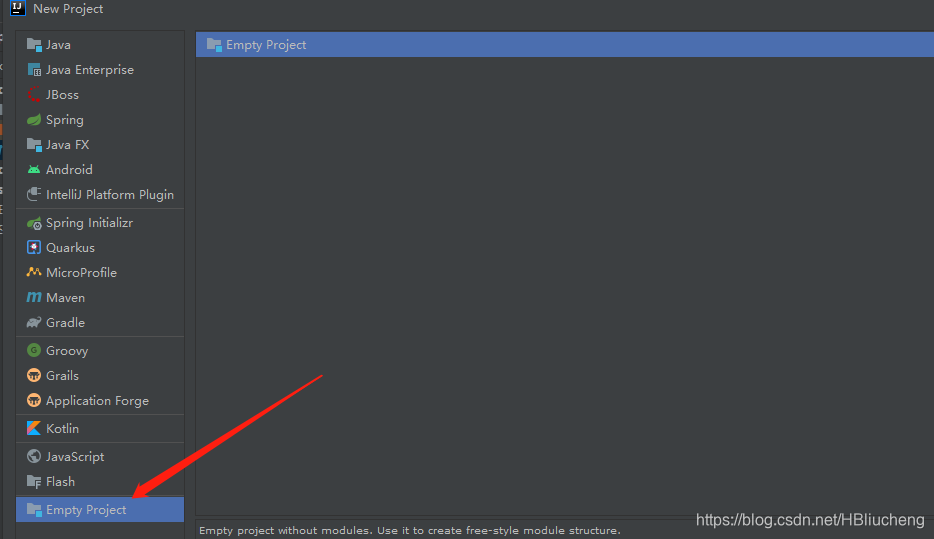
2、新建一个普通Maven模块:cheng-spring-boot-starter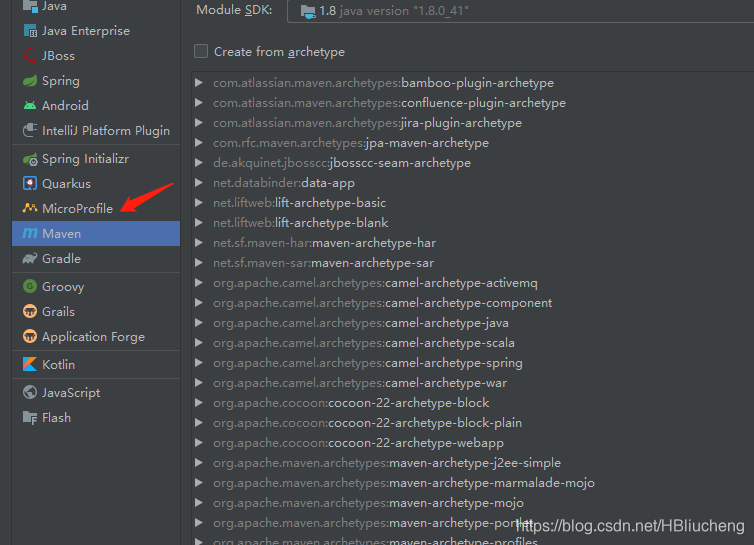
3,新建一个Springboot模块:cheng-spring-boot-starter-autoconfigure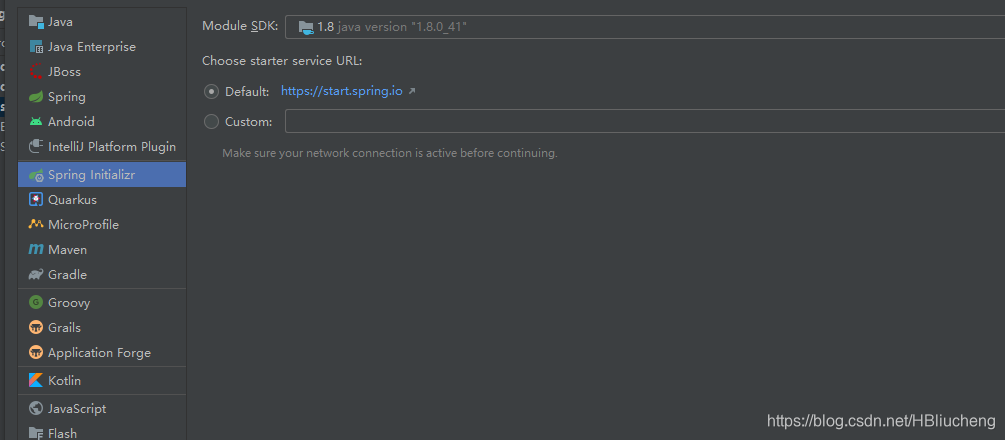
4 、在我们的 starter 中 导入 autoconfigure 的依赖!
starter中pom文件如下
<?xml version="1.0" encoding="UTF-8"?>
<project xmlns="http://maven.apache.org/POM/4.0.0"
         xmlns:xsi="http://www.w3.org/2001/XMLSchema-instance"
         xsi:schemaLocation="http://maven.apache.org/POM/4.0.0 http://maven.apache.org/xsd/maven-4.0.0.xsd">
    <modelVersion>4.0.0</modelVersion>

    <groupId>org.example</groupId>
    <artifactId>cheng-spring-boot-starter</artifactId>
    <version>1.0-SNAPSHOT</version>
    <dependencies>
        <dependency>
            <groupId>com.study</groupId>
            <artifactId>cheng-spring-boot-starter-autoconfigure</artifactId>
            <version>0.0.1-SNAPSHOT</version>
        </dependency>
    </dependencies>

</project>
5、autoconfigure 的Pom中只留下一个 starter和一个test,这是所有的启动器基本配置!
<?xml version="1.0" encoding="UTF-8"?>
<project xmlns="http://maven.apache.org/POM/4.0.0" xmlns:xsi="http://www.w3.org/2001/XMLSchema-instance"
	xsi:schemaLocation="http://maven.apache.org/POM/4.0.0 https://maven.apache.org/xsd/maven-4.0.0.xsd">
	<modelVersion>4.0.0</modelVersion>
	<parent>
		<groupId>org.springframework.boot</groupId>
		<artifactId>spring-boot-starter-parent</artifactId>
		<version>2.4.4</version>
		<relativePath/> <!-- lookup parent from repository -->
	</parent>
	<groupId>com.study</groupId>
	<artifactId>cheng-spring-boot-starter-autoconfigure</artifactId>
	<version>0.0.1-SNAPSHOT</version>
	<name>cheng-spring-boot-starter-autoconfigure</name>
	<description>Demo project for Spring Boot</description>
	<properties>
		<java.version>1.8</java.version>
		<!-- 指定maven.compiler.plugin 配置版本,解决编译问题 -->
		<maven.compiler.source>1.8</maven.compiler.source>
		<maven.compiler.target>1.8</maven.compiler.target>
	</properties>
	<dependencies>
		<dependency>
			<groupId>org.springframework.boot</groupId>
			<artifactId>spring-boot-starter</artifactId>
		</dependency>
		<dependency>
			<groupId>org.springframework.boot</groupId>
			<artifactId>spring-boot-starter-test</artifactId>
			<scope>test</scope>
		</dependency>
	</dependencies>

</project>
6、我们编写一个自己的服务
package com.study.service;

import com.study.properties.HelloProperties;

/**
 * @data 2021/3/19 10:01
 */
public class HelloService {
    HelloProperties helloProperties;

    public HelloProperties getHelloProperties() {
        return helloProperties;
    }

    public void setHelloProperties(HelloProperties helloProperties) {
        this.helloProperties = helloProperties;
    }
    public String sayHello(String name){
        return helloProperties.getPrefix()+name+ helloProperties.getSuffix();
    }
}
7、编写HelloProperties 配置类
package com.study.properties;

import org.springframework.boot.context.properties.ConfigurationProperties;

/**
 * 读取配置
 * @author LiuCheng
 * @data 2021/3/19 10:02
 */
@ConfigurationProperties(prefix = "cheng.hello")
public class HelloProperties {
    private String prefix;
    private String suffix;

    public String getPrefix() {
        return prefix;
    }

    public void setPrefix(String prefix) {
        this.prefix = prefix;
    }

    public String getSuffix() {
        return suffix;
    }

    public void setSuffix(String suffix) {
        this.suffix = suffix;
    }
}
8、编写我们的自动配置类并注入bean,测试!
package com.study.configuration;

import com.study.properties.HelloProperties;
import com.study.service.HelloService;
import org.springframework.beans.factory.annotation.Autowired;
import org.springframework.boot.autoconfigure.condition.ConditionalOnWebApplication;
import org.springframework.boot.context.properties.EnableConfigurationProperties;
import org.springframework.context.annotation.Bean;
import org.springframework.context.annotation.Configuration;

/**
 * @author LiuCheng
 * @data 2021/3/19 10:14
 */
@Configuration
@ConditionalOnWebApplication
@EnableConfigurationProperties(HelloProperties.class)
public class HelloServiceAutoConfiguration {
    @Autowired
    HelloProperties helloProperties;
    @Bean
    public HelloService helloService(){
        HelloService helloService = new HelloService();
        helloService.setHelloProperties(helloProperties);
        return  helloService;
    }
}
9、在resources编写一个自己的 META-INF\spring.factories
org.springframework.boot.autoconfigure.EnableAutoConfiguration=\
com.study.configuration.HelloServiceAutoConfiguration
10、编写完成后,可以安装到maven仓库中!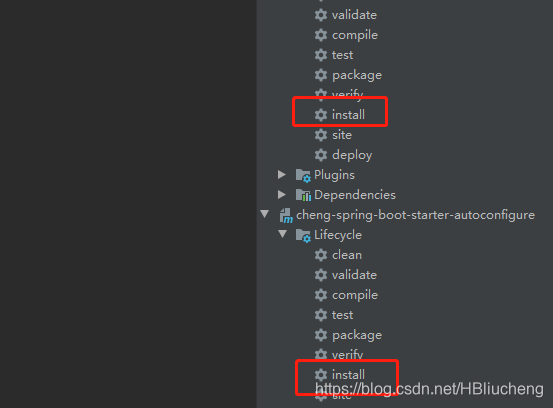
如果无法install尝试在pom加入下面依赖
<build>
		<plugins>
			<plugin>
				<groupId>org.springframework.boot</groupId>
				<artifactId>spring-boot-maven-plugin</artifactId>
			</plugin>
			<plugin>
				<groupId>org.apache.maven.plugins</groupId>
				<artifactId>maven-compiler-plugin</artifactId>
				<version>3.8.1</version>
				<configuration>
					<source>1.8</source>
					<target>1.8</target>
				</configuration>
			</plugin>
			<plugin>
				<groupId>org.apache.maven.plugins</groupId>
				<artifactId>maven-surefire-plugin</artifactId>
				<version>2.22.1</version>
				<configuration>
					<skipTests>true</skipTests>
				</configuration>
			</plugin>

		</plugins>
	</build>
二、测试我们自己写的启动器
1、新建一个SpringBoot 项目
2、导入我们自己写的启动器
<?xml version="1.0" encoding="UTF-8"?>
<project xmlns="http://maven.apache.org/POM/4.0.0" xmlns:xsi="http://www.w3.org/2001/XMLSchema-instance"
xsi:schemaLocation="http://maven.apache.org/POM/4.0.0 https://maven.apache.org/xsd/maven-4.0.0.xsd">
<modelVersion>4.0.0</modelVersion>
<!-- <parent>-->
<!-- <groupId>org.springframework.boot</groupId>-->
<!-- <artifactId>spring-boot-starter-parent</artifactId>-->
<!-- <version>2.4.4</version>-->
<!-- <relativePath/> <!– lookup parent from repository –>-->
<!-- </parent>-->
<groupId>com.example</groupId>
<artifactId>spring-boot-custom-starter-test</artifactId>
<version>0.0.1-SNAPSHOT</version>
<name>spring-boot-custom-starter-test</name>
<description> for spring-boot-custom-starter-test</description>
<properties>
<java.version>1.8</java.version>
</properties>
<dependencies>
<dependency>
<groupId>org.example</groupId>
<artifactId>cheng-spring-boot-starter</artifactId>
<version>1.0-SNAPSHOT</version>
</dependency>
<dependency>
<groupId>org.springframework.boot</groupId>
<artifactId>spring-boot-starter-web</artifactId>
<version>2.4.3</version>
</dependency>
<!-- <dependency>-->
<!-- <groupId>org.springframework.boot</groupId>-->
<!-- <artifactId>spring-boot-starter-test</artifactId>-->
<!-- <scope>test</scope>-->
<!-- </dependency>-->
</dependencies>
</project>
3,编写一个 HelloController 进行测试我们自己的写的接口!
package com.controller;

import com.study.service.HelloService;
import org.springframework.beans.factory.annotation.Autowired;
import org.springframework.stereotype.Controller;
import org.springframework.web.bind.annotation.RequestMapping;
import org.springframework.web.bind.annotation.RestController;

/**
 * @author LiuCheng
 * @data 2021/3/19 13:48
 */
@RestController
public class HelloController {
    @Autowired
    HelloService helloService;
    @RequestMapping("/hello")
    public String hello(){
        return helloService.sayHello("zxc");
    }

}
4、编写配置文件 application.properties
cheng:
  hello:
    prefix: ppp
    suffix: qqq
5,启动项目进行测试,结果成功 !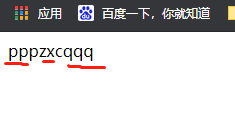
代码下载地址 https://download.csdn.net/download/HBliucheng/15931014
如有疑问,请留言相互交流
版权声明:本文为HBliucheng原创文章,遵循CC 4.0 BY-SA版权协议,转载请附上原文出处链接和本声明。