Linux多线程(下)
1.线程池
什么是线程池?
一种线程使用模式。线程过多会带来调度开销,进而影响缓存局部性和整体性能。而线程池维护着多个线
程,等待着监督管理者分配可并发执行的任务。这避免了在处理短时间任务时创建与销毁线程的代价。线程池不仅能够保证内核的充分利用,还能防止过分调度。可用线程数量应该取决于可用的并发处理器、处理器内核、内存、网络
sockets等的数量。
1.应用场景
1需要大量的线程来完成任务,且完成任务的时间比较短。 WEB服务器完成网页请求这样的任务,使用线程池技术是非常合适的。因为单个任务小,而任务数量巨大,你可以想象一个热门网站的点击次数。 但对于长时间的任务,比如一个Telnet连接请求,线程池的优点就不明显了。因为Telnet会话时间比线程的创建时间大多了。
2对性能要求苛刻的应用,比如要求服务器迅速响应客户请求。
3接受突发性的大量请求,但不至于使服务器因此产生大量线程的应用。突发性大量客户请求,在没有线程池情况下,将产生大量线程,虽然理论上大部分操作系统线程数目最大值不是问题,短时间内产生大量线程可能使内存到达极限,出现错误.
2.原理
1.线程安全的队列:
线程安全:互斥+同步
队列:先进先出
元素:待处理的数据、处理数据的方法
2.一堆的线程
3.代码实现
线程池要完成的事情:
创建固定数量线程池,循环从任务队列中获取任务对象,
获取到任务对象后,执行任务对象中的任务接口
代码实现:
#include <stdio.h>
#include <unistd.h>
#include <pthread.h>
#include <queue>
using namespace std;
//数据结构体
typedef void (*Handler)(int data);
//创建队列处理数据
class QueueData{
public:
QueueData(){
}
QueueData(int data, Handler handler){
data_ = data;
handler_ = handler;
}
void run(){
handler_(data_);
}
private:
int data_;
Handler handler_;
};
//线程池
class ThreadPool{
public:
ThreadPool(int capa, int thread_count){
capacity_ = capa;
pthread_mutex_init(&lock_, NULL);
pthread_cond_init(&cons_cond_, NULL);
thread_count_ = thread_count;
pthread_cond_init(&prod_cond_, NULL);
flag_exit_ = 0;
}
~ThreadPool(){
pthread_mutex_destroy(&lock_);
pthread_cond_destroy(&cons_cond_);
pthread_cond_destroy(&prod_cond_);
}
int OnInit(){
int cnt = 0;
for(int i = 0; i < thread_count_; i++){
pthread_t tid;
int ret = pthread_create(&tid, NULL, ThreadPollStart, (void*)this);
if(ret < 0){
cnt++;
}
}
return thread_count_ -= cnt;
}
void Push(QueueData qd){
pthread_mutex_lock(&lock_);
while(que_.size() >= capacity_){
if(flag_exit_){
pthread_mutex_unlock(&lock_);
return;
}
pthread_cond_wait(&prod_cond_, &lock_);
}
que_.push(qd);
pthread_mutex_unlock(&lock_);
pthread_cond_signal(&cons_cond_);
}
void Pop(QueueData* qd){
*qd = que_.front();
que_.pop();
}
static void* ThreadPollStart(void* arg){
pthread_detach(pthread_self());
ThreadPool* tp = (ThreadPool*)arg;
while(1){
//pos1 - no
pthread_mutex_lock(&tp->lock_);
while(tp->que_.empty()){
//pos2 - yes
if(tp->flag_exit_){
tp->thread_count_--;
pthread_mutex_unlock(&tp->lock_);
pthread_exit(NULL);
}
pthread_cond_wait(&tp->cons_cond_, &tp->lock_);
}
QueueData qd;
tp->Pop(&qd);
pthread_mutex_unlock(&tp->lock_);
pthread_cond_signal(&tp->prod_cond_);
qd.run();
}
return NULL;
}
void ThreadPoolExit(){
flag_exit_ = 1;
while(thread_count_ > 0){
pthread_cond_signal(&cons_cond_);
}
}
private:
//线程安全队列
queue<QueueData> que_;
size_t capacity_;
pthread_mutex_t lock_;
pthread_cond_t cons_cond_;
pthread_cond_t prod_cond_;
int thread_count_;
int flag_exit_;
};
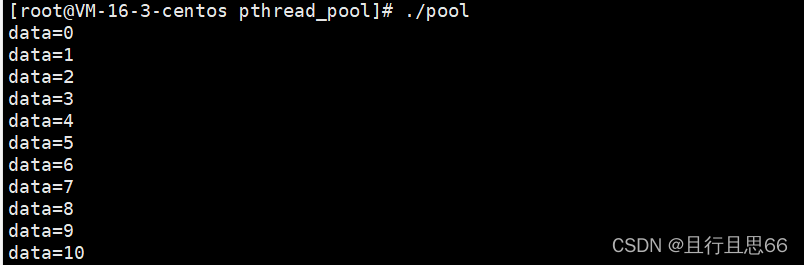
void DealData(int data){
printf("data = %d\n", data);
}
int main(){
ThreadPool* tp = new ThreadPool(10, 5);
if(tp == NULL){
printf("create threadpool failed\n");
return 0;
}
if(tp->OnInit() <= 0){
printf("create thread failed\n");
return 0;
}
for(int i = 0; i < 10000; i++){
QueueData qd(i, DealData);
tp->Push(qd);
}
tp->ThreadPoolExit();
delete tp;
return 0;
}
2.单例模式
单例模式是一种 “经典的, 常用的, 常考的” 设计模式
1.设计模式及分类
什么是设计模式?
设计模式是软件开发人员在软件开发过程中面临的一般问题的解决方案。
这些解决方案是众多软件开发人员经过租当长的一段时间的试验和错误总结出来的。
设计模式分类有哪些?
- 创建型模式:这些设计模式提供了一种在创建对象的同时隐藏创建逻辑的方式,而不是使用new运算符直接实例化这使得程序在判断针对某个给定实例需要创建哪些对象时更加灵活。
例如:工厂模式(Factory Pattern)、单例模式(Singleton Pattern)- 结构型模式:这些设计模式关注类和对象的组合。继承的概念被用来组合接口和定义组合对象获得新功能的方式
例如:适配器模式(Adapter Pattern) 、桥接模式(Bridge Pattern)- 行为型模式:这些设计模式特别关注对象之间的通信。
例如:命令模式(Command Pattern)、观察者模式(Observer Pattern)
2.单例模式
- 单例类只能有一个实例。(在整个软件当中就只有一个实例对象)
- 单例类必须自己创建自己的唯一实例。
- 单例类必须给所有其他对象提供这一实例。
- 意图:保证一个类仅有一个实例,并提供一个访问它的全局访问点。
- 主要解决:一个全局使用的类频繁地创建与销毁。
- 何时使用:当你想控制实例数目,节省系统资源的时候。
- 如何解决:判断系统是否已经有这个单例,如果有则返回,如果没有则创建。关键代码:构造函数是私有的。
3.单例模式的两种形式(懒汉/饿汉)
饿汉模式:在程序启动的时候就1创建了唯一的实例对象,饿汉模式不需要加锁
代码:
#include<iostream>
#include<pthread.h>

class Sigleton{
    private:
        Sigleton(){

        };
        static Sigleton* st;
    public:
        static Sigleton* GetInstance();
        void Print(){
            cout << "hhh" << endl;
        }
};

//程序一旦启动, 就创建了全局唯一的实例对象
Sigleton* Sigleton::st = new Sigleton;
Sigleton* Sigleton::GetInstance(){
    return st;
}

int main(){
    Sigleton* st = Sigleton::GetInstance();
    Sigleton* st1 = Sigleton::GetInstance();
    if(st == st1){
        cout << "st == st1" << endl;
    }
    st->Print();
    return 0;
}

懒汉模式:当第一次使用时才创建一个唯一的实例对象,从而实现延迟加载效果。
懒汉模式在第一次使用单例对象时才完成初始化工作,因此可能存在多线程竞态环境,如果不加锁会导致重复构造或构造不完全问题。
代码:
#include<pthread.h>
#include<iostream>

using namespace std;

//懒汉模式的单例类
class Sigleton{
	private:
		Sigleton(){};
		static Sigleton* st;
		static pthread_mutex_t lock_;
	public:
		static Sigleton* GetInstance();
};

Sigleton* Sigleton::st=NULL;
pthread_mutex_t Sigleton::lock_=PTHREAD_MUTEX_INITIALIZER;
Sigleton* Sigleton::GetInstance(){
//判断使后面的线程不用再加锁判断,直接返回
	if(st==NULL){
	//当第二个线程紧跟第一个时,加锁等待
		pthread_mutex_lock(&Sigleton::lock_);
		if(st==NULL){
			st=new Sigleton;
		}
		pthread_mutex_unlock(&Sigleton::lock_);
	}
	return st;
}

int main(){
		Sigleton* st = Sigleton::GetInstance();
    Sigleton* st1 = Sigleton::GetInstance();
    if(st == st1){
        cout << "st == st1" << endl;
    }
	return 0;
}

3.乐观锁与悲观锁
1.概念
- 悲观锁:针对某个线程访问临界区修改数据的时候,都会认为可能有其他线程并行修改的情况发生,所以在线程修改数据之前就进行加锁:让多个线程互斥访问。悲观锁有:互斥锁读写锁,自旋锁等等
- 乐观锁:针对某个线程访问临界区修改数据的时候,乐观的认为只有该钱程在修改,大概率不会存氐并行的情况。所以修改数据不加锁,但是,在修改完毕,进行更新的时候,进行判断。例如:版本号控制,CAS无锁编程
2.自旋锁与互斥锁的区别
接口:
#include <pthread.h>
int pthread_spin_init (pthread_spinlock_t *lock,int pshared) ;
int pthread_spin_destroy(pthread_spinlock_t *lock);
int pthread_spin_lock(pthread_spinlock_t *lock); (int pthread_spin_trylock(pthread_spinlock_t *lock);
int pthread_spin_unlock(pthread_spinlock_t *lock);
自旋锁加锁时,加不到锁,线程不会切换(时间片没有到的情况下,时间片到了也会进行线程切换),会持续地尝试拿锁,直到拿到自旋锁(忙等类型的锁)
互斥锁加锁时,加不到锁,线程会切换(时间片没有到也会切换),进入睡眠状态,当其他线程释放互斥锁(解锁)之后,被唤醒,切换回来进行抢锁(睡等类型的锁)
优点:因为自旋锁不会引起调用者睡眠,所以自旋锁的效率远高于互斥锁
缺点:自旋锁一直占用着CPU,他在未获得锁的情况下,一直运行(自旋),如果不能在很短的时间内获得锁,这会导致CPU的效率降低
适用情况:临界区代码较短时(执行时间短),使用自旋锁频率比较高,因为线程不用来回切换
3.无锁编程
版本号控制: 修改之前的版本号,和修改之后的版本号一致,允许修改,修改完毕,产生新的版本号
CAS机制中的三个操作数:
v:内存地址
A:旧的预期值
B:要将内存地址值修改成的新值
在修改V对应的内存内容的时候,先进行比较V的值和A的值是否相等
如果相等:说明没有人修改过,则将B的值赋值给V
如果不相等:说明有人修改过,则重新获取V的值,重新进行判断,直到V的值和A的值相等。