文章目录
搭建环境
- Ubuntu18.04
- VSCode
- Jenkins
- Git
- Gitlab
ubuntu18.04安装Jenkins
wget -q -O - https://pkg.jenkins.io/debian/jenkins.io.key | sudo apt-key add -
sudo sh -c 'echo deb http://pkg.jenkins.io/debian-stable binary/ > /etc/apt/sources.list.d/jenkins.list'
sudo apt-get update
sudo apt-get install jenkins
- 安装该软件后,将会
- 将Jenkins设置为启动时启动的守护进程。查看
/etc/init.d/jenkins获取更多细节 - 创建一个’jenkins’用户来运行此服务
- 直接将控制台日志输出到文件
/var/log/jenkins/jenkins.log。若要解决Jenkins问题,请检查此文件 - /etc/default/jenkins`为启动填充配置参数,例如JENKINS_HOME
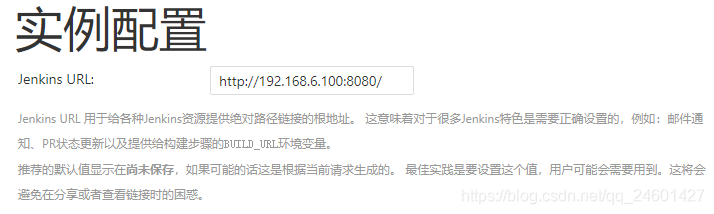
- 将Jenkins设置为在端口8080上进行监听。使用浏览器访问此端口以开始配置
- 如果
/etc/init.d/jenkins文件无法启动Jenkins,编辑/etc/default/jenkins, 修改 ----HTTP_PORT=8080----为----HTTP_PORT=8081----在这里,“8081”也可被换为其他可用端口 - 初次登陆密码获取:sudo cat /var/lib/jenkins/secrets/initialAdminPassword,或从从Jenkins控制台日志输出中,复制自动生成的字母数字密码(在两组星号之间)
安装jenkins插件
- 安装建议插件,可以通过Jenkins的Mange Jenkins > Manage Plugins页面管理插件
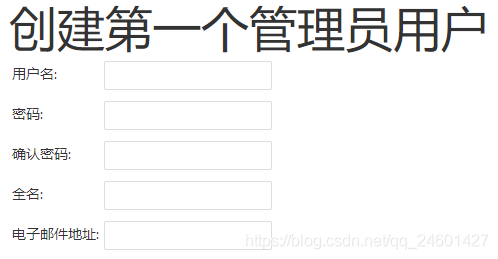
创建管理员用户
安装Gitlab
由于gitlab安装结束后会占用80和8080端口,安装前查看端口状态,并把80和8080端口解除占用,输入命令查看端口状态
sudo netstat -anptl
找到80和8080端口对应的PID,输入命令解除端口占用
kill -9 <pid>
- 安装必要的依赖
sudo apt-get install curl openssh-server ca-certificates postfix
如果要安装Postifx 来发送邮件,在安装过程中选择“Internet Site”。 也可以使用Sendmail,或者配置客户端SMTP 服务器来发送邮件
- 添加gitlab包服务并安装包
curl -sS https://packages.gitlab.com/install/repositories/gitlab/gitlab-ce/script.deb.sh | sudo bash
然后
sudo apt-get install gitlab-ce
- 配置并重气gitlab
sudo gitlab-ctl reconfigure
- 检查是否安装成功
sudo gitlab-ctl status
- 更改端口
#更改gitlab.rb
sudo vim /etc/gitlab/gitlab.rb
#把文件中的external_url 'http://localhost'==>externa_url 'http://localhost:2030'
#更改unicorn.rb
sudo vim /var/opt/gitlab/gitlab-rails/etc/unicorn.rb
#把文件中的listen "127.0.0.1:8080"==>listen "127.0.0.1:2030"
#使配置生效
sudo gitlab-ctl reconfigure
Jenkins使用教程
详细教程:https://www.jenkins.io/zh/doc/book/pipeline/jenkinsfile/
C/C++参考:https://blog.csdn.net/xujiali5172923/article/details/50948197/
源代码准备
- 将远程源代码管理器(github或gitlab)fork到个人账户仓库中
- 将个人仓库的源代码clone到本地机器(编译机器)上,并记下该路径,如/home/Code/example
创建流水线项目
- 登录Jenkins,点击左上角的New Item
- 在 Enter an item name 域, 填写你的新的流水线项目的名称
- 向下滚动并单击 Pipeline(流水线) , 然后点击页面末尾的 OK
- ( Optional )在下一页中,在 Description(描述) 字域为你的流水线项目做一个简短的描述
- 点击页面顶部的 Pipeline(流水线) 选项,向下滚动到 Pipeline(流水线)部分
- 在Definition (定义)域,选择 Pipeline script from SCM 选项。此选项指示Jenkins从源代码管理(SCM)仓库获取你的流水线, 这里的仓库就是你clone到本地的Git仓库
- 在 SCM 域中,选择 Git
- 在 Repository URL 域中,填写你本地仓库的 目录路径(如/home/Code/example), 这是从主机上的用户账户home目录映射到Jenkins容器的/home
- 点击 Save 保存你的流水线项目。你现在可以开始创建你的 Jenkinsfile,这些文件会被添加到你的本地仓库
创建多分支流水线
- 登录Jenkins,点击左上角的New Item
- 在 Enter an item name 域, 填写你的新的流水线项目的名称
- 向下滚动并单击 Multibranch Pipeline(多分支流水线) , 然后点击页面末尾的 OK
- 添加 Branch Source(分支源) (比如, Git) 并输入仓库的位置,并且Save
为流水线创建执行步骤
用文本编辑器或者IDE,在本地的源代码Git仓库的根目录创建并保存一个名为 Jenkinsfile 的文本文件,并在文件内写入流水线代码
- Pipelines 由多个步骤(step)组成,允许你构建、测试和部署应用,在 Linux、BSD 和 Mac OS(类 Unix ) 系统中的 shell 命令, 对应于 Pipeline 中的一个 sh 步骤(step)
pipeline {
    agent any
    stages {
        stage('Build') {
            steps {
                sh 'echo "Hello World"'
                sh '''
                    echo "Multiline shell steps works too"
                    ls -lah
                '''
            }
        }
    }
}
- 超时、重试,这些步骤可以相互结合
pipeline {
    agent any
    stages {
        stage('Deploy') {
            steps {
                retry(3) {
                    sh './flakey-deploy.sh'
                }

                timeout(time: 3, unit: 'MINUTES') {
                    sh './health-check.sh'
                }
            }
        }
    }
}
“Deploy”阶段(stage)重复执行 flakey-deploy.sh 脚本3次,然后等待 health-check.sh 脚本最长执行3分钟。 如果 health-check.sh 脚本在 3 分钟内没有完成,Pipeline 将会标记在“Deploy”阶段失败。
- 完成时动作
pipeline {
    agent any
    stages {
        stage('Test') {
            steps {
                sh 'echo "Fail!"; exit 1'
            }
        }
    }
    post {
        always {
            echo 'This will always run'
            junit 'target/surefire-reports/*.xml'
        }
        success {
            echo 'This will run only if successful'
            slackSend channel: '#ops-room',
            	color: 'good',
				message: "The pipeline ${currentBuild.fullDisplayName} completed successfully."
        }
        failure {
            echo 'This will run only if failed'
            mail to: 'team@example.com',
            	subject: "Failed Pipeline: ${currentBuild.fullDisplayName}",
            	body: "Something is wrong with ${env.BUILD_URL}"
            hipchatSend message: "Attention @here ${env.JOB_NAME} #${env.BUILD_NUMBER} has failed.",
            color: 'RED'
        }
        unstable {
            echo 'This will run only if the run was marked as unstable'
        }
        changed {
            echo 'This will run only if the state of the Pipeline has changed'
            echo 'For example, if the Pipeline was previously failing but is now successful'
        }
    }
}
- 分发
pipeline {
    agent any
    stages {
        stage('Deliver') {
            steps {
            	sh './jenkins/scripts/deliver.sh'
            }
        }
    }
}
- 多分钟流水线,加入有development和production两个分支
pipeline {
    agent any
    stages {
        stage('Build') {
            steps {
                sh 'echo "Hello World"'
                sh '''
                    echo "Multiline shell steps works too"
                    ls -lah
                '''
            }
        }
        stage('Test') {
            steps {
                sh './jenkins/scripts/test.sh'
            }
        }
        stage('Deliver for development') {
            when {
                branch 'development'
            }
            steps {
                echo 'Deliver for development'
            }
        }
        stage('Deploy for production') {
            when {
                branch 'production'
            }
            steps {
                echo 'Deploy for production'
            }
        }
    }
}
构建流水线
- 保存并提交你编辑的 Jenkinsfile 到你本地的 Git 仓库
- 执行命令
git add .
git commit -m "Message"
- 再次回到Jenkins,点击左边的 Open Blue Ocean 进入 Jenkins的Blue Ocean 界面
- 在 This job has not been run 消息框, 点击 Run, 然后快速的点击在右下的 OPEN 链接,查看Jenkins构建你的流水线项目. 如果你点击不了 OPEN 链接, 点击Blue Ocean的主界面的一行来使用这一特性
- 在clone你本地的 Git 仓库后, Jenkins进行了以下动作:
- 将项目加入队列等待在agent上的运行
- 运行 Jenkinsfile 阶段
- 如果Jenkins成功构建了你的应用,Blue Ocean的界面就会变绿
版权声明:本文为qq_24601427原创文章,遵循CC 4.0 BY-SA版权协议,转载请附上原文出处链接和本声明。