首先爬之前我们应该先想好我们想要在这个网站获取的目标信息都有哪些.我们可以先打开网站猫眼电影,记得要登录上自己的账号,我们稍后会用上.
点击这个电影,我们可以看到有关这个电影的具体信息,在这个网页我们主要爬取剧情简介即可:
我们主要爬取一个电影的信息如下,一共有两页;
    private String num;//电影编号
    private String name;//电影名字
    private String score;//电影评分
    private String type;//类型
    private String actors;//演员
    private String time;//上映时间
    private String context;//电影剧情简介
第一步:打开SQLyog Community,创建一个maoyan数据库,并创建一个名叫movie的数据表,表中信息如下: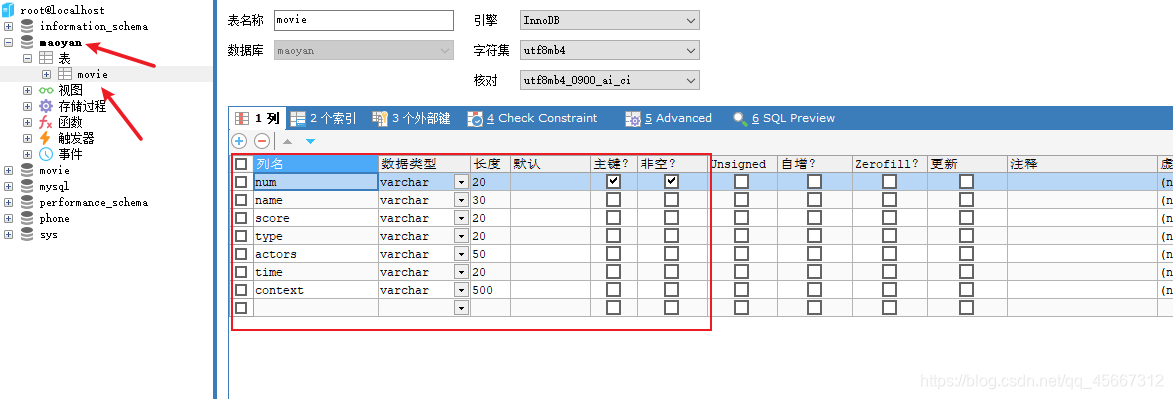
**第二步:**打开IDEA,创建一个Maven项目.并在pom.xml中导入依赖:
<?xml version="1.0" encoding="UTF-8"?>
<project xmlns="http://maven.apache.org/POM/4.0.0"
         xmlns:xsi="http://www.w3.org/2001/XMLSchema-instance"
         xsi:schemaLocation="http://maven.apache.org/POM/4.0.0 http://maven.apache.org/xsd/maven-4.0.0.xsd">
    <modelVersion>4.0.0</modelVersion>
    <parent>
        <groupId>org.springframework.boot</groupId>
        <artifactId>spring-boot-starter-parent</artifactId>
        <version>2.0.2.RELEASE</version>
    </parent>
    <groupId>cn.ayulong</groupId>
    <artifactId>ayulong-crawler-jd</artifactId>
    <version>1.0-SNAPSHOT</version>

    <dependencies>

        <dependency>
            <groupId>commons-logging</groupId>
            <artifactId>commons-logging</artifactId>
            <version>1.2</version>
        </dependency>
        <!-- mysql -->
        <dependency>
            <groupId>mysql</groupId>
            <artifactId>mysql-connector-java</artifactId>
            <version>8.0.25</version>
        </dependency>


        <!-- HttpClient -->
        <dependency>
            <groupId>org.apache.httpcomponents</groupId>
            <artifactId>httpclient</artifactId>
        </dependency>

        <!--Jsoup-->
        <dependency>
            <groupId>org.jsoup</groupId>
            <artifactId>jsoup</artifactId>
            <version>1.10.3</version>
        </dependency>

        <!--工具包-->
        <dependency>
            <groupId>org.apache.commons</groupId>
            <artifactId>commons-lang3</artifactId>
        </dependency>
    </dependencies>
</project>
先看一下项目整体结构:
第三步:创建一个pojo包,并在该包下创建一个Movie类,代表着一个电影的所有信息
public class Movie {

    private String num;//电影编号
    private String name;//电影名字
    private String score;//电影评分
    private String type;//类型
    private String actors;//演员
    private String time;//上映时间
    private String context;//电影剧情简介

    public String getNum() {
        return num;
    }

    public void setNum(String num) {
        this.num = num;
    }

    public String getName() {
        return name;
    }

    public void setName(String name) {
        this.name = name;
    }

    public String getScore() {
        return score;
    }

    public void setScore(String score) {
        this.score = score;
    }

    public String getType() {
        return type;
    }

    public void setType(String type) {
        this.type = type;
    }

    public String getActors() {
        return actors;
    }

    public void setActors(String actors) {
        this.actors = actors;
    }

    public String getTime() {
        return time;
    }

    public void setTime(String time) {
        this.time = time;
    }

    public String getContext() {
        return context;
    }

    public void setContext(String context) {
        this.context = context;
    }
}
第四步:我们开始连接maoyan数据库,首先在resources下创建一个db.properties文件
jdbc.driver=com.mysql.cj.jdbc.Driver
jdbc.url=jdbc:mysql://localhost:3306/maoyan(连接的数据库名)?useUnicode=true&characterEncoding=utf-8
jdbc.user=账号
jdbc.password=密码
然后在util包下创建一个DButil工具类,不需要自己写
/**
 *
 * @author Administrator
 * 1、读取配置文件
 *
 */
public class DButil {
	private static String driver;
	private static String url;
	private static String user;
	private static String password;

	static{
		InputStream is = DButil.class.getClassLoader().getResourceAsStream("db.properties");
		Properties props = new Properties();
		try {
			props.load(is);
			driver= props.getProperty("jdbc.driver");
			url = props.getProperty("jdbc.url");
			user = props.getProperty("jdbc.user");
			password = props.getProperty("jdbc.password");
			System.out.println(user + url + " " + password + " " + driver);
		} catch (IOException e) {
			e.printStackTrace();
		}
	}
	/**
	 * 获取连接Connection对象
	 * @return  连接对象
	 */
	public static Connection getConn(){
		Connection   conn = null;
		try {
			Class.forName(driver);//加载到内存
			conn  = DriverManager.getConnection(url, user, password);
			System.out.println(" *" + conn);
		} catch (Exception e) {
			e.printStackTrace();
		}

		return conn;
	}
	/**
	 * 释放连接资源
	 * @param conn  :连接对象
	 */
	public static void close(Connection conn){
		try {
			if(conn != null){
				conn.close();
				//conn = null;
			}
		} catch (SQLException e) {
			e.printStackTrace();
		}
	}

	public static void close(Statement st){
		try {
			if(st != null){
				st.close();
			}
		} catch (SQLException e) {
			e.printStackTrace();
		}
	}

	public static void close(Statement st,Connection conn){
		try {
			if(st != null){
				st.close();
			}
		} catch (SQLException e) {
			e.printStackTrace();
		}
		try {
			if(conn != null){
				conn.close();
				//conn = null;
			}
		} catch (SQLException e) {
			e.printStackTrace();
		}
	}

	public static void close(ResultSet rs ,Statement st,Connection conn){
		try {
			if(rs != null){
				rs.close();
			}
		} catch (SQLException e) {
			e.printStackTrace();
		}
		try {
			if(st != null){
				st.close();
			}
		} catch (SQLException e) {
			e.printStackTrace();
		}
		try {
			if(conn != null){
				conn.close();
				//conn = null;
			}
		} catch (SQLException e) {
			e.printStackTrace();
		}
	}
}
**第五步:**创建一个dao包,并在该包下创建一个MovieDao类,作用是数据库表movie下的增删改查操作
import com.alvin.pojo.Movie;
import com.alvin.util.DButil;

import java.sql.*;
import java.util.ArrayList;
import java.util.List;

public class MovieDao {


    //添加记录
    public int insert(String num,String name,String score,String type,String actors,String time, String context) {
        //返回结果跑
        int result = 0;
        //获取连接对象
        Connection connection = DButil.getConn();
        //定义sql 表名movie
        String sql = "insert into movie(num,name,score,type,actors,time,context) values(?,?,?,?,?,?,?)";
        //获取PreparedStatement对象,执行sql语句     固定
        PreparedStatement pst = null;

        try {
            pst = connection.prepareStatement(sql);
            //预编译的赋值,替换

            pst.setString(1,num);
            pst.setString(2,name);
            pst.setString(3,score);
            pst.setString(4,type);
            pst.setString(5,actors);
            pst.setString(6,time);
            pst.setString(7,context);
            //执行sql
            result = pst.executeUpdate();

        } catch (SQLException throwables) {
            throwables.printStackTrace();
        }finally {
            //关闭资源
            DButil.close(pst,connection);
        }


        return result;
    }

    //删除,根据主键删除
    public int delete(String num){
        //返回结果跑
        int result = 0;
        //获取连接对象
        Connection connection = DButil.getConn();
        //定义sql 表名movie
        String sql = "delete from movie where num = ?";
        //获取PreparedStatement对象,执行sql语句     固定
        PreparedStatement pst = null;

        try {
            pst = connection.prepareStatement(sql);
            //预编译的赋值,替换

            pst.setString(1,num);

            //执行sql
            result = pst.executeUpdate();

        } catch (SQLException throwables) {
            throwables.printStackTrace();
        }finally {
            //关闭资源
            DButil.close(pst,connection);
        }


        return result;


    }

    //修改
    public int update(String num,String new_name){

        int result = 0;//返回结果
        //  获取连接对象
        Connection conn  = DButil.getConn();
        //定义sql     movie表名
        String sql =  "update movie set name = ? where num = ?";
        //获取PreparedStatement对象     固定
        PreparedStatement pst = null;
        //预编译
        try {
            pst = conn.prepareStatement(sql);
            //预编译的赋值     替换?
            pst.setString(1, new_name);
            pst.setString(2, num);
            //执行sql
            result = pst.executeUpdate();
        } catch (SQLException e) {
            e.printStackTrace();

        }finally{
            //关闭资源
            DButil.close(pst, conn);
        }
        return   result;
    }

    //查询
    public List<Movie> query(){
        //创建一个集合
        List<Movie> movieList = new ArrayList<>();
        Connection connection = DButil.getConn();
        Statement st = null;
        //存放查询结果
        ResultSet rs = null;
        //表名 movie
        String sql = "select * from movie";

        try {
            st = connection.createStatement();
            //执行sql,返回查询结果
            rs = st.executeQuery(sql);
            //BOF表示rs当前的指针是指在了数据集的前面
            //EOF:指当前记录位置位于Recordset对象的最后一个记录之后
            while(rs.next()){
                //把rs中的数据封装成java的对象,数据库连接可以关闭,不影响使用
                Movie movie = new Movie();
                //rs.getString("表中的列名")
                movie.setNum(rs.getString("num"));
                movie.setName(rs.getString("name"));
                movie.setScore(rs.getString("score"));
                movie.setType(rs.getString("type"));
                movie.setActors(rs.getString("actors"));
                movie.setTime(rs.getString("time"));
                movie.setContext(rs.getString("context"));
                //把数据放入集合中
                movieList.add(movie);

            }

        } catch (SQLException throwables) {
            throwables.printStackTrace();
        }finally {
            DButil.close(rs,st,connection);
        }
        return movieList;

    }

    //查询
    public boolean find(String num ){
        //创建一个集合
        Boolean result = false;
        Connection connection = DButil.getConn();
        PreparedStatement pst = null;
        //存放查询结果
        ResultSet rs = null;
        //表名 movie
        String sql = "select * from movie where num = ?";

        try {
            pst = connection.prepareStatement(sql);
            pst.setString(1,num);
            //执行sql,返回查询结果
            rs = pst.executeQuery();
            //BOF表示rs当前的指针是指在了数据集的前面
            //EOF:指当前记录位置位于Recordset对象的最后一个记录之后
            if(rs.next()){
                return true;
            }else {
                return false;
            }

        } catch (SQLException throwables) {
            throwables.printStackTrace();
        }finally {
            DButil.close(rs,pst,connection);
        }
        return false;
    }

    //测试
    public static void main(String[] args) {
        MovieDao movieDao = new MovieDao();
        movieDao.insert("1111","2","3","4","5","6","7");
    }
}
**第六步:**在util工具包下创建HttpUtils类,作用是抓取网页数据
import org.apache.http.client.config.RequestConfig;
import org.apache.http.client.methods.CloseableHttpResponse;
import org.apache.http.client.methods.HttpGet;
import org.apache.http.impl.client.CloseableHttpClient;
import org.apache.http.impl.client.HttpClients;
import org.apache.http.impl.conn.PoolingHttpClientConnectionManager;
import org.apache.http.util.EntityUtils;

import java.io.IOException;

public class HttpUtils {

    PoolingHttpClientConnectionManager cm;

    public HttpUtils() {
        this.cm = new PoolingHttpClientConnectionManager();
        // 设置最大连接数
        this.cm.setMaxTotal(100);
        // 设置每个主机的最大连接数
        this.cm.setDefaultMaxPerRoute(10);
    }

    /**
     * 根据请求地址下载页面数据
     * @param url
     * @return 页面数据
     */
    public String getHtml(String url) {
        // 获取HttpClient对象
        CloseableHttpClient httpClient = HttpClients.custom().setConnectionManager(this.cm).build();

        // 创建httpGet请求对象, 设置url地址
        HttpGet httpGet = new HttpGet(url);

        // 设置请求信息
        httpGet.setConfig(getConfig());

        // 设置请求头, 伪装用户
        setHeaders(httpGet);

        CloseableHttpResponse response= null;

        try {
            // 使用HttpClient发起请求, 获取响应
            response = httpClient.execute(httpGet);

            // 解析响应, 返回结果
            if (response.getStatusLine().getStatusCode() == 200) {
                // 判断响应体Entity是否不为空, 如果不为空就可以使用EntityUtils
                if (response.getEntity() != null) {
                    String content = EntityUtils.toString(response.getEntity(), "utf8");
                    return content;
                }
            }
        } catch (IOException e) {
            e.printStackTrace();
        } finally {
            // 关闭response
            if (response != null) {
                try {
                    response.close();
                } catch (IOException e) {
                    e.printStackTrace();
                }
            }
        }
        // 返回空串
        return "";
    }

    // 设置请求信息
    private RequestConfig getConfig() {
        RequestConfig config = RequestConfig.custom()
                .setConnectTimeout(1000) // 创建连接的最长时间
                .setConnectionRequestTimeout(500) // 获取连接的最长时间
                .setSocketTimeout(10000) // 数据传输的最长时间
                .build();
        return config;
    }

    // 设置请求头
    private void setHeaders(HttpGet httpGet) {
        httpGet.setHeader("User-Agent", "Mozilla/5.0 (Windows NT 6.1; rv:6.0.2) Gecko/20100101 Firefox/6.0.2");
        //下面三个在网页自行添加,cookie代表不同用户,所以一定要写自己的cookie
        httpGet.setHeader("Cookie", "");
        httpGet.setHeader("Referer", "");
        httpGet.setHeader("Accept", "");
    }
}
谷歌浏览器按F12:
**第七步:**使用Jsoup解析网页数据,在task包下创建MaoYanTask类
import com.alvin.dao.MovieDao;
import com.alvin.util.HttpUtils;
import org.jsoup.Connection;
import org.jsoup.Jsoup;
import org.jsoup.nodes.Document;
import org.jsoup.nodes.Element;
import org.jsoup.select.Elements;

import java.io.FileOutputStream;
import java.io.IOException;
import java.io.InputStream;
import java.io.OutputStream;
import java.net.URL;
import java.net.URLConnection;
import java.util.HashMap;
import java.util.Map;

public class MaoYanTask {

    private HttpUtils httpUtils = new HttpUtils();
    private MovieDao movieDao = new MovieDao();

    public void task(){

        //需要解析的初始地址
        String url = "https://maoyan.com/films?offset=";
        //共两页,每页30个
        for(int i=0;i<31;i=i+30){

            String html = httpUtils.getHtml(url+i);
            //输出测试
            //System.out.println(html);
            //解析页面,获取电影信息
            this.parse(html);

        }


    }

    private void parse(String html) {
        // 解析html获取Document对象
        Document doc = Jsoup.parse(html);
        //System.out.println(doc);
        Elements dd = doc.select(" div.movies-list > dl > dd");
        //测试dd
        //System.out.println(dd);
        for (Element element : dd) {
            //利用标签内属性名查找元素,电影名字
            Element title_element = element.select("div[class=\"channel-detail movie-item-title\"]").first();
            String name = title_element.text();
            System.out.println(name);

            //获取url以及电影序号
            Element num_element = element.select("div.movie-item-hover > a").first();
            String detailUrl = "https://maoyan.com" + num_element.attr("href") ;
            System.out.println(detailUrl);
            String num = detailUrl.substring(detailUrl.lastIndexOf('/')+1);
            System.out.println(num);

            //获取分数
            Elements score_element = element.select("div[class=\"channel-detail channel-detail-orange\"]");
            String score = "";
            score = score + score_element.get(0).text();
            System.out.println(score);

            //获取电影类型
            Element type_element = element.select("div[class=\"movie-hover-title\"]").get(1);
            String type = type_element.text().substring(type_element.text().lastIndexOf(':') + 2);
            System.out.println(type);

            //获取演员
            Element actors_element = element.select("div[class=\"movie-hover-title\"]").get(2);
            String actors = actors_element.text().substring(actors_element.text().lastIndexOf(':') + 2);//主演: ***  去掉前面部分
            System.out.println(actors);

            //获取时间
            Element time_element = element.select("div[class=\"movie-hover-title movie-hover-brief\"]").first();
            String time = time_element.text().substring(time_element.text().lastIndexOf(':') + 2); // 上映时间: **** 去掉前面部分
            System.out.println(time);

            //获取照片url
            Element img_element = element.select("img[class=\"movie-hover-img\"]").first();
            String imgUrl = img_element.attr("src");
            imgUrl = imgUrl.substring(0,imgUrl.lastIndexOf('@'));//https://p0.meituan.net/movie/3174df7470fff6e22d63c67d8314ffdd418651.jpg   去除@218w_300h_1e_1c
            System.out.println(imgUrl);
            //下载照片到文件
            download(imgUrl,name);

            //获取电影剧情简介
            //使用Jsoup解析URL
            Connection connection = Jsoup.connect(detailUrl);
            Connection connection1 = connection.headers(add_header());//设置请求头
            Document document = null;
            try {
                document = connection1.get();
                //测试document
                //System.out.println(document);
                Element context_element = document.select("span[class=\"dra\"]").first();
                String context = context_element.text();
                System.out.println(context);
                System.out.println();

                //写入数据库
                if(movieDao.find(num)){
                    //数据库表里有则不用写入
                }else {
                    movieDao.insert(num,name,score,type,actors,time,context);
                }

            } catch (IOException e) {
                e.printStackTrace();
            }


        }


    }

    //下载照片
    public void download(String url,String name){
        //https://p0.meituan.net/movie/bc71b11a44bc645615d0a7278859250b412392.jpg
        //图片的名字

        //String name = url.substring(url.lastIndexOf("/")+1);
        System.out.println(name);
        //图片的存储路径   随便设置
        String path =  "C:\\Users\\mkn\\IdeaProjects\\hy_alvin_practice\\src\\main\\java\\images\\"+name+".jpg";
        //网络请求的地址
        try {
            URL   myUrl = new URL(url);
            URLConnection conn = myUrl.openConnection();
            //获取输入流
            InputStream is = conn.getInputStream();
            //创建输出流
            OutputStream os = new FileOutputStream(path);
            //解析流 ,缓冲区
            byte[] buffer = new byte[512];//内存       2G
            int len = is.read(buffer);
            while(len != -1){//判断是否读取到末尾
                os.write(buffer, 0, len);
                len = is.read(buffer);
            }
            os.close();
            is.close();
        } catch (Exception e) {
            e.printStackTrace();
        }


    }


    //返回请求头
    public Map add_header(){
        Map<String, String> header = new HashMap<String, String>();
        header.put("Host", "maoyan.com");
        header.put("User-Agent", "Mozilla/5.0 (Windows NT 10.0; Win64; x64) AppleWebKit/537.36 (KHTML, like Gecko) Chrome/63.0.3239.108 Safari/537.36");
        header.put("Accept", "text/html,application/xhtml+xml,application/xml;q=0.9,image/webp,image/apng,*/*;q=0.8");
        header.put("Accept-Language", "zh-cn,zh;q=0.5");
        header.put("Accept-Encoding", "gzip, deflate");
        header.put("Cache-Control", "max-age=0");
        header.put("Connection", "keep-alive");
        //添加自己的
        header.put("Referer", "");
        header.put("Cookie", "");
        return header;
    }


    public static void main(String[] args) {
        MaoYanTask maoYanTask = new MaoYanTask();
        maoYanTask.task();
    }
以上需要注意的是将下载的照片保存的路径需要更改到自己想要保存的路径,同时cookie也需要自己设置
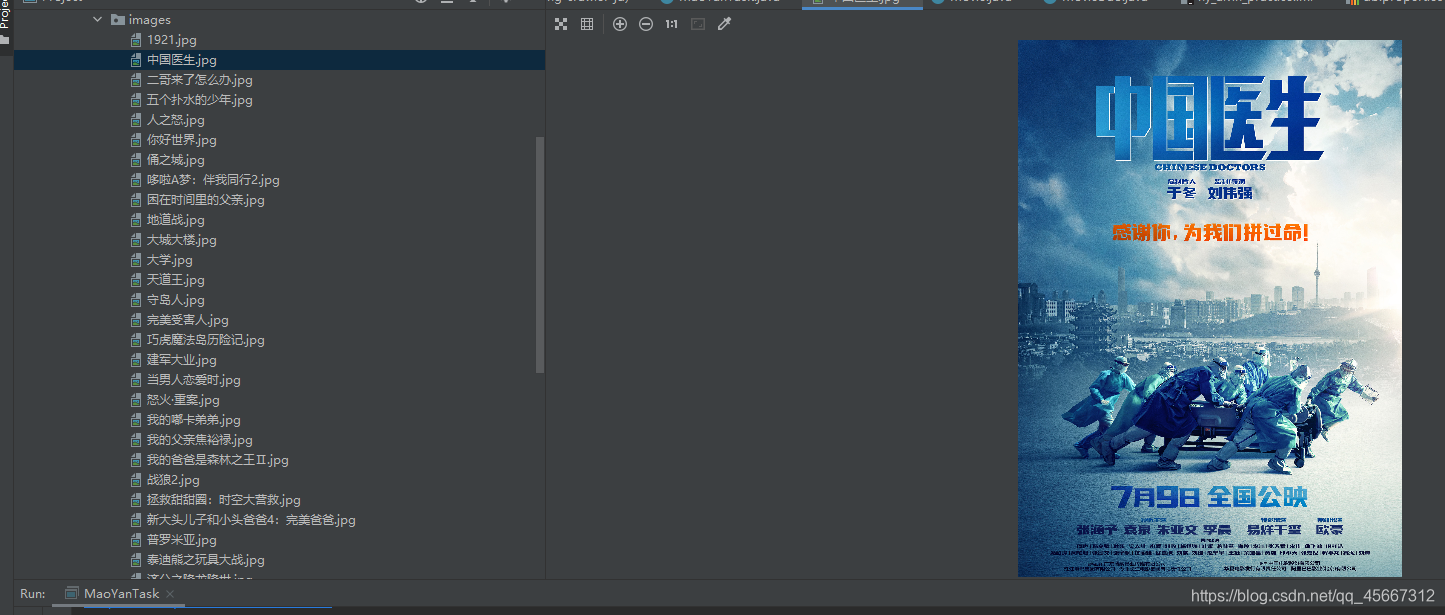
最后结果截图:
总结:
代码若有不对之处,请大家多多指正,同时大家有疑问的话也可以在评论区留下你的问题
版权声明:本文为qq_45667312原创文章,遵循CC 4.0 BY-SA版权协议,转载请附上原文出处链接和本声明。