HyperledgerFarbic1.4-创建新的联盟
增加一个联盟信息
以官方fabric-samples项目中 的first-network 项目为例。
1 增加联盟的原理
因为fabric的配置信息都是存放在orderer节点的sys_channel中,在byfn.sh的脚本中,可以找打关于sys_channel的配置信息。
# system channel name defaults to "byfn-sys-channel"
# 系统channel的名称 默认为byfn-sys-channel
SYS_CHANNEL="byfn-sys-channel"

# 如果排序节点以solo方式启动,则以TwoOrgsOrdererGenesis这个配置节点下的配置来生成创世区块 并存记录到系统channel中
if [ "$CONSENSUS_TYPE" == "solo" ]; then
    configtxgen -profile TwoOrgsOrdererGenesis -channelID $SYS_CHANNEL -outputBlock ./channel-artifacts/genesis.block
上一节时已经查看到了现在orderer节点中存放的配置信息并转成了json。其中关于联盟的配置如下。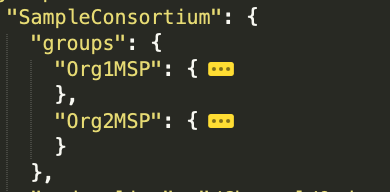
对应了first-network中的联盟配置configtx.yaml
所以 要想新增联盟 就需要在configtx.yaml配置文件中修改联盟的配置信息,并提交到区块链中做增量数据。
2 修改first-network中的configtx.yaml配置文件
在本地路径
~/fabric-samples/first-network/configtx.yaml 修改文件内容 增加TestConsortium
默认是用solo模式启动所以 要修改的配置节点是TwoOrgsOrdererGenesis
修改之前可以先备份
TwoOrgsOrdererGenesis:
  <<: *ChannelDefaults
  Orderer:
     <<: *OrdererDefaults
     Organizations:
        - *OrdererOrg
     Capabilities:
        <<: *OrdererCapabilities
  Consortiums:
     SampleConsortium:
        Organizations:
           - *Org1
           - *Org2
     TestConsortium:   # 增加新的联盟 名称为TestConsortium
        Organizations:  # 组织机构配置节点
           - *Org1  # 将org1配置到该联盟中
3 将新的配置信息输出为json格式
因为我本地mac环境下没有jq工具 所以 我在cli容器中执行修改配置文件 生成新区块的操作
由于生成config区块信息 需要制定配置文件和orderer节点的证书地址
所以吧
~/fabric-samples/first-network/configtx.yaml文件 复制到
~/fabric-samples/first-network/channel-artifacts/configtx.yaml
然后吧证书 也复制
~/fabric-samples/first-network/crypto-config/
~/fabric-samples/first-network/channel-artifacts/crypto-config/
因为在docker启动时 容器已经挂在了这个channel-artifacts文件目录。所以进入cli容器后,在容器中的channel-artifacts也可以找到复制过去的配置文件和证书
进入到cli容器中 验证文件是否成功挂载
# 第一步 进入容器
docker exec -it cli base

# 切换到orderder的 admin用户身份
export ORDERER_CA=/opt/gopath/src/github.com/hyperledger/fabric/peer/crypto/ordererOrganizations/example.com/orderers/orderer.example.com/msp/tlscacerts/tlsca.example.com-cert.pem
export CORE_PEER_LOCALMSPID="OrdererMSP"
export CORE_PEER_TLS_ROOTCERT_FILE=$ORDERER_CA
export CORE_PEER_MSPCONFIGPATH=/opt/gopath/src/github.com/hyperledger/fabric/peer/crypto/ordererOrganizations/example.com/users/Admin@example.com/msp


# 第二步 查看当前所在目录
pwd
# 输出:/opt/gopath/src/github.com/hyperledger/fabric/peer/

# 第三步 查看目录下的文件夹
ls
# 输出:channel-artifacts  crypto  log.txt  mychannel.block  scripts

# 第四步 进入channel-artifacts
cd channel-artifacts

# 第五步 查看文件
ls
# 输出 中包含准备好的 configtx.yaml  crypto-config  验证完成

#  第六步 进入目录 执行生成新配置区块的指令
cd /opt/gopath/src/github.com/hyperledger/fabric/peer

# 第七步 生成包含新联盟的新配置区块 覆盖原来的区块
configtxgen -configPath=./channel-artifacts/  -profile TwoOrgsOrdererGenesis -channelID byfn-sys-channel -outputBlock ./channel-artifacts/sys-channel.block

# 第八步  将其内容转换成JSON并抽取出新联盟的配置材料
configtxlator proto_decode --input ./channel-artifacts/sys-channel.block --type common.Block | jq .data.data[0].payload.data.config.channel_group.groups.Consortiums.groups.TestConsortium > ./channel-artifacts/TestConsortium.json
可以查看输出的TestConsortium.json文件
因为在 将区块内容转换成json的时候我们只抽取了新的联盟信息输出 所以 这个json中只包含新联盟的配置信息。
这里可以看到Org1的配置信息已经生成了。
我们要做的就是吧这个json信息 添加到原来的sys_config.josn中 并生成新的区块 提交到sys_channel 中 给其他节点同步
4 获取到当前网络中正在使用的配置节点
也就是 # 七、查看网络中联盟的配置数据 最后获取到的那个sys_config.json
获取到当前的配置文件,并且生成了新的增量配置 TestConsortium.json。
接下来需要的就是 把增量的配置TestConsortium.json 添加到 原来的sys_config.json中去
5 向sys_config.json中增加增量联盟信息
将新联盟TestConsortium配置定义TestConsortium.json添加到channel的Consortiums的TestConsortium中,并将最终生成文件 写入sys_updated_config.json
依然是在容器中 使用orderer的admin用户 并在
/opt/gopath/src/github.com/hyperledger/fabric/peer
目录下执行
jq -s '.[0] * {"channel_group":{"groups":{"Consortiums":{"groups": {"TestConsortium": .[1]}}}}}' ./channel-artifacts/sys_config.json ./channel-artifacts/TestConsortium.json >& ./channel-artifacts/sys_updated_config.json
生成之后sys_updated_config.json
会有以下内容 已经变成了两个联盟的信息了
6 计算区块增量数据
将上一步生成的sys_updated_config.json文件转为pb格式 提价增量计算
依然是在容器中 使用orderer的admin用户 并在
/opt/gopath/src/github.com/hyperledger/fabric/peer下操作
只有pb格式 才可以计算增量 所以 第一步和第二步先将原始的配置和新的配置转成pb格式
 # 将原始的配置sys_config.json编码成protobuf
configtxlator proto_encode --input ./channel-artifacts/sys_config.json --type common.Config --output ./channel-artifacts/sys_config.pb

 # 将更新后的配置sys_updated_config.json编码成protobuf
configtxlator proto_encode --input ./channel-artifacts/sys_updated_config.json --type common.Config --output ./channel-artifacts/sys_updated_config.pb

# 计算增量
configtxlator compute_update --channel_id byfn-sys-channel --original ./channel-artifacts/sys_config.pb --updated ./channel-artifacts/sys_updated_config.pb --output ./channel-artifacts/sys_config_update.pb
增量计算完成后 都会记录在sys_config_update.pb 文件中
7 生成发送给orderer节点的envelope数据
先将计算增量完成后的sys_config_update.pb转成json
依然是在容器中 使用orderer的admin用户 并在
/opt/gopath/src/github.com/hyperledger/fabric/peer下操作
# 将sys_config_update.pb编码成json
configtxlator proto_decode --input ./channel-artifacts/sys_config_update.pb --type common.ConfigUpdate | jq . > ./channel-artifacts/sys_config_update.json
查看生成的sys_config_update.json
其中的write_set 中 包含了我们本次增加的TestConsortium数据
要组装一个标准的envelope格式的数据 需要封装一个头信息
echo '{"payload":{"header":{"channel_header":{"channel_id":"byfn-sys-channel", "type":2}},"data":{"config_update":'$(cat ./channel-artifacts/sys_config_update.json)'}}}' | jq . > ./channel-artifacts/sys_config_update_in_envelope.json
该头信息 标志着 本次是一次 config_update的操作
完成之后查看该json,头部信息已经添加进去了
然后 把sys_config_update_in_envelope.json数据 转成pb格式 准备提交给orderer节点
configtxlator proto_encode --input ./channel-artifacts/sys_config_update_in_envelope.json --type common.Envelope --output ./channel-artifacts/sys_config_update_in_envelope.pb
之后会生成文件./channel-artifacts/sys_config_update_in_envelope.pb
8 向orderer发送envelope
之前使用orderer的admin用户 组装好了一个信封,信封的内容是创建一个新的联盟并将org1添加到该联盟中
使用一下命令将信封数据提交到orderer节点
peer channel update -f ./channel-artifacts/sys_config_update_in_envelope.pb -c byfn-sys-channel -o orderer.example.com:7050 --tls true --cafile $ORDERER_CA
出现一下的提示 表示已经成功的将增加联盟的数据提交到了order节点
9 查看修改联盟结果
在orderer的admin用户下操作。
可以获取最新的区块数据
peer channel fetch config ./channel-artifacts/sys_config_block.pb -o orderer.example.com:7050 -c byfn-sys-channel --tls --cafile $ORDERER_CA
可以看到接收到新区块的输出
现在会覆盖掉之前的sys_config_block.pb
然后 将这个pb转成json查看数据
configtxlator proto_decode --input ./channel-artifacts/sys_config_block.pb --type common.Block | jq .data.data[0].payload.data.config > ./channel-artifacts/sys_config.json
同样会覆盖掉之前的数据
查看新的区块数据
发现新的区块中 已经包含了新的联盟信息
10 创建Test联盟对应的channel
修改容易映射目录中的configtx.yaml配置文件 添加TestChannel数据
TestChannel:
        Consortium: TestConsortium
        Application:
            <<: *ApplicationDefaults
            Organizations:
                - *Org1
            Capabilities:
                <<: *ApplicationCapabilities
此处我们testConsortium里面的是org1,所有无需切换环境变量,如果是其他org,则必须切换到该org的admin用户
从新进入 cli容器 cli容器中 默认使用的就是 org1 中的admin用户
docker exec -it cli bash
使用env命令 可以看到当前使用的用户信息
CORE_PEER_LOCALMSPID=Org1MSP
CORE_PEER_TLS_CERT_FILE=/opt/gopath/src/github.com/hyperledger/fabric/peer/crypto/peerOrganizations/org1.example.com/peers/peer0.org1.example.com/tls/server.crt
CORE_PEER_MSPCONFIGPATH=/opt/gopath/src/github.com/hyperledger/fabric/peer/crypto/peerOrganizations/org1.example.com/users/Admin@org1.example.com/msp
CORE_PEER_TLS_ROOTCERT_FILE=/opt/gopath/src/github.com/hyperledger/fabric/peer/crypto/peerOrganizations/org1.example.com/peers/peer0.org1.example.com/tls/ca.crt
生成testchannel对应的创世区块的配置文件
configtxgen -configPath=./channel-artifacts/ -profile TestChannel -outputCreateChannelTx ./channel-artifacts/testchannel.tx -channelID testchannel
执行成功后 会生成testchannel.tx这个channel的配置文件
配置好orderer-ca证书的位置
export ORDERER_CA=/opt/gopath/src/github.com/hyperledger/fabric/peer/crypto/ordererOrganizations/example.com/orderers/orderer.example.com/msp/tlscacerts/tlsca.example.com-cert.pem
执行创建channel的命令
peer channel create -o orderer.example.com:7050 -c testchannel -f ./channel-artifacts/testchannel.tx --tls --cafile $ORDERER_CA
拿到testchannel中的第0个区块 就是创世区块
peer channel fetch 0 testchannel.block -o orderer.example.com:7050 -c testchannel --tls --cafile $ORDERER_CA
将org1当前的peer加入到testchannel中
peer channel join -b testchannel.block
提示加入成功
此时 可以查看peer0 已经加入的channel
peer channel list
输出
Channels peers has joined:
mychannel
testchannel
查看peer1加入的channel
切换到peer1 的用户身份
export CORE_PEER_LOCALMSPID="Org1MSP"
export CORE_PEER_TLS_ROOTCERT_FILE=/opt/gopath/src/github.com/hyperledger/fabric/peer/crypto/peerOrganizations/org1.example.com/peers/peer1.org1.example.com/tls/ca.crt
export CORE_PEER_MSPCONFIGPATH=/opt/gopath/src/github.com/hyperledger/fabric/peer/crypto/peerOrganizations/org1.example.com/users/Admin@org1.example.com/msp
export CORE_PEER_ADDRESS=peer1.org1.example.com:8051
最后 export CORE_PEER_ADDRESS=peer1.org1.example.com:8051 的地址以自己容器中启动的地址为准
此时
peer channel list
输出
Channels peers has joined:
mychannel
peer1 加入到channel中
peer channel join -b testchannel.block
peer channel list #查看
输出
Channels peers has joined:
mychannel
到此 完成了 联盟的创建以及节点加入到联盟对应的channel中的操作